Page Contents
Master class in steady camera holding
Taking a photo is easy – you trigger the shutter button and you’re done. Right?
The very small Minox negatives must be greatly enlarged in order to obtain normal-sized photos. Any motion blur caused by camera shake is also enlarged. Large-format negatives can suffer from the same blurring, but since such negatives do not need to be enlarged as much, it is not as noticeable. Avoiding camera shake is therefore extremely important with Minox cameras.
The Minox is a very small camera. Even small vibrations can be noticeable as blurring on the image. The size of a camera, especially one as compact as the Minox, has a direct influence on stability when taking pictures:
The smaller the object, the less leverage there is when you press down. With a large camera, the force is distributed over a larger weight when the shutter is released, resulting in less camera shake. With the small Minox, the force is concentrated on a smaller weight, which means that even small movements can be amplified.
In order to hold such a small camera securely and operate the shutter release with precision, a certain amount of fine motor skills is required.
More shots are ruined by camera shake than by any other shooting error. Severe camera shake is easy to recognize in a photo: all contours are distorted in one direction. Slight camera shake, on the other hand, is often overlooked. You wonder why the shots of your Minox are not quite as clear and sharp and you suspect the distance setting. Instead, you breathed at the wrong moment. Or you put too much energy into your right index finger. Or …
This essay combines the experience of triggering a Minox with experience from sport shooting. It bases on an article “Meisterkurs der ruhigen Camerahaltung” in “Der Minox Freund”, issue 16, 1965 courtesy of Blaser Group.
Sports shooters can optimize themselves better than Minox photographers, as they can see the results of their shooting immediately and correct themselves accordingly. Analog photographers usually have to wait days to see their results. It is therefore worth using the experience of sports shooters.
Finger position
If you want to avoid camera shake, you have to retrain yourself to hold your hands on the camera in a very specific way so that the camera does not move. But you also have to pay attention to your posture and a few other things so that your body does not move. And the camera with it.
What is an advantage when carrying the Minox – its low weight – causes us problems when releasing the shutter. Large, heavy cameras tend to compensate for shaking and small bumps due to their inertia. The Minox, on the other hand, follows every movement. What can you do about this? The Minox is light, very light in fact – but you can replace the missing weight during the shot: By applying pressure in the right direction in the right place.
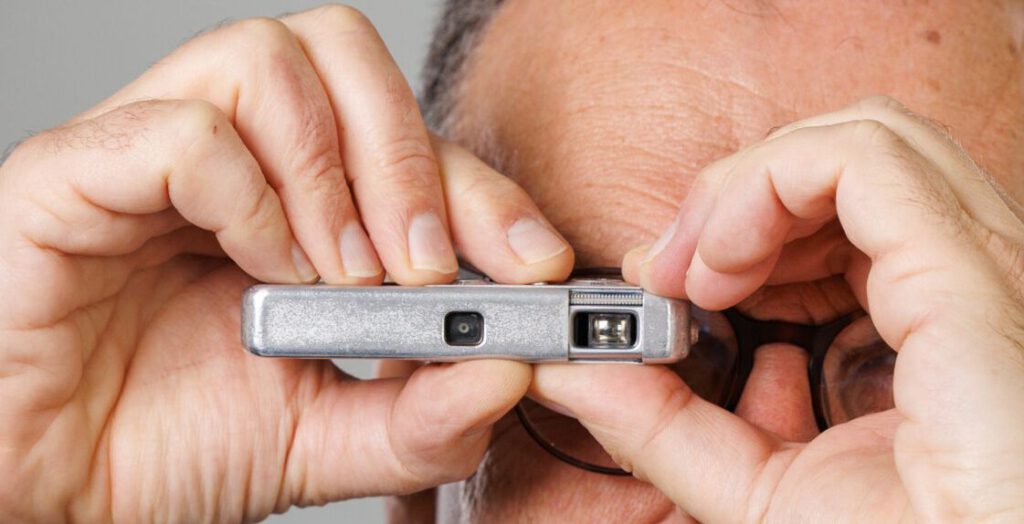
Landscape format shot
The surface against which you should apply the pressure is your two thumbs. When taking a landscape format shot, they lie on the underside of the Minox. Their tips should only be a short distance apart. You apply the pressure with the fingers that lie on the outer ends of the top of the camera. This applies downward pressure, which you resist with your thumbs. If you do it correctly, you will feel as if you want to break your Minox in half right in front of your eyes. Try it. Don’t be afraid, the Minox could really break in two, it should and must be gripped firmly.
Now take a pencil and actually break it right in front of your eyes. If you watch yourself carefully, you will notice that you are not applying the pressure on the ends of the pencil so much with the muscles in your fingers. Instead, you stiffen your wrists and let your elbows drop down. It takes less strength and the muscles don’t cramp. Do the same with the Minox.
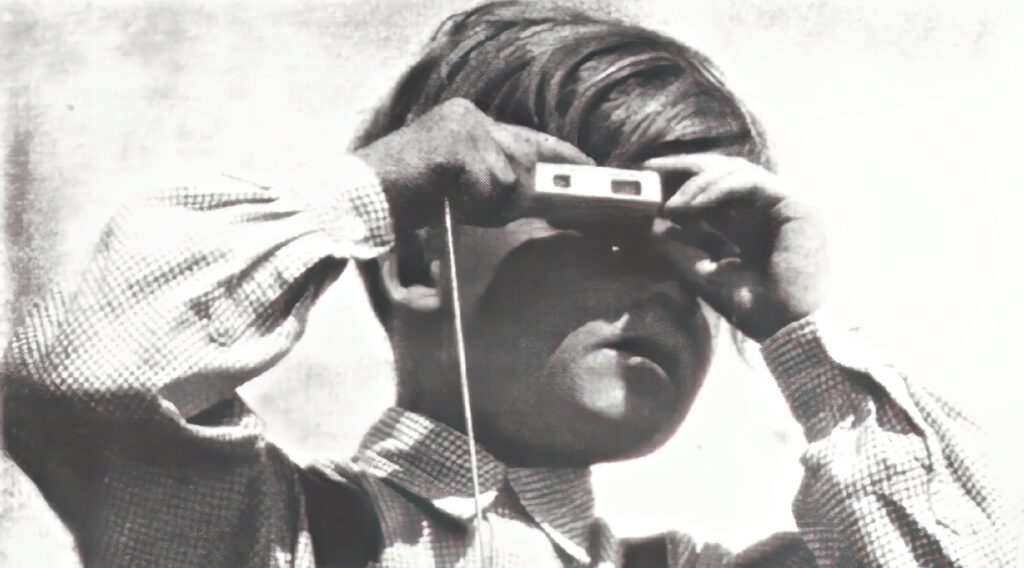
The “flute grip”
With this camera position, which is calm and safe even for shaking hands, you almost automatically place the fingertips of your right hand next to each other on the top of the Minox. The position is reminiscent of the fingering of a concert flute. That’s why we call it the “flute grip”. No finger grips the front of the camera, no finger can cover the lens.
The right index finger is to the right of the shutter release and presses firmly – even before the picture is taken.
Portrait format shot
The position for portrait format shots is not much different. You turn your camera and with it both your hands 90 degrees clockwise. It may be that the grip for the middle, ring and little fingers of your right hand becomes uncomfortable. Then let these three fingers slide down the scale side of the Minox until the left flank of your right middle finger is flat against the camera.
All other fingers remain in the places they are used to in landscape format. Nothing else changes either; you try to “break through” the Minox and to release the shutter you only shift the pressure of your right index finger.
Posture
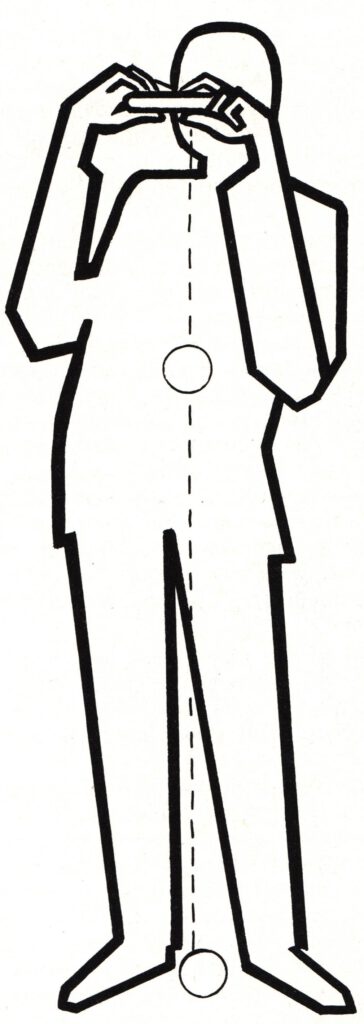
Every shooter knows how important posture, the stance, is for the correct position of the weapon. It is no different when shooting with a camera. So let’s learn from the people who shoot best and are most accurate, the sports shooters. When shooting, they stand like this: their legs are only slightly apart, their stomach sticks out and their back is rounded. They pay attention to two things: standing still with as little muscle tension as possible (tense muscles tremble!) and distributing their weight as evenly as possible across both feet, i.e. heels and balls of the feet. The center of gravity of the body should be exactly vertical above the center of the area enclosed by your two feet.
Admittedly, it doesn’t look particularly pretty when you stand like that: with your stomach pushed forward and your head and shoulders pulled back.
Incidentally, this arm position is also used for binoculars, as you can see here.

All muscles are tense. Finger position incorrect.
In contrast, people who hold the camera with their arms raised high, their upper body stretched forward and the balls of their feet bouncing look much better.
However, they have to tense almost all their muscles at the same time to avoid falling forward. It is clear that they will blur the shot.
Sitting
If the subject allows it, the seated position is ideal for avoiding camera shake. This involves resting your elbows on your thighs or knees. Everything else remains as described above. In this position, the body forms a tripod, which provides a high degree of stability.
Eyes
The posture with the head tilted back offers you another advantage: your eyes look straight ahead through the viewfinder without any effort. You don’t try to roll your eyes and aim past the upper edge of your eyelid. You see a brighter and sharper image with less effort, especially if you wear glasses.
Sports shooters keep both eyes open when aiming. It is tiring to squint one eye – not only because it is a one-sided, asymmetrical muscle movement, but because the pupil of the open eye has a harder time adjusting to the existing brightness. You too will find it easier if you keep both eyes open when looking through the viewfinder. When holding the camera normally, you can easily cover the field of view of the unused eye with one hand or wrist.
Breathing and timing
Holding your breath when shooting is a given for every shooter. It seems less obvious when taking photos. Nevertheless, it is correct – here as well as there. When you breathe, your entire upper body moves, and since your head and arms are attached to your upper body, they move with it. So hold your breath, but not with your lungs full. Holding your breath halfway out is much more comfortable.
Inhale fully before you begin to raise the camera to your eye and exhale about halfway through the movement.
After lifting the camera into the eye position, it takes about 3 to 5 seconds until the camera is really steady. You then have around 8 to 10 seconds to release the shutter. After that, the camera starts to move again due to lack of oxygen and lack of concentration.
Triggering the shutter
Remember, the right index finger is pressed firmly to the right of the release button.
To release the shutter, roll the tip of your finger a few millimeters to the left until the shutter is released. The main advantage: When releasing the shutter, the index finger does not exert any more pressure than before. The risk of pushing the camera out of position with the trigger finger and thus blurring the picture is very low. The rolling finger also protects against accidental release.
It is important to consciously start rolling your finger tip and to do it continuously, but then let yourself be surprised by the shutter release.
Follow-through
There is follow-through for shootings, as well as playing basketball, golfing, or pretty much any sporting activity. A good follow-through involves maintaining physical contact with the trigger. Not involving the trigger finger in the follow-through makes shooting considerably more difficult. So the index finger remains motionless for up to one second after the shutter sound. In addition, we continue to look through the viewfinder with concentration during this time.
Why is that? Shooters know that the mental attitude is crucial when shooting. If I consider the shooting to be finished at the moment the trigger is released, my body adjusts to it. It will then start to relax the muscles at that moment. Perhaps even very shortly before – too early. And be aware that the shutter only starts to work at the moment of release. It is a mechanical process that takes a certain amount of time, even if we disregard the exposure time.
So without follow-through we start moving ourselves and the camera far too early. A fatal mistake!
Start with a firm grip before taking the picture and only loosen it one second after the shutter sound has stopped.
Practice
The disadvantage of all these tips is that it is by no means enough to just read them. You have to really train yourself to do them. This is all the more difficult the longer you have been used to a different camera position and body position.
Don’t be under any illusions. You have to train for it often and for a long time. Sport shooters know this. A clay pigeon shooting coach friend of mine told me that top shooters practice the cheek rest position up to 1500 times a day! And for many days before the competitions.
But the effort is worth it. Apart from the finger position, these rules apply to all cameras – including modern digital cameras with 5-axis image stabilization. Because the steadier I hold the camera, the better the assistance systems can support me and the less I have to post-process the image.
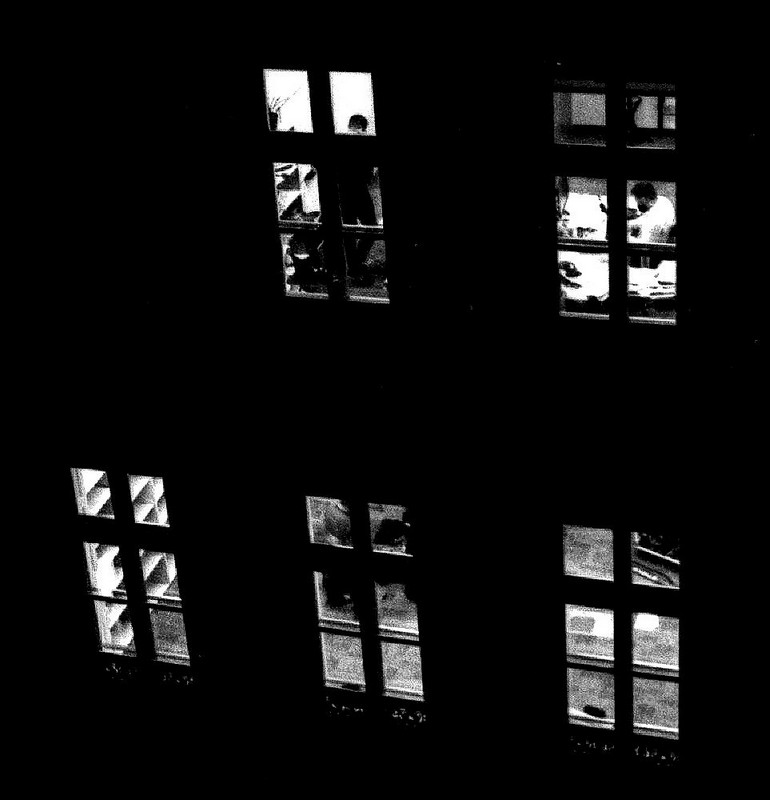
Budapest, Hungary, 2023,
Minox IIIs, Agfa APX 100, 1/2 s handheld
Courtesy of Julian Tanase
This photo by Julian Tanase shows just how far you can go with practice. He has been taking photos with Minox 8×11 cameras for 30 years and always has one with him when he’s out and about.
He took this picture handheld with a 1/2 second exposure time. At most you can see the grain of the film, but no motion blur!
How long can I expose from hand?
There is a rule of thumb among photographers. According to this rule, the longest exposure time that most people can still expose without blurring when shooting handheld is:
Shutter speed shorter than: 1 / focal length
For example, with a focal length of 50 mm, you cannot expose for more than 1/50 s to avoid blurring from camera movement. With a focal length of 200 mm, the maximum exposure time should be 1/200 s or shorter. However, this formula only applies to 35mm format. For other negative formats, you have to correct for the crop factor:
Shutter speed shorter than: 1 / (focal length x crop factor)
The crop factor for the Minox format is 3.18, the focal length of the Minox lens is 15 mm, so:
Shutter speed shorter than: 1 / (15 x 3.18) ≈ 1 / 50 s
If the light is not sufficient for 1/50 s, you will need to use a tripod or something similar; see the next chapter. If you follow the advice I gave above in this article, you will probably be able to expose for 1/20 s from hand. If you’re as good as Julian Tanase, then you can manage the 1/2 s, but that’s unlikely.
Tools
String tripod
The string tripod is a string that is connected to the camera at one end and the other end is fixed to the ground with your foot. The length of the string is dimensioned so that it is taut when the camera is at eye level. Why does this help us to avoid camera shake? Well, as long as you push the camera up against the cord, the camera can no longer move vertically. This eliminates half of the risk of camera shake. If you also adhere to the above rules, you have significantly increased the stability of the shot.
With the Minox you always have a string tripod in the form of a measuring chain with you. To use it for this purpose, attach the chain to your belt or trousers so that it is taut when you hold the Minox in the correct shooting position. You can adjust the length of the chain by, for example, winding it around the belt several times before attaching it.
Read here in a post of Wim Wiskerke, how the dutch star photographer Theo Van Houts used a Minox 35 (not 8×11) with a string tripod to shoot unique pictures of the ceremony for Nobel Prize in literature to Garcia Marquez in 1996.
Support surfaces
One of the most obvious methods of keeping the camera steady is to use solid objects in the environment. Walls, fences, car roofs or other stable surfaces can serve as platforms for the camera. We have to be creative here to find suitable options. This also includes vertical surfaces such as walls or door frames. However, we must be careful not to force our body into a certain position when leaning. This could lead to muscle tension and shaking and would therefore be counterproductive.
Unlike with large cameras, we cannot simply lay the Minox down and work with a self-timer. Instead, we support our hands on the surface. This also gives us more options for aligning the camera on all axes to the subject.
Intentional camera movement
“Sharpness is a bourgeois concept”, said Henri Cartier-Bresson self-deprecatingly when he was asked about his somewhat shaky hands when taking photographs at the age of 80.
Motion blur has always been an artistic means of expression in photography. It is created either by subjects that move or by the camera that moves during exposure. We spent a long time thinking about how to prevent the latter.
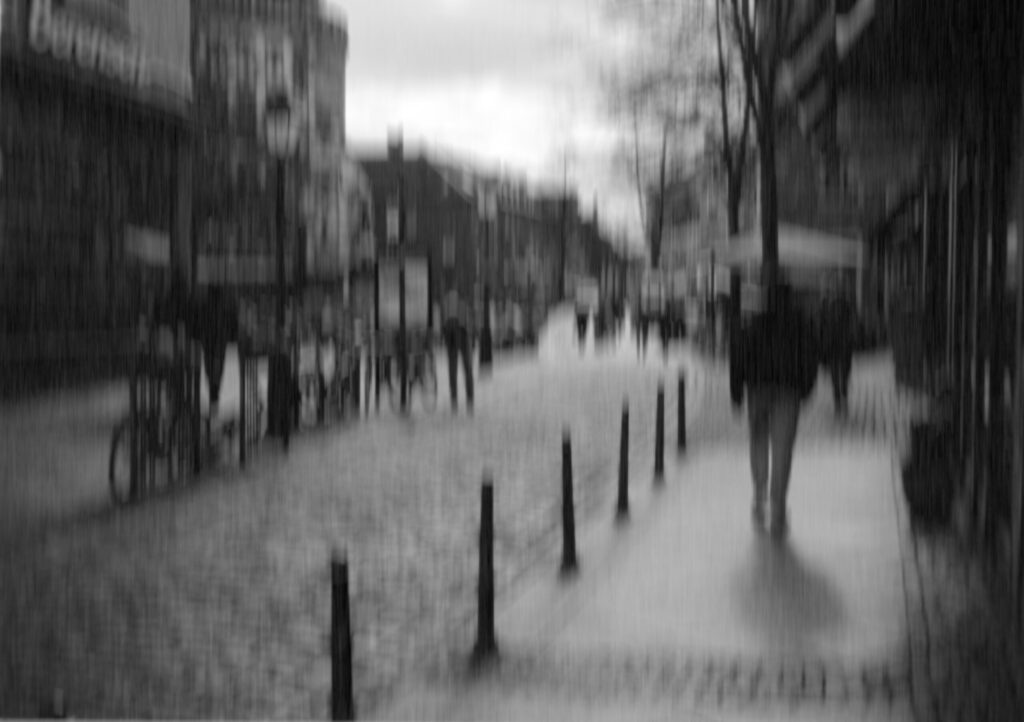
Intentional camera movement (ICM) is a shooting technique in which the camera is intentionally moved during the exposure time. This creates varied effects such as streaking, textures, and layers in the resulting image. Olga Karlovac makes magical pictures with this technique. One could argue that then the above rules are not necessary. The opposite is the case. The word “intentional” tells us why.
If you don’t want the shot to succeed just by luck or chance, you have to think very carefully in advance about what you want to achieve and how. I maintain that making the necessary movements with the camera is even more difficult than holding the camera steady – and that is difficult enough, as we have seen.
From this point of view, the ability to hold the camera steady is the prerequisite for Intentional Camera Movement.
Using tripods
The strength of the Minox lies in its tiny size. I am therefore not a fan of accessories that I have to carry with me and with which I have to give up this unique advantage. However, if I need long exposure times, e.g. because I’m using a very fine-grained but slow film or shooting in low light, I have to fix the camera.
The safest way to avoid camera shake is to clamp the camera in a tripod. There is a Minox adapter with cable release for the Minox A IIIs, B, BL and C, which can be attached to any standard tripod. The Minox LX and AX have a standard tripod thread and therefore do not require an adapter.
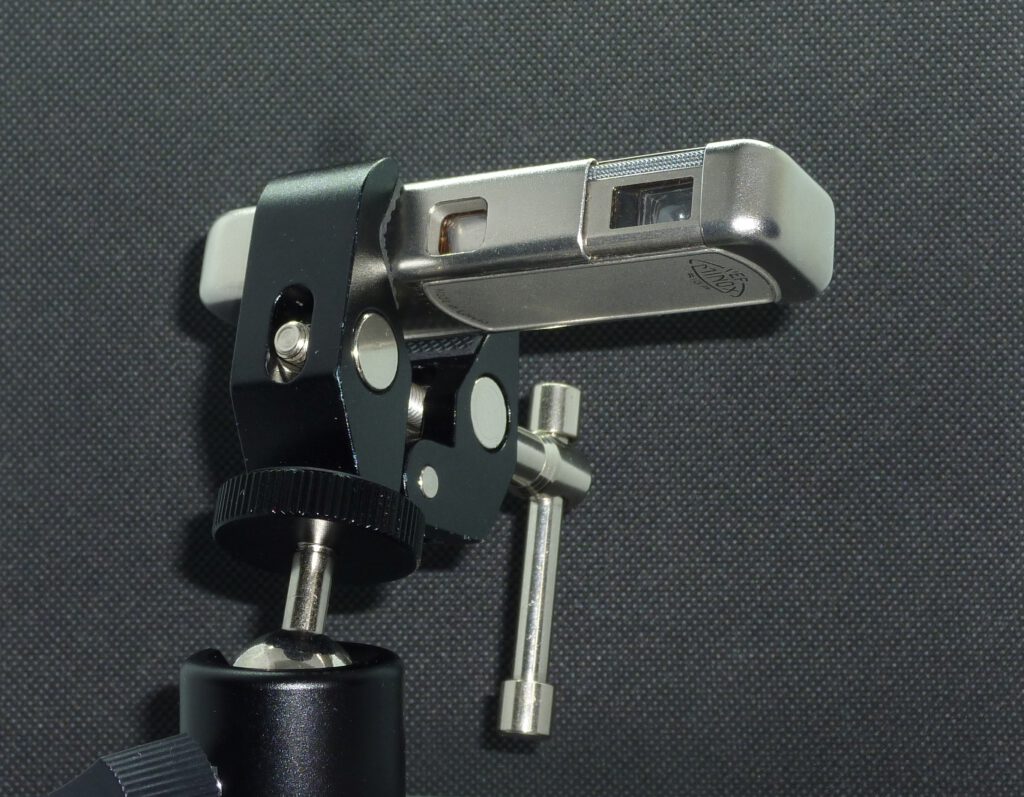
The Riga Minox does not offer either option. Nevertheless, it can be safely connected to tripods. Commercially available tripod clamps can be used. A cable release cannot be used with them. However, as described above, you can hold the shutter release between your index finger and thumb and press it evenly.
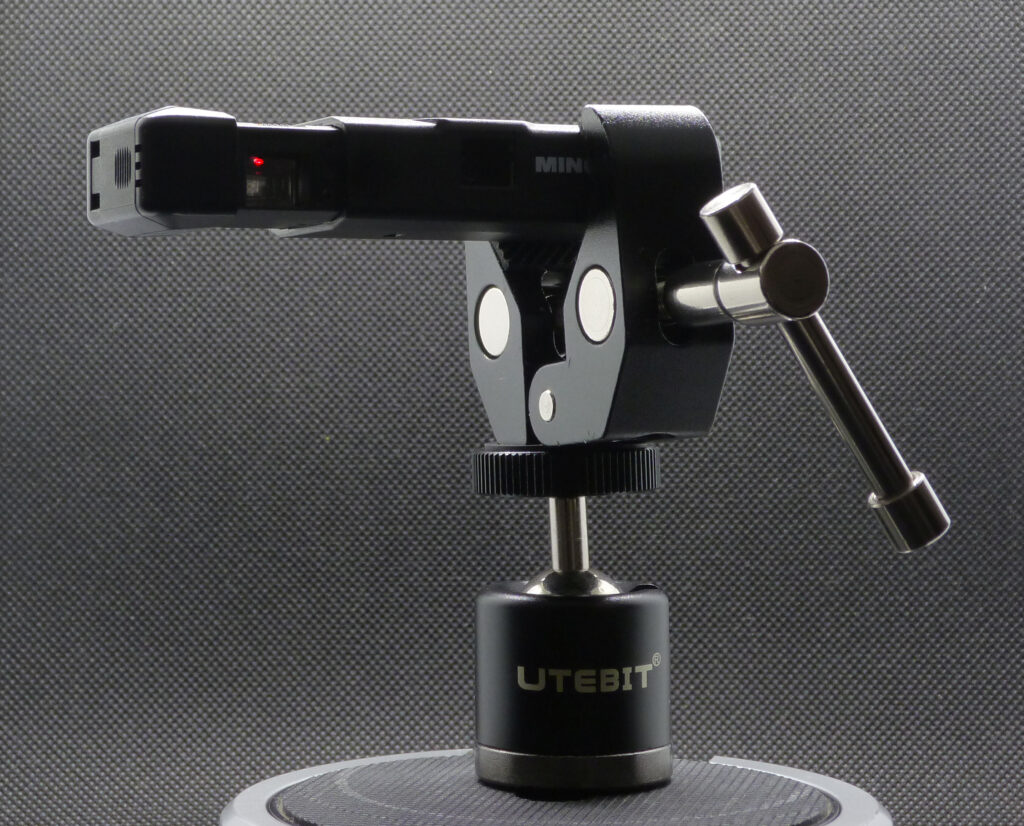
The Minox EC can be attached to a tripod in the same way.
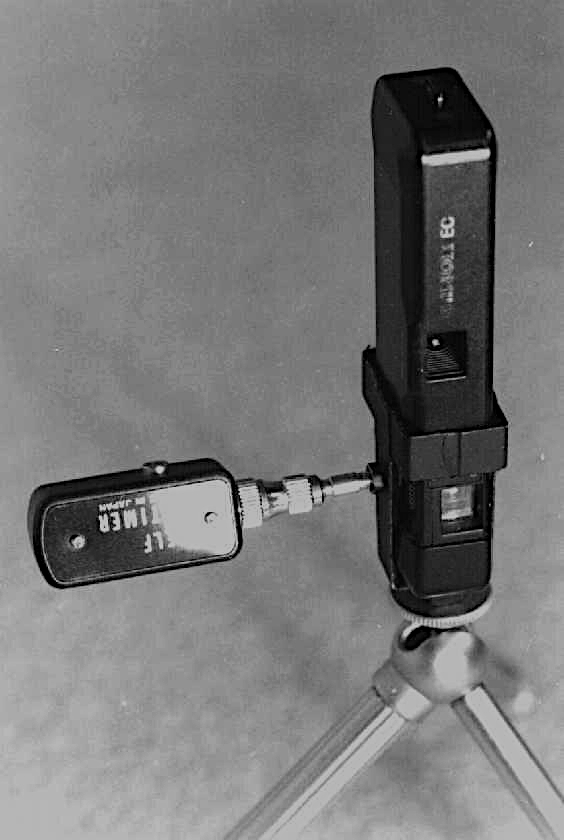
It’s always been easy to use older Minox cameras with a tripod, thanks to the neat Minox adapter. Unfortunately the EC can’t be used in this way due to its different construction. However, it’s not hard to make an adapter for yourself.
Stuart Hill has developed this great DIY tripod adapter for the Minox EC. Its design also includes a connection for a cable release.
You can find his complete assembly instructions as a PDF file here (courtesy Stuart Hill).