Page Contents
Why and when?
In some cases, especially if the camera has been opened improperly, all photos are only ever in focus at a certain distance. Often the shortest distance of 0.2 m is then always set, regardless of what you set on the distance dial.
You can detect this problem by pressing the shutter release button at the “T” time setting which opens the shutter permanently. Then look into the lens, turn the distance dial and check whether the lens rotates. You have to look carefully. If it does not turn, the distance dial has lost its connection to the lens. In this case, proceed as described below.
Caution, the degree of difficulty of this work is high. The final reassembly of the distance dial and image counter are particularly difficult and require careful preparation. Recommendations for tools for this work can be found here.
The main task, however, is to synchronize the distance dial with the lens. There is a simple and a more complex method for this. Both are described below.
Dismantling the distance dial
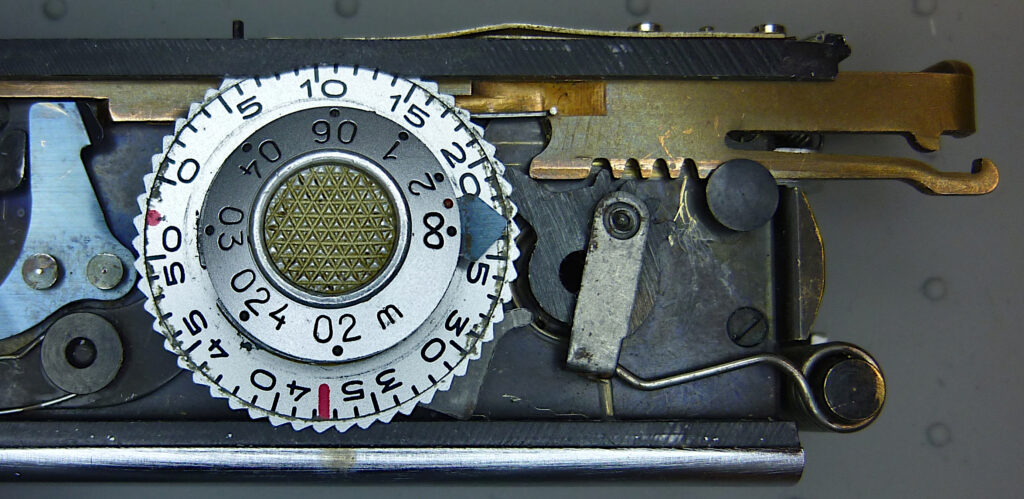
First, the Minox must be opened and the control panel removed. This also involves removing distance dial, frame counter and its transfer to the film feeding mechanism. Both must be reinstalled correctly later. I have described this work in detail here. The body then looks like this:
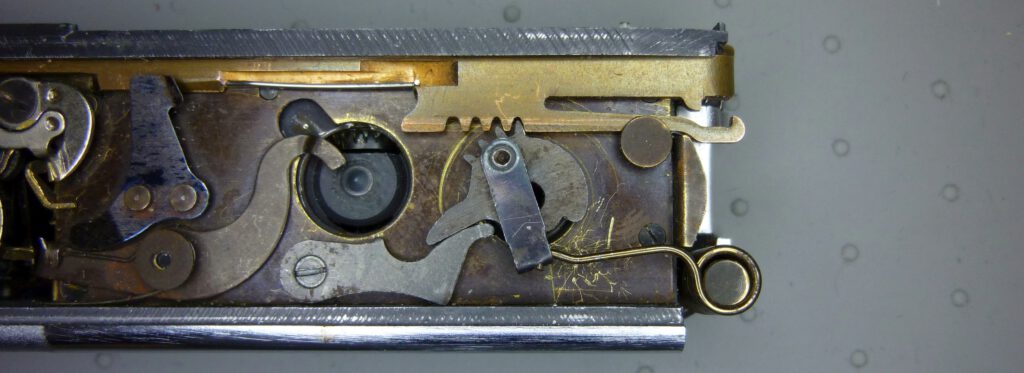
Adjusting the lens
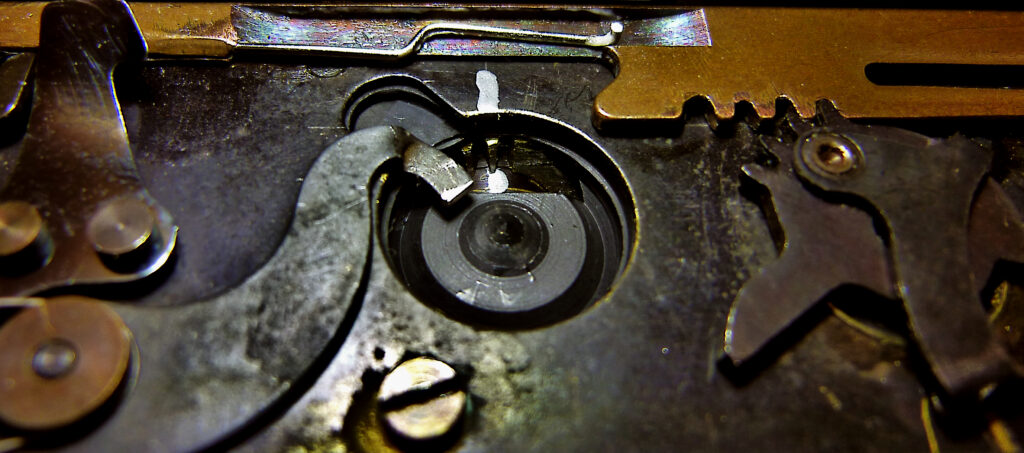
The position of the lens in relation to the film plane is determined by the position of the bevel gear located under the distance wheel.
The basic idea with both methods is to adjust the lens to “infinity” while the distance dial is removed. The distance dial is then remounted in the “infinity” position. There are two ways to do this. They differ in how you find the “infinity” position on the lens. These are the two procedures:
Turn the bevel gear by sight to a position that corresponds to the “infinity” setting.
Or do an optical adjustment with a collimator, i.e. a suitable lens is used to look through the front of the lens at a test image in the film plane. The lens is then adjusted until the test image appears sharp. This is the more accurate method.
Adjustment via bevel gear position
The bevel gear, which moves the lens via a worm gear, does not have continuous teeth. Either the infinity setting or the close-up setting of 0.2 m is located where the toothing of the bevel gear ends.
When adjusting by sight via the bevel gear, it is assumed that the infinity setting is reached when the bevel gear is turned so far to the left that the last tooth is vertical, as shown in the following picture:
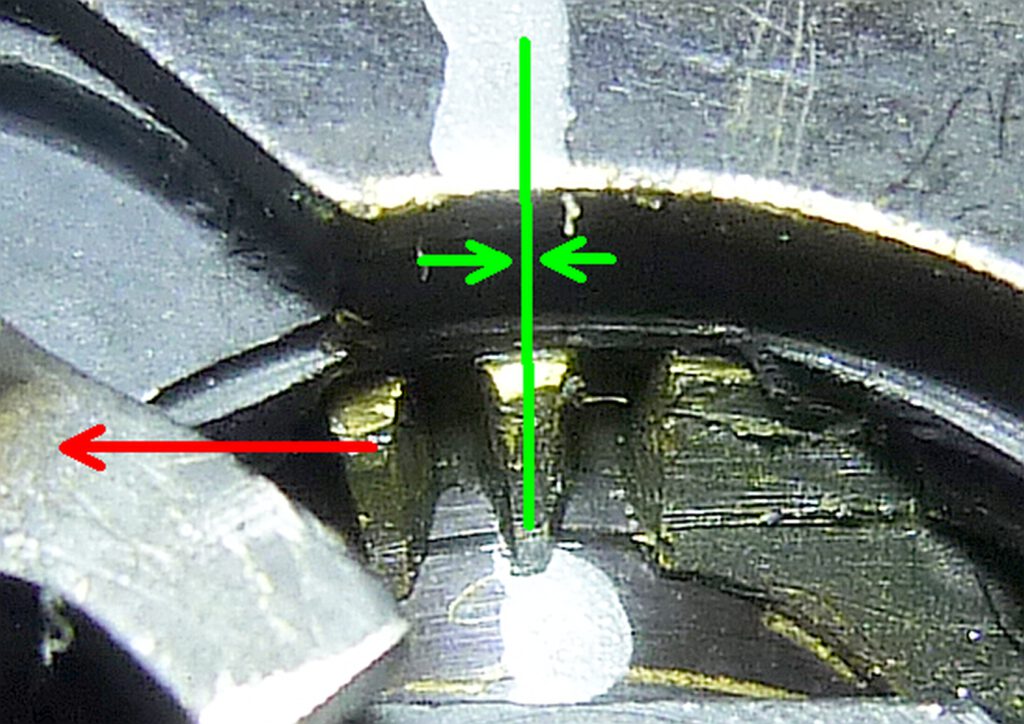
A needle or similar can be used to turn the bevel gear. Then reassemble everything, see above, and attach the housing.
Adjustment with collimator
Actually, the lens adjustment described above is accurate enough. However, if you want to check for yourself that the lens is in the “infinity” position, you can do so as follows.
You actually need an collimator for this process. Such a device can cost several thousand dollars. In the method I use, an SLR camera is used as a collimator. The Minox is placed in its optical axis with a transparent test image in the film plane. Pair the cameras so their image planes are parallel. Level both cameras and align the lenses at the same height. The spacing between the cameras is flexible.
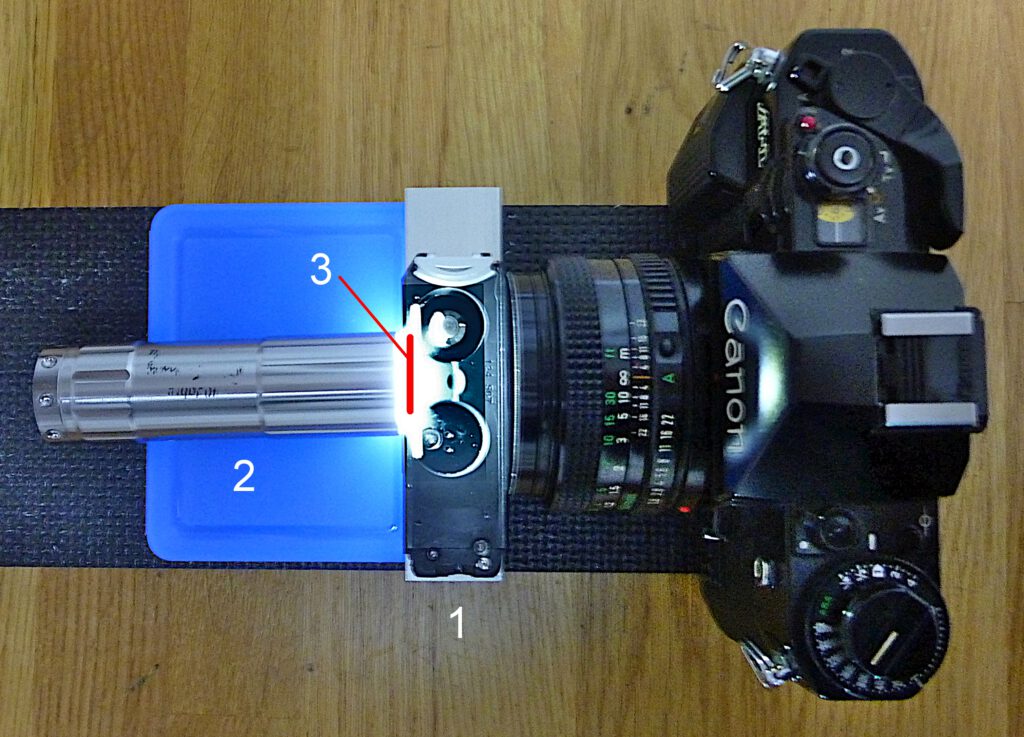
The following steps must be carried out for this setup. First remove the back cover. I have described this step in detail here. The back of the Minox then looks like this:
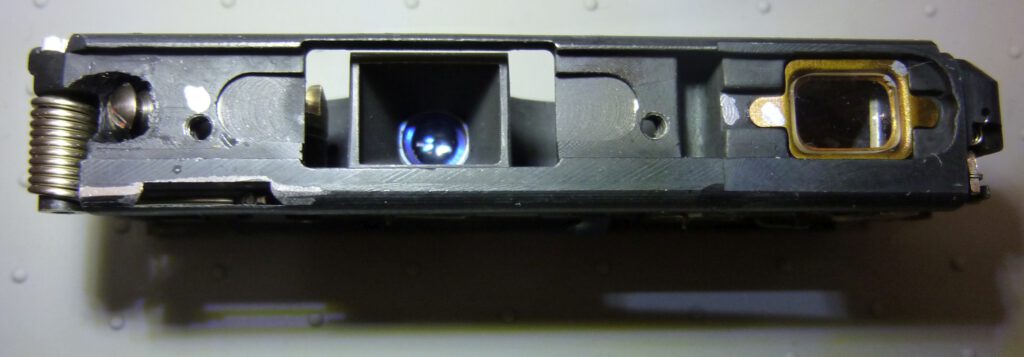
You can make the test image yourself from a piece of transparent film on which you scratch a cross with a needle. Then insert the film into the Minox film slot:
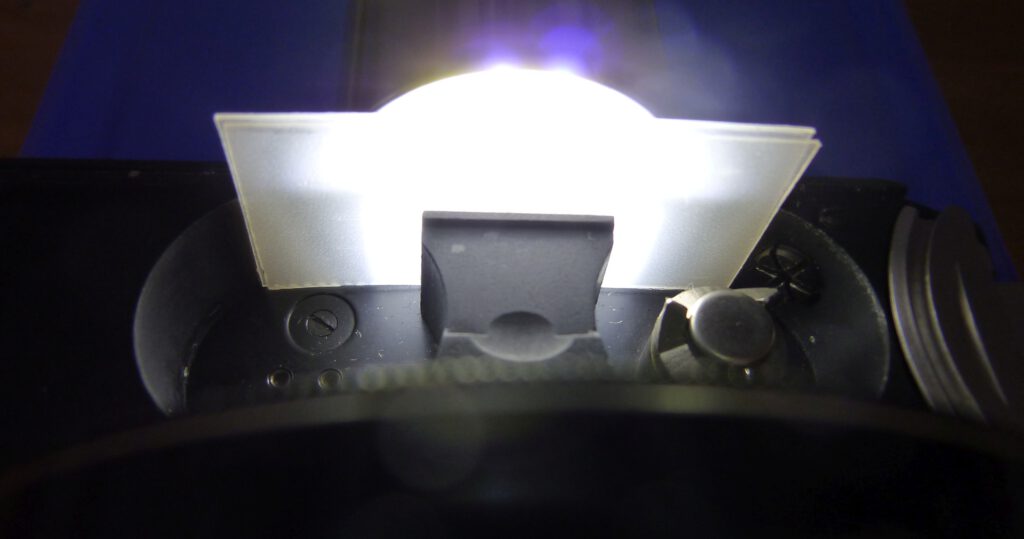
Now set the distance on the SLR camera lens to “infinity”. Then look through the viewfinder of the SLR camera. Now adjust the Minox lens by turning the bevel gear that the test image is exactly in focus and thus obtain the correct infinity setting for the Minox lens:
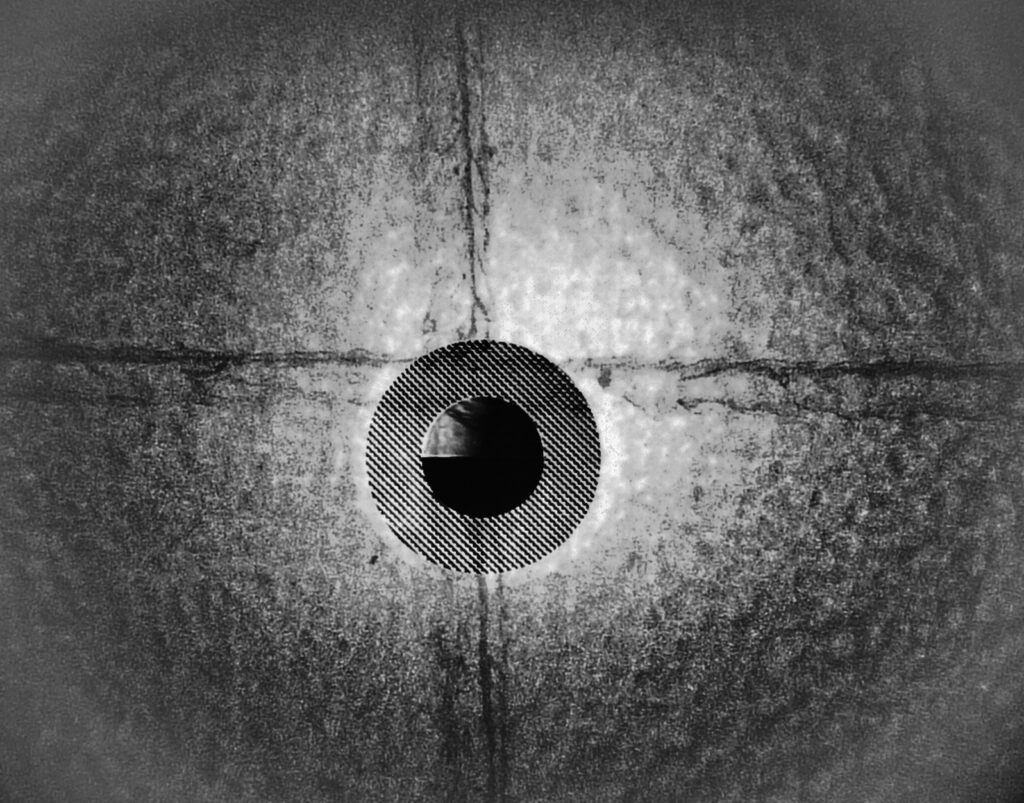
The infinity setting found is now marked on the bevel gear and on the front of the lens:
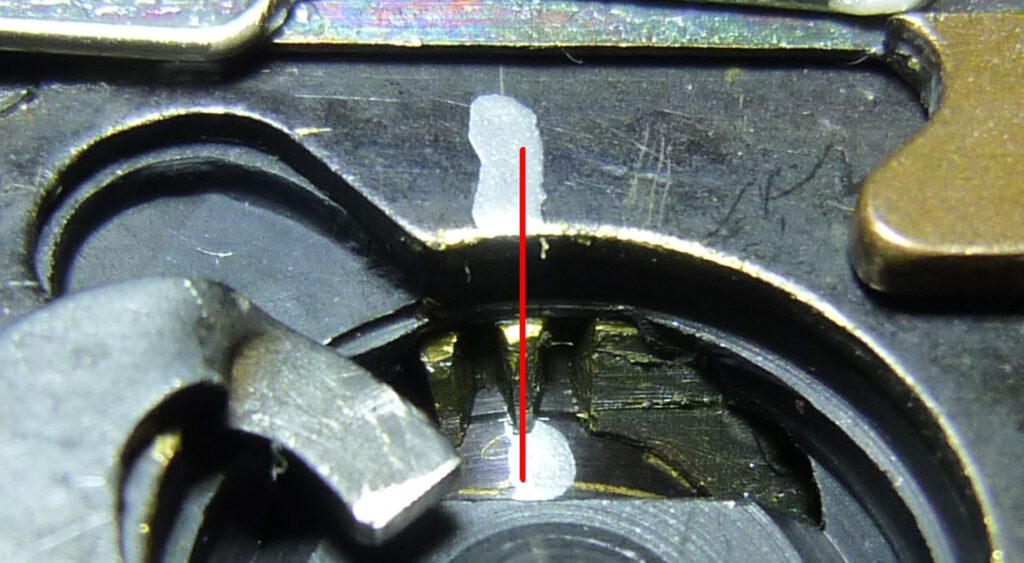
Then reinstall the image counter disk and distance dial as described above in reverse order and attach the housing.
Conclusion
The actual adjustment of the lens is not difficult – at least according to the first method. Difficult is dismantling and, above all, mounting frame counter and distance dial later on. However, with the instructions presented here it should be possible. I recommend that you first try out the work on a Minox that you have obtained for practice purposes.

An exceptionally well written technical article. Very much appreciated. Steve