Page Contents
Take on the ultimate challenge and photograph in the smallest analog film format with a Minox spy camera!
For those who are eager to know, here are the answers to the three most frequently asked questions:
- Which Minox should I use to start with, and what do I need to bear in mind?
- Where can I get suitable Minox film these days?
- Where can I still get Minox film developed?
Why?
- Are you bored of taking tons of photos with your cell phone or digital camera that you usually never look at again?
- Do you want to take photos you’re proud of instead?
- Do you want to push the boundaries of your photography?
- Do you like unusual challenges?
- Do you want to experience real success?
Then this article is for you!
The challenge
Shooting with a Minox spy camera requires sporting ambition, because there is probably no more difficult way to take photos. And none cooler. As with any analog camera you can’t view the result immediately So you are forced to think much more about your picture before you take it. As a result, your photos improve and you have a closer relationship with the result.
Setting up the process from film selection to the final digitized image may require many decisions and creative ideas. If you like that, you’ll have a lot of fun with a Minox.
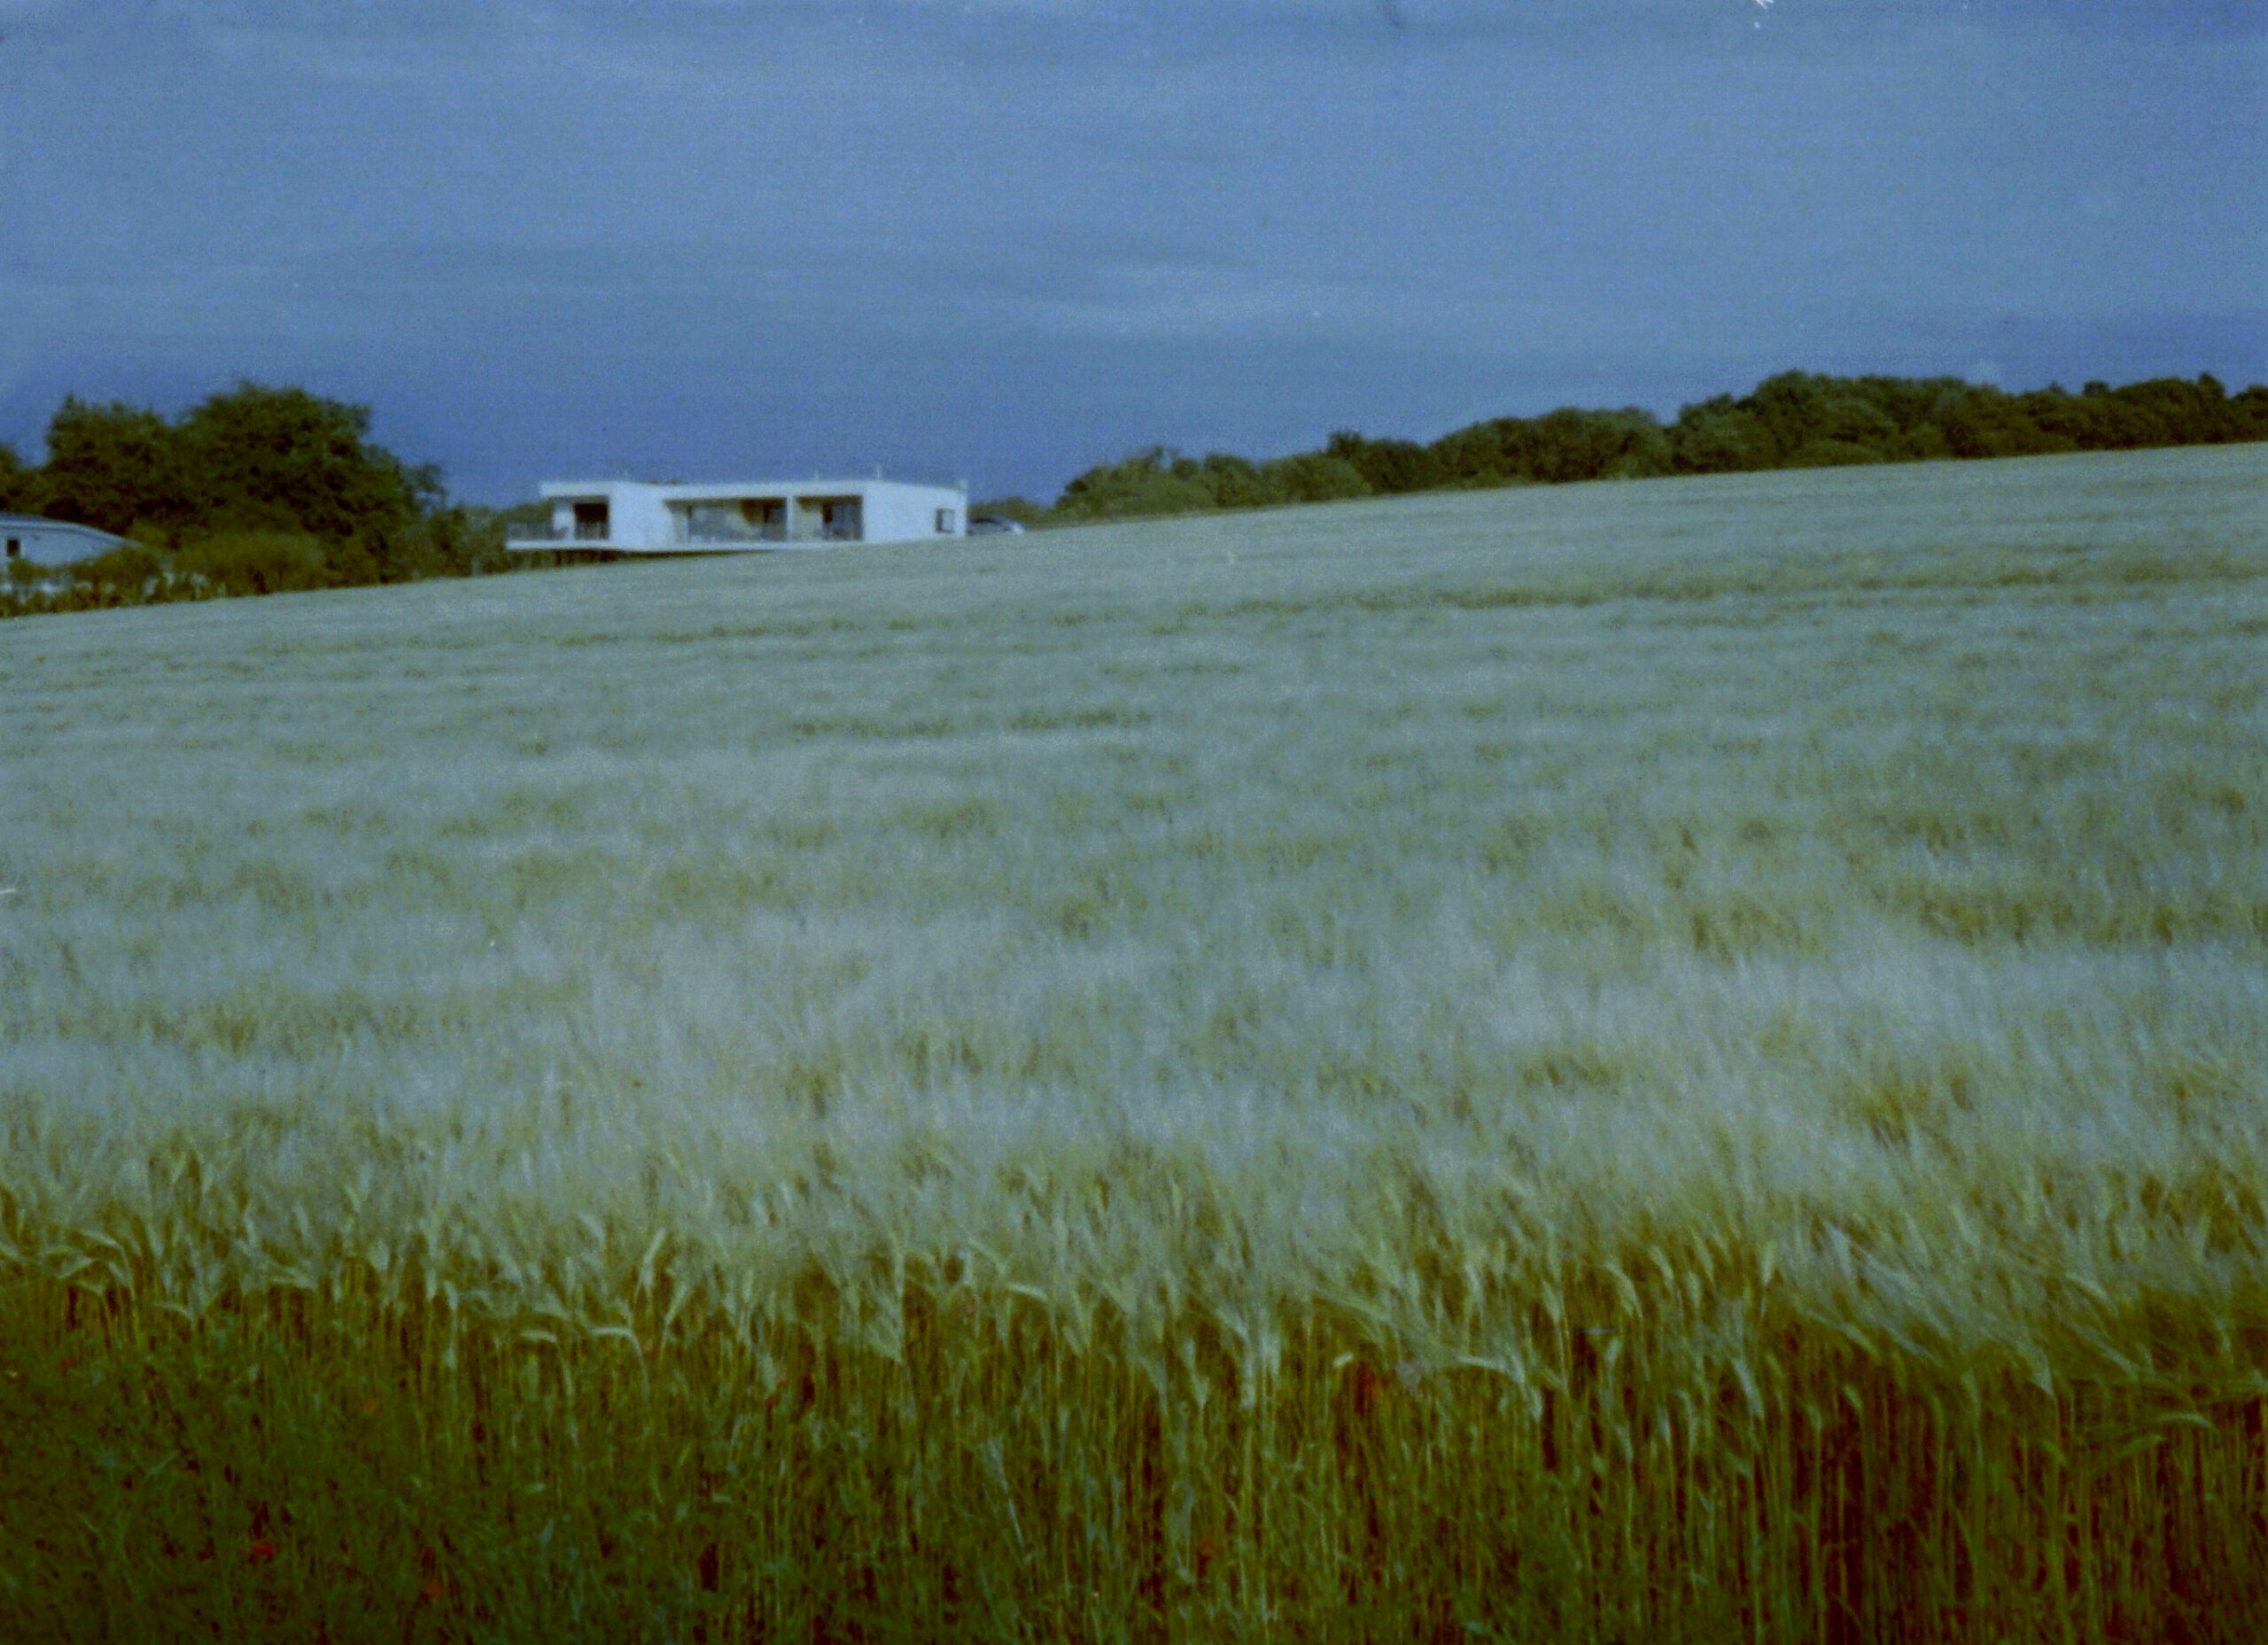
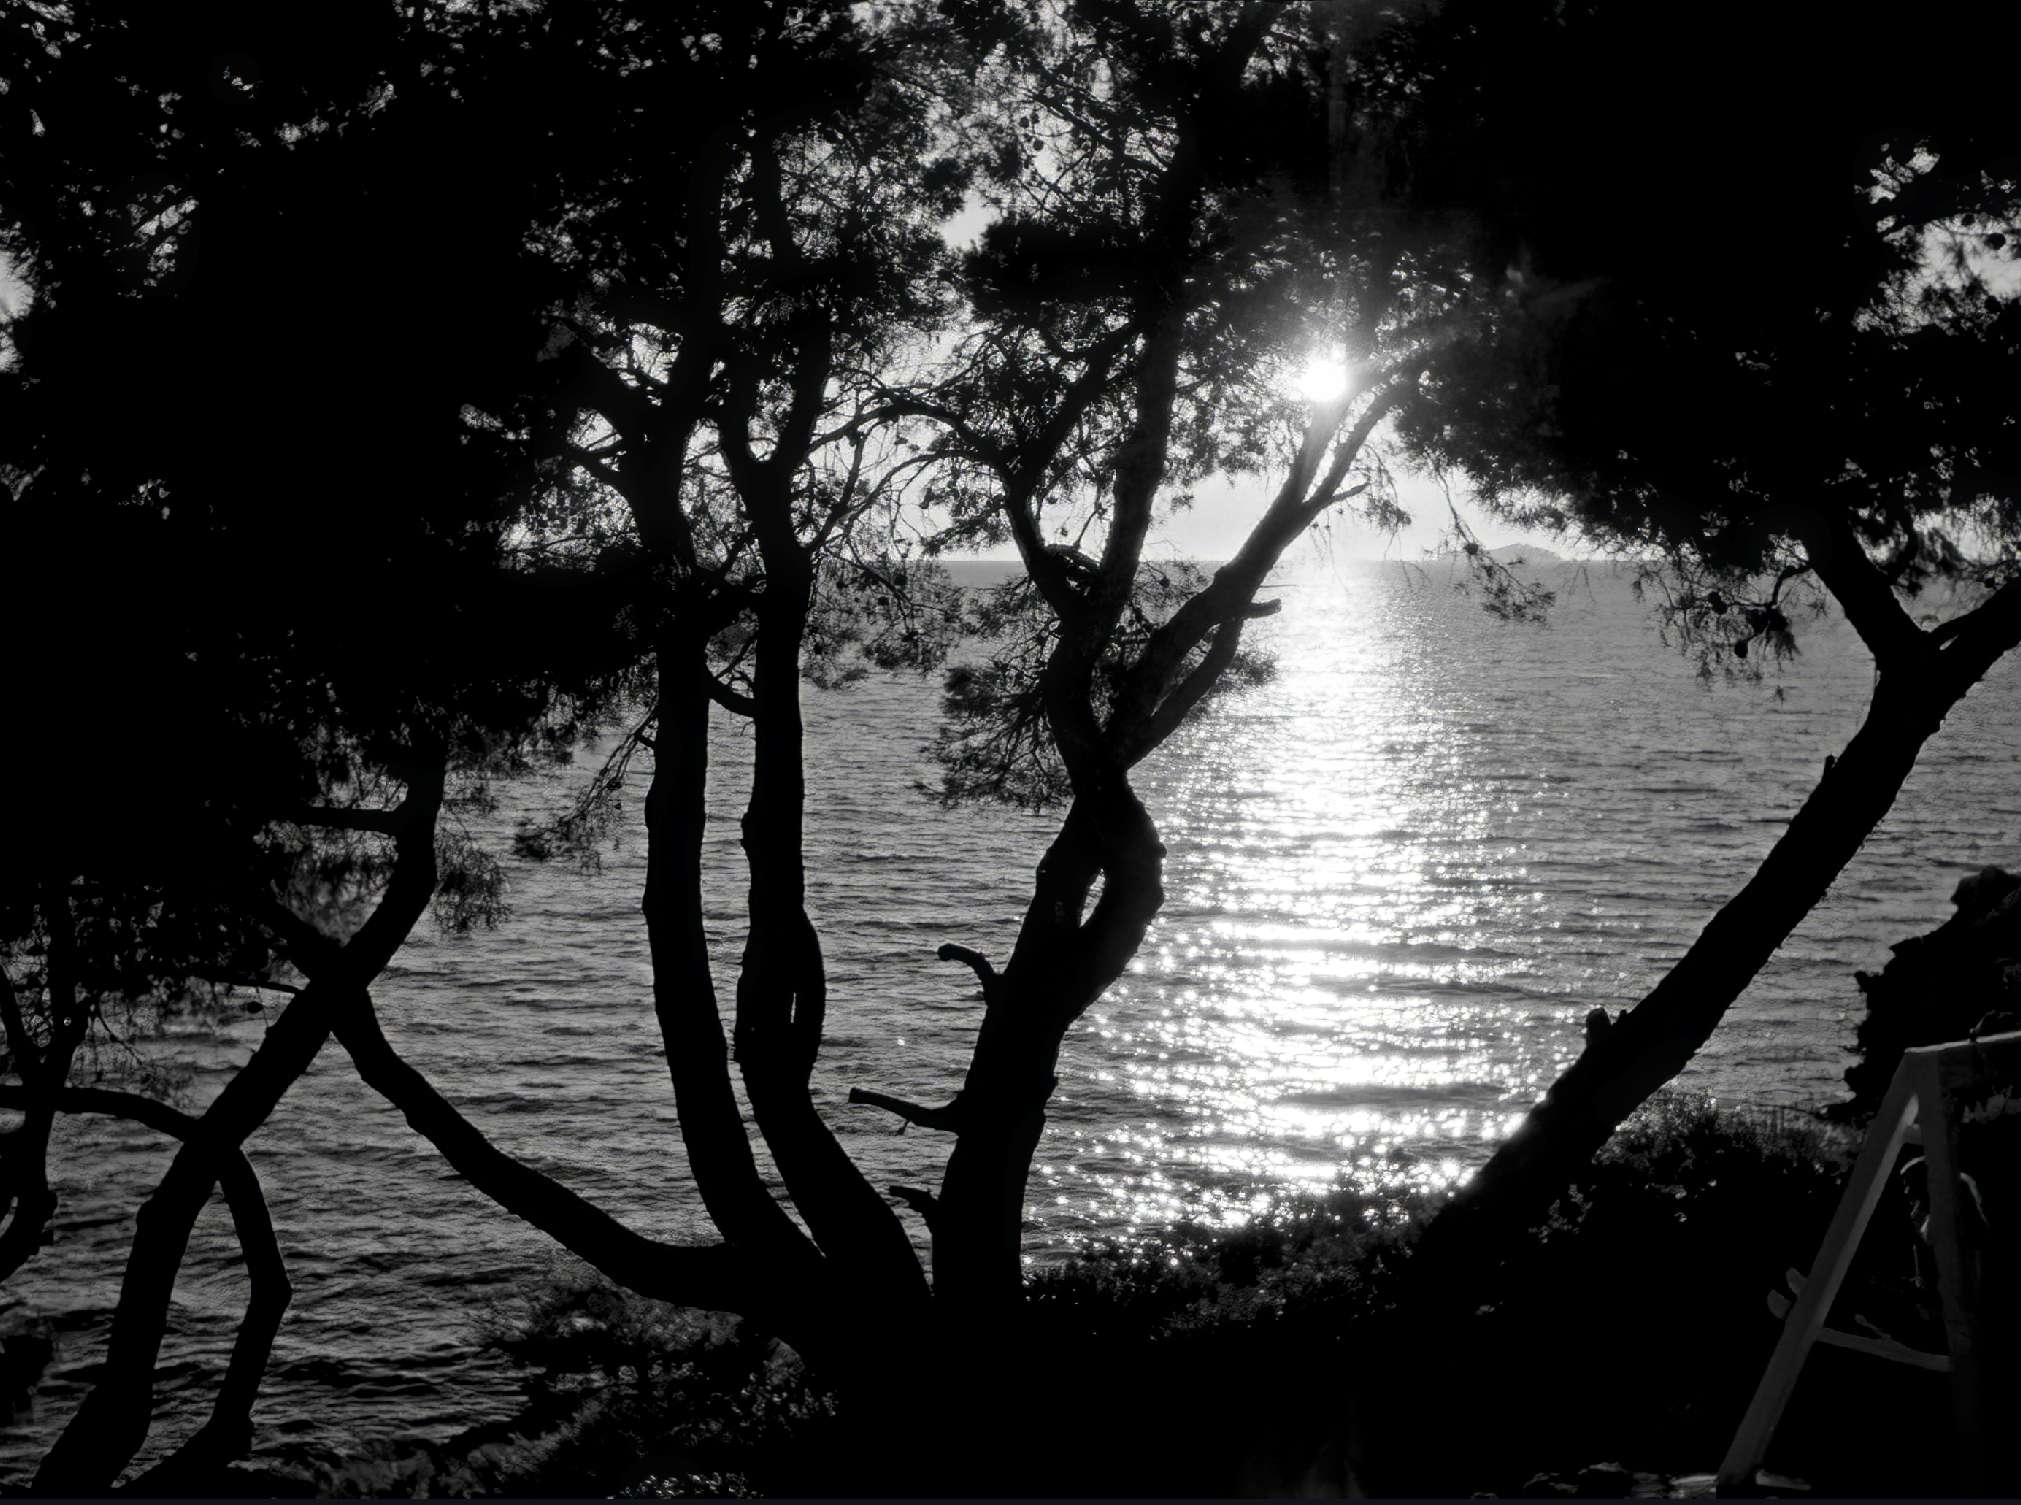
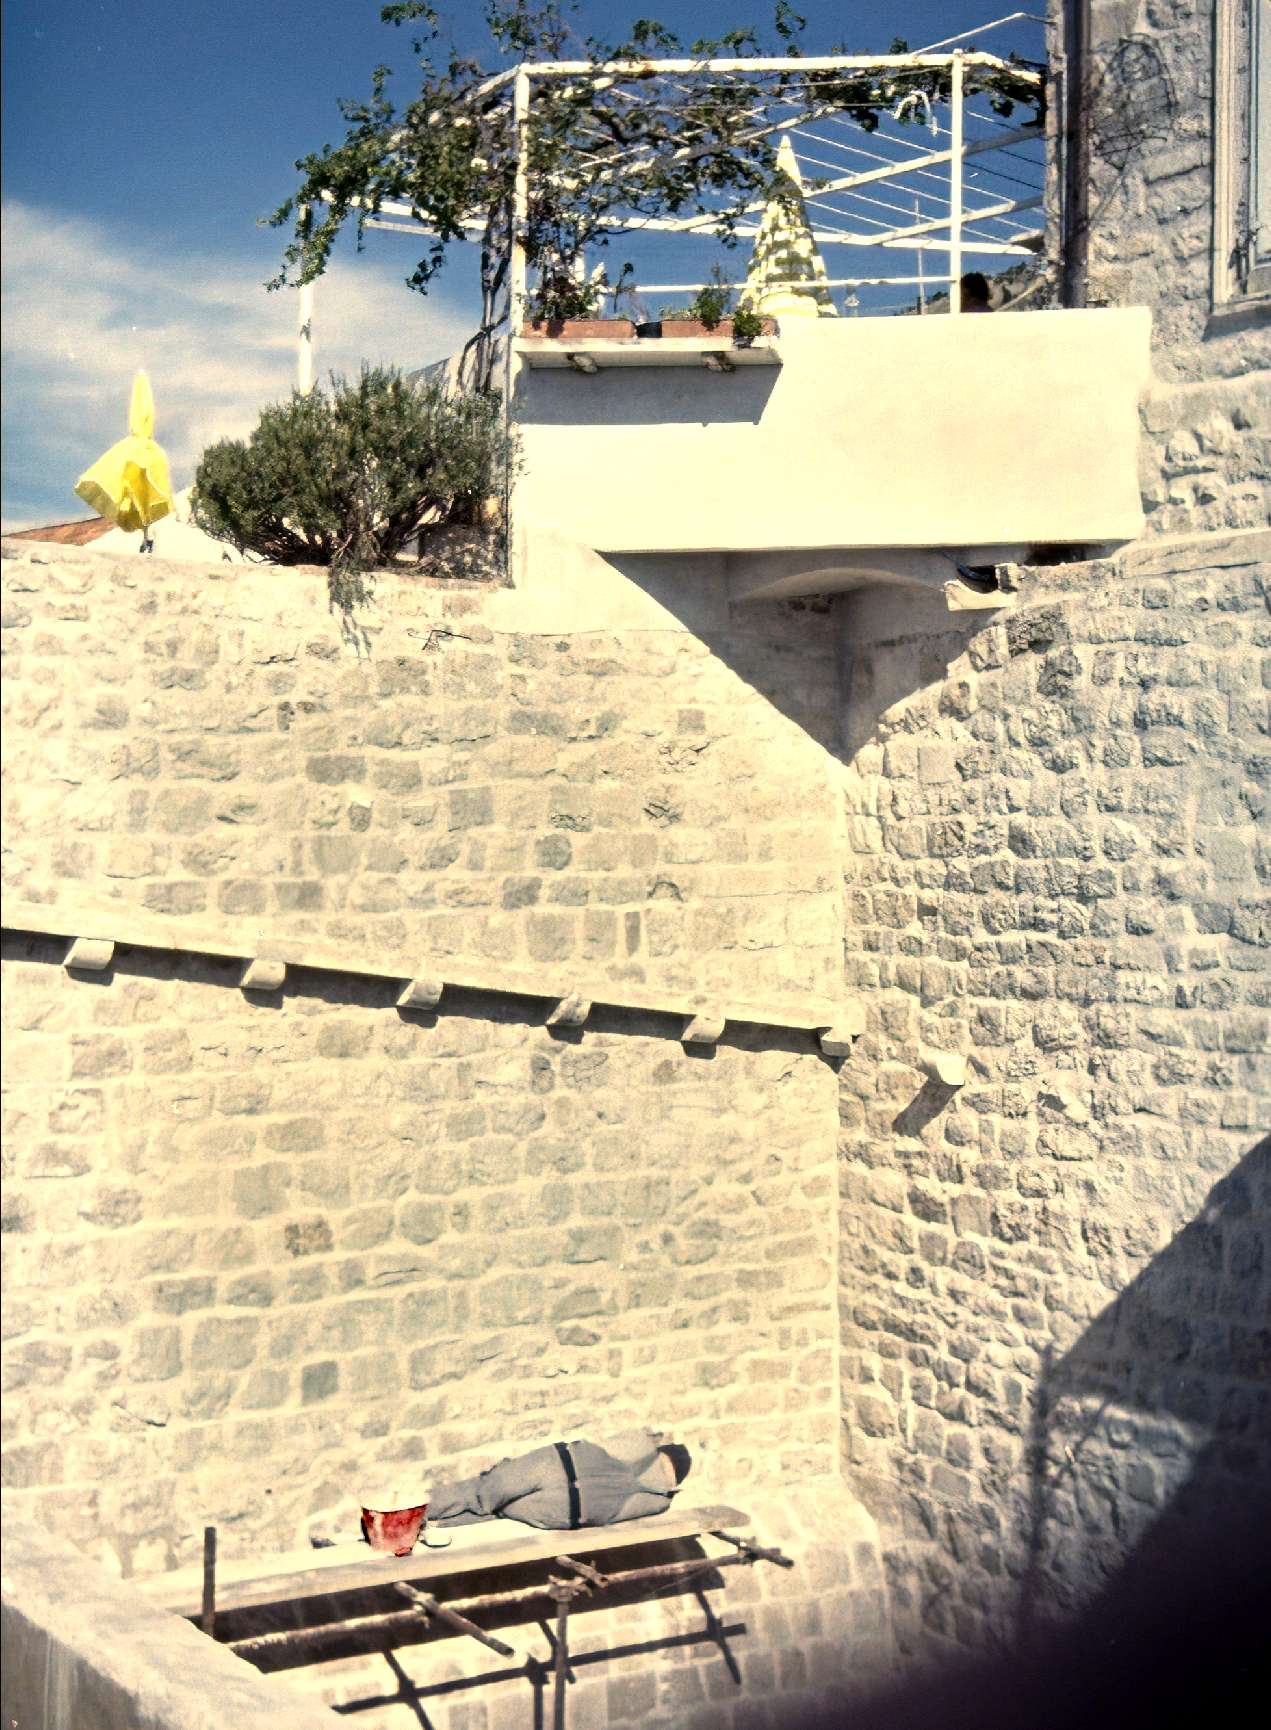
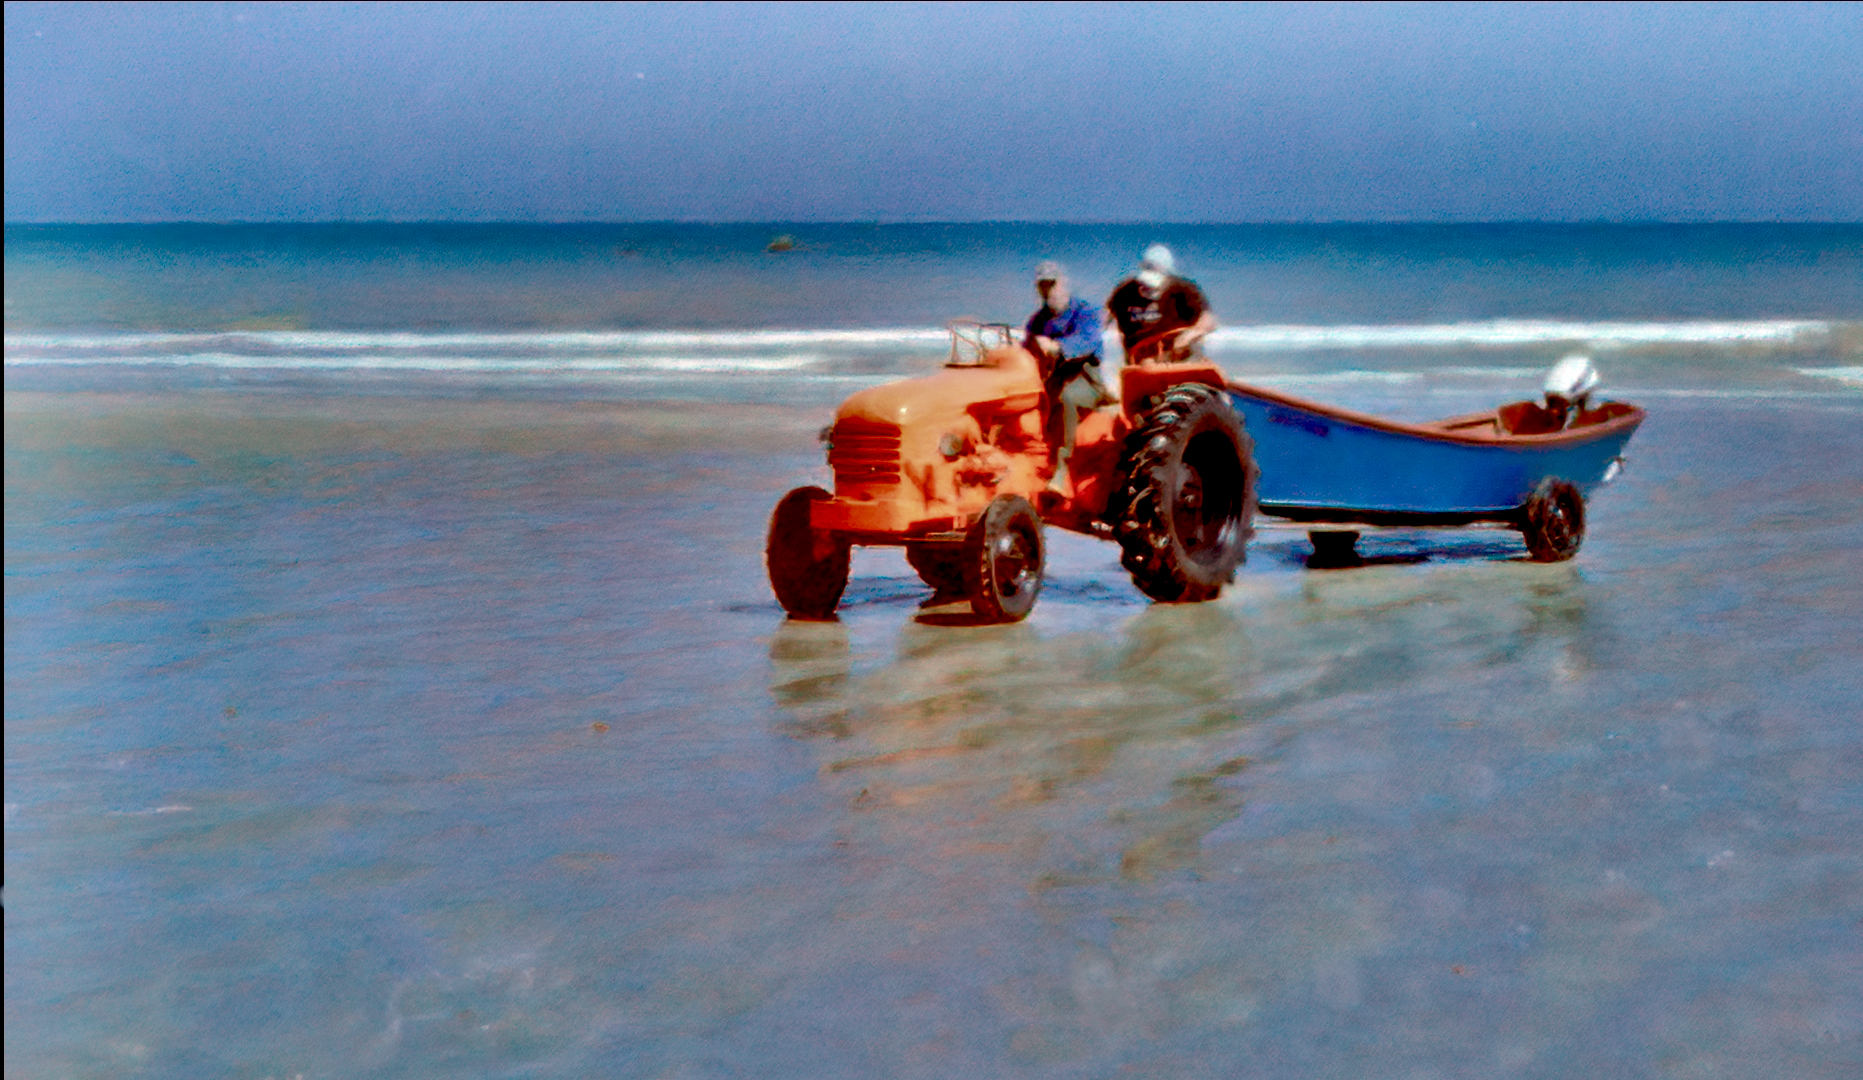
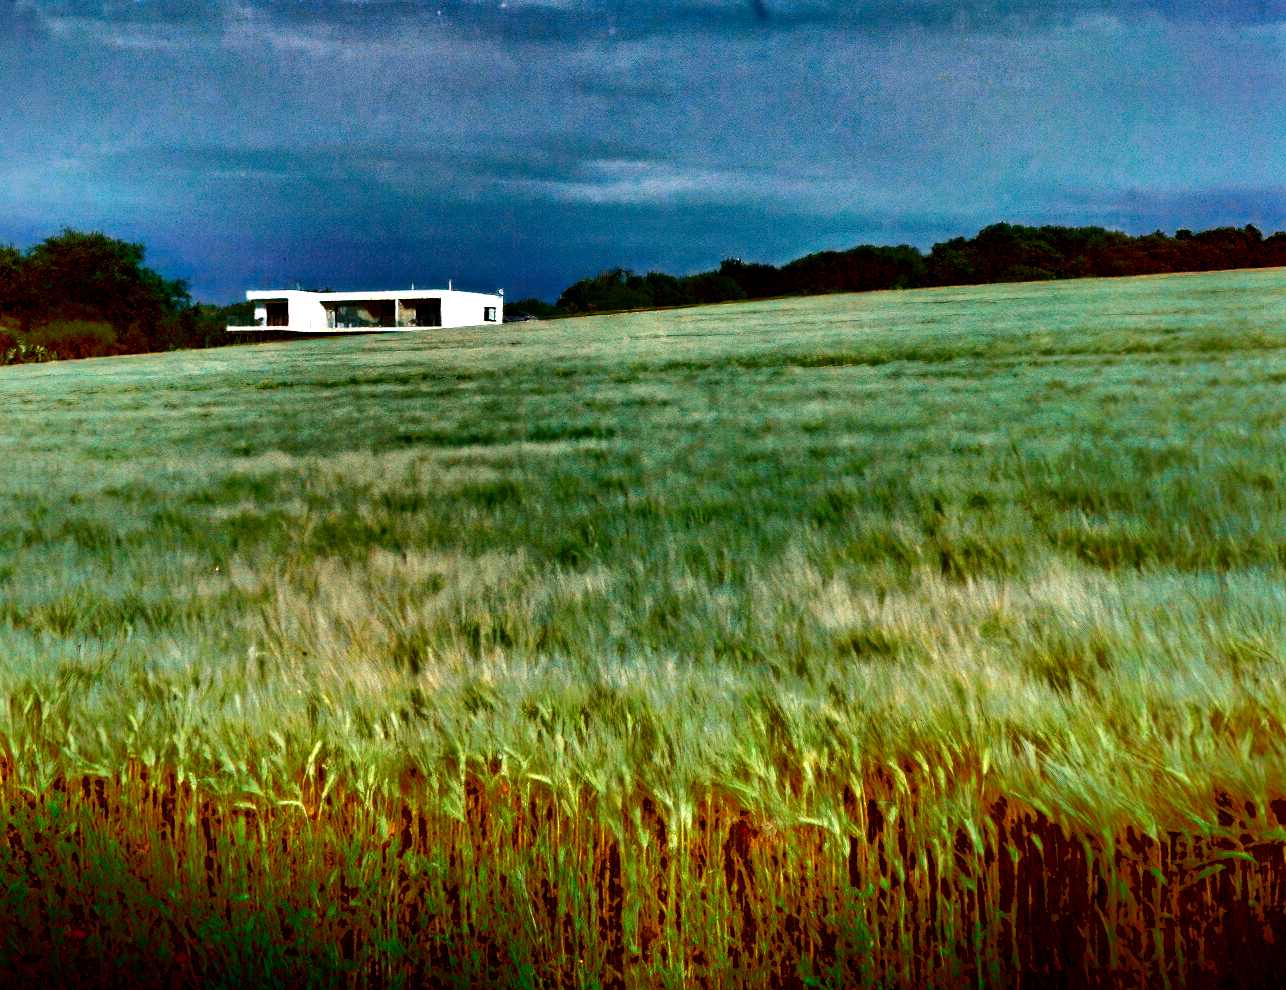
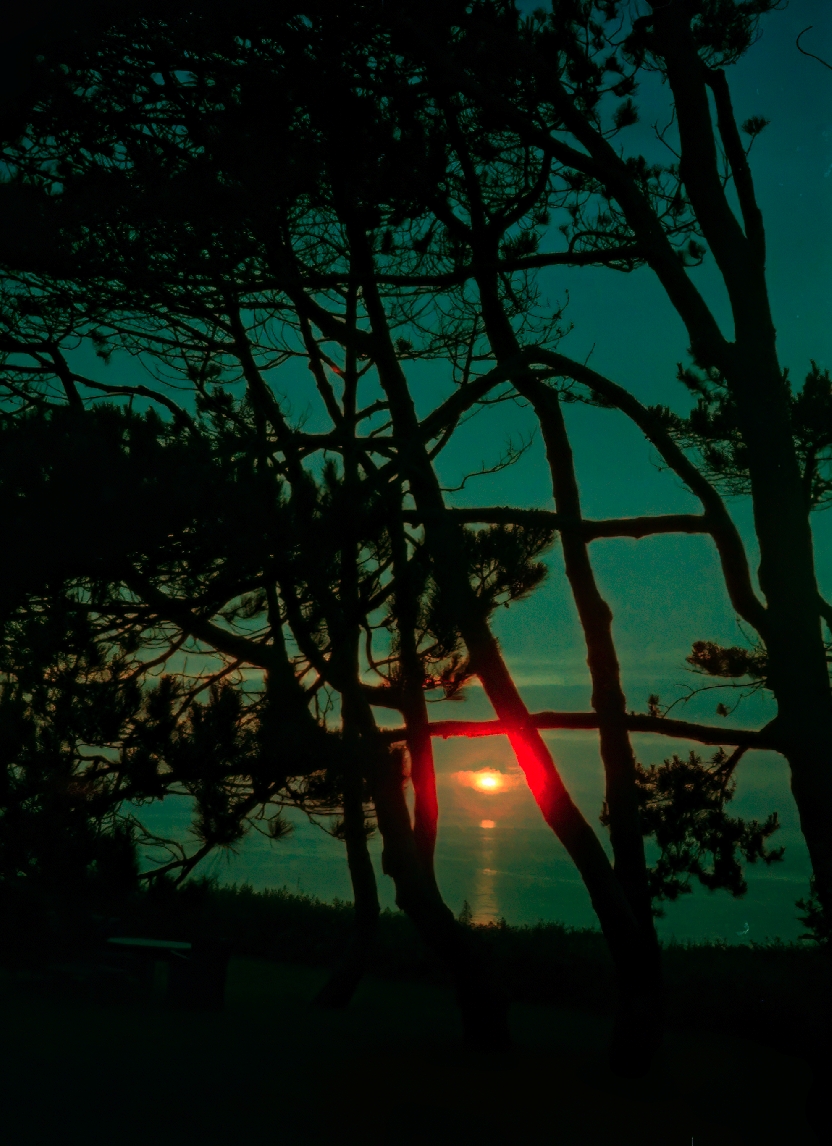
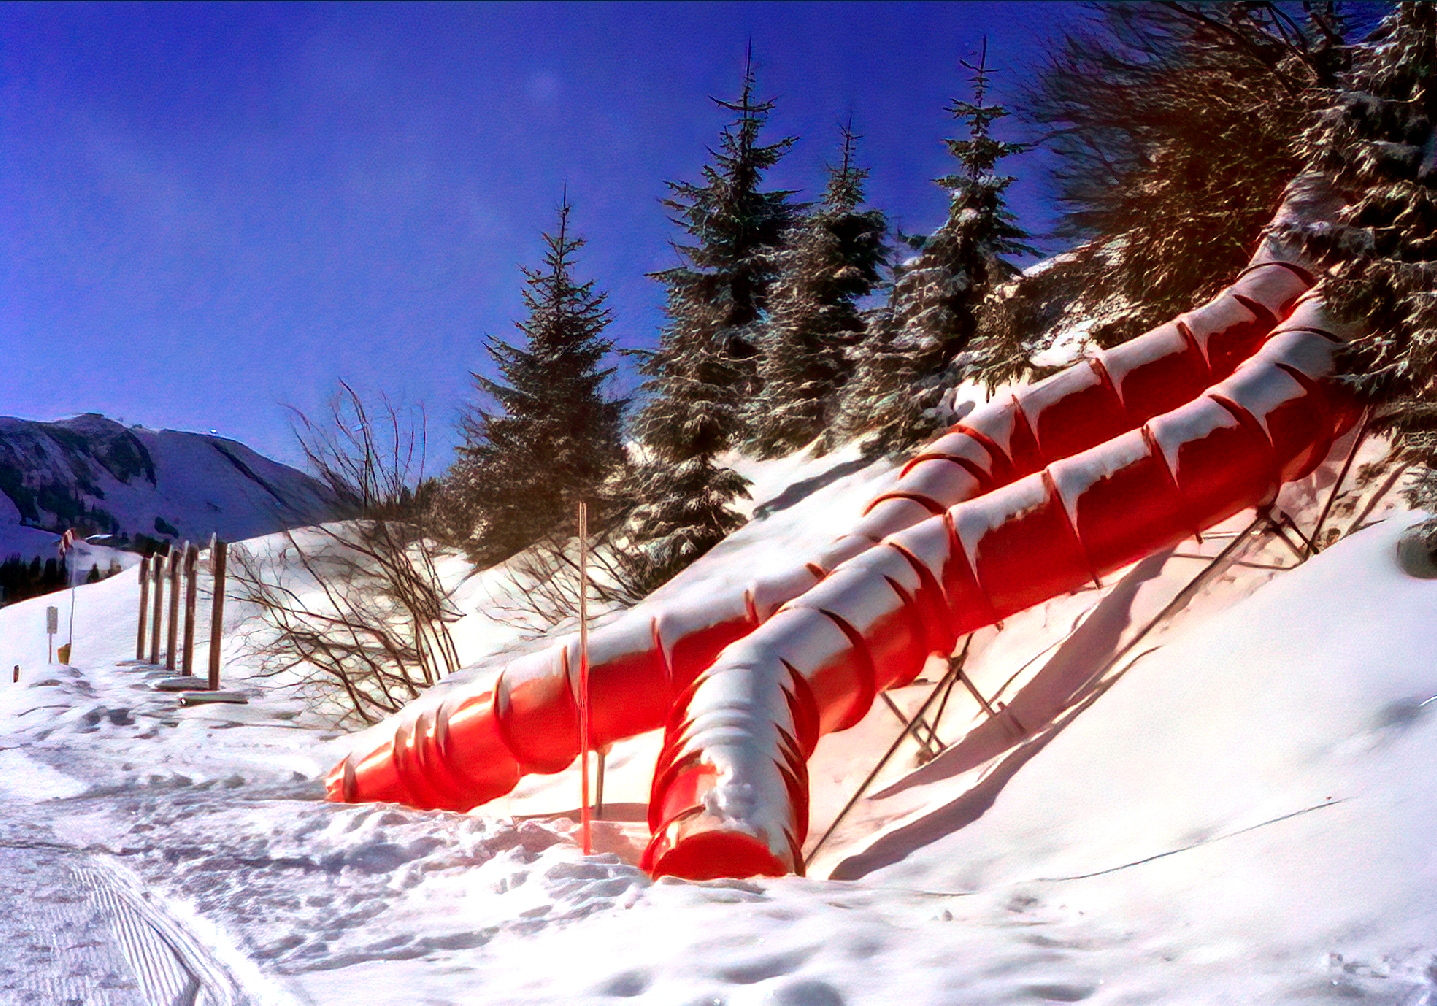
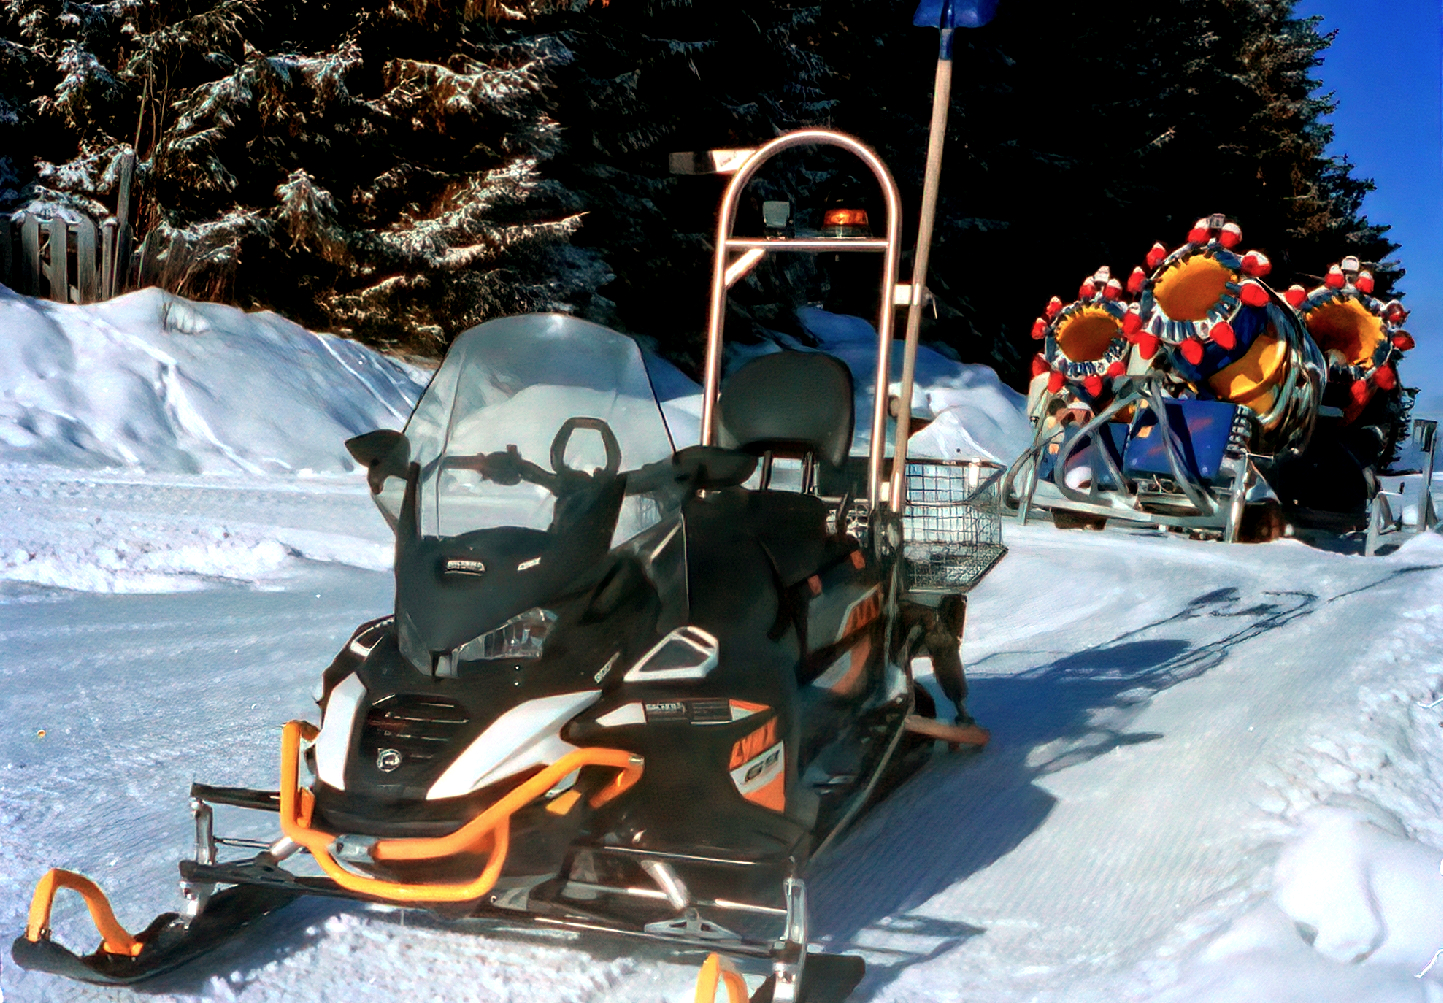
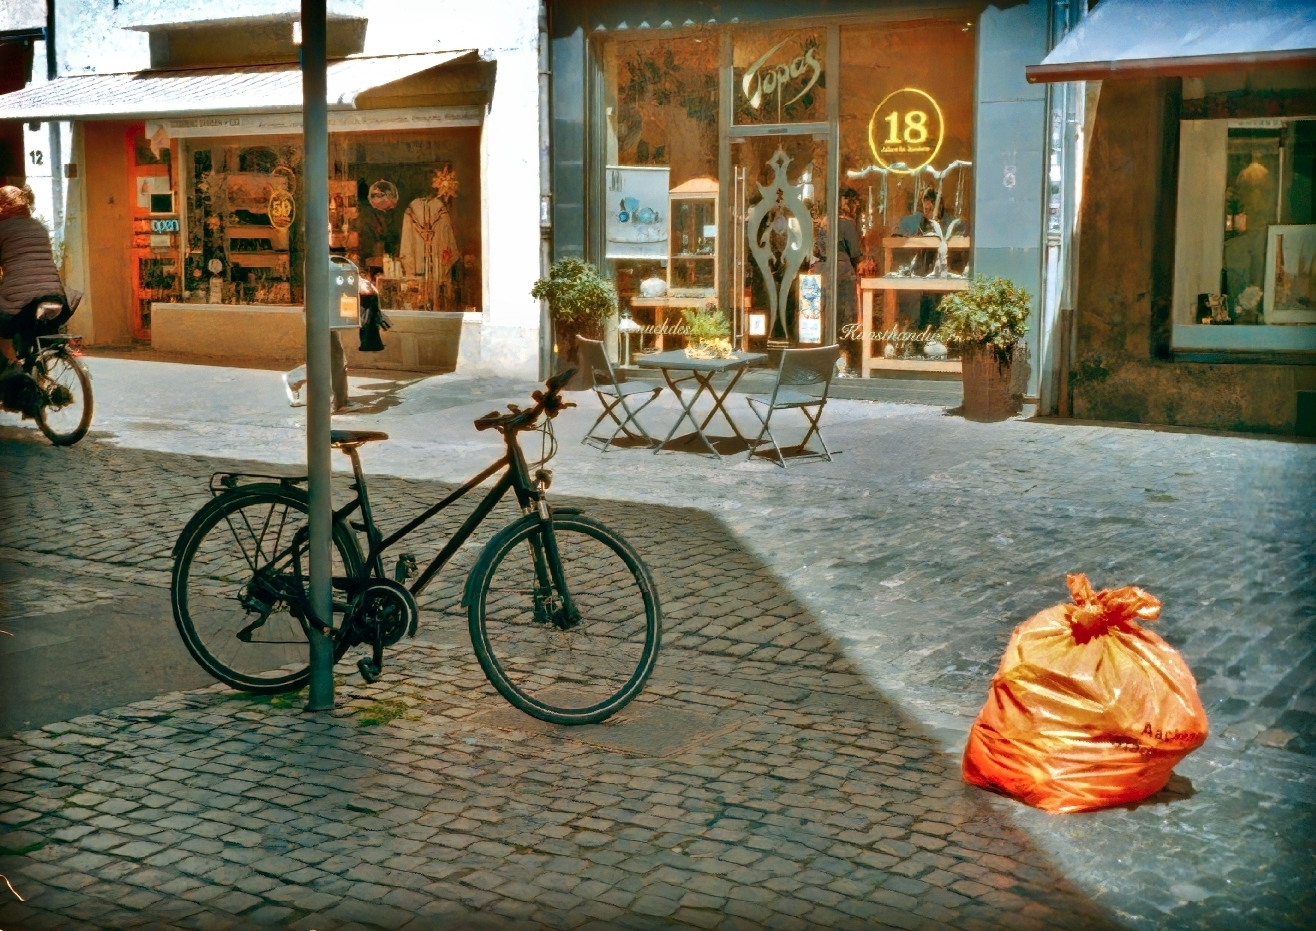
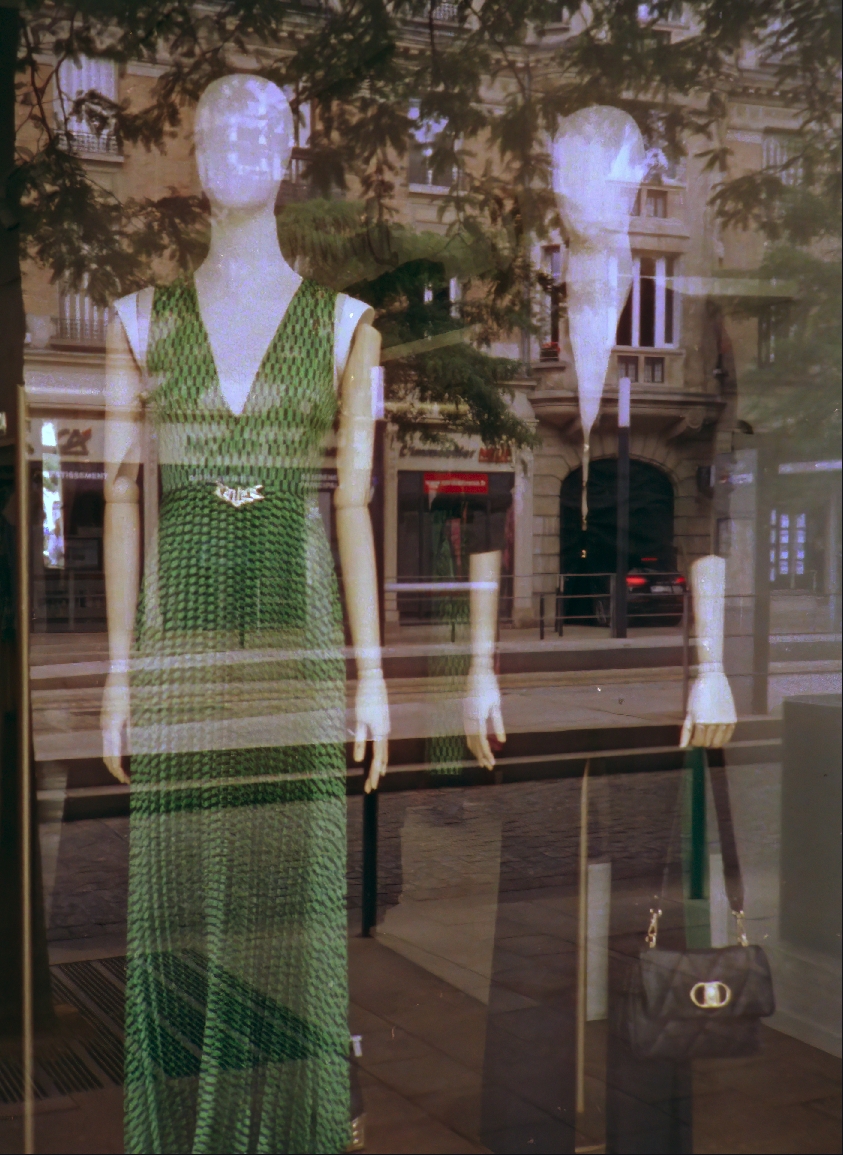
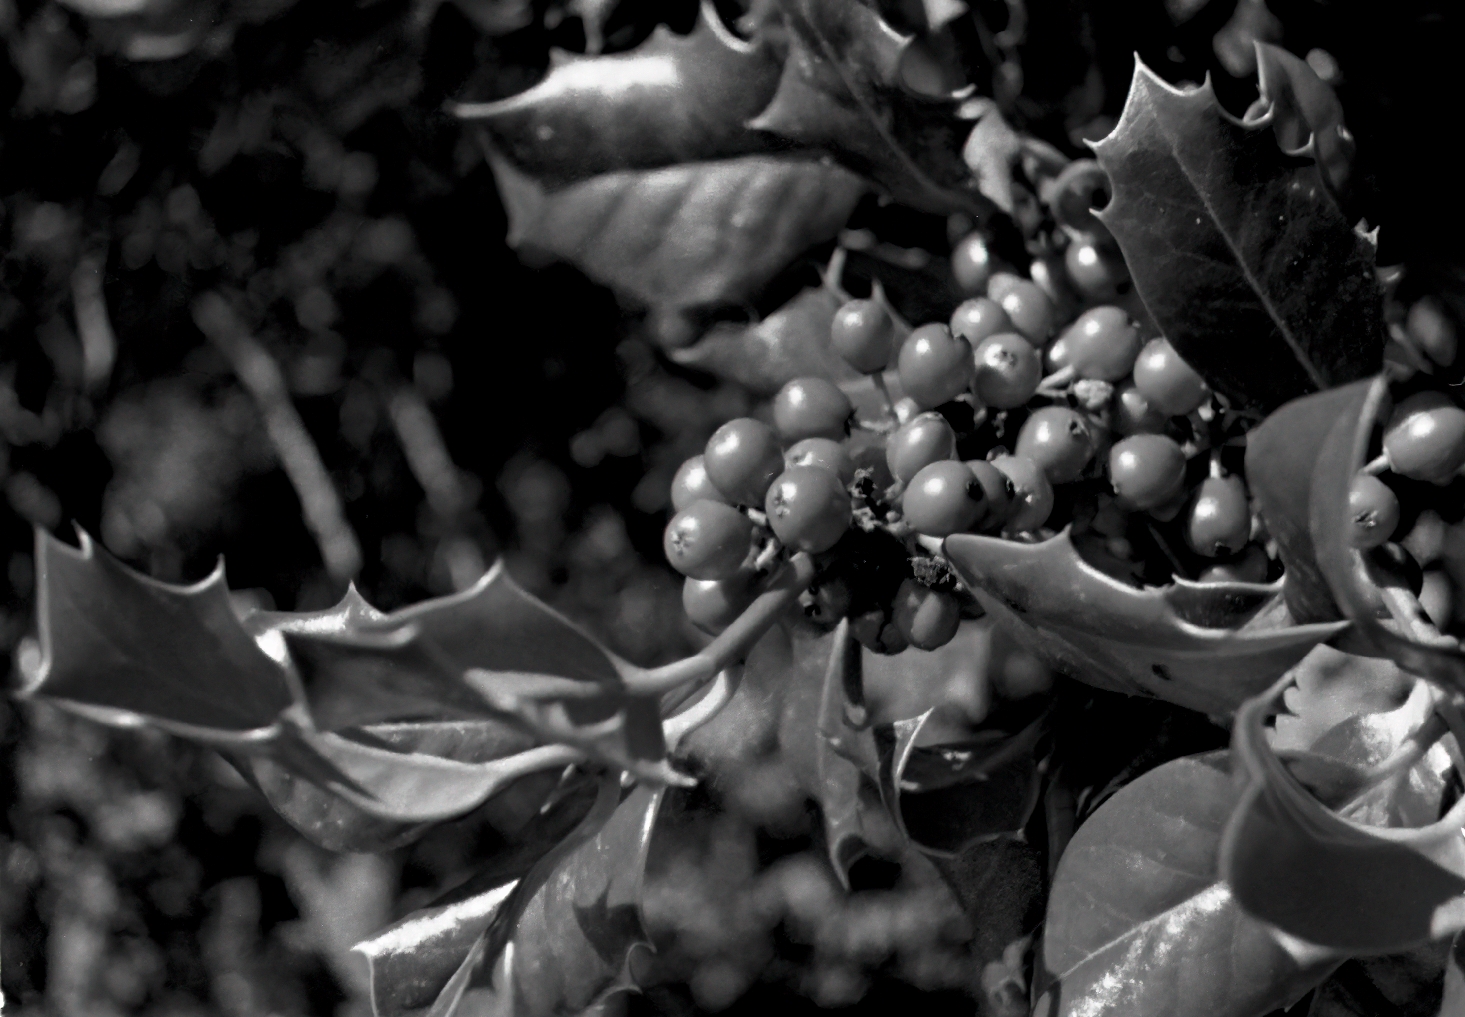
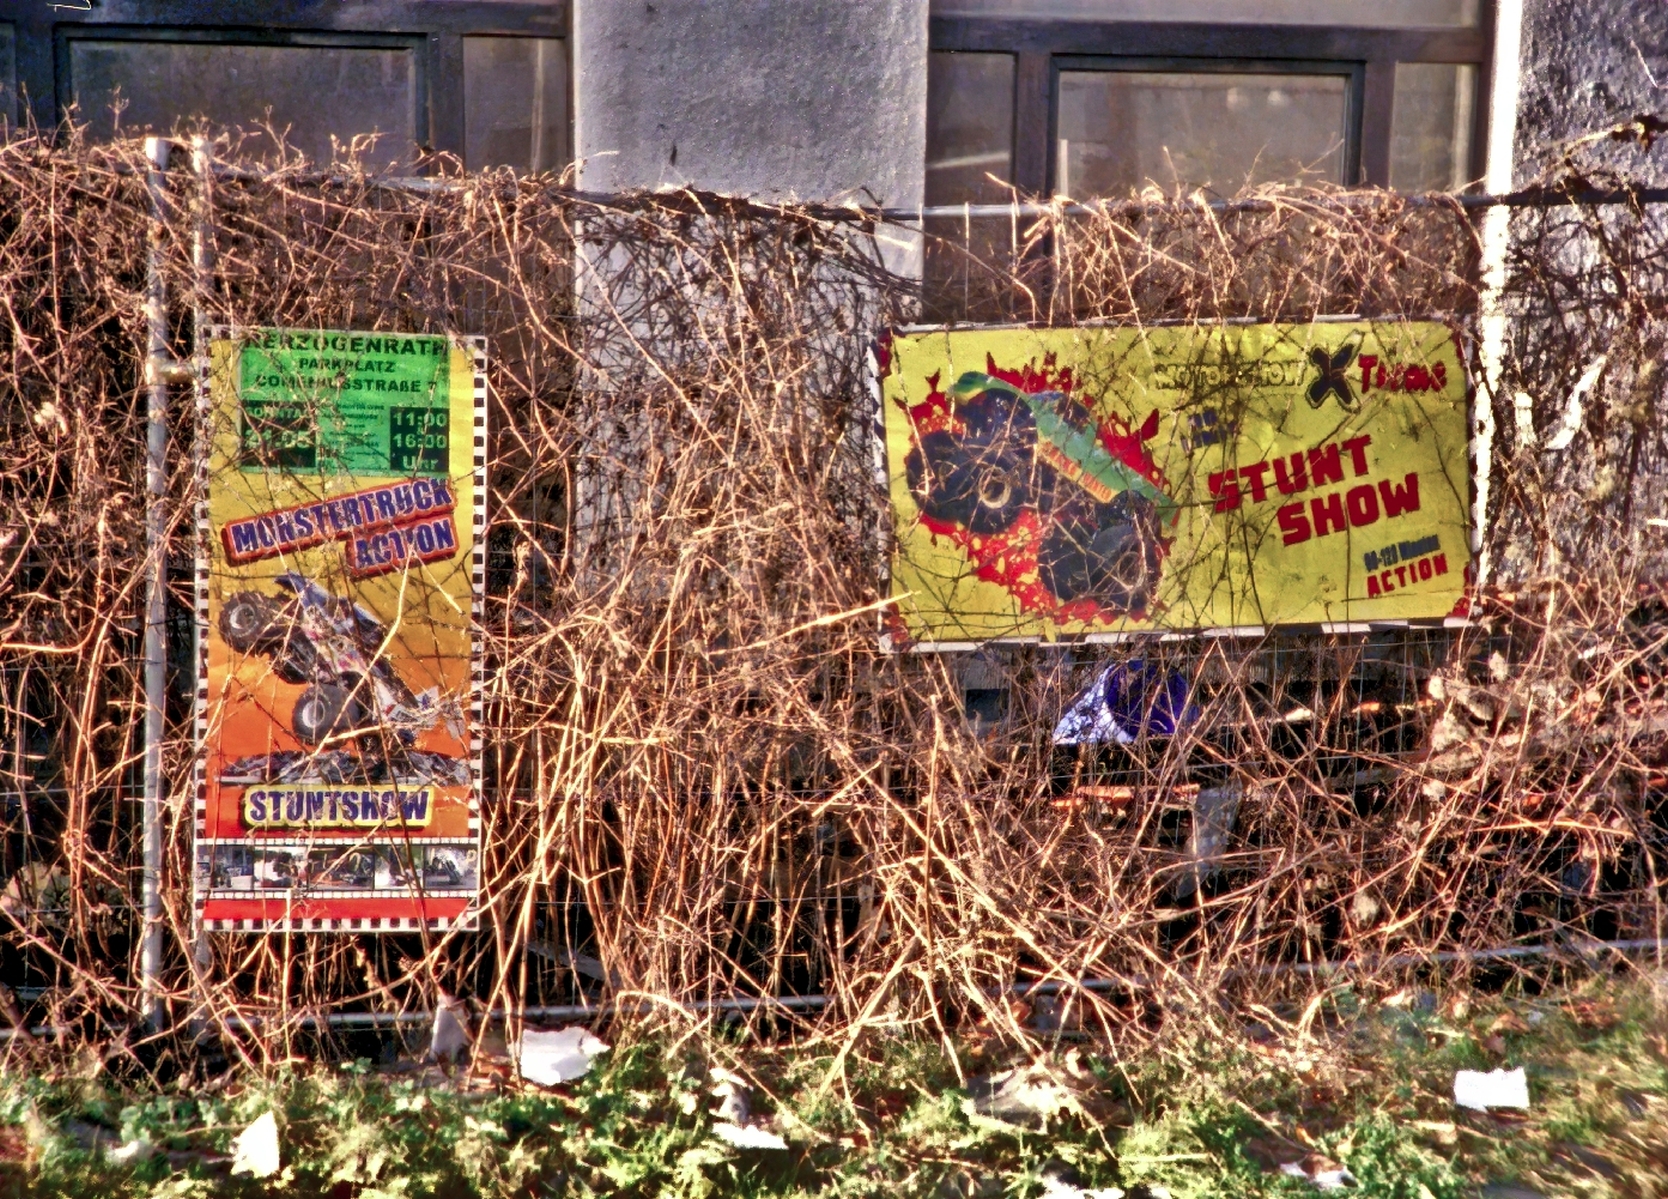
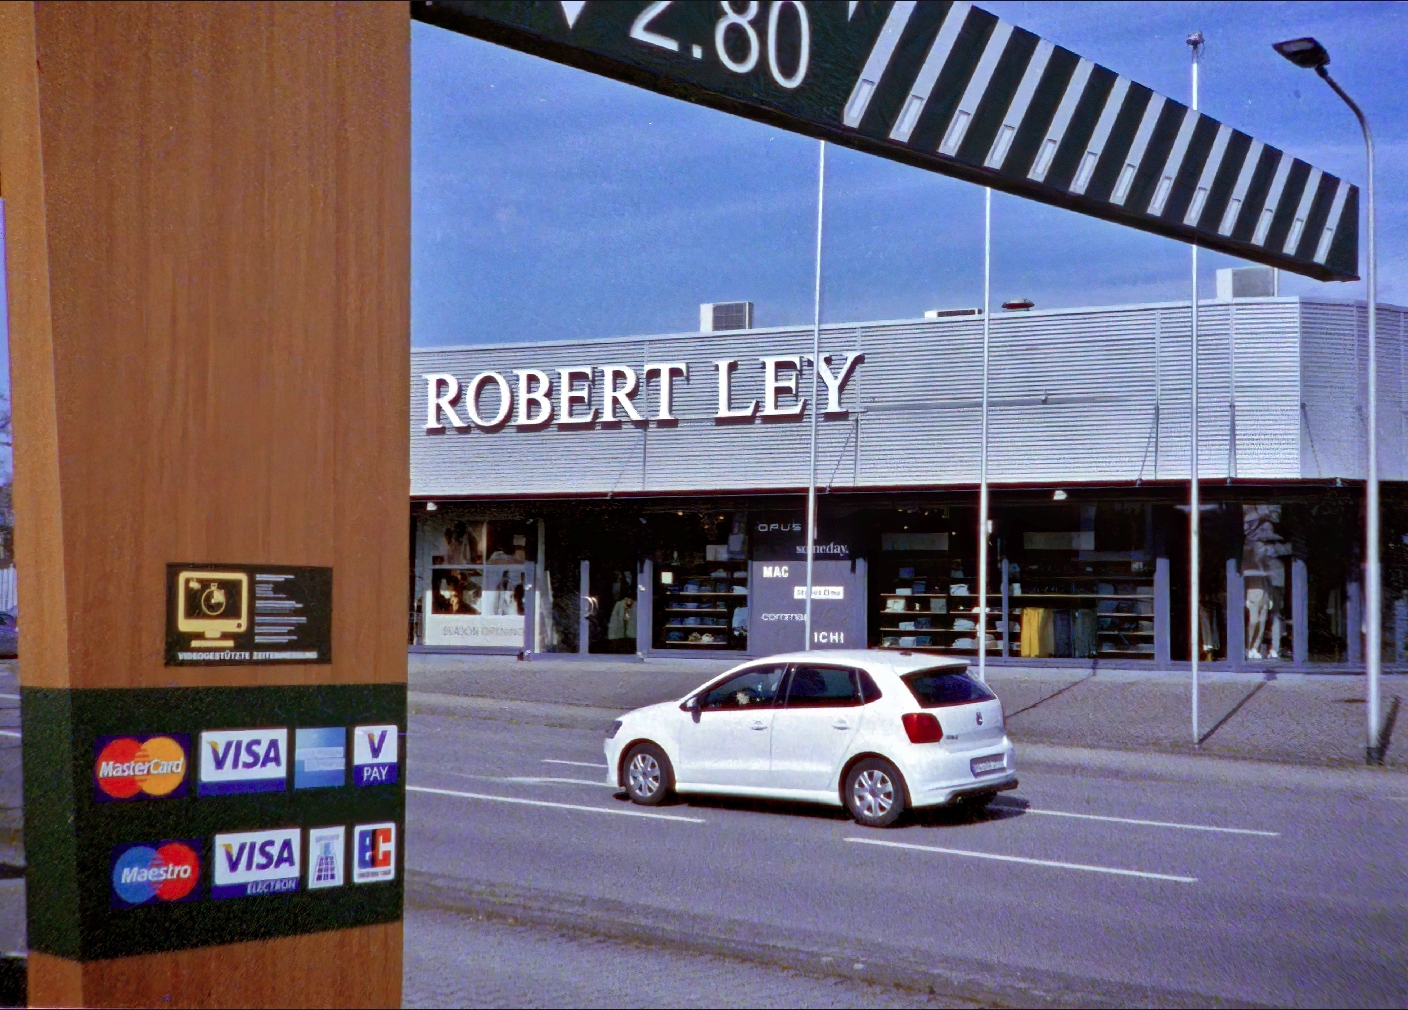
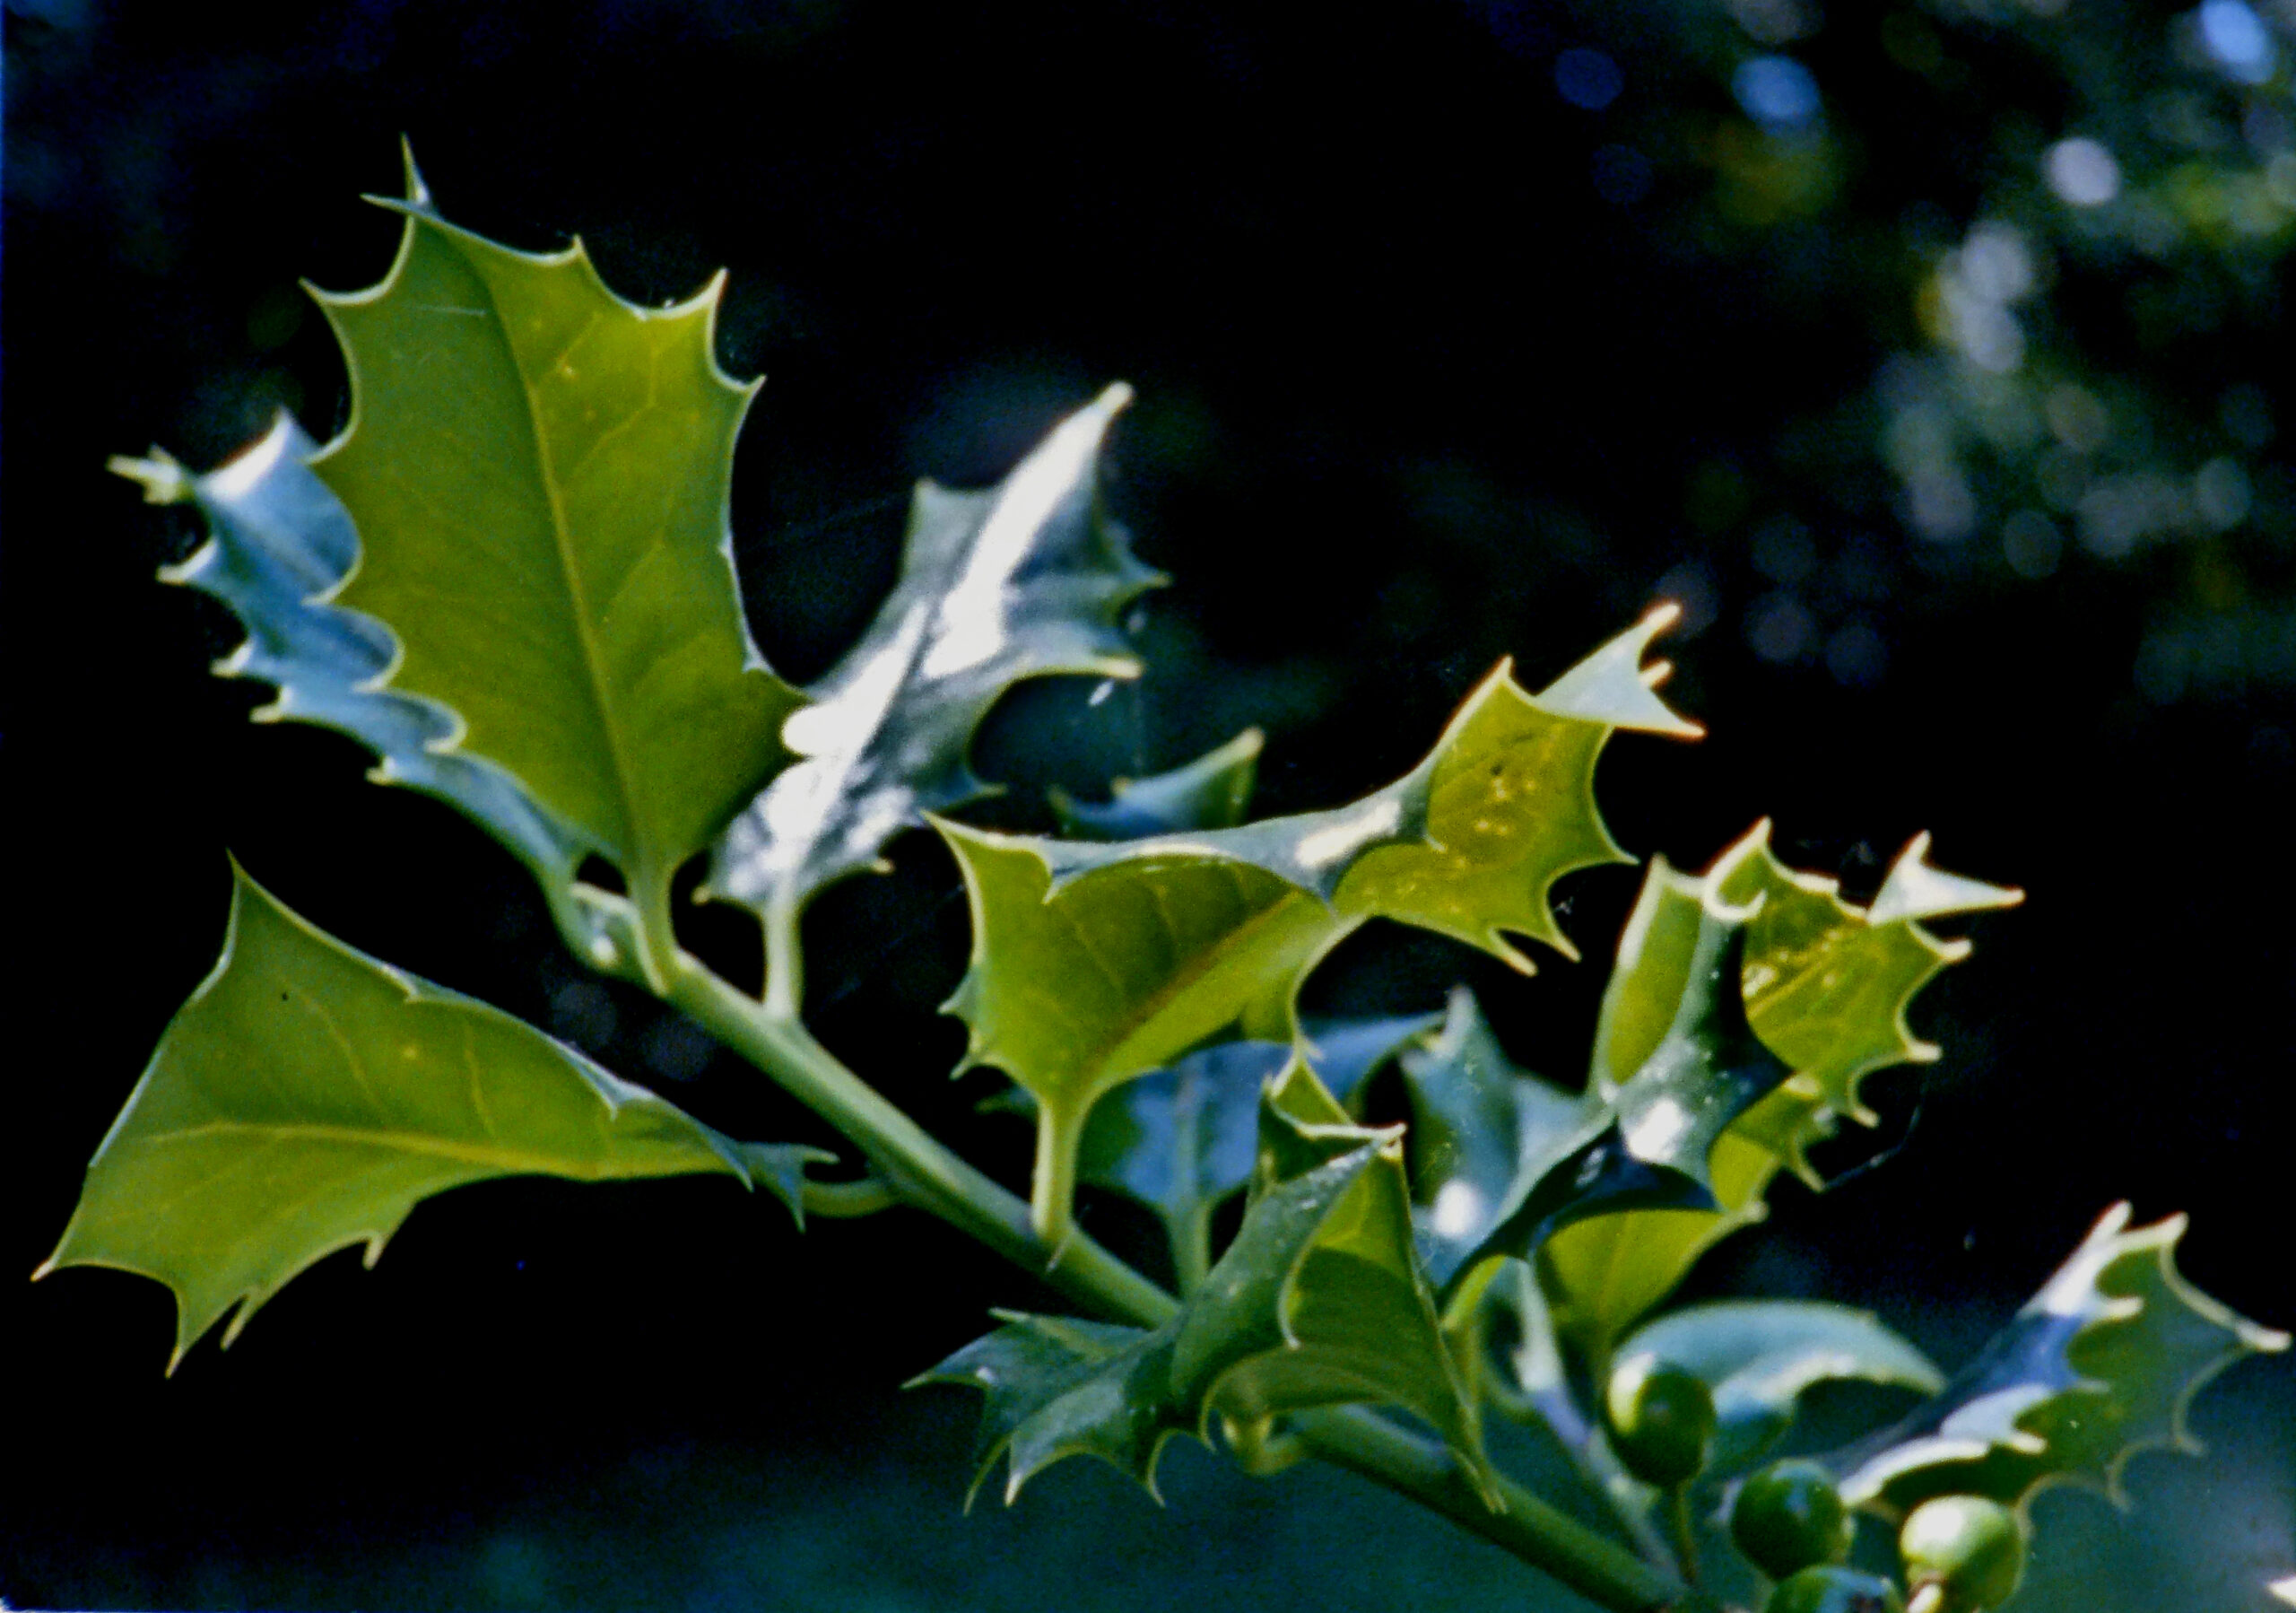
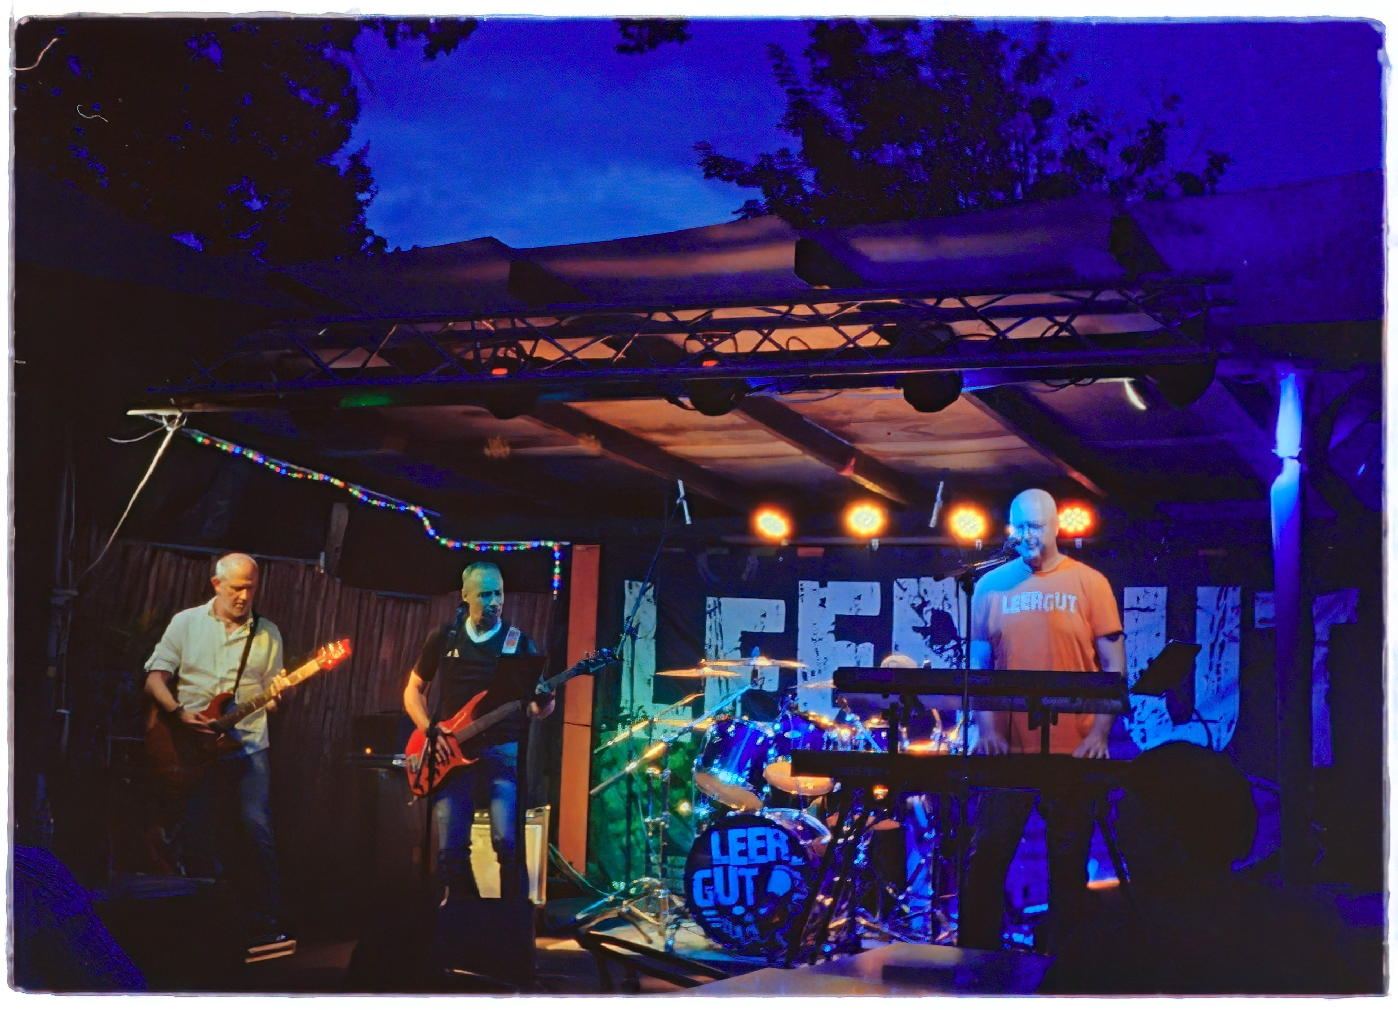
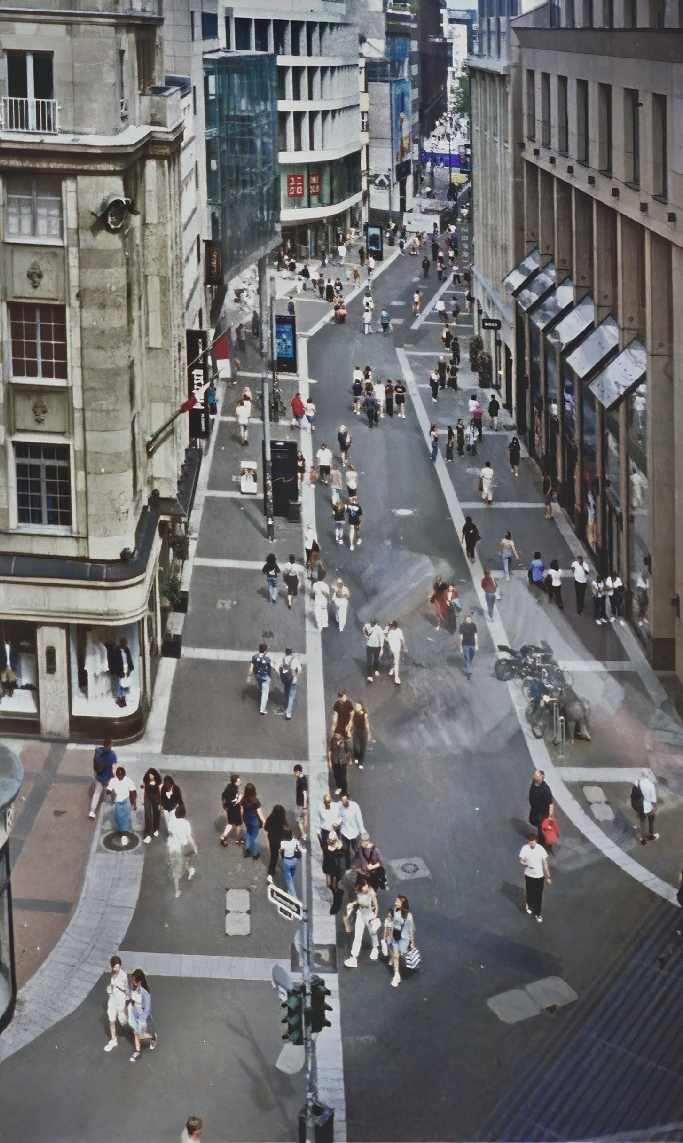
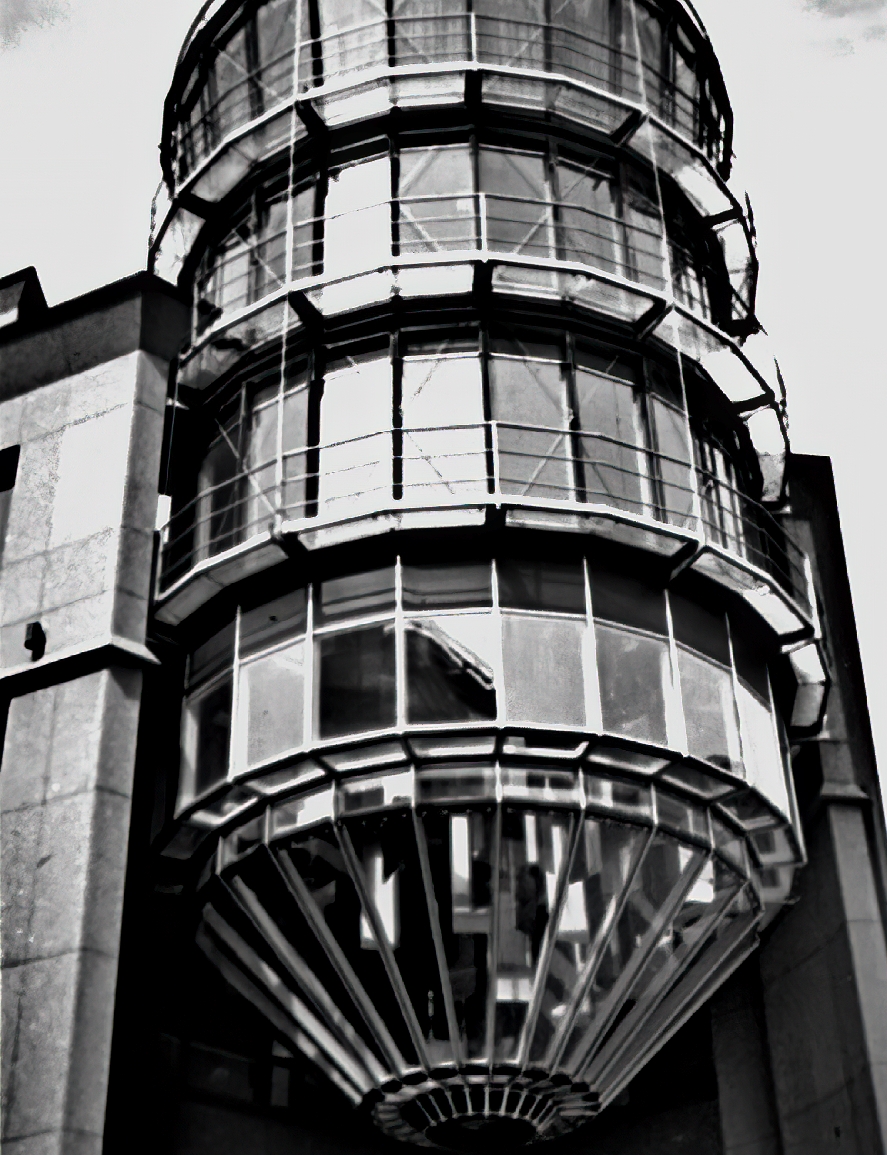
What kind of photos can you expect from a Minox? Check out the gallery of my Minox photos here.
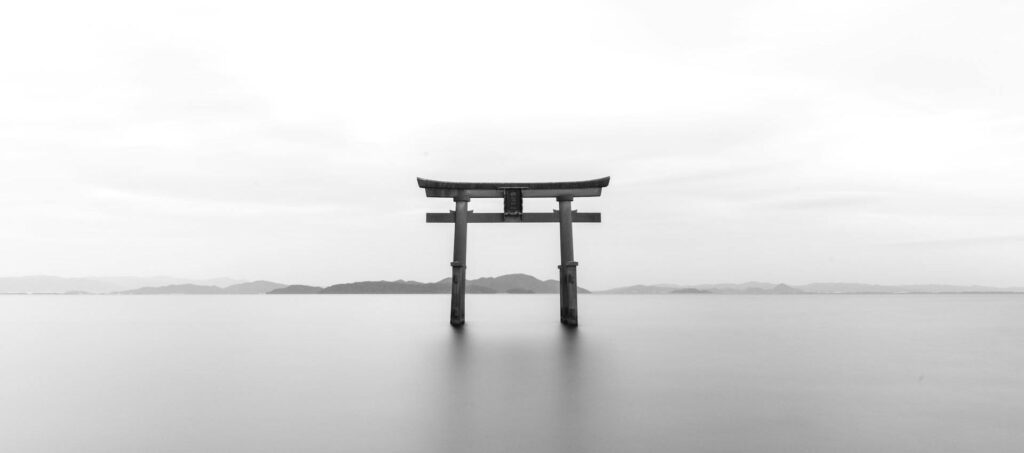
One often hears the objection to the 8×11 mm negative format that it is not suitable for serious or fine art photography. It is claimed that no enlargements larger than postcard size are possible because the images would otherwise be too grainy. This is of course nonsense! One of the most famous photos by one of the most famous photographers of all time has a graininess and blurriness that is easily surpassed by a Minox. See yourself: “Behind the Gare Saint-Lazare” by Henri Cartier-Bresson.
Reduce to the maximum
“Perfection is achieved, not when there is nothing more to add, but when there is nothing left to take away.” ― Antoine de Saint-Exupéry, Airman’s Odyssey
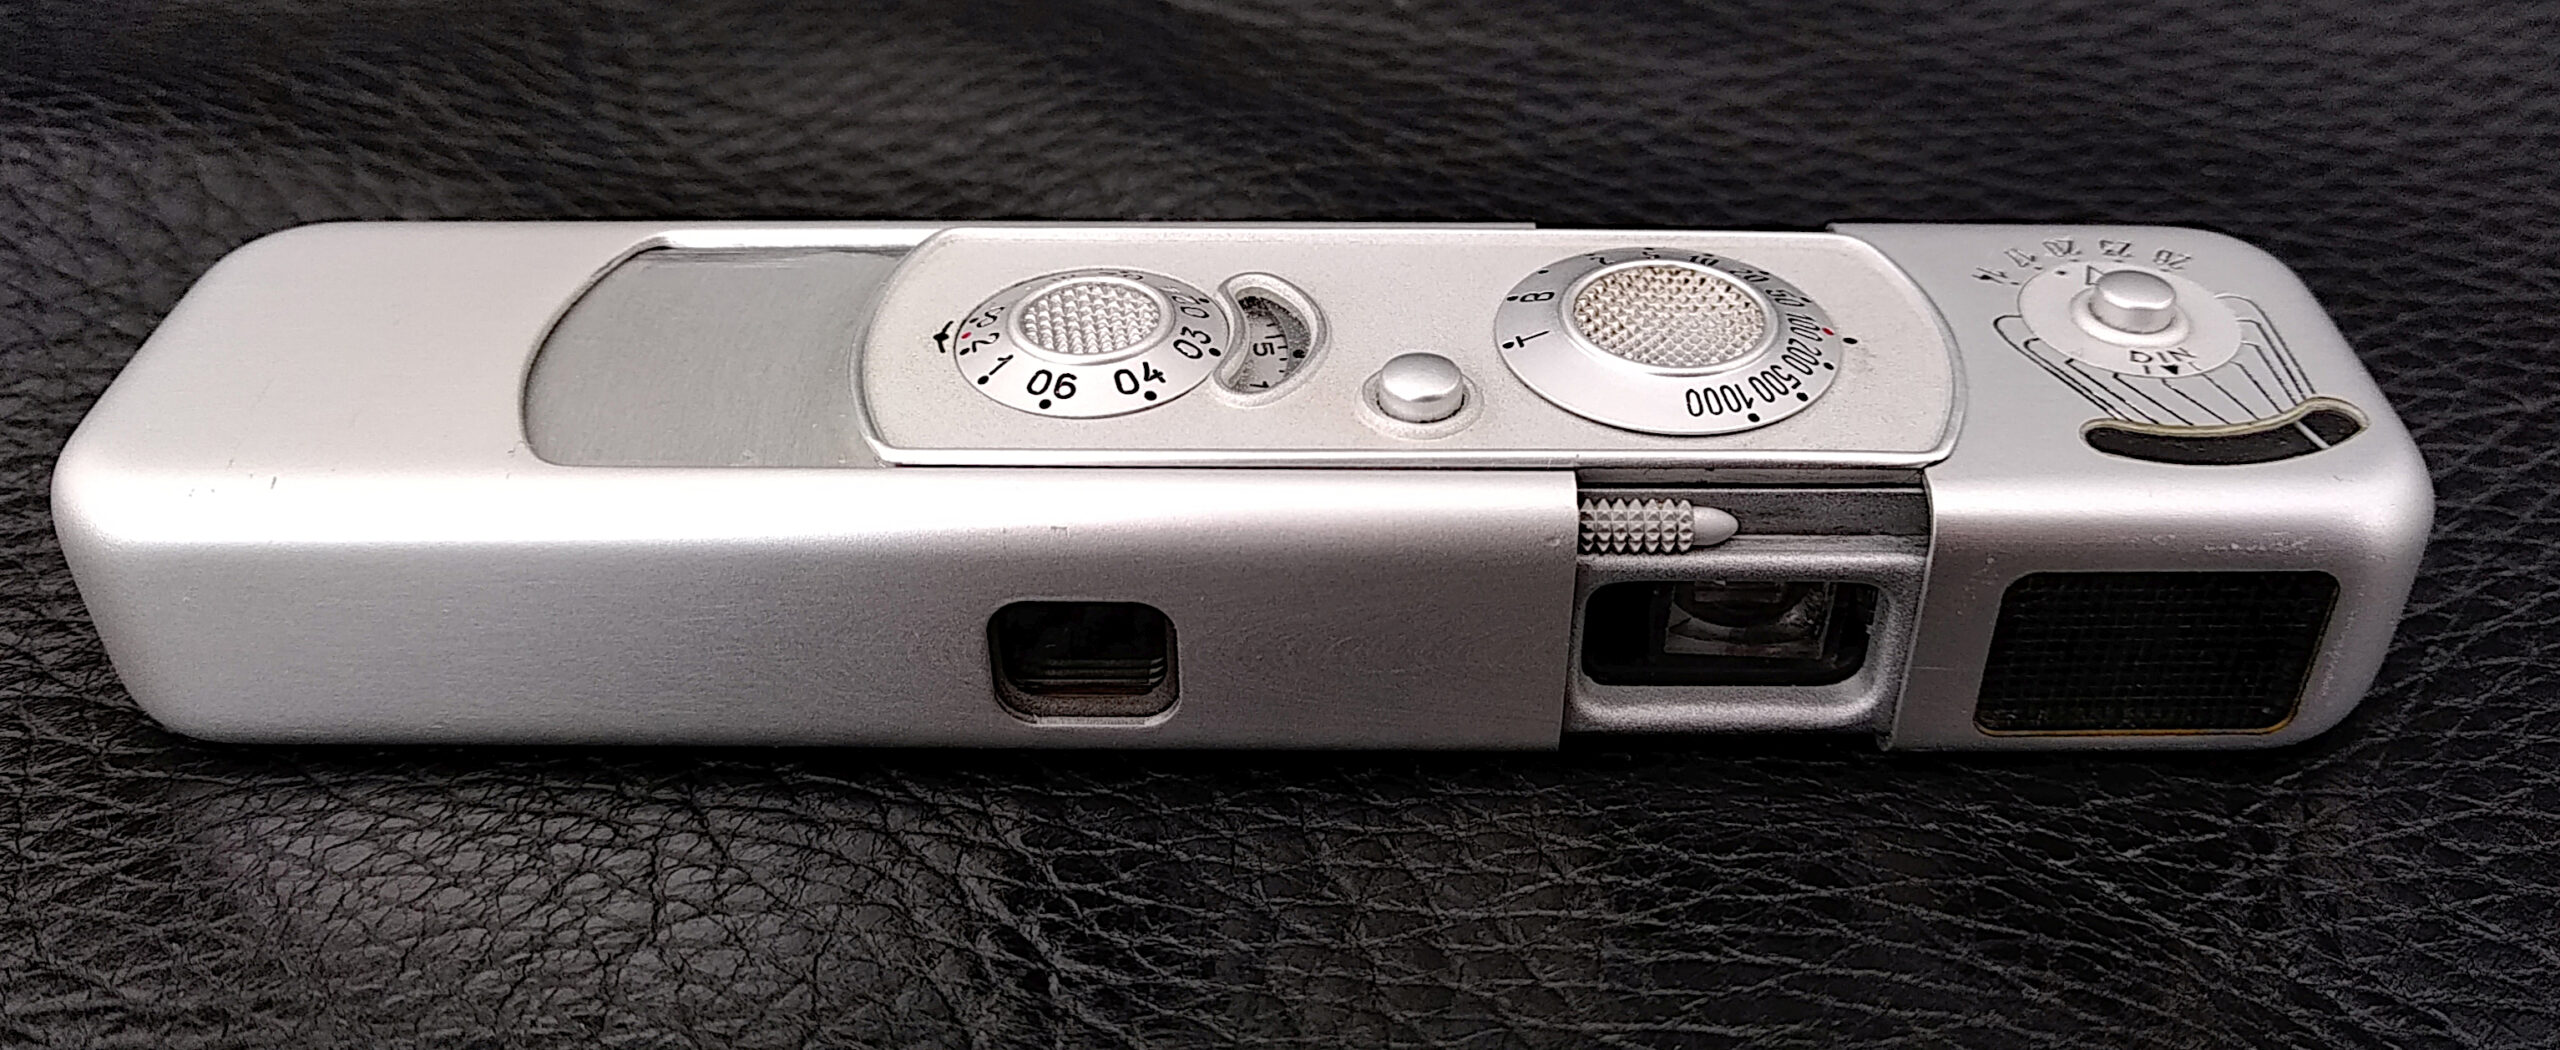
This camera is really tiny. There is no smaller analog camera that takes better pictures than a Minox. And that’s all the camera you need.

I have a much closer relationship with a camera when I know how it works on the inside. A Minox is a fully mechanical camera, with no electrical components. So you virtually can see how it works. But be careful, even if it’s only mechanical, it’s a wonderfully sophisticated mechanism that you will not immediately understand. Well, you don’t have to understand the inner workings of a Minox to take good pictures with it. But I enjoy this knowledge and that’s why you’ll find a lot of articles on this subject on this website.
But one thing at a time. First of all, let’s have a look at a brief guide on how to achieve initial success with this camera quickly.
Quick start guide
- Buy a Minox B (40 – 80 $) or a Minox EC (10 – 40 $).
- Buy Minox film from Blue Moon (36 exp., $26).
- Take photos.
- Send the film for development (6 $).
- Digitize the developed film by photographing it with your digital camera or smartphone (do not scan it).
- Edit the film digitally. I use GIMP for this.
From the second film onwards you can optimise steps 2 to 6. Read the following sections.
WhichMinox camera?
Minox B
I would buy a Minox B. They are the cheapest because they were produced in the largest quantities and are the most widely available. Since the Minox B was sold from 1958 to 1972, i.e. in the middle of the Cold War, it is also THE Minox spy camera. They differ from the Minox A (or Minox III as they are called outside Germany) in that they have an integrated light meter. You don’t necessarily need one these days, so it’s no big deal if you buy a Minox B whose light meter is defective, read here why. Otherwise there are no differences to the Minox A.
Find the PDF instruction manual here.
Costs: $40 (defective light meter and/or scratches on the housing) – $80 (fully functional) and more
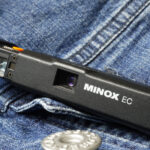
Minox EC

The Minox EC is particularly suitable for beginners in 8×11 photography. The cameras are inexpensive to buy and are fully automatic. It is also the smallest and lightest of all Minox cameras.
What particularly amazed me at first was the quality of the photos you can take with it. It is in no way inferior to the classic Minox. Take a look at the photos at my Minox gallery. The lens is supposedly the same lens as the Minox LX, only stopped down to f/5.6, which probably makes it even sharper than the LX.
One disadvantage is the inability to take close-ups. There is no distance setting. According to Minox, the focus range of the fixed focus lens is from 1 m to infinity. The second disadvantage is the low lens speed of 5.6 instead of 3.5. With 100 ASA film, however, this is not a major limitation in my opinion. Everything else you want to know about the Minox EC can be found here.
Oh yes, you need a battery. As the original batteries contained mercury, they are no longer on the market. You can use a PX27A Alkaline Photo, 6 V, details see here. At the same time, the battery compartment is the most frequent source of faults in this camera. A battery has often been stored there for years and has corroded the contact springs.
Find the PDF instruction manual here.
Cost: Camera 10 $ to 40 $, Battery: 6 $
If you have bought a Minox EC that doesn’t seem to work properly, you should definitely read this article. It describes the most common malfunctions and how to repair them.
How to get a Minox

If you are not lucky enough to receive a Minox as a gift, you can buy one from a local dealer or online.
At a local dealer you have the great advantage of being advised. You can also take the camera in your hand and check it immediately. However, the prices are usually higher than on the Internet – for good reasons. In addition, the selection of Minox models is usually very limited.
On the Internet, of course, there is a large range of offers. In my experience, however, I would attach two conditions to this. Firstly, an unlimited right of return for a limited period of time. In this case, the purchase risk is no higher than with a local dealer. Or I would have the full functionality of the camera guaranteed by email before I buy it. In this case, you always have the right to return the camera if it does not work. I have had to make use of this several times. Secondly, a delivery location in your own country so that there are no customs duties, import formalities or import times as well as the same applicable statutory regulations for the return.
Checking a Minox when buying
The most common and easiest problem to check is problems with the shutter. When buying online, make sure that all shutter speeds are reasonable. Otherwise, I wouldn’t buy it. Once you have the camera in your hand, you can follow these instructions.
You can find all the checks I recommend here. They only take a few minutes. You can even do most of them in the store.
How to get a film
… and of course, how much does a roll of film with 36 exposures (Kodak Ektar 100) cost?
- Ready-made: film $26 to $30; development in a photo lab $8 to $10.
So approx. $1/frame. - If you prepare the film yourself: film, $4; development in a photo lab, $5.
So approx. $0.25/frame.
Make or buy?
I would advise taking the first shots with a purchased film. There are many things to consider when taking your first shots with a Minox – as with any other analog camera. It’s good to know that if the results are unexpected, it can’t be the fault of the film. Minox films can be purchased, e.g. in the USA from Blue Moon or in Germany from Fotoimpex.
Color film or black-and-white film?
With the ready-made Minox films on offer, I would recommend a 100 ASA color negative film. There is also 400 ASA color negative film and 100 ASA black and white film. I have more flexibility with color because I can always turn it into a black and white image later during digital post-processing and also have the option of differentiating by color when converting to grayscale.
If you want to make your own Minox films later, you have the whole range of 35mm films to choose from. Then, for example, high-resolution black and white films make sense, e.g. the ADOX HR 50. Or the CineStill 50d in color.
Considerations regarding film types
Color Negative Film (C-41)
If you’re not interested in home development, C-41 color negative film is your best option. The C-41 process is the most widely supported film development method in the world, giving you the highest chance of finding a commercial photo lab that still offers this service. This makes it a practical and reliable choice for anyone who wants to shoot film without the hassle of a home darkroom. A major benefit of shooting in color is the flexibility it provides in post-production: you can decide later whether to keep the image in color or convert it to black and white, allowing you to experiment with different tonal filters.
Black and White Film
Black and white film offers a straightforward and accessible entry point into home development. The chemicals and process are simple, inexpensive, and readily available, making it an ideal choice if you want to learn to process your own negatives.
Slide Film
In today’s digital world, slide film has lost its primary advantage. Historically, its main purpose was to create positive transparencies for projection. Since most people now digitize their images rather than project them, the unique benefits of slide film are largely obsolete.
The Modern Workflow: Digitize and Edit
For all types of film, it’s highly recommended to digitize your developed negatives or slides. Once your images are on a computer, post-processing becomes significantly easier and more affordable than making prints in a traditional darkroom. Digital editing software gives you the freedom to non-destructively adjust your photos, with the ability to undo changes and experiment with different looks without the cost of materials.
What does the ISO value mean for analog films?
There are currently analog films with a light sensitivity between ISO 20 and ISO 3200.
A high ISO value means that the film still works even in low light. So why not always use films with a high ISO value? Well, high light sensitivity comes at the price of coarser grain; in digital terms, they are more pixelated. If you want the highest possible resolution (equivalent to a high megapixel value of digital cameras), you have to choose a film with a low ISO value. However, this comes at the price of a longer exposure time and the risk of blurring the photo. Good ISO values for Minox cameras are ISO 50 to 100.
Make the film yourself
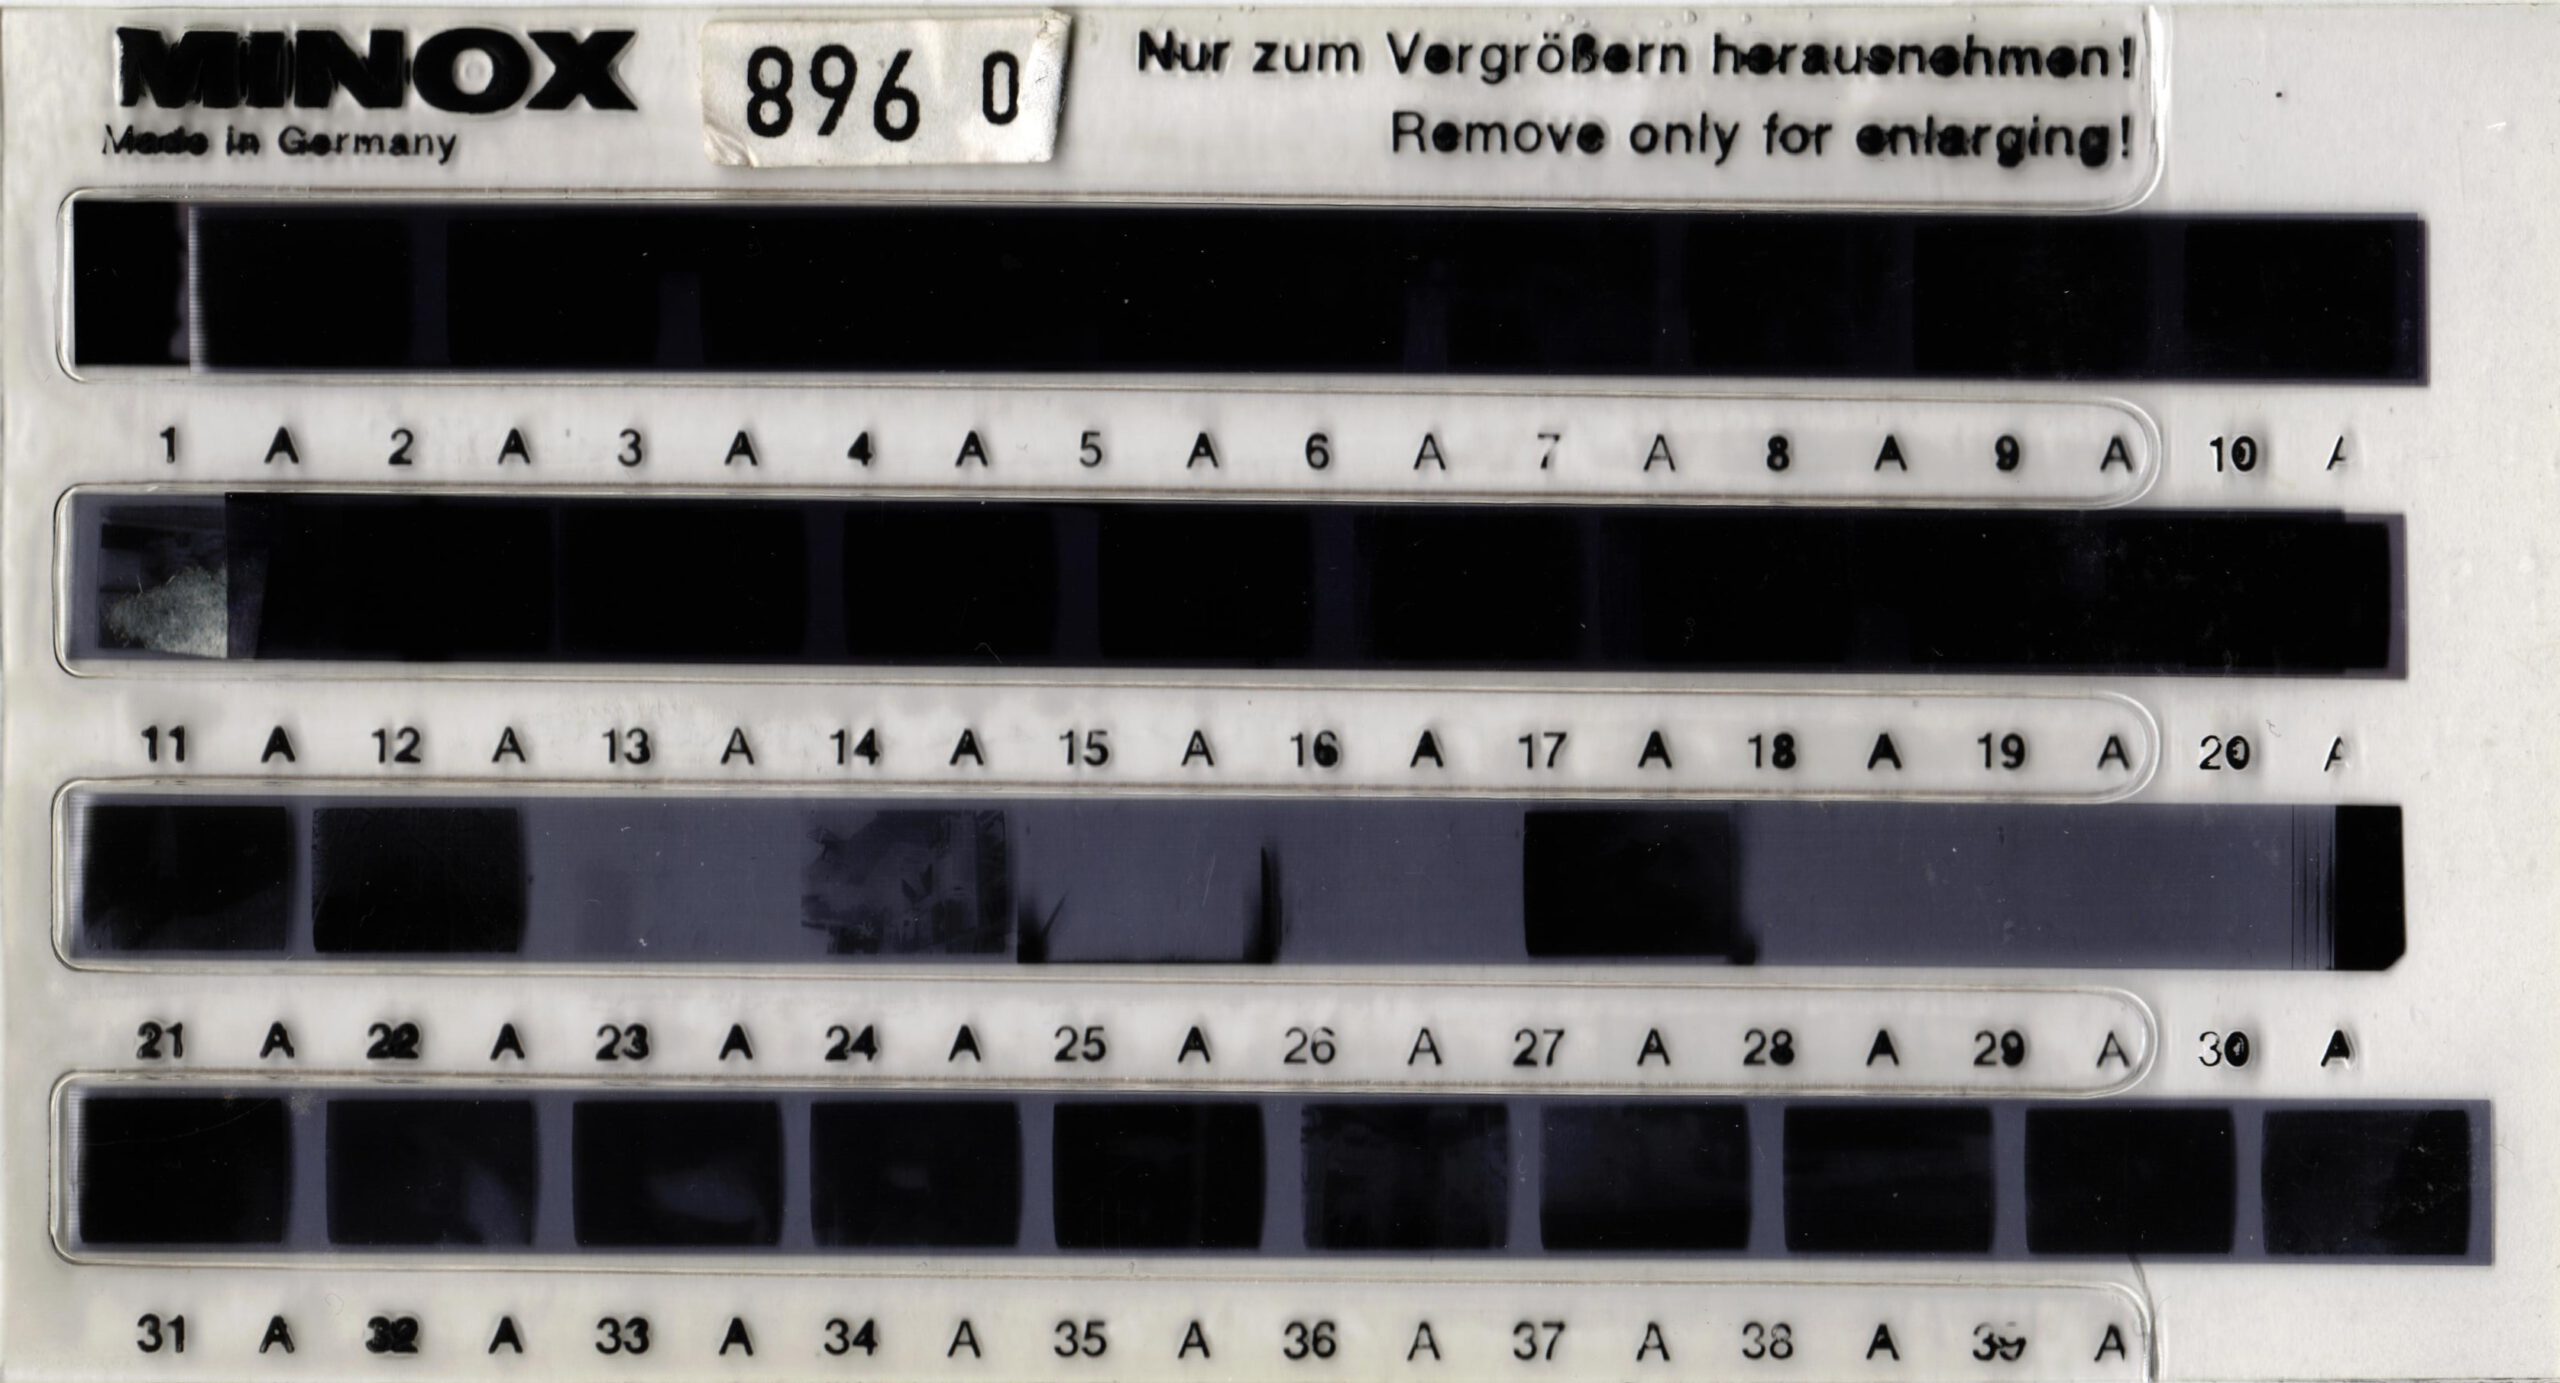
What does a Minox film strip look like? Here you will find all measurements in detail.
Preliminary considerations
Once you have gained your first experience with Minox photography and have found it fun, you may want to produce the Minox films yourself. You can do this for several reasons:
- It’s fun because it’s a challenge to load very narrow 9 mm and half a meter long strips of film into tiny plastic cans in complete darkness.
- You can use any film that is available in 35mm format and that is an ultimate choice.
- You can save money if you consider that you can make four Minox films with 36 exposures each from a single 35 mm film.
However, some preparation is required to make Minox films yourself. The basic procedure is to cut up a 35 mm film and insert it into a Minox film cartridge.
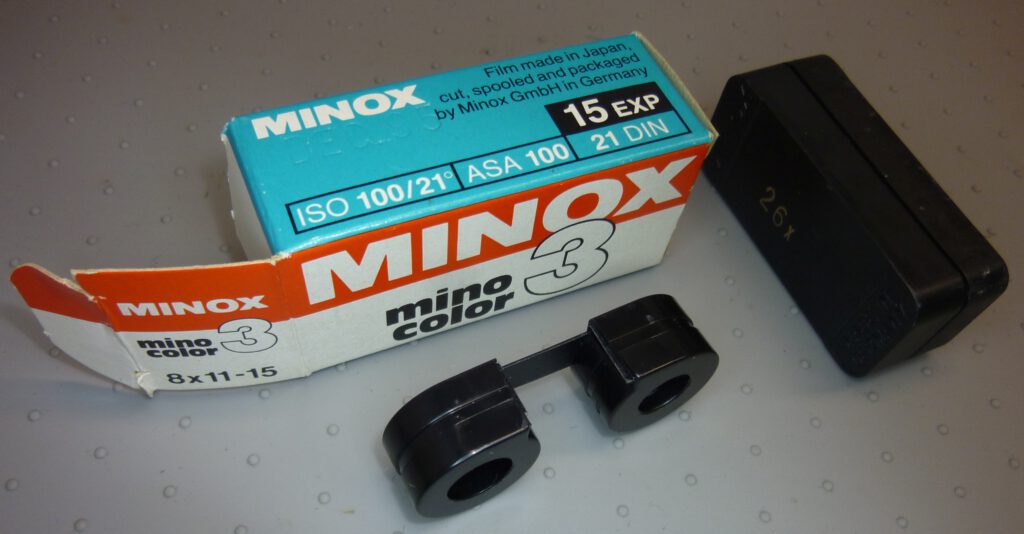
The cartridge
Original Minox film cartridges are available on the Internet, but are usually expensive. They are considered collector’s items, not used material, and are sold for 15 $ to 30 $ each. You have to wait for good opportunities. But we still have at least one cartridge from the first film we bought (so make sure you get the empty cartridge back after developing).
Minox film cartridges were available with 15, 30, 36, and 50 exposures. I recommend using only the 36-exposure film for the following reasons
- Today’s films have a typical film thickness that, when rolled up to a length for 50 exposures, do not fit into the cartridges still available today. Secret services used to produce extra-thin films, which allowed rolls with as many as 110 exposures to fit into a Minox cartridge. Of course, this is not an option for us.
- Films for 15 exposures fit into any Minox cartridge, but require a special take-up spool with a larger diameter. Otherwise, the spacing between the negatives will not be correct. See here for the reason. One reason to use 15-exposure film lengths anyway would be if you only have a 15-exposure Minox film cartridge with this take-up spool (they are more common and cheaper). You cannot use 36-exposure film in this cartridge. In any case, 15-exposure film does not offer any cost advantage due to the same development costs.
Slit a film and put it in the cartridge
As it is difficult for a beginner to visualize this process in concrete terms, I have written detailed instructions with lots of pictures. The film slitter presented there costs $40.
You can also find a detailed text instruction at subclub.org. With Goathill they offer custom-made slitters that cut roll film down to Minox size not only from 135 film, but also from 70mm, 65mm, 120 and even 16mm film. You can also get slitters that cut strips in Minox width and 16 mm side by side, for example. All further information can be found here.
How many megapixels?
How many megapixels does a Minox actually have? Well, we are dealing with an open system here, consisting of lens and film. Both components together determine the resolution. With the Minox we have a fixed lens, so the answer depends only on the film used. If we realistically assume that the Minox lens – one of the best analog lenses of its time – is not the limiting factor, we have to deal exclusively with the film.
Analog films can only resolve a certain number of line pairs per millimeter. This number is specified by the film manufacturer. So if a resolution of 100 line pairs is specified for a color film, it can resolve 2 * 100 lines per millimeter. With a negative size of 8 x 11 mm, the number of dots would be
8 mm * 200 lines/mm * 11 mm * 200 lines/mm = 3,520,000 dots
To compare with the megapixel specifications of conventional digital cameras, you need to know that a digital sensor requires 4 pixels (green, green, red, blue) to register one dot. If a digital camera requires 4 pixels for color information, this would actually mean that only a quarter of the megapixels of a digital sensor contribute to the resolution of the image.
However, it is not quite as bad as that. Modern algorithms such as VNG demosaicing achieve 75% resolution instead of 25%. So, to compare the analog resolution of a negative with a modern digital sensor, you have to calculate as follows:
3,520,000 dots / 0.75 = 4,700,000 pixels = 4.7 MPixels
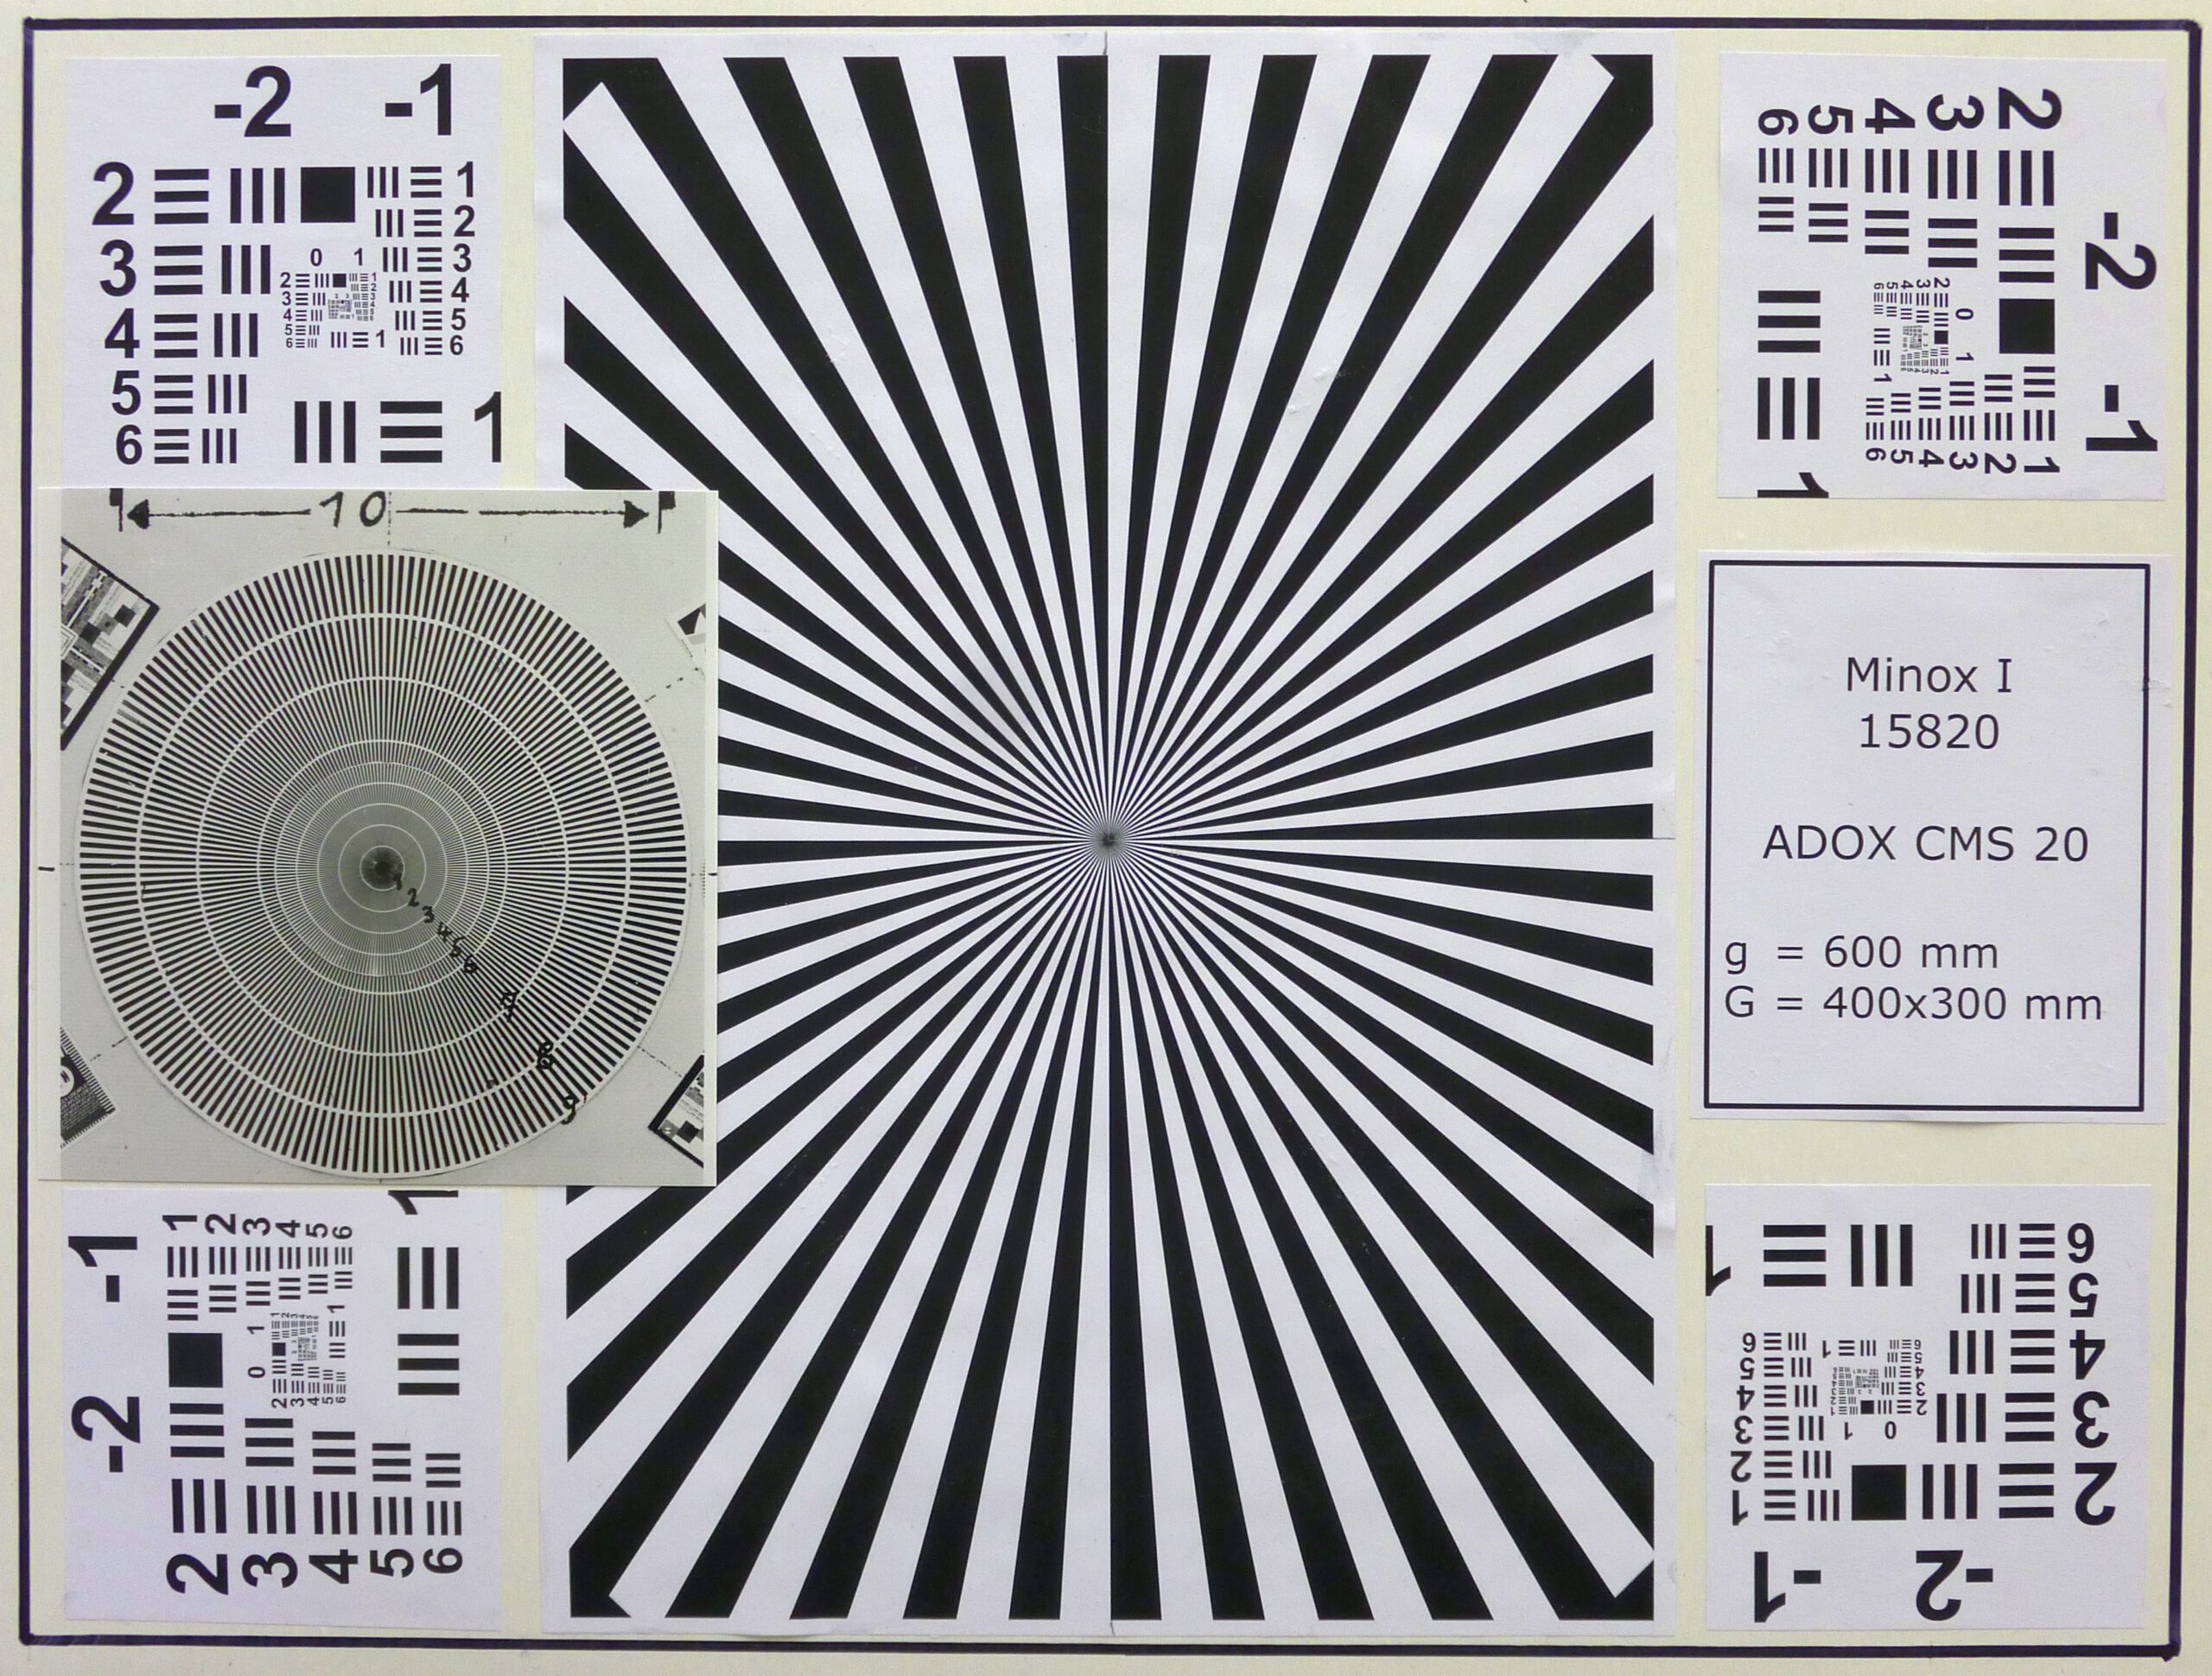
The manufacturer specifies the Kodak Ektar 100 with 100 line pairs. If we equip our Minox with it, we achieve approximately 5 MPixel.
According to the manufacturer, the resolution of the ADOX CMS 20 is 800 lp/mm with a contrast ratio of 1000 : 1. The Minox Complan lens theoretically can resolve a maximum of 400 line pairs 2, so it becomes a bottleneck with this film. So the ADOX CMS 20 would give us 20 MPixel in the Minox.
Why are we talking about megapixels here in this context? Well, first of all to get a rough comparison with digital cameras. Secondly, these considerations are important for digitizing the negatives later on. If we want to exploit the full potential of the Minox, we should therefore digitize with at least 5 MPixel or 5,000 dpi. This explains why scanners are not optimal for Minox negatives. You want more information on Minox lens resolution? Read here.
In practice, a Minox achieves the resolution of 5 to 20-megapixel digital cameras.
Taking pictures with a Minox camera
It’s actually quite simple:
- Insert the film into the camera. Avoid common mistakes, see here.
- Set the exposure time
- Set the distance
- Open the camera
- Look through the viewfinder and compose the image
- Press the shutter release button
Well, if it were that easy, where would the challenge be? Yes, you can make it that easy and you should do the same at the beginning. But if you want to take the really exceptional pictures I promised you, then you should take a closer look at the following tips.
In any case, you should also consult the original camera operating instructions. Everything that is written there is assumed here and will not be described again. You can find the manuals online here.
Don Krehbiel has written a very comprehensive collection of tips specifically for taking photos with all Minox cameras, including the latest models. The tips are available as a PDF file here. I recommend them for those who want to delve deeper into the subject.
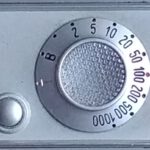
Determine the exposure time

If you shoot with a Minox B, you have a built-in light meter. The Minox EC even has fully automatic exposure control and you don’t have to worry about anything. Just look at the respective operating instructions.
Exposing the inserted film correctly with the Minox is easier than many people think. Of course, it depends on the film you use, but in contrast to the often underestimated shutter release (see below), it is easy to determine the correct exposure time. You can find everything you need to know here.
Determine the distance setting
None of the Minox cameras have a rangefinder. So you have to determine the distance yourself before you can set it on the camera. I have written down everything you need to consider – and a lot more – here.
How to trigger the shutter of a Minox

With the correct distance setting, we have already eliminated one reason for blurred images. The second equally important cause is camera shake when the shutter is released. In principle, this applies to all camera types, even digital cameras. With Minox cameras, however, blurred negatives have worse effects due to the small negative format. A Minox negative with an edge length of 11 mm must be enlarged about three times more than a 35 mm negative with an edge length of 36 mm to obtain an image of the same size.
Since low-shake shutter release requires a lot of knowledge and practice, I have written a master class on shutter release specifically for Minox cameras.
Remove the film cartridge from the camera
Before removing the film from the camera, be sure to follow these instructions.
The film cassettes are not easy to remove from the camera. I have tried with fingernails, screwdrivers, pocket knives and tweezers, nothing has worked well. But there is a simple trick. Take a 50 mm piece of Minox film from a scrap piece. Cut the piece in half lengthwise.
Insert one end from behind under the bridge of the cartridge. Then pull up the cassette with the two ends of the strip:


Life is only easier here if you have a Minox LX. The LX has a spring that lifts the cassette when the film chamber is opened.
Film processing

Don’t worry, there are various solutions to this problem. Depending on your personal preferences, I will present a few alternatives here.
Recommendation for the first film
For the first film, I would use the development service offered by the film dealer. You have to send the film in. Cost (Fotoimpex in Germany): $6 + shipping, duration: 10 days. USA: Blue Moon.
Why photo labs do not develop Minox films
After the first time, when everything has worked out, I would look for a photo lab nearby that still develops color negative film using the so-called C41 process. This is a globally standardized development process that is exactly the same for all color negative films. So it doesn’t matter which film you use. These labs now only develop 35mm format films. That’s the only format their fully automatic developing machines are set up for.
If you go to one of these labs and ask if they also develop Minox film, they will say no. Most of the time, they won’t even know what kind of film format and cartridge Minox is. But your actual Minox film could be developed in their machine without any problems. However, they will refuse for the following reasons:
- Specialized equipment: Minox films have a tiny format of 8×11 mm and use special cassettes. Developing them requires equipment tailored to this format. Standard lab machines designed for 35 mm film cannot process Minox films.
- Low demand: Minox cameras were niche products, even in the 1950s to 1970s. Today, the number of Minox users is extremely small. For a profit-oriented lab, it therefore does not make economic sense.
- Manual work and effort: The development of Minox films is purely manual work. Removing the film from the cassette, winding it into the development adapter in the darkroom, and processing it requires a great deal of care and time. This manual effort is not provided for in laboratories that still develop analog films at all.
- Additional costs: Even at special laboratories that offer Minox development, the costs are significantly higher than for developing 35 mm film due to the manual effort and specialization involved. They believe that their customers will not pay these costs.
How you can still have Minox films developed in a photo lab
I have a surprisingly simple and cheap solution. I make it as easy as possible for my lab to develop my Minox film. I give them my Minox film inserted into a 35mm film cartridge. Then they can insert this cartridge into their automatic film processor as usual. It makes no difference to them that only a 9.2 mm wide film strip protrudes from the cartridge instead of 35 mm. Insert and done. The rest is the same for them as with any 35mm film. I was able to test this successfully at a laboratory near me.
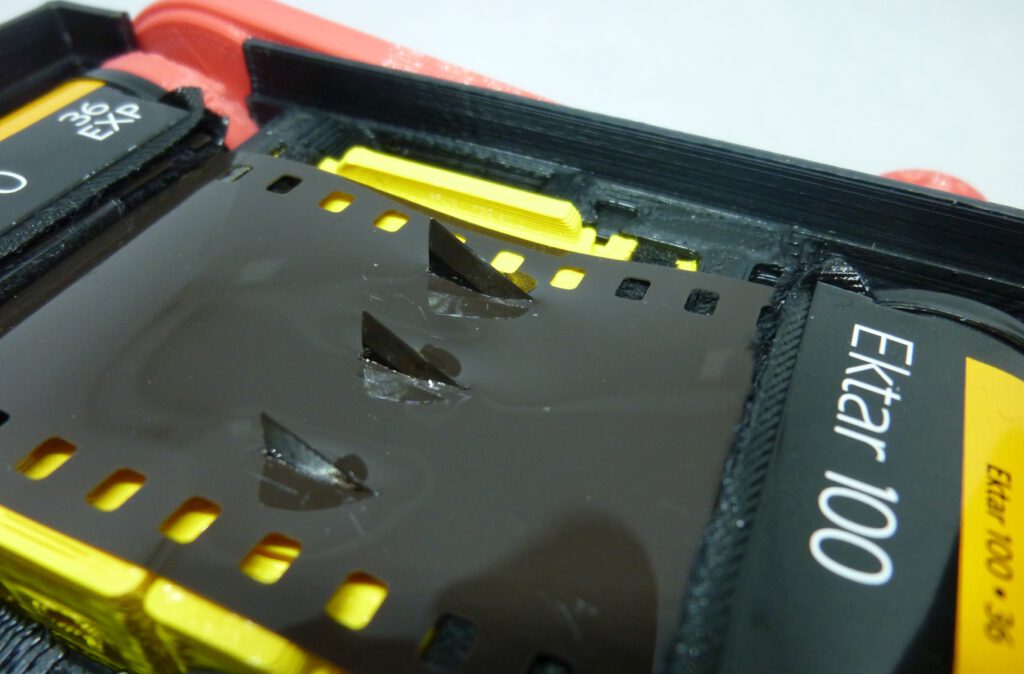
Filling an empty used 35 mm cartridge
This is how I fill an empty used 35 mm cartridge with Minox film:
- Take an empty 35 mm cartridge.
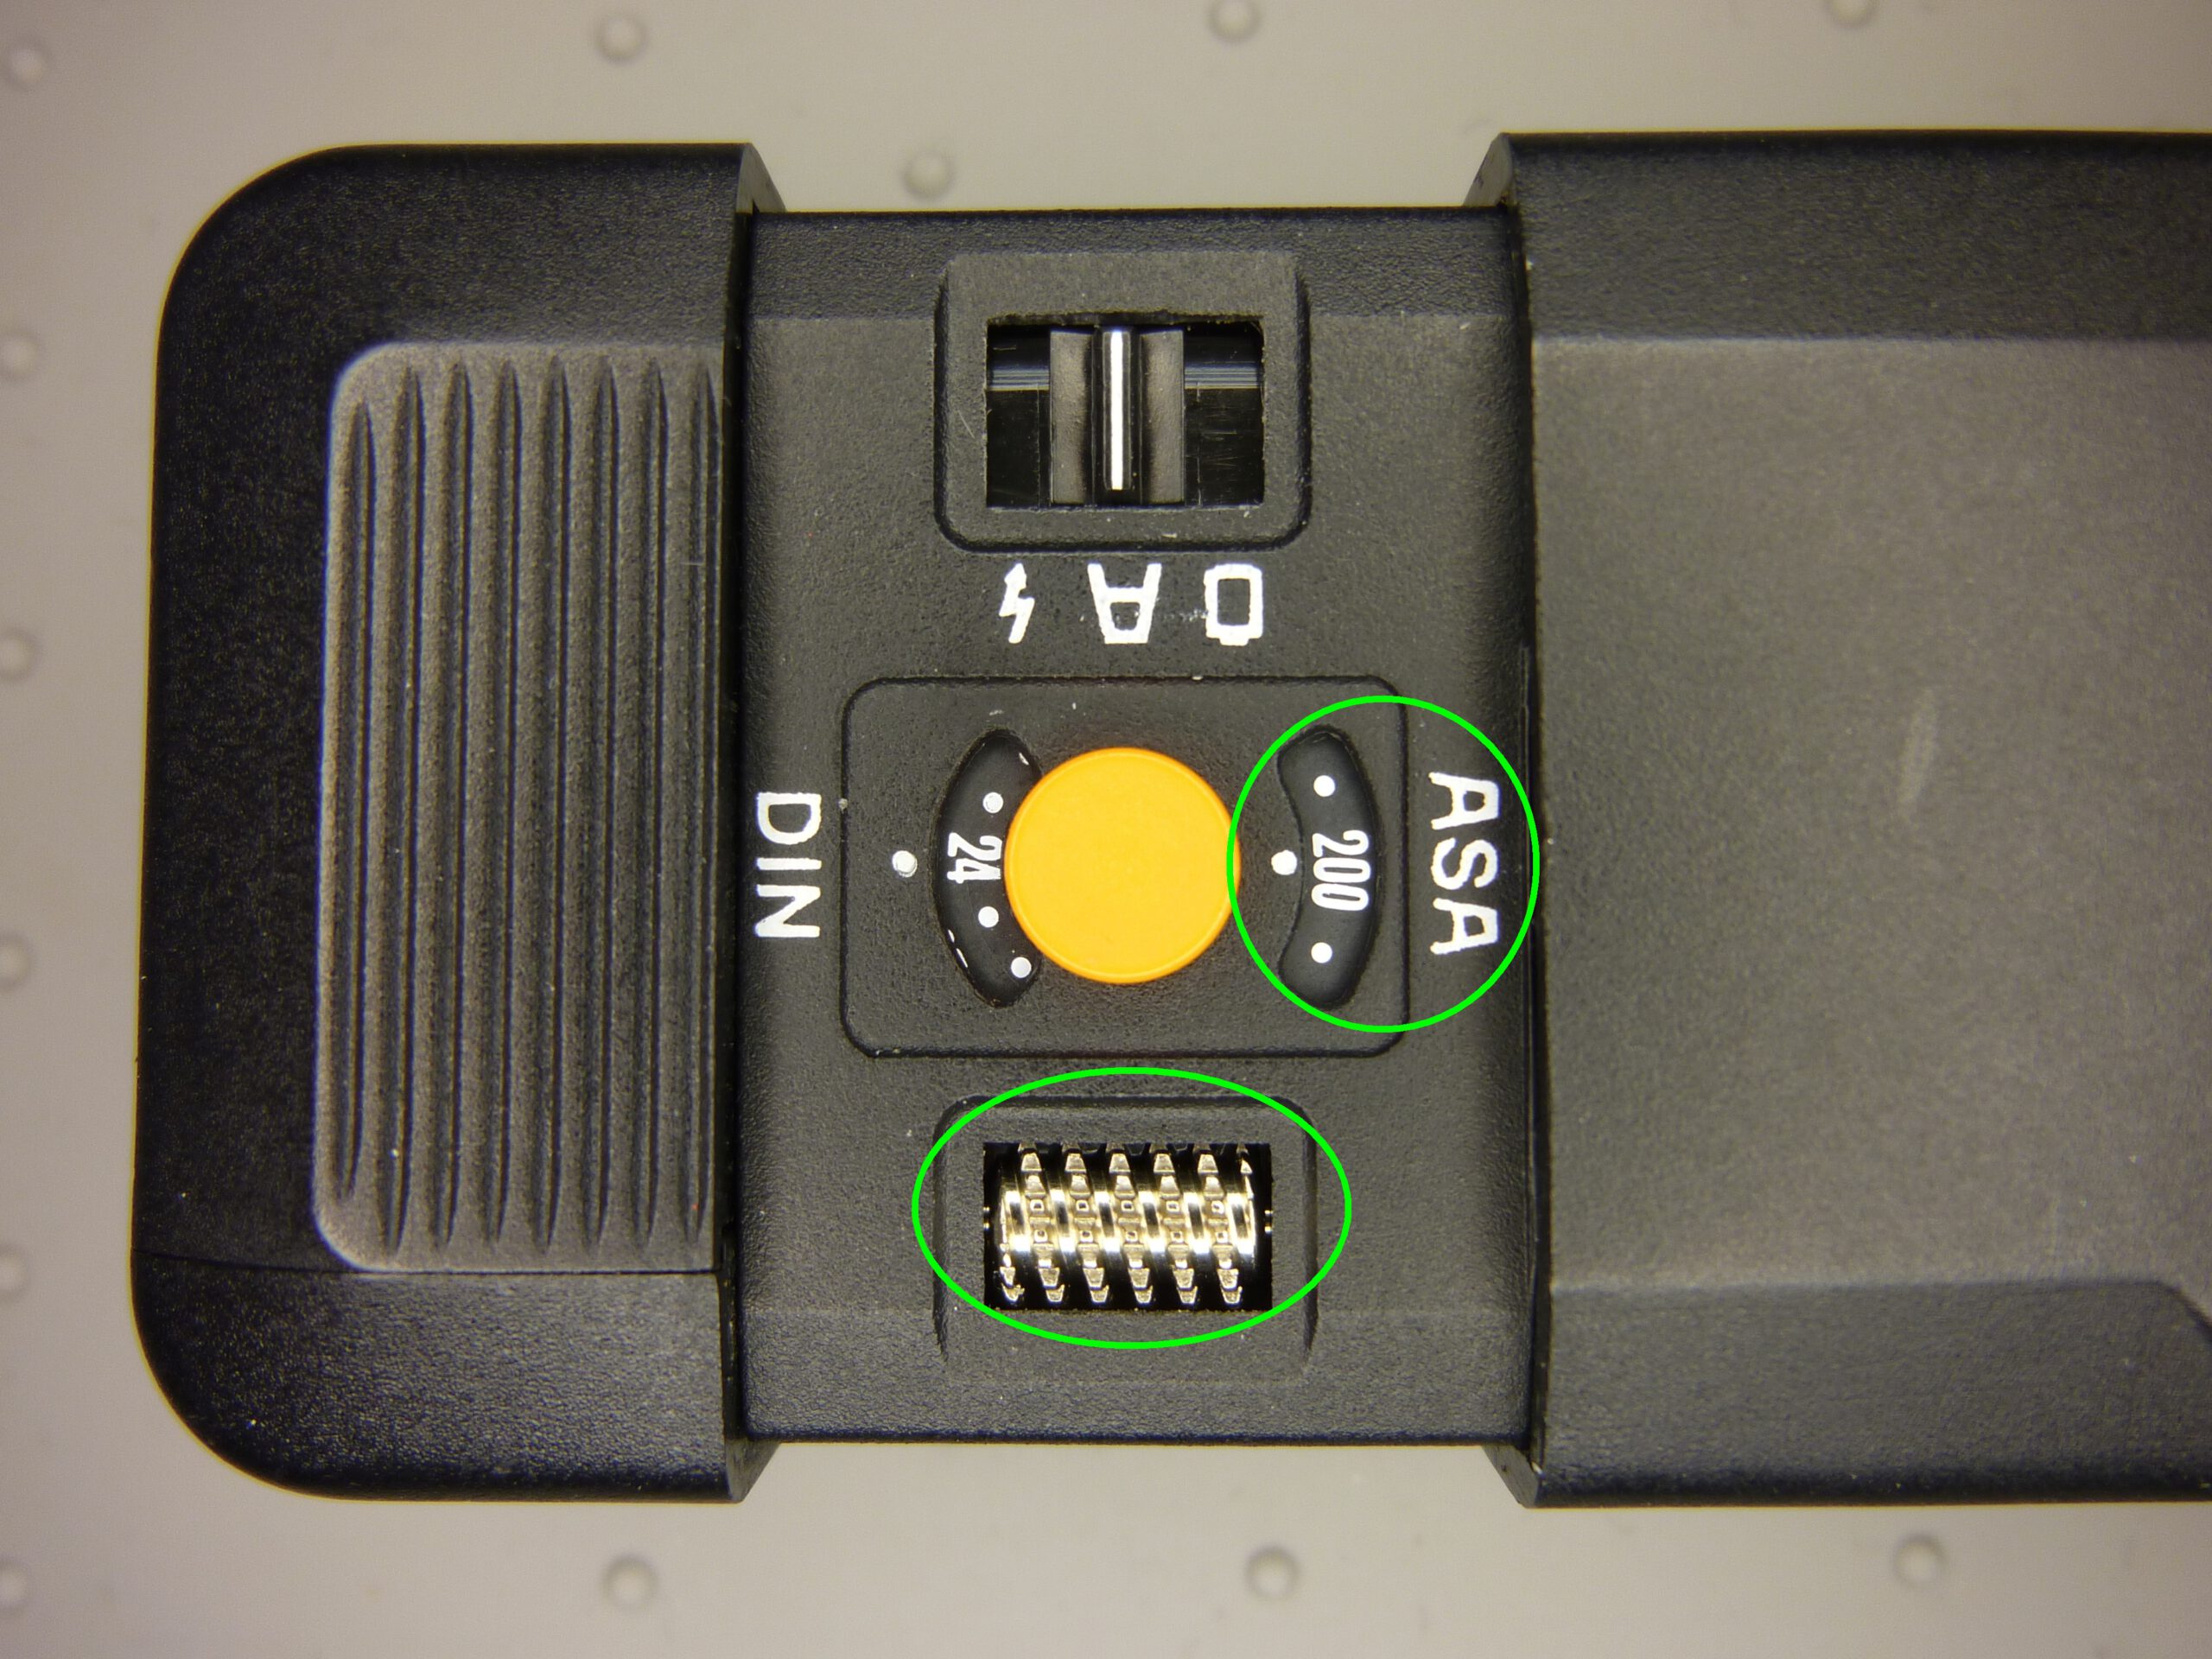
- Cut the end of the film that is still protruding into a round shape and make a 10 mm wide slit in it (green arrow).
- Then take the Minox cartridge with the exposed film. The entire exposed strip is on the take-up spool in the left chamber of the cartridge. Now pull the last end of the film strip out of the right supply chamber of the cartridge. I bend this end about 5 mm.
- Push the end of the film strip into the slit of the 35 mm film end. I advise against sticking the film down. The labs don’t like adhesive tape or labels in their developing baths. This could contaminate the baths.

- The following simple step you have to perform in the dark, either in a changing bag or in a completely dark room.
- Carefully turn the spool of the 35 mm cartridge to pull the Minox film into the cartridge. Finally, a short piece (approx. 20 mm) of the Minox film must still be visible.
- Now that you are back in the light, remove the film from the Minox spool.
- Leave a short piece (maximum 40 mm) of film sticking out. The photo lab needs this end to attach the film to the conveyor belt of the automatic film processor.

Filling a reloadable 35 mm cartridge
If you prefer, you can also purchase a reloadable 35mm cartridge ($2). These are easy to open and close. This is how I fill a relaodable 35 mm cartridge with Minox film:
- Reloadable cartridges have a bayonet cap that is easy to open. Remove the spool.
- Take the Minox cartridge with the exposed film. The entire exposed strip is on the take-up spool in the left chamber of the cartridge. Pull the last end of the film out of the right supply chamber of the cartridge and fold the last 5 mm over.
- Slide the end of the film sideways past the movable white tab through the spool core. Make sure that the spool is positioned correctly.
- Slide the spool core and film through the light seal.

- The following simple step you have to perform in the dark, either in a changing bag or in a completely dark room.
- In darkness, carefully turn the spool of the 35 mm cartridge to pull the whole Minox film into the cartridge.
- Now that you are back in the light, remove the film from the Minox spool.
- Leave a short piece (maximum 40 mm) of film sticking out. The photo lab needs this end to attach the film to the conveyor belt of the automatic film processor.

Take the film to the photo lab
The 35mm cartridge now contains my Minox film, and I hand it in to my lab. I ask them to return the cartridge to me after development because I want to reuse it next time.
I tell the people in the lab that the film is not fastened at the end and therefore does not need to be cut off. It simply slides out of the cartridge and can be fed into the developing machine without any problems.
I have a photo lab nearby that develops this film for me. Cost: $5 per film, 1 hour wait.
What you need to bear in mind with this method
- This solution only works for color negative film (the C41 process). For me, this is ideal, as I don’t use black-and-white film with my Minox. Ultimately, I have the option of converting any color photo into a black-and-white image later on. The reverse is not possible.
- If, after developing the film, you notice that one or more frames are missing at the beginning of the film, the lab has pulled the strip out of the cartridge further than necessary. In this case, talk to them and make them aware of the problem. Normally, 60 mm should be enough to pull out of the cartridge.
If you want to develop film yourself
You can also develop black and white films yourself. The classic approach would be to use the original Minox daylight developing tank. You can get it used on the net for between 80 $ and 100 $. It is specially designed for developing Minox films in daylight. A good manual has been written by Julian Tanase.
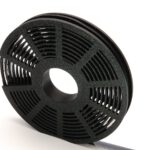
For several reasons, I would prefer to use a Minox development reel for a standard developing tank (Paterson or Jobo).
Digitizing negatives
What you need to digitize Minox negatives depends largely on the film you use. For the film I use most, Kodak Ektar 100, all of the methods presented here are sufficient, e.g., a simple travel camera.
To fully exploit the advantages of ADOX CMS 20, one of the highest-resolution films in the world, in combination with a Minox, you need digitizing equipment that costs several thousand dollars. Digitizing Minox negatives with scanners is also not worthwhile. Scanners under $1,000 do not achieve the required resolution.
Why digitize?
How was it done in the past?
The classic workflow in analog photography involves enlarging the negative with an enlarger. The negative is placed in the device, where it is illuminated from behind. A lens projects the image from above onto a table covered with light-sensitive photographic paper for a few seconds. The paper is developed in a developer bath, just like analog film, and then fixed in a second bath. Once dry, you have a paper image. The size of this image can be varied by changing the distance between the negative and the paper.
For this work, you need a darkroom, an enlarger, photographic paper, developer and fixing chemicals. The time required for one image is one to two hours, including drying. If you want to go completely analog, this is how you have to do it. Just like working with analog cameras, it can be deeply satisfying.
What is the advantage of digitization?
Before digital photography, I enlarged many photos myself in the darkroom as described above. Nevertheless, I no longer do this with analog photos today. Why? Because digital processing of film negatives offers me so many advantages:
- Digital optimization of images is incomparably better. I can try out much more and much faster (undo!).
- I have many more options for editing the image than I did with analog enlargement.
- I show most of my photos on digital media, so I would have to scan a paper photo beforehand.
- Digitization is much faster and easier than analog enlargement. Okay, that may not be an argument for an analog photographer. But my analog ambitions are limited to the camera.
- I don’t need a darkroom and a special Minox enlarger, but can work on the computer.
- In the end, I have a digital image that I can also print out if I want to. And yes, I do that sometimes:
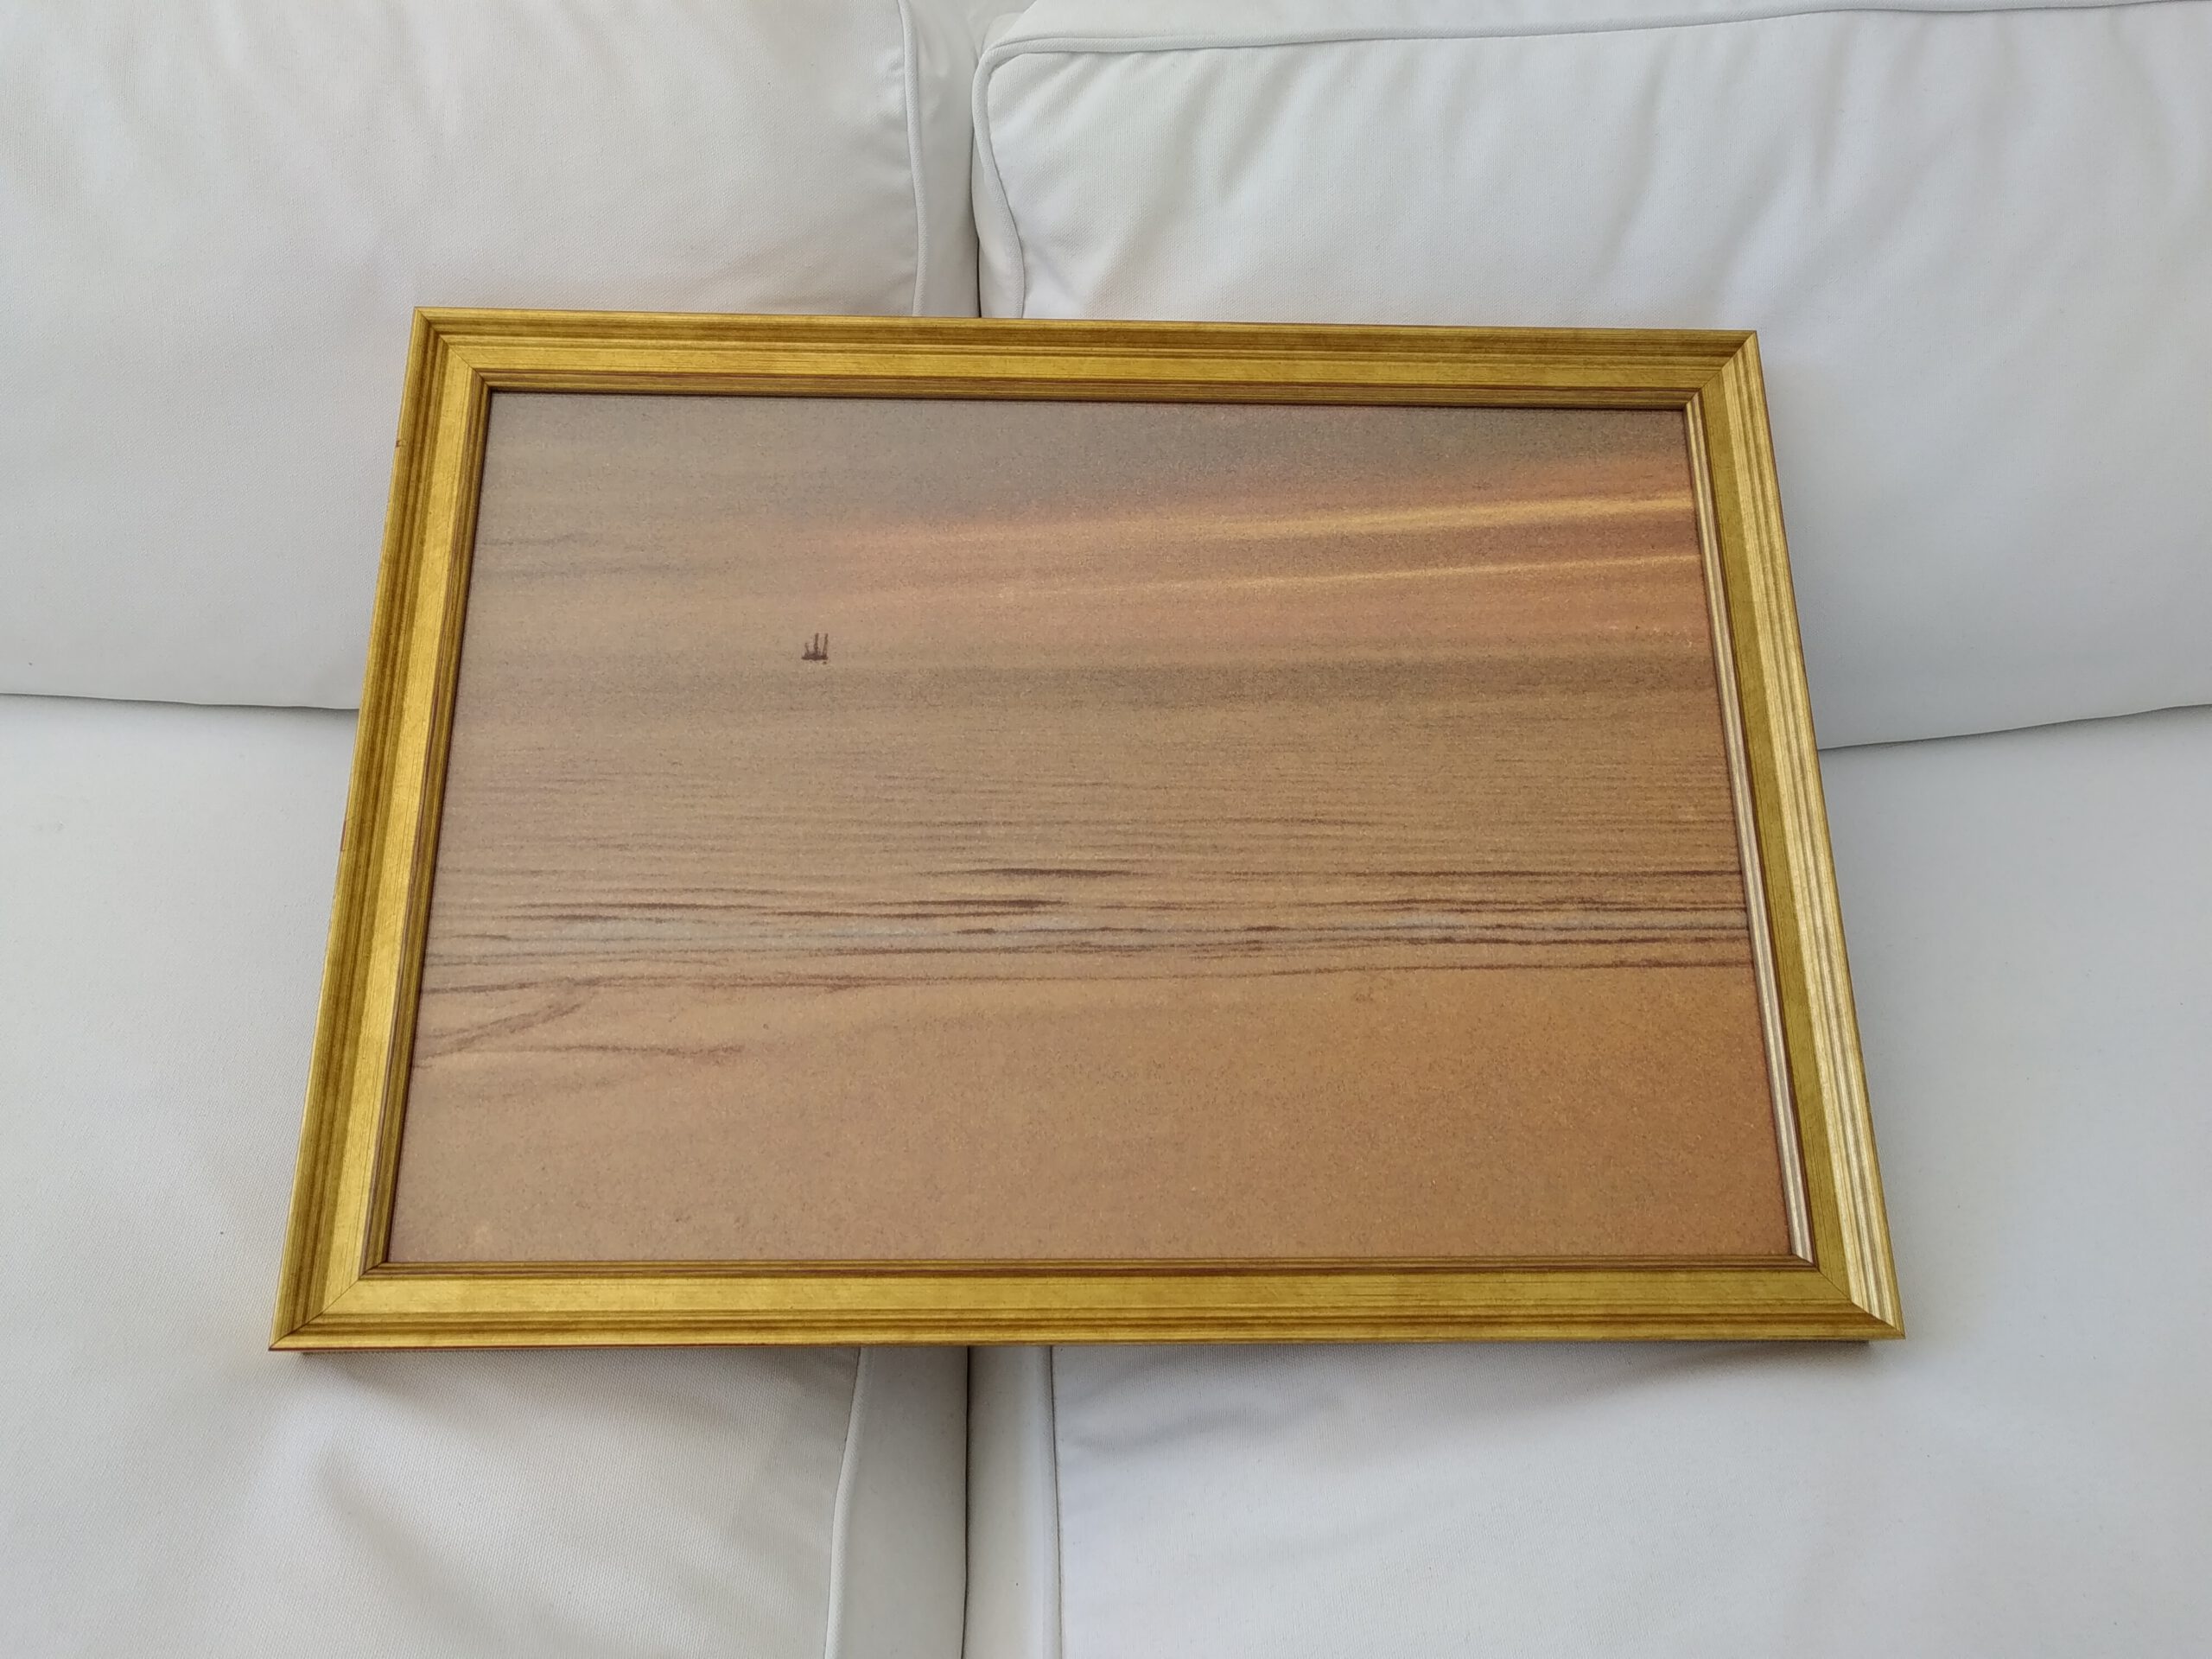
Viewing the negatives

The negatives are easier to assess if you can view them in positive. Just for the sake of completeness, I would like to point out that with the Kodak Mobile Film Scanner app, for example, you can display both color and black and white negatives live in positive with the smartphone via the built-in camera, see picture on the left. With 8×11 mm negatives, of course, everything remains very small.
Negative holder

First we need a holder for the film. I made this from strong cardboard and a Minox slide frame. I happened to have the slide frame, but it was enough to cut a 10 x 13 mm cut-out in the cardboard. To make it more comfortable, I glued in two cardboard strips as longitudinal guides and glued narrow felt strips to the top and bottom of the left and right edges to wipe the dust off the film.
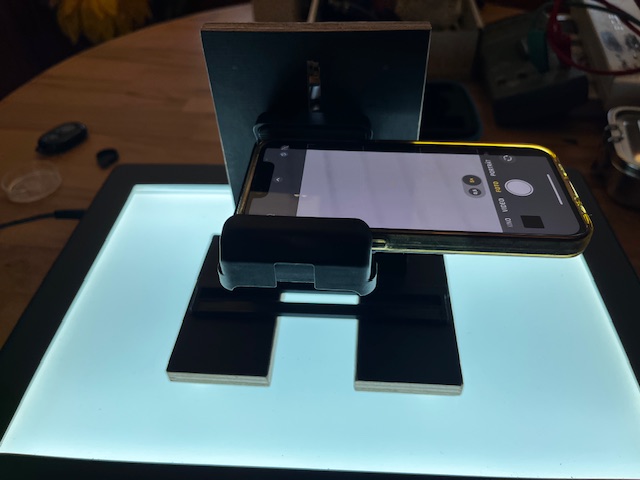
Camera holder
You can easily build a holder yourself. Instead of a tripod, I built a stable camera mount from two wooden boards and a macro focusing rail ($50). A tripod would also work, of course.

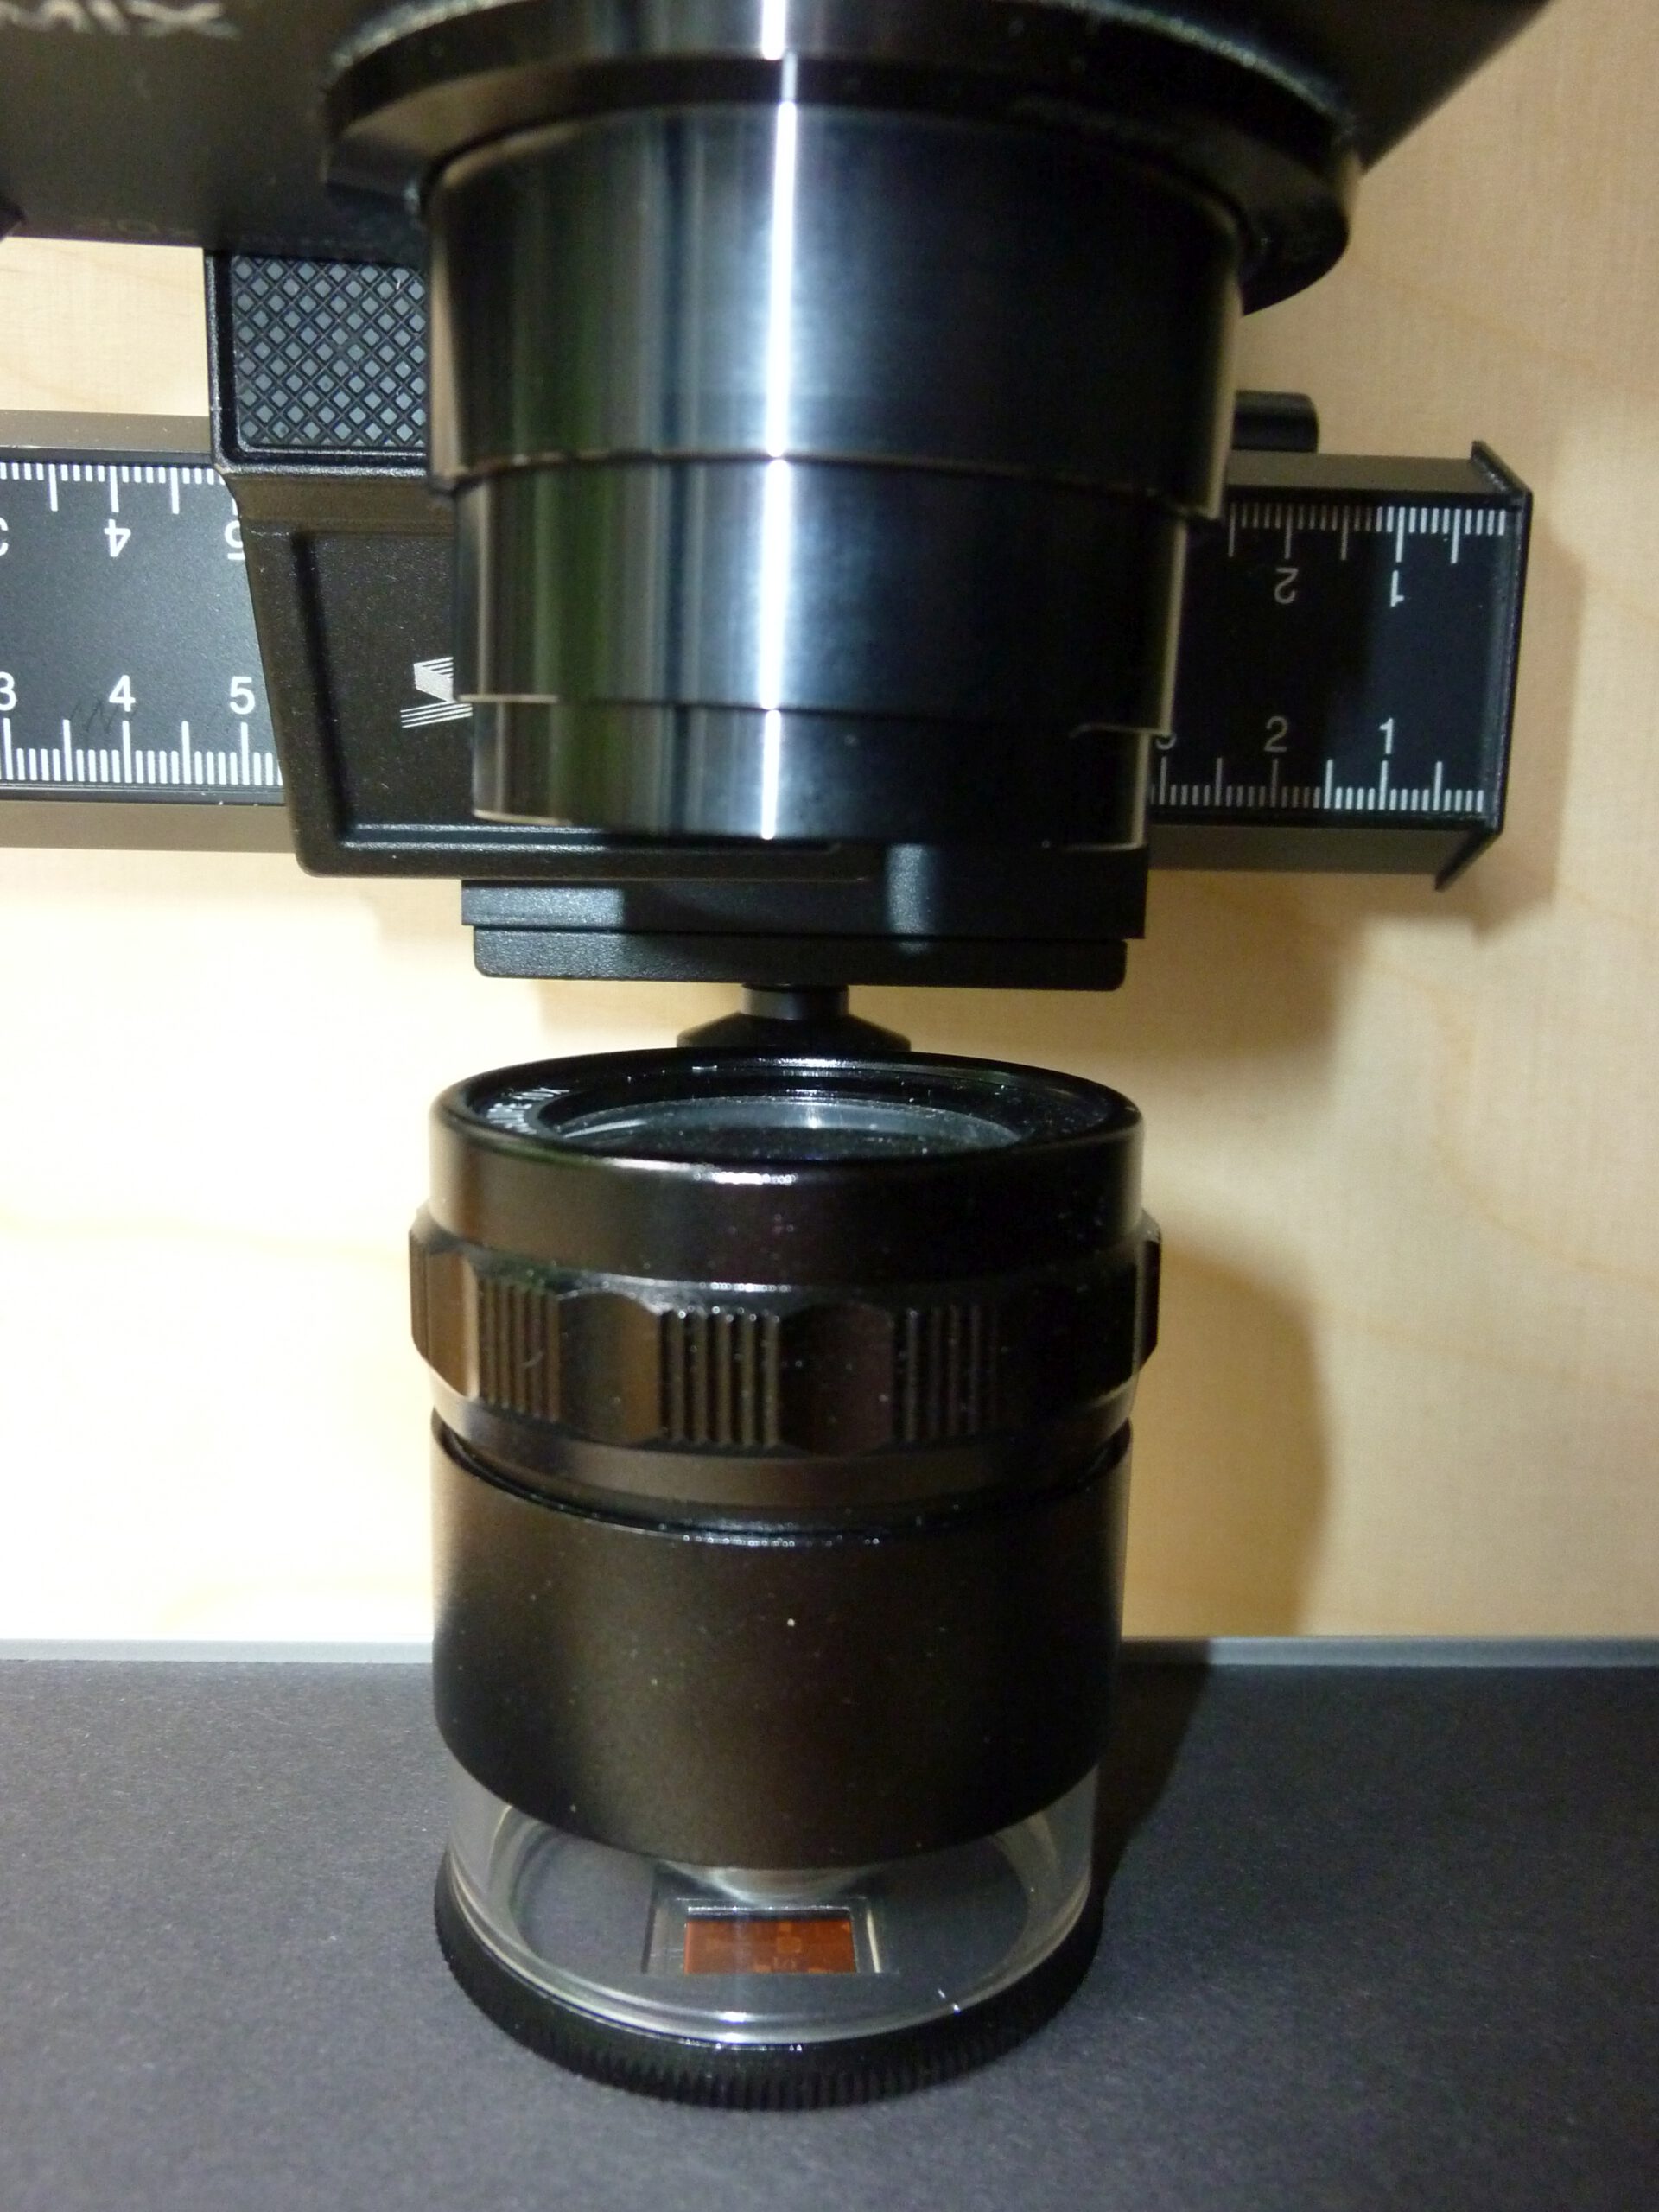
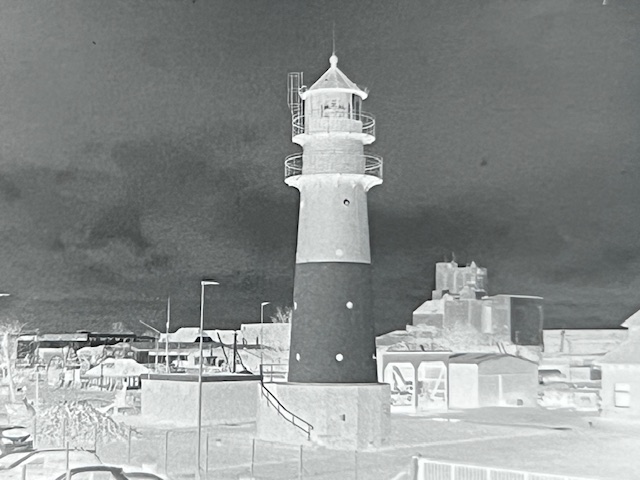
Compact camera with magnifying lens

This is a cost-effective solution that delivers good results. Many of the pictures in my Minox gallery have been digitized in this way. For example, look at the photo on the right. Click to enlarge.
I used my existing simple compact travel camera for this. These days, cameras like this are hardly manufactured anymore because most people use their smartphones for this purpose. This makes them even cheaper to buy secondhand. In addition, I use a very high-quality magnifying glass, which is not exactly cheap ($60).
I photograph the Minox negatives illuminated from below under an ADOX 10x loupe with my Panasonic TZ41, which produces JPGs of 4340 x 3160 pixels (= 13.7 MPixel). This results in a scan resolution of 4340 / 11 * 25.4 = 10021 ppi.
These are outstanding values that even a scanning lab cannot offer. However, the camera’s lens and sensor limit the quality. The lens shows slight distortion at the edges and the tiny sensor tends to produce noise. Nevertheless, the quality of Minox photos is much better than can be achieved with a scanner.
In the beginning, I used my smartphone for lighting, as you can see in the picture below. I now use a Rollei Lumis LED continuous light which is much brighter.
For color film it is advisable to make a manual white balance on a piece of unexposed (orange) film before taking the photograph.
To minimize distortion caused by the zoom lens, I work with a zoom factor of about 2x that corresponds to a focal length of 48 mm for my camera. This is the entire structure in action:

System camera
I achieve an even higher quality with a Sony alpha 6000 in combination with the Sony 30 mm macro lens (total $450). Then I can do without the magnifying glass.
For example, look at the photo on the right. Click to enlarge.
With autofocus and automatic exposure, I can digitize a Minox 36-exposure film in 10 minutes. I have saved all the settings in a user profile and can call them up at the start of film digitization at the touch of a button.
Negative holder, camera holder and lighting are the same as in the above setup.


This setup produces JPGs of 2700x 1925 pixels (= 5.2 MPixel). This results in a scan resolution of 2700/ 11 * 25.4 = 6235 ppi. Although this is less resolution than with the setup presented above, the high-quality macro lens and the omission of the magnifying glass still result in a better image quality. For comparison: professional scanning service providers offer 2000 to 4000 ppi.
Smartphone with macro lens
You can even use your smartphone to digitize. Many thanks to Jens for this tip and the following photos! He uses his iPhone in combination with the Apexel ZoomMacro 10-20X macro lens. The wooden holder is self-made:
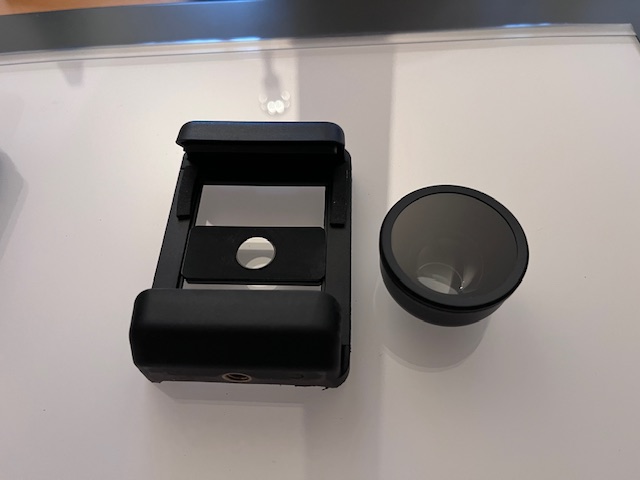
The results of this procedure are surprisingly good:
Post-processing the digitized photos
The result of the digitization process is a side reversed color negative:
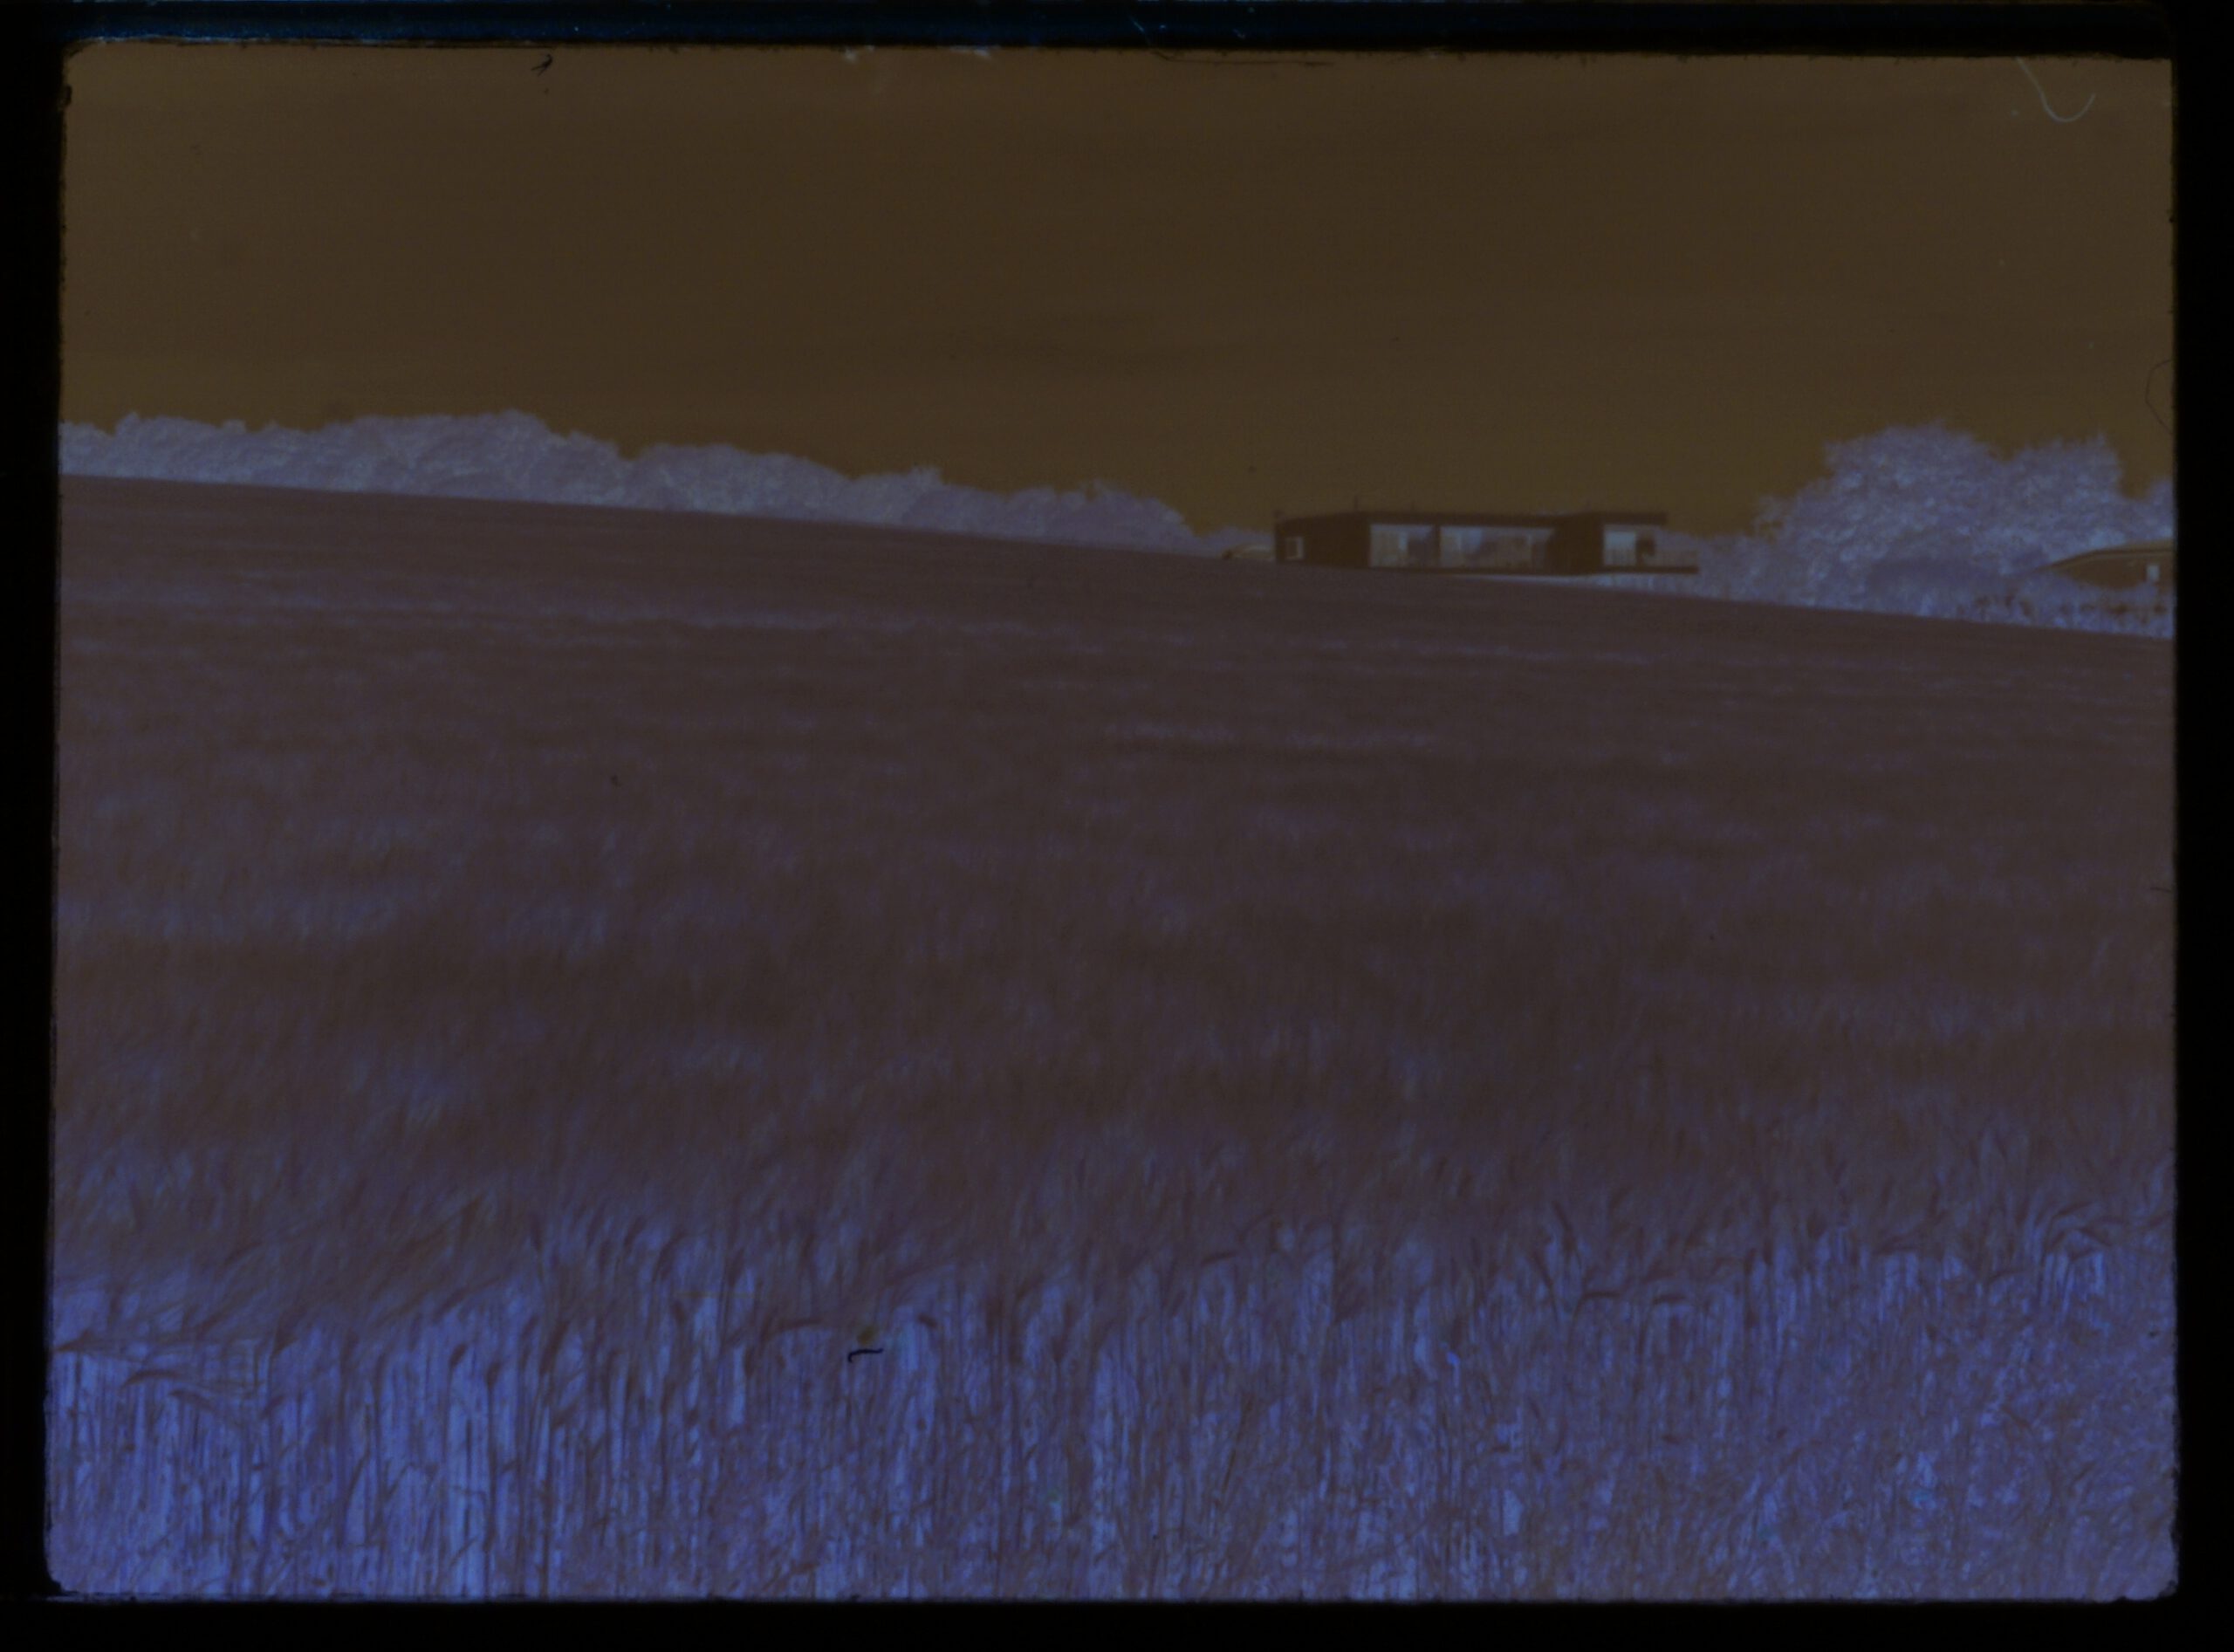
Click to enlarge
Conventional post-processing
The photographed negative must now be post-processed. I do this with GIMP (version 2.10). Two steps are necessary in any case
- Invert the colors of the negative. GIMP/Colors/Invert
- White balance, black balance. GIMP/Colors/Levels…
Here is the result of step 1:
Click to enlarge
Optional Steps:
- Crop the image. GIMP: Rectangular selection/Image/Crop Image
- Convert to black and white. GIMP: Colors/Desaturate/Mono Mixer
The advantage of generating black-and-white images from color photos is that you have full control over the filters. This means you can try out green or orange filters of varying strengths and optimize the result. This is not possible after shooting with black-and-white film.
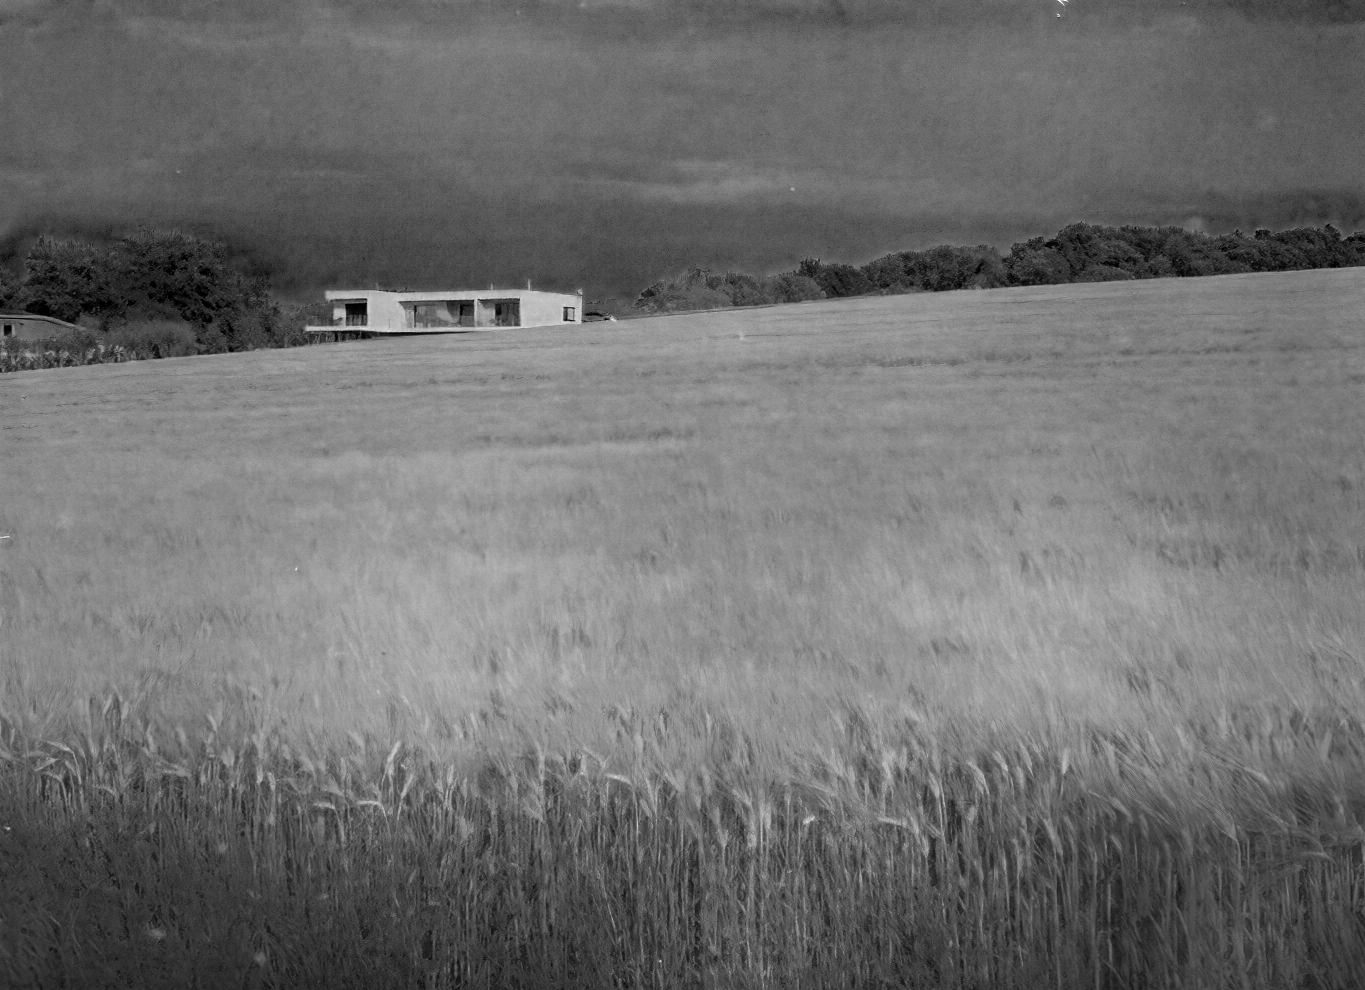
Click to enlarge
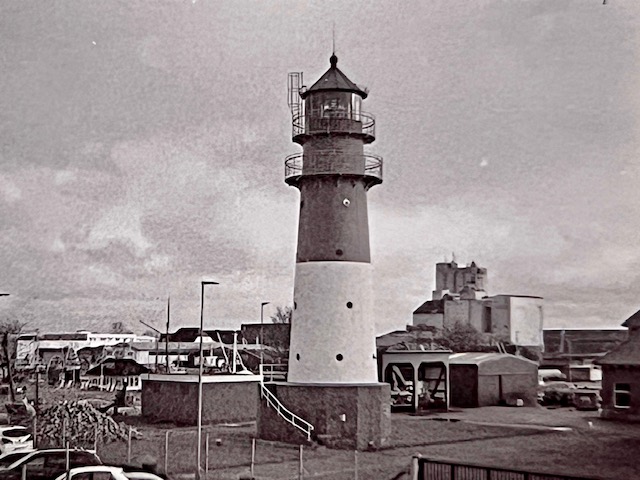
AI-based post-processing
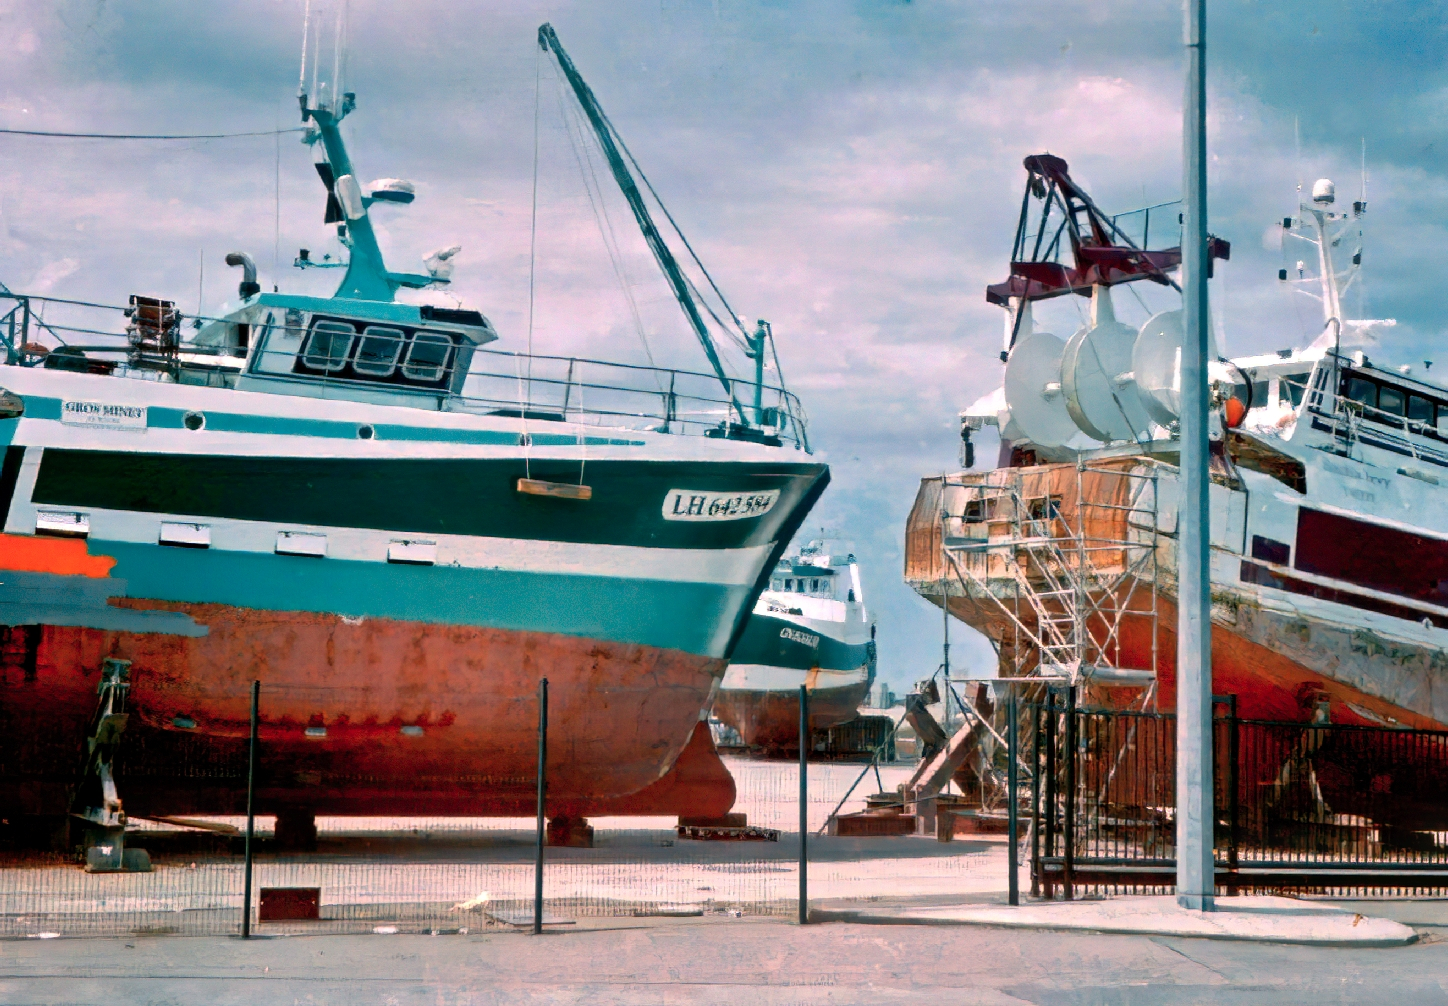
The quality of images can be greatly improved using AI-powered noise reduction and sharpening software. I use Topaz DeNoise AI for this.
Note that this is not so-called generative AI. The AI does not generate objects in the image that were not there before. The AI automates the otherwise very laborious manual selection of important objects that need to be sharpened, while other objects are left blurred. In addition, surfaces that are smooth in reality but have been given texture by the film grain are recognized. These are smoothed accordingly. The result is often spectacularly good:

Click to enlarge
Free post-processing
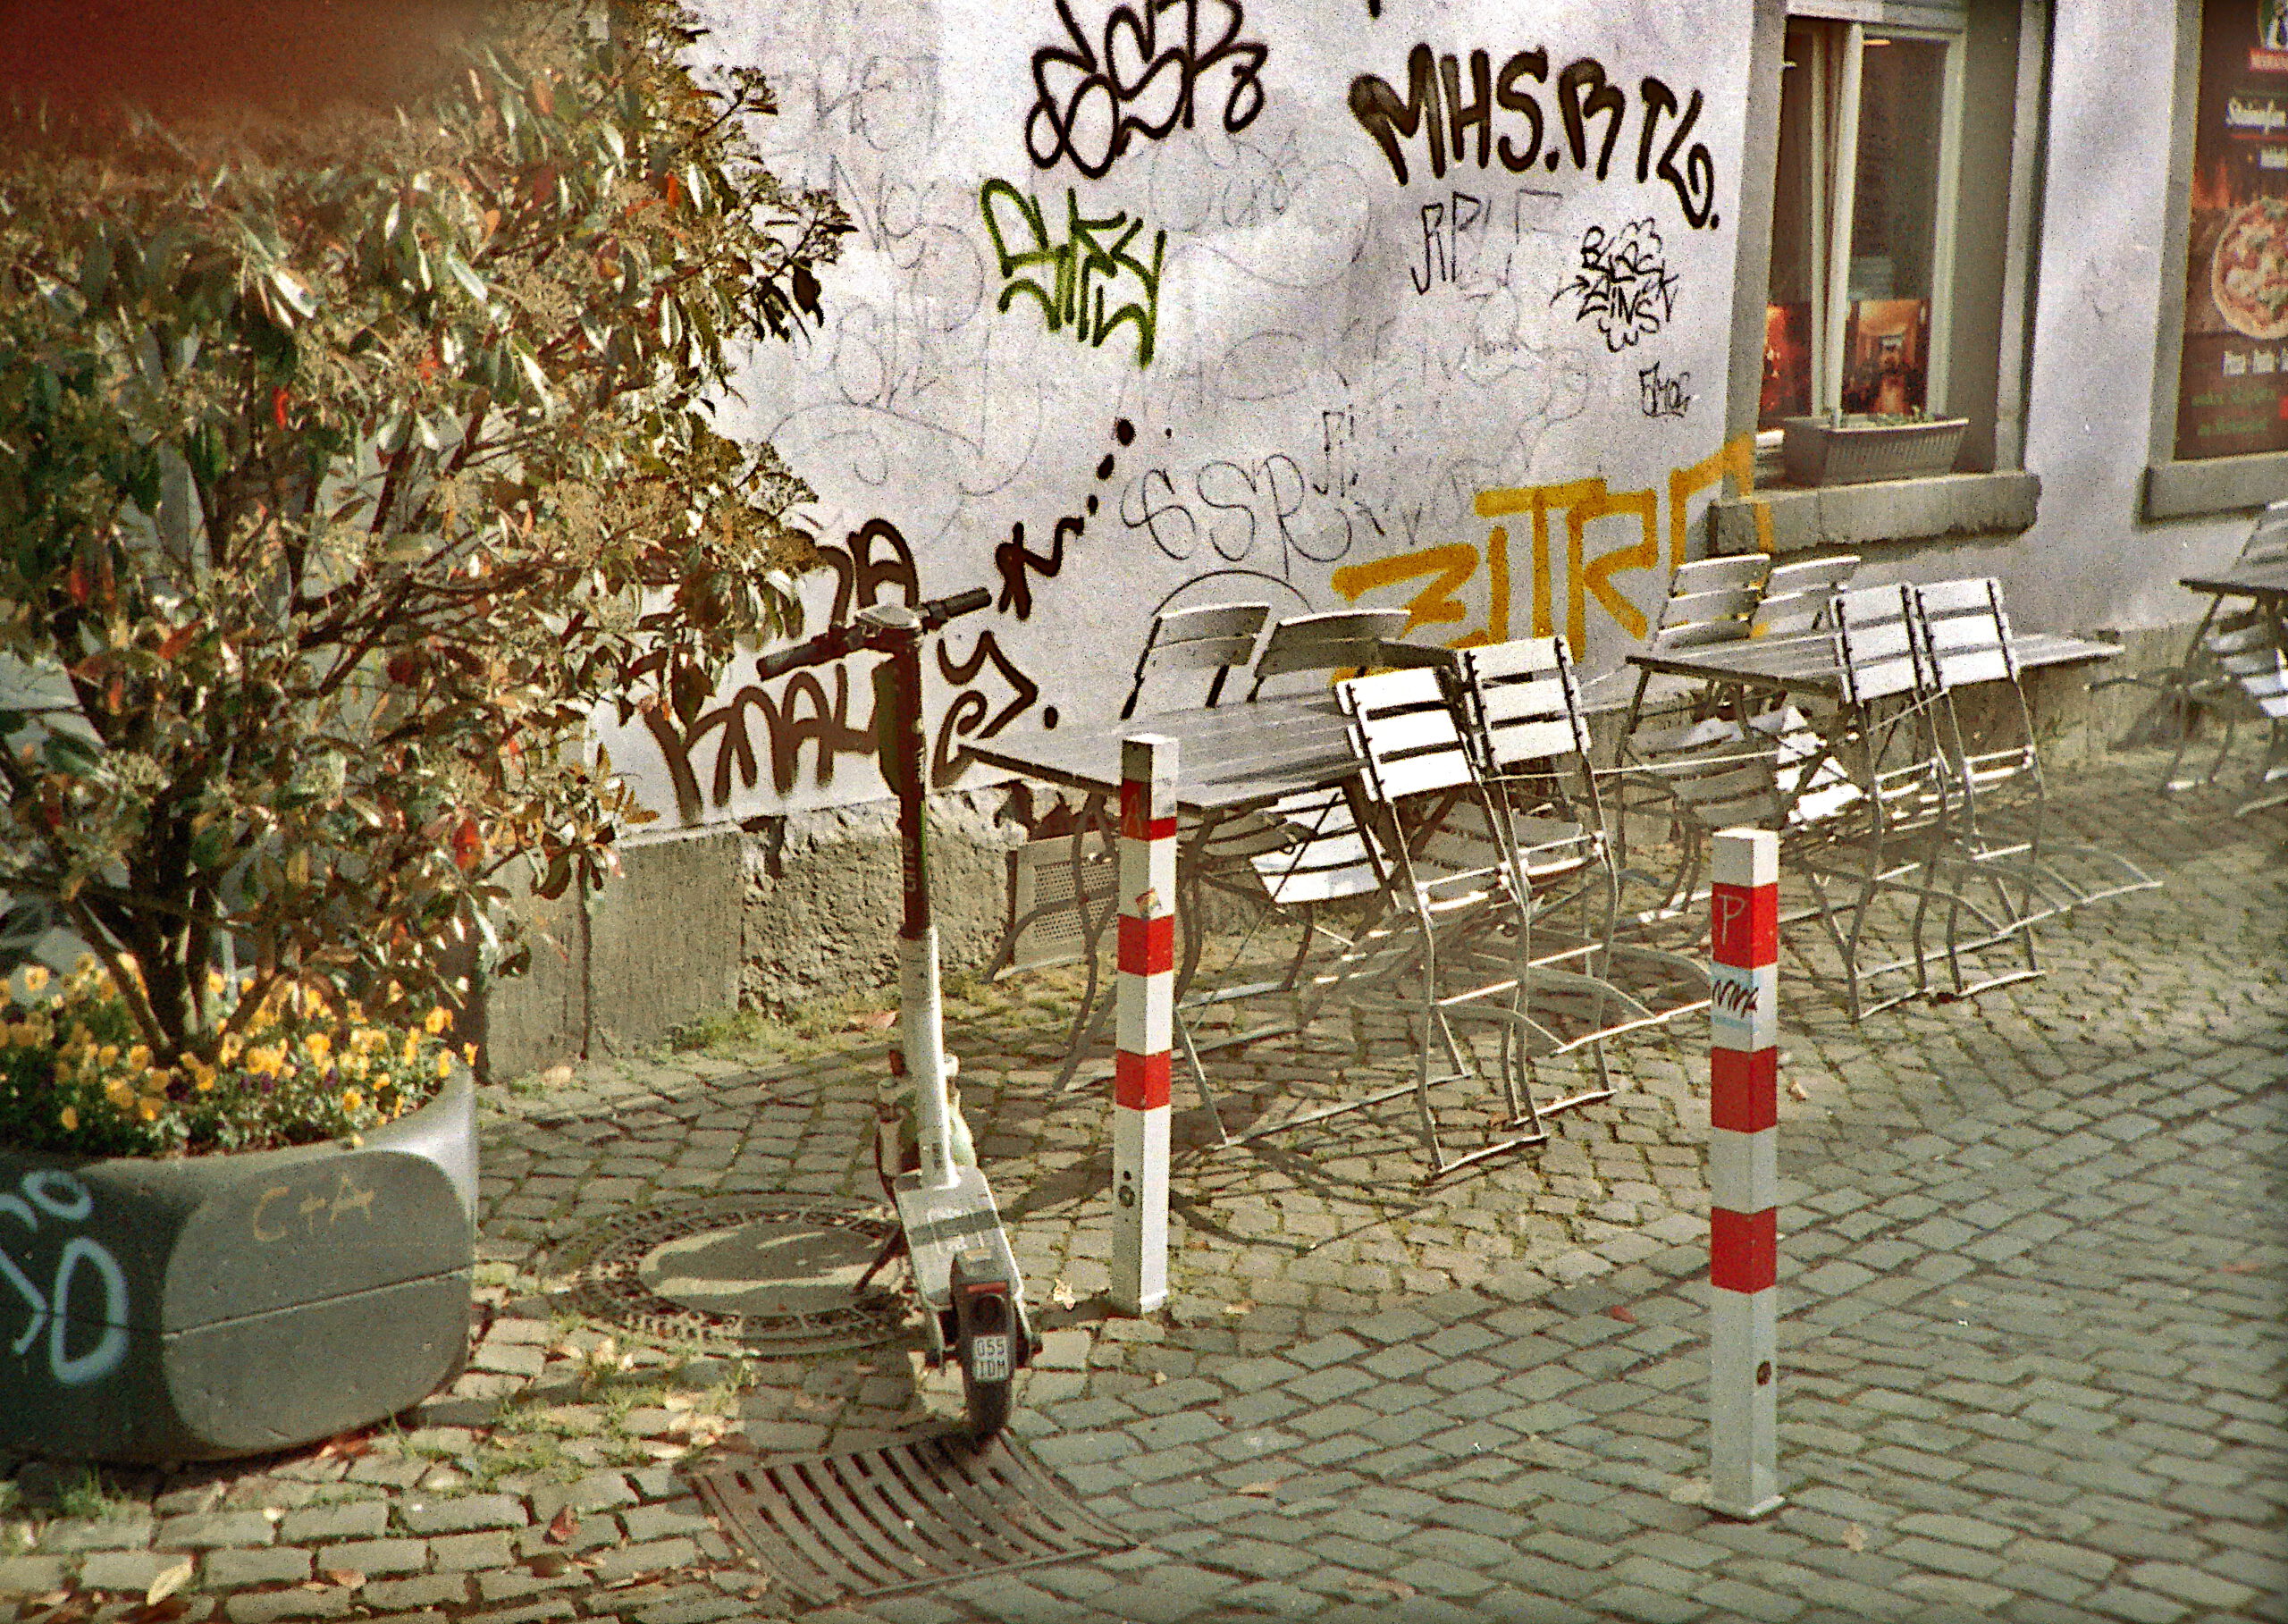
I often want to edit a photo to reflect the mood I felt when I took it. In doing so, I take every liberty to reinforce the message of the image:

Click to enlarge
I reworked the above image in GIMP using various methods.
Storing Minox negatives
Once you have digitized the negatives, you don’t really need them anymore. In this respect, this chapter is actually superfluous. However, there are reasons to keep the negatives. On the one hand, they are the actual product of analog photography, i.e. something that you can really touch, unlike digital photos. On the other hand, you may want to digitize individual negatives again using a different, new process. They should then be stored carefully.
I make my own negative sleeves to fit Minox 8×11 exactly. You can find the detailed description here.
Conclusion
I hope that my explanations here will help to motivate some of you to take pictures with Minox 8×11 cameras.
I have made a point of writing as concretely and practically as possible. Of course I am not perfect. So if anything is unclear to you, please use the comment function below and I will take care of it! The same applies if you miss a topic.
Any questions?
Do you have any questions or is there anything missing? I’d be happy to help you personally! Free of charge, of course, because this is about our hobby. I usually respond within a day. Simply use the comment function at the bottom of this page. No registration required.
Newest Minox tips
- Minox shutter speeds: Use the film latitude
- Minox color film processing at any photo lab

- New development reel for Minox 8×11 film – A Review
- Minox EC – High-Quality Subminiature Photography
- Minox photography for absolute beginners

Take on the Minox challenge and have fun!
Moments of Minox
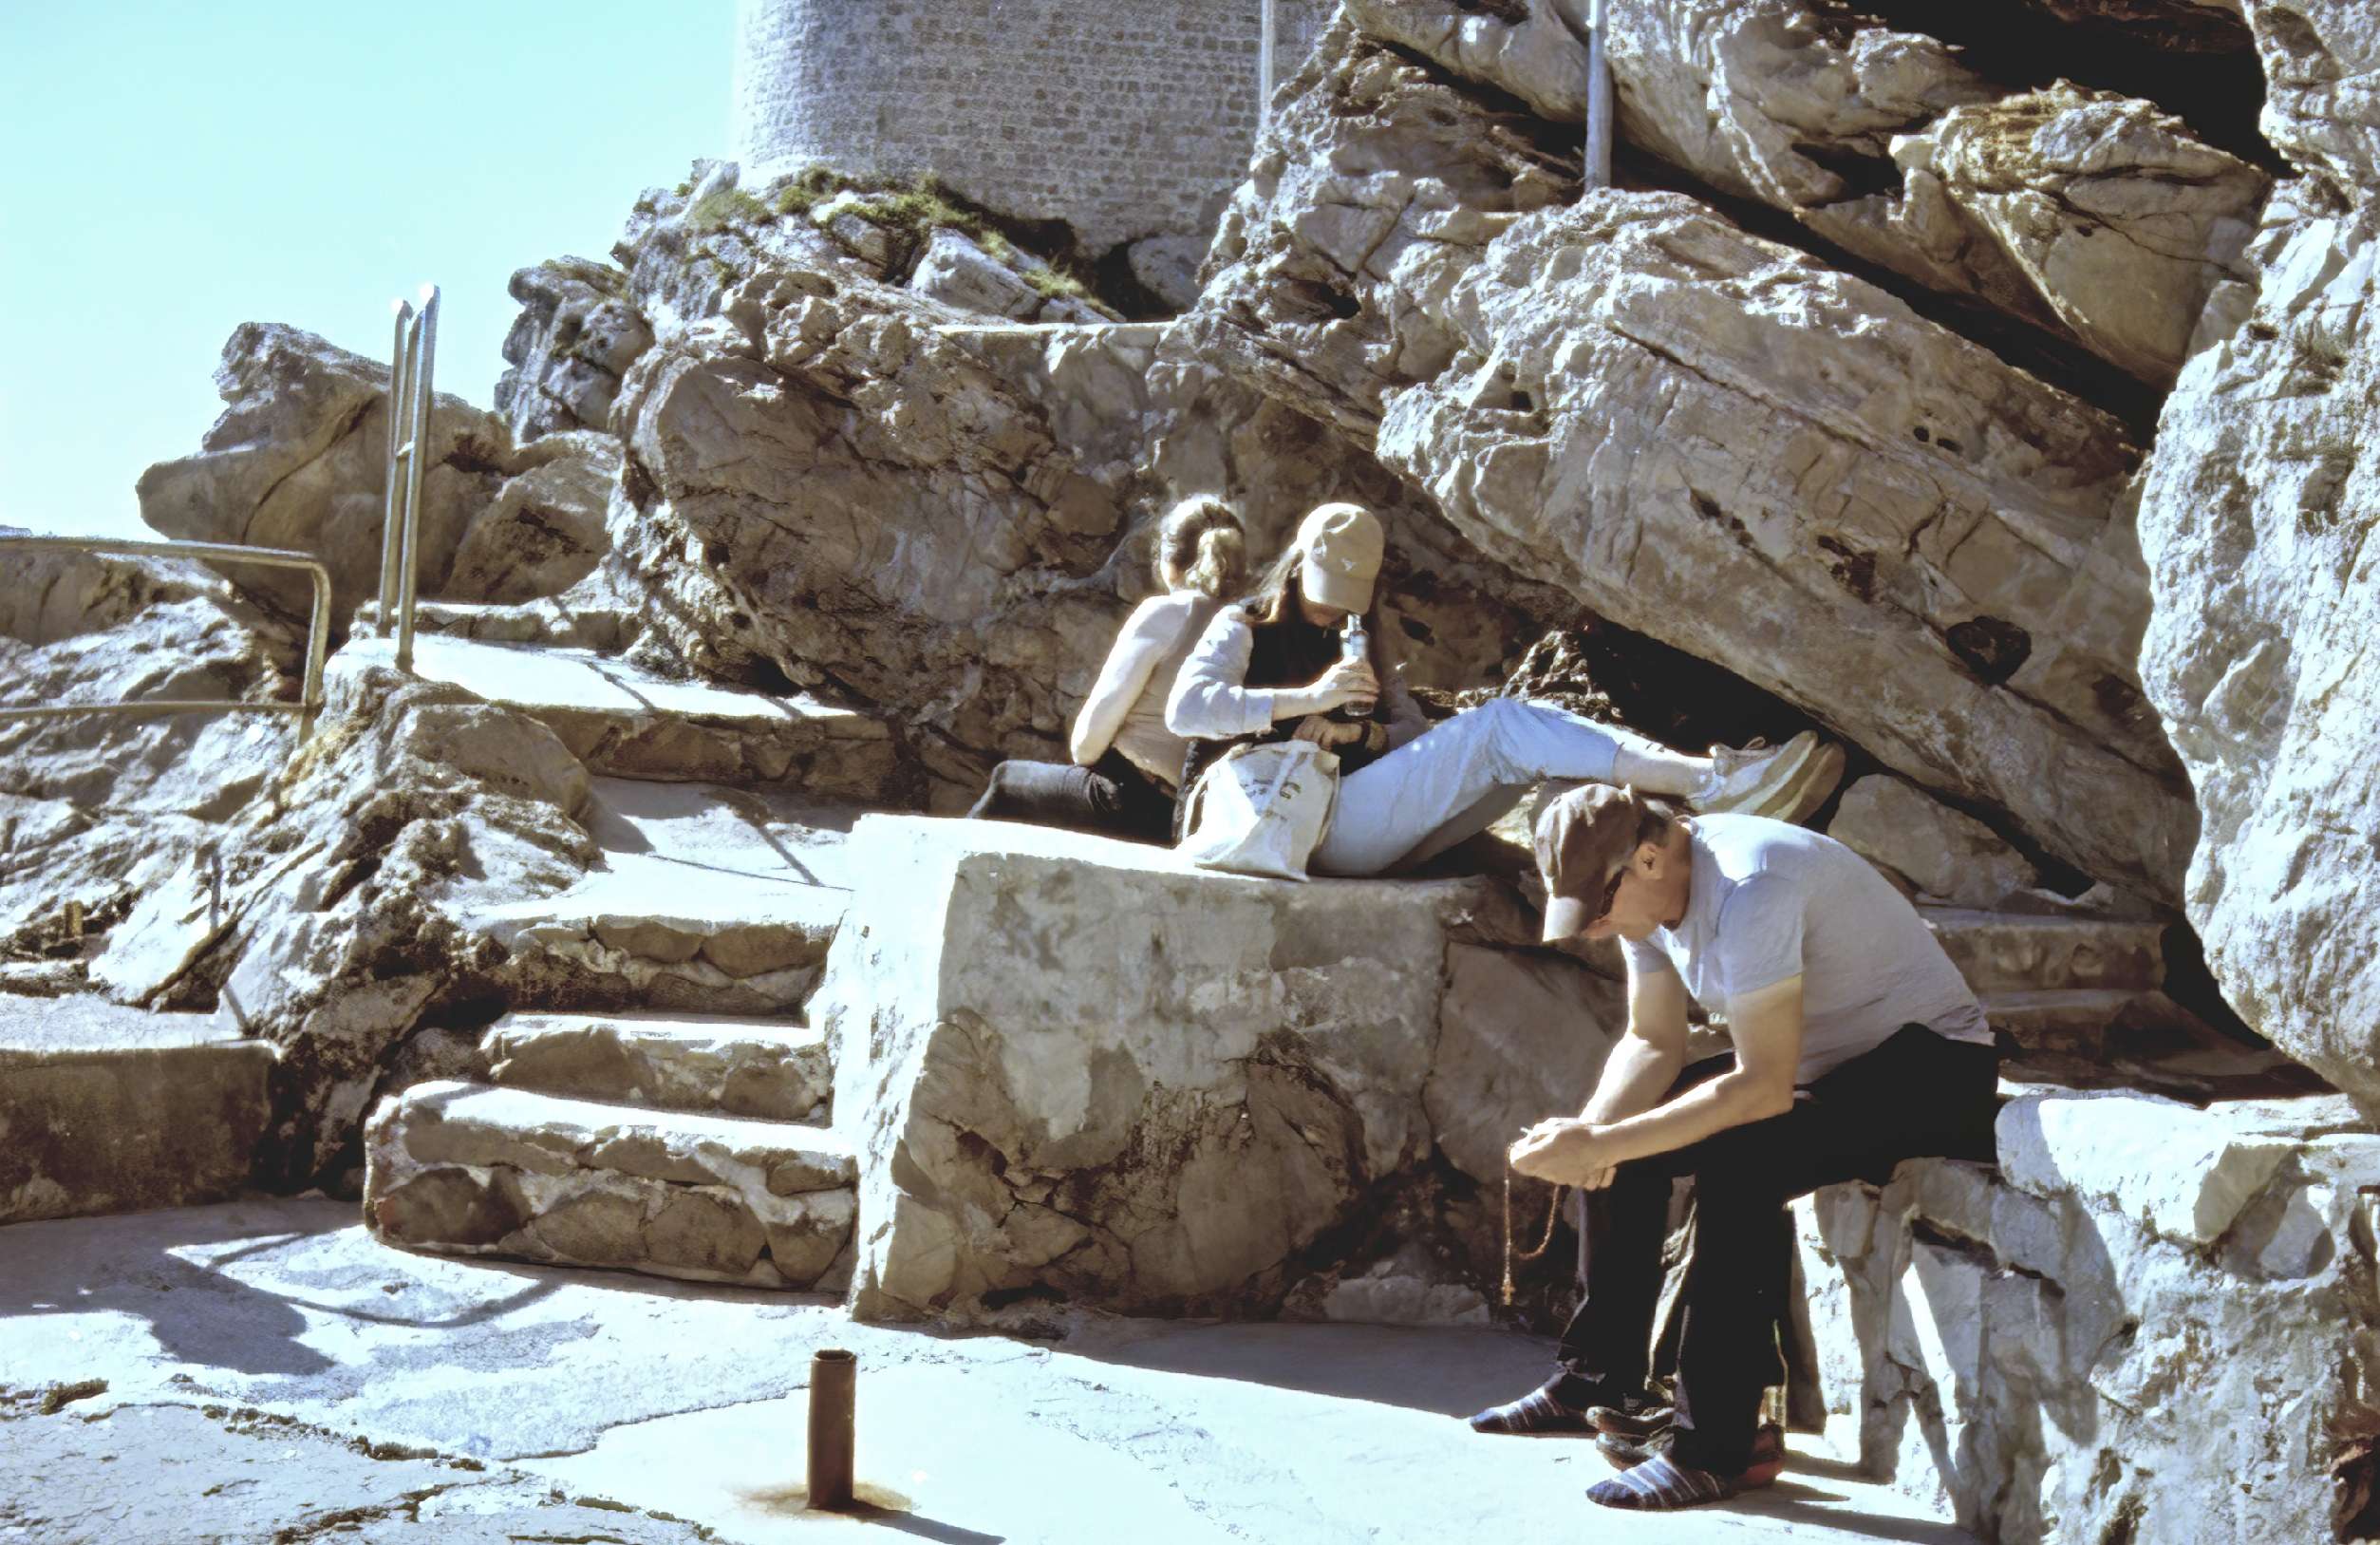


![Many moments of self-discipline pay off: Young couple on their way up. [Düsseldorf, Germany, 2024, Minox A IIIs, Kodak Ektar 100]](https://moments-of-now.com/wp-content/uploads/2024/11/DSC2660-IDG.jpg)

Attract attention with photos
So far, we’ve only talked about the right exposure. If you want to take photos that will attract attention, read on here.
Post your questions, suggestions, and feedback here
Do you have any questions or is there anything missing? I’d be happy to help you personally! Free of charge, of course, because this is about our hobby. I usually respond within a day.
Simply write in the comment field and press the Post Comment button. Your name, email address, and website are optional. If you ask me a question, you may provide your email address so that I can respond in detail and we can engage in a dialogue.
If you would like to save this article, you can download it as a PDF file here:
Eine super interessante Homepage, sehr gut gemacht ,tolle Hilfe für Einsteiger.
Vielen Dank, ich würde mich freuen, wenn diese Seite das Interesse am Fotografieren mit minimalem Gerät und maximalen Gedanken weckt.
extremely useful info on this page, and your others, thank you so much!
Thank you! I would be delighted if people begin to take photos with these cameras through my pages.
I’m so impressed and thankful about your incredibly informative article! Thank you so much for sharing your knowledge and expertise! I may just purchase a minox B just because of you. The only other analog camera I have is a Polaroid SX-70. Your article is a joy to read and just amazingly entertaining too. Thank you so much! (From Oregon U.S.A.)
Thank you for this very positive feedback!
I am delighted to hear that you enjoyed the article and that it has even inspired you to consider purchasing a Minox B. I would be delighted if you were to try out a Minox for yourself.
It is a great pleasure to know that my articles are so well-received. Your comment means a lot to me!
Best regards to Oregon!
Purchased my minox B! $55 including shipping. (ebay) Will test and clean using your article! Live near Portland so will use Blue Moon for film and developing at first. Thanks again!
Congratulations, good luck!
When it comes to developing, take a look at the new chapter on film processing in this article. If it’s color film, you may be able to have it developed locally.
Hello, would I be able to use bulk Super 8 film for the Minox B? I know it’s a little small but could it work?
Hello JH,
I have no experience with this, but I foresee the following problems:
– The perforation protrudes significantly into the image. Only 5 of the 8 mm may be usable.
– With the Minox A/III and Minox B, the pressure plate likely won’t achieve the correct curvature of the negative. With the other Minox models, the film might not be flat enough. In both cases, there would be blurry areas.
– Super 8 film might be thinner than standard photographic film. This would mean the film transport mechanism for the negative spacing wouldn’t be accurate, and the negatives could overlap.
– Due to the narrower film, light could enter through the film slots of the cartridge.
– The film could be fed in at an angle and jam.
Thomas