Quick guide:
- Purchase the film you want to use as 35mm film
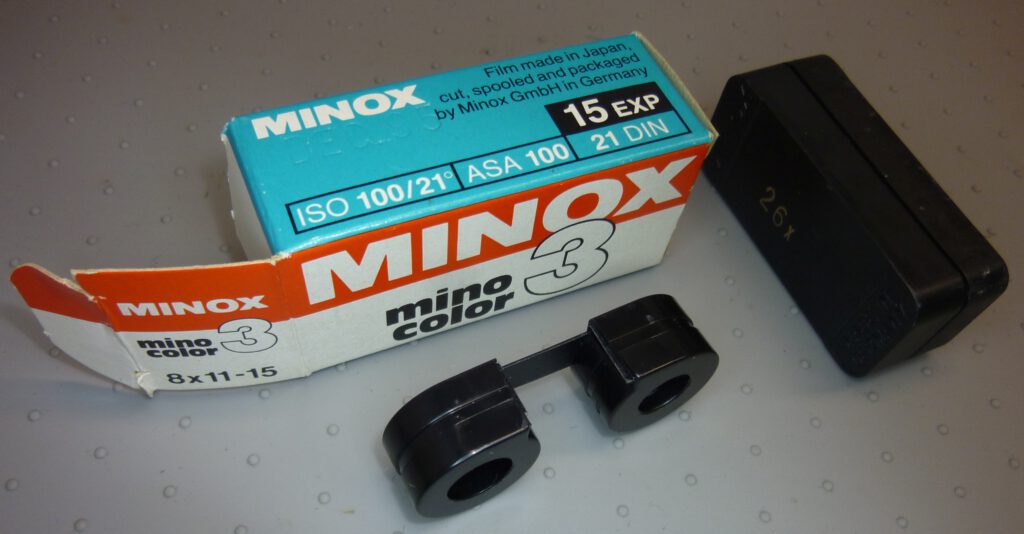
- Obtain a used Minox film cartridge.
- Cut the film into four strips the width of the Minox
- Load one strip into the Minox cartridge.
Done!
Here are the detailed instructions:
Page Contents
My personal experience
I have used the procedure described here to assemble numerous Minox films. I haven’t had a single failure with these films, whether it’s light penetration marks on the negatives or issues during film transport. I have also not found any traces of dust or fluff on the negatives. I didn’t lose a single film when cutting and loading, even though I had to teach myself everything from scratch at the beginning and had no prior experience.
I can therefore recommend this process with a clear conscience. However, I accept no responsibility for any damage that may occur to the camera or film as a result of using this procedure.
Here’s a list of the film types I have loaded so far:
- Kodak Gold 200
- CineStill 50d
- Kodak Ektar 100
- Kodak Portra 400
- ADOX CMS 20 II
- Agfa APX 100
Have fun reading and creating your own Minox films. Some things may seem difficult at first glance, and they are! But otherwise it would be boring.
Slitting the film
Before you edit the film, you should consider how many shots you want to include in the film and how long the film strip needs to be or can be. It might also be good to know how the shots are stored on the film. Everything you need to know about this is here.
The following method has the advantage, especially for beginners, that you can cut the film almost entirely in daylight.
The daylight slitter
I use 135 film cartridges as the base material, for which there is the largest selection of film material.

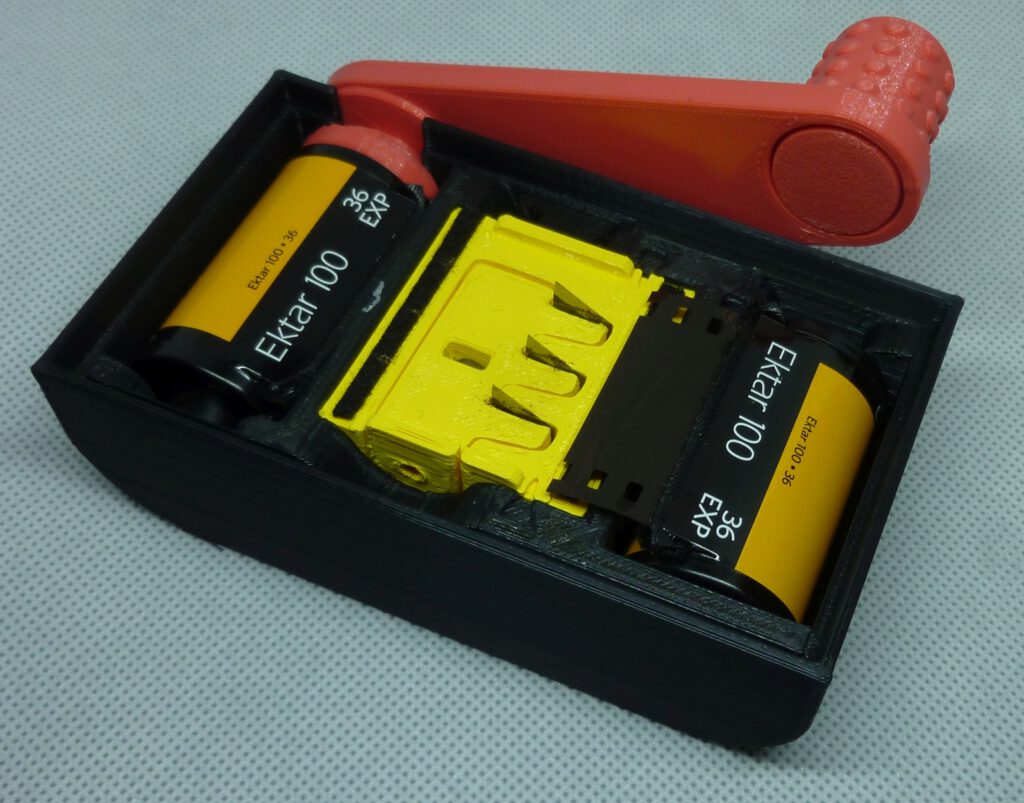
The good news is that for the most delicate part, namely slitting and cutting the film, there is a device that can be used to do this completely in daylight. I use the Film Slitter from Camerhack, with which I have had good experiences. After more than 35 films that I have slit with it so far, I can’t see any wear yet. As far as I know, it is the only Minox slitter that can be used in daylight. According to the manufacturer, it is produced using a 3D printing process. It is so inexpensive that it is not worth making yourself.
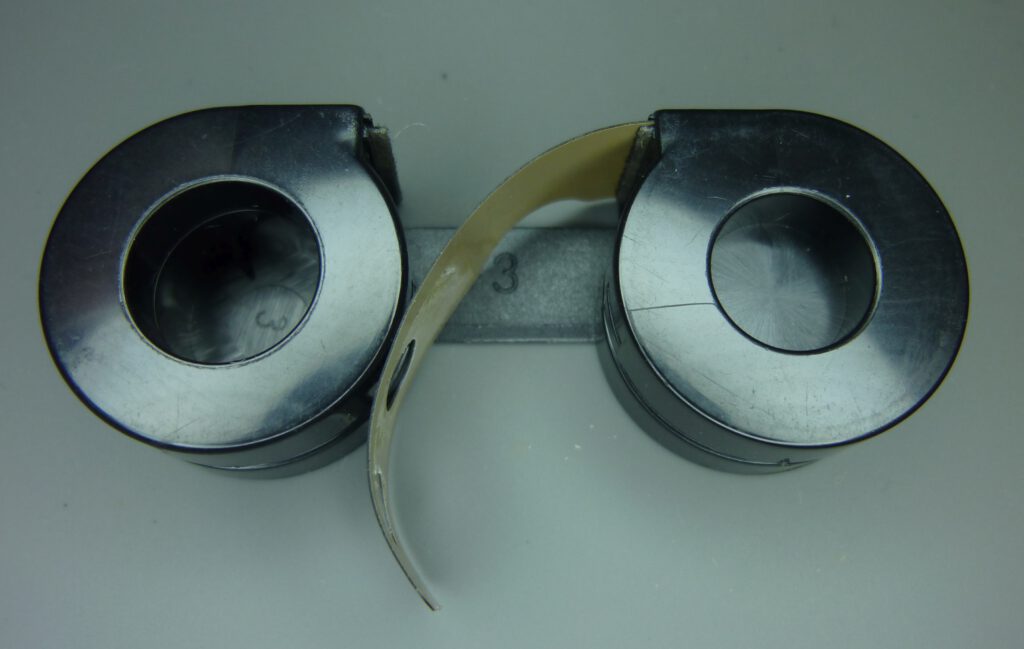
Right cartridge with film, left cartridge empty
View without lid
It cuts the 35 mm film into four strips. The two inner strips have exactly the right width (9.2 mm) for a Minox film, the two outer strips with the perforation are waste. One 35 mm film yields four Minox films of 36 exposures each. Here is a video from the manufacturer showing the cutting process.
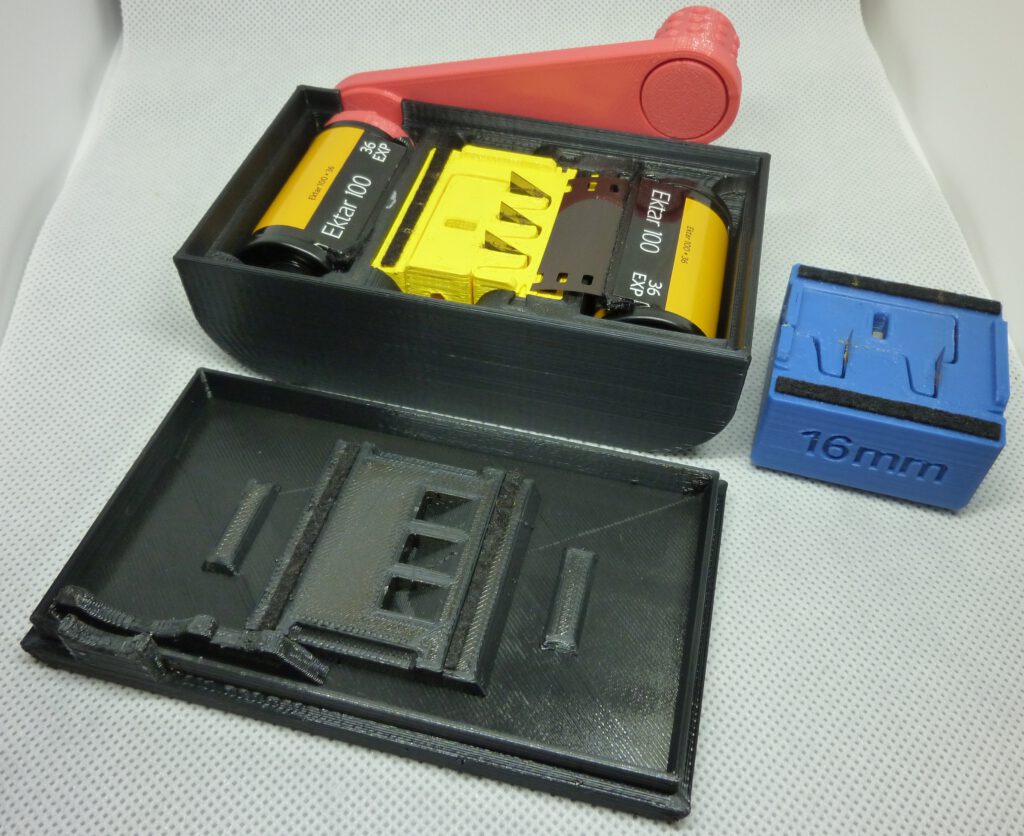
Incidentally, the Slitter has a modular design. The yellow Minox cutting insert can simply be lifted out and replaced with a 16 mm insert. This is practical for all subminiature fans who also photograph 16 mm.
Cost: Slitter 35 $ (with Minox cutter insert) 1
The cutting procedure
Preparations
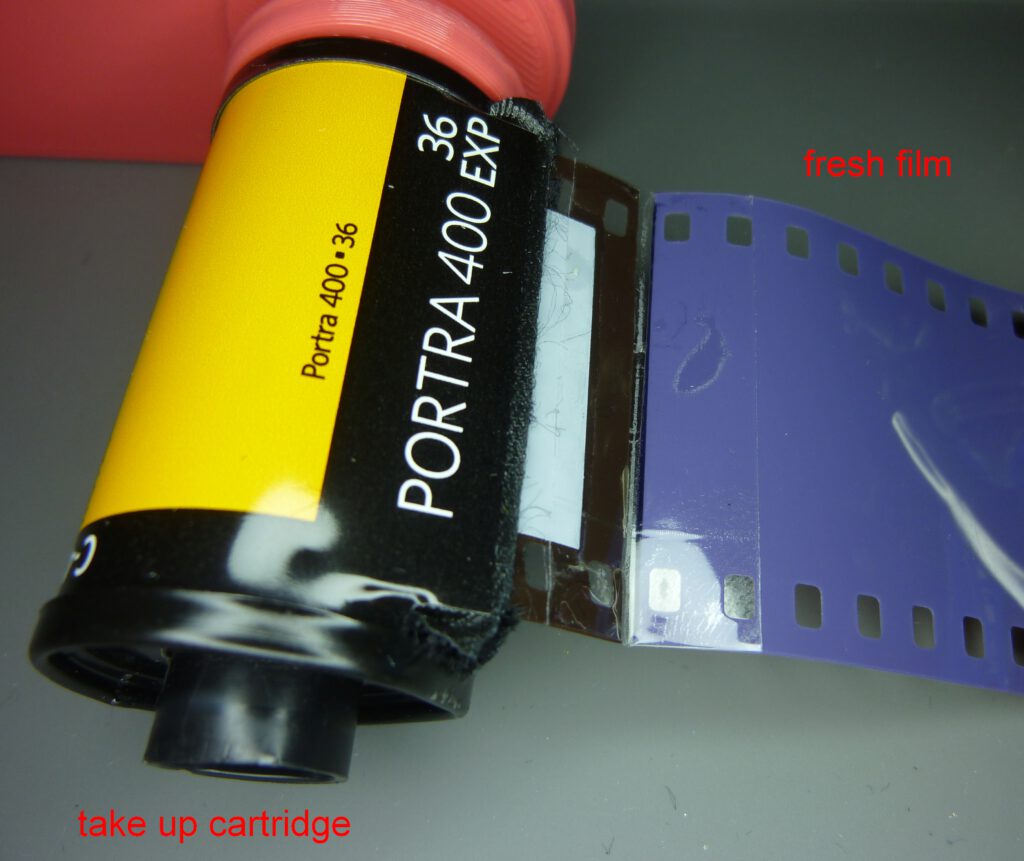
In addition to the slitter and the film in the form of a 135 cartridge, we also need a take-up cartridge. For this we take a used, empty 135 cartridge. It is important that the cartridge has not been opened and that there is still a piece of film sticking out of the cartridge.
The whole procedure can take place in the light. That is the great advantage of this slitter.
- First, cut off the tongue on the cartridge with the fresh film so that you have a straight end piece. Then stick this end piece together with the remaining piece of the empty cartridge using adhesive tape.
- Place the crank on the empty cartridge and place the whole thing in the slitter.
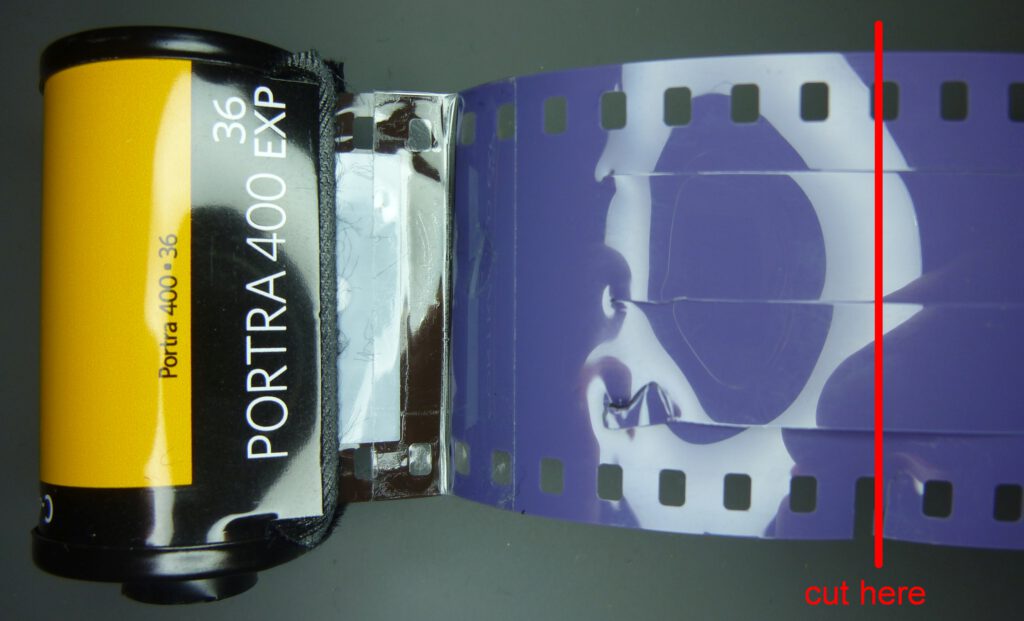
- We now make a mark on the film by cutting the perforation at a certain point, as shown here:
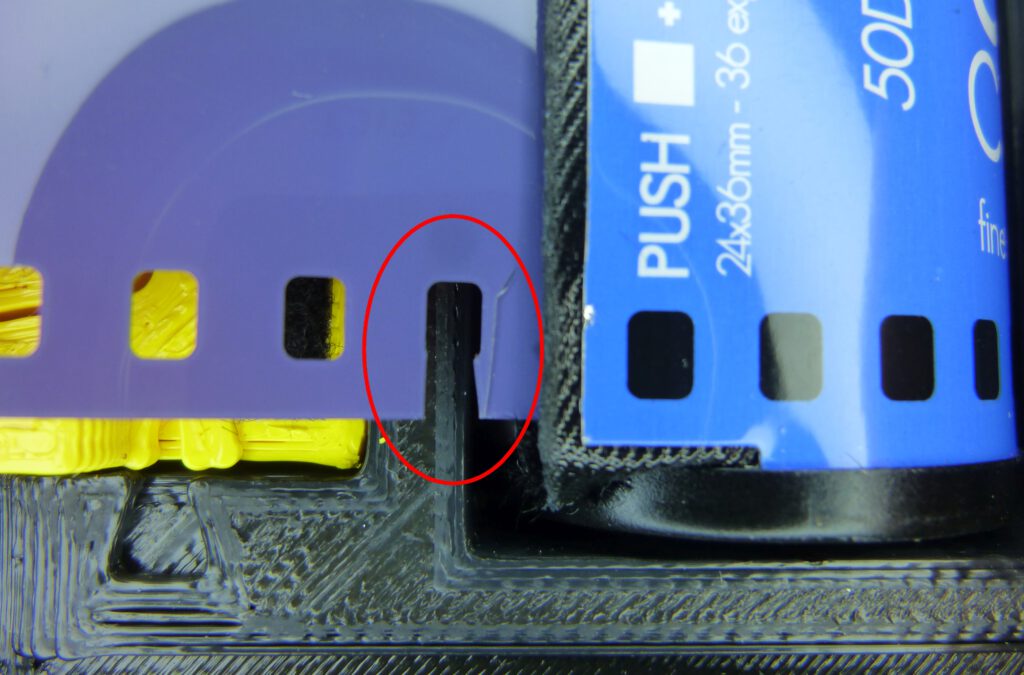
It must be the last sprocket before the film cartridge slot. The marking means that the film to the right has not been exposed and can be used. We will need this information later when we cut the film from the take-up spool in the dark.
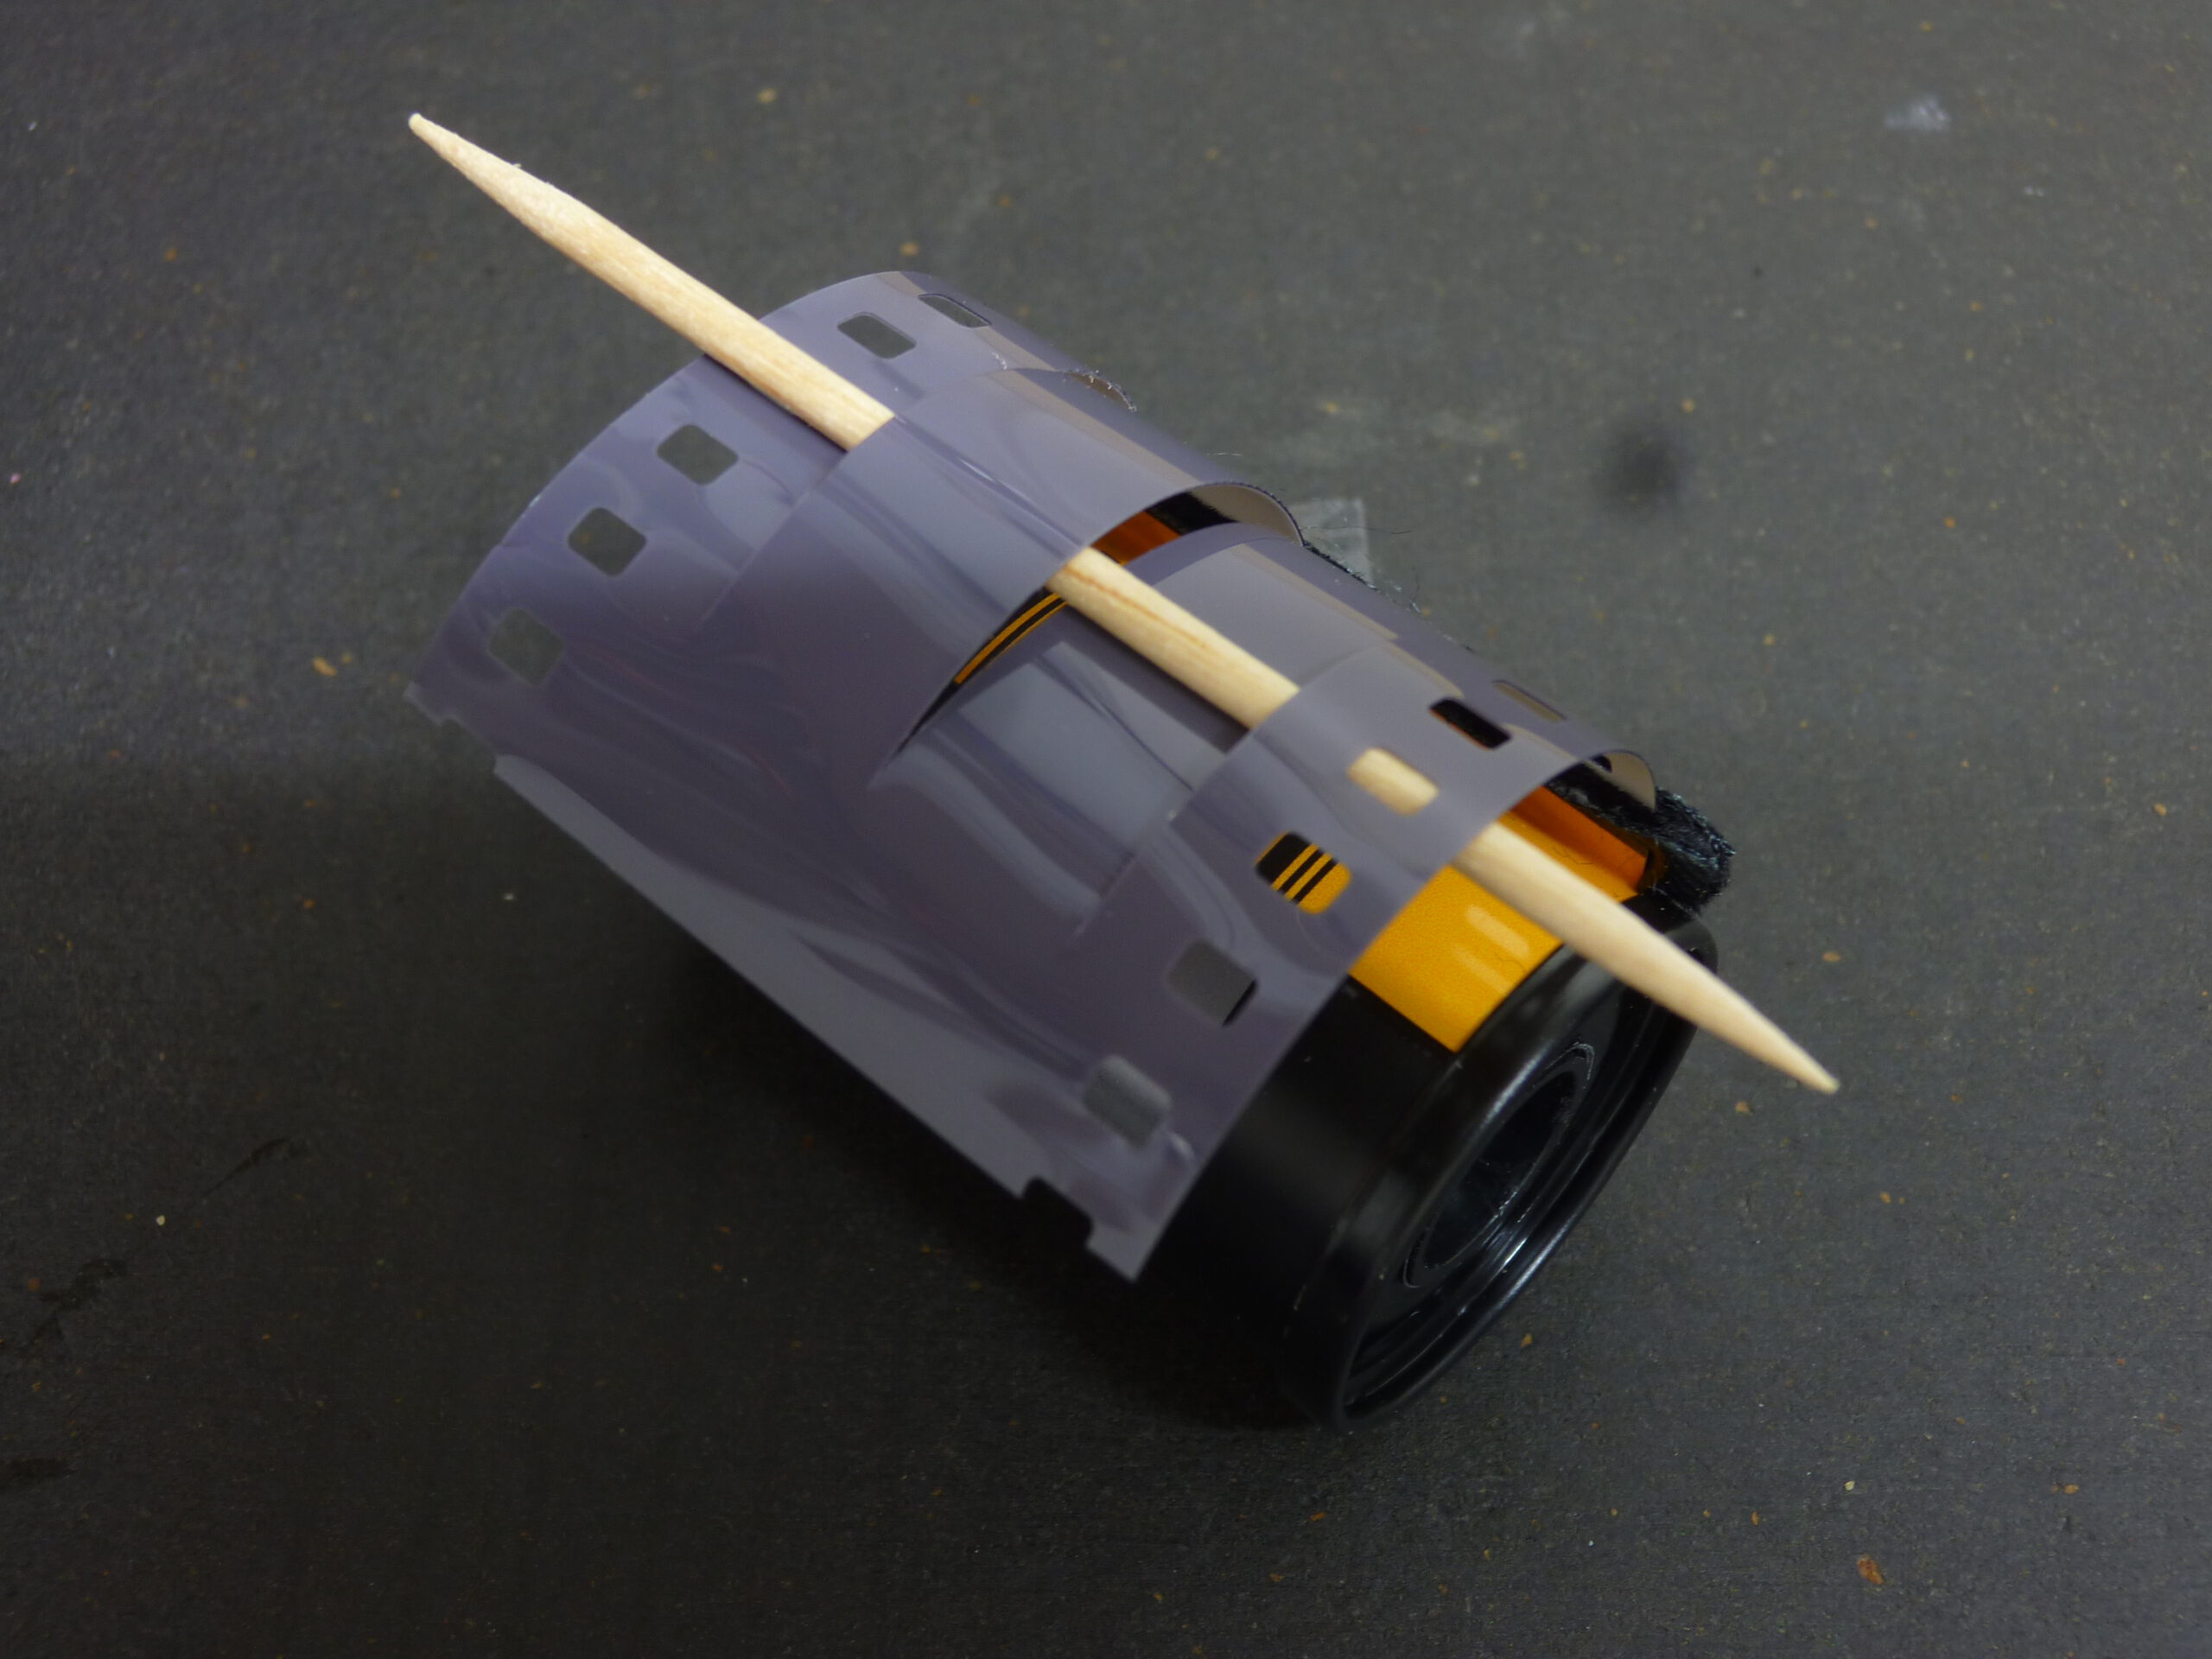
- Now, carefully press down the film in the center with a stick or similar tool so that the three blades penetrate the film. Do not use your fingers so that you do not injure yourself on the very sharp blades. This concludes the preparations. This is the state immediately before the film is cut:
The process of slitting
- The lid is placed on the slitter before the slitting process. In this way, the film is completely sealed off from light during slitting and we can continue working in the light.
- Now turn the crank until the film has been pulled all the way through. You will feel resistance at the end of the film.
Alternatively, you can stop after 16 revolutions. This transports 650 mm of film in the take-up cartridge. As we will later cut the film at our mark, 50 mm will be omitted, giving us the required 600 mm. - The slit film is now in the take-up cartridge.
The idea of determining the length of the film by the number of revolutions during slitting comes from Steve (perkeleellinen at photrio.com). - Now remove the lid from the slitter again.
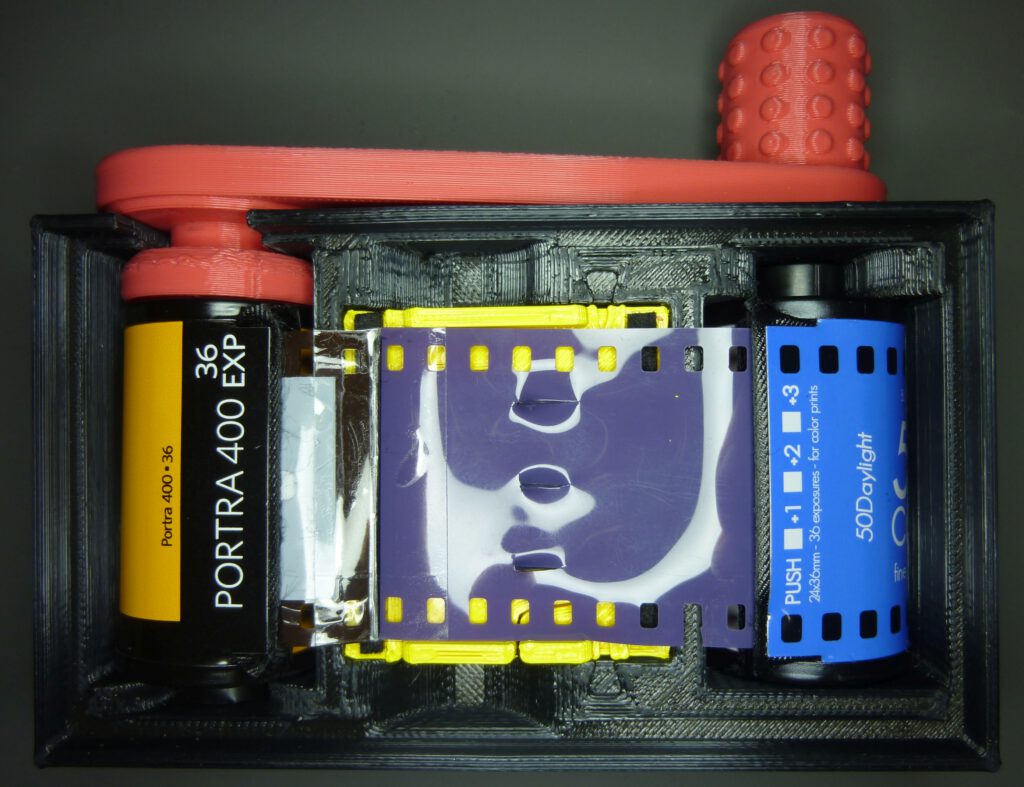
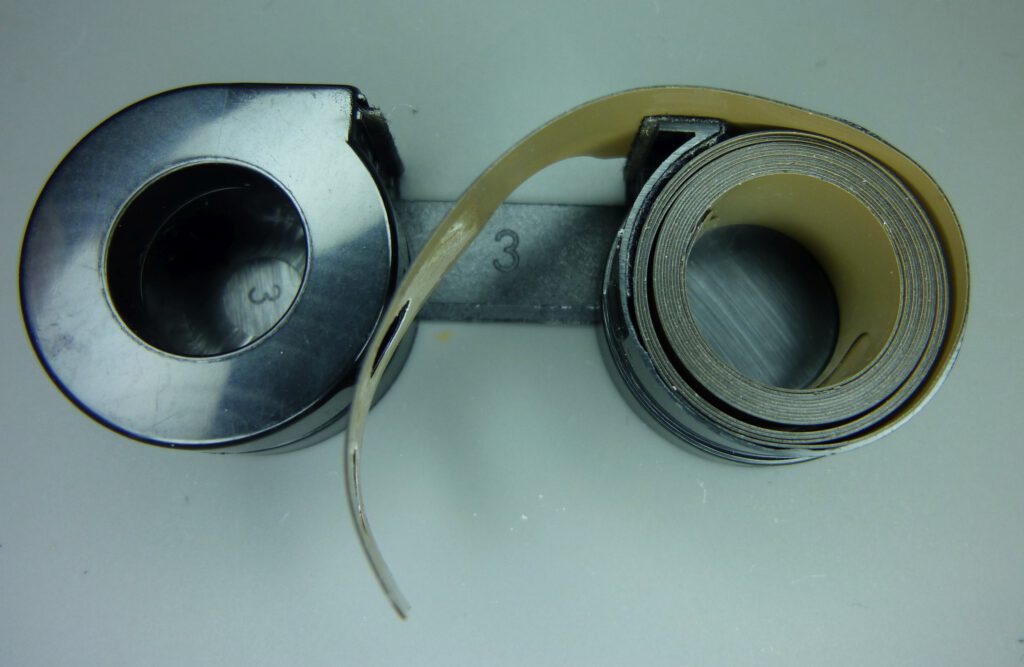
- Then carefully remove the two cartridges, making sure that no more film is pulled out of either cartridge.
- We can now see that the film is slit in the direction of the take-up cartridge. We then cut off the four strips just before the take-up cartridge. You have to make sure that you leave enough of the strips sticking out of the cartridge so that you can still pull them out easily in the dark. 10 to 20 mm should be enough.
Now we have four or two Minox films in a 135 cartridge. We can either keep them for later use or insert them into a Minox cartridge now, see the next chapter.
Loading the Minox cartridge
This step must take place in complete darkness. We therefore need a darkroom or a film change bag. We also need a pair of scissors and two Minox cartridges.
Attention: In my description here, I assume that you want to produce films with 36 exposures. Then you need 36 exp. cartridges. A 15-exp cartridge must not be used. You can read here why this is the case.
Preparation
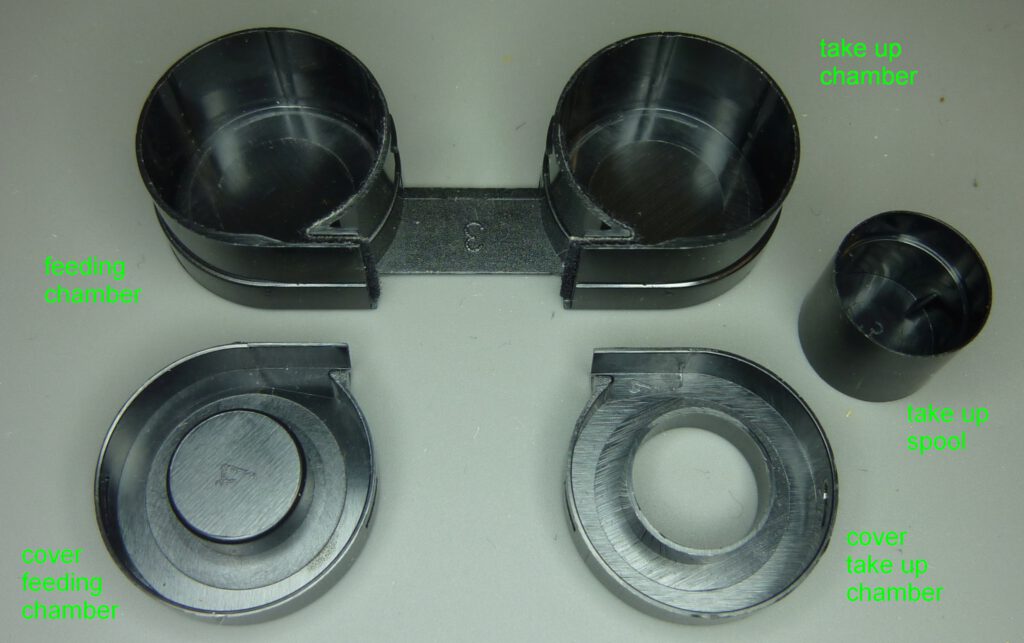
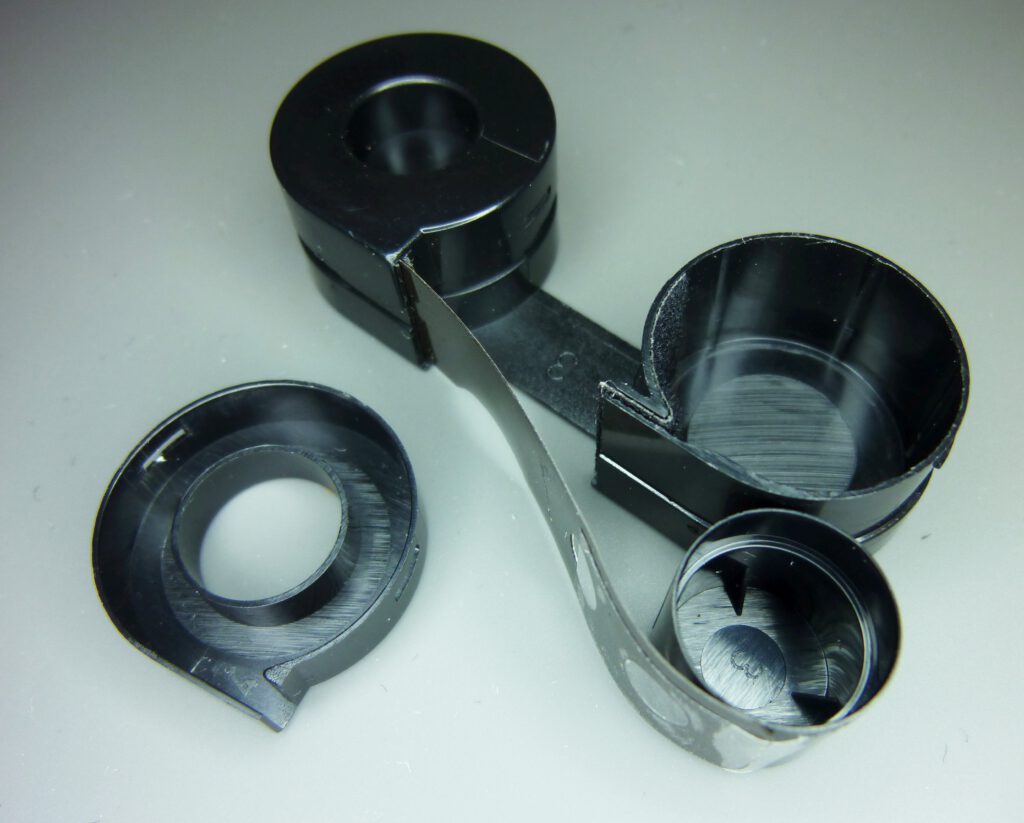
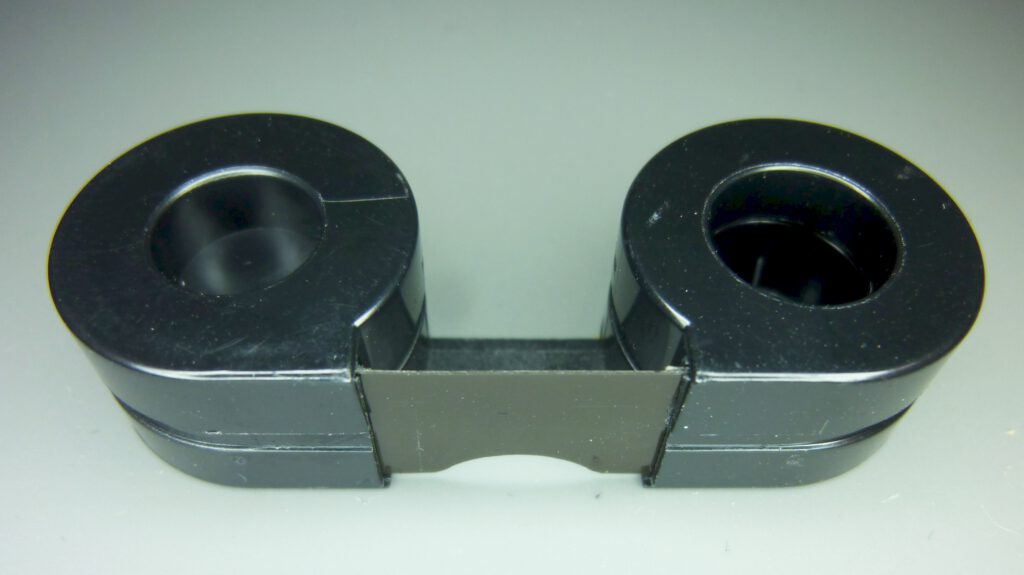
Before we start here an overview of the four components of the Minox film cartridge:
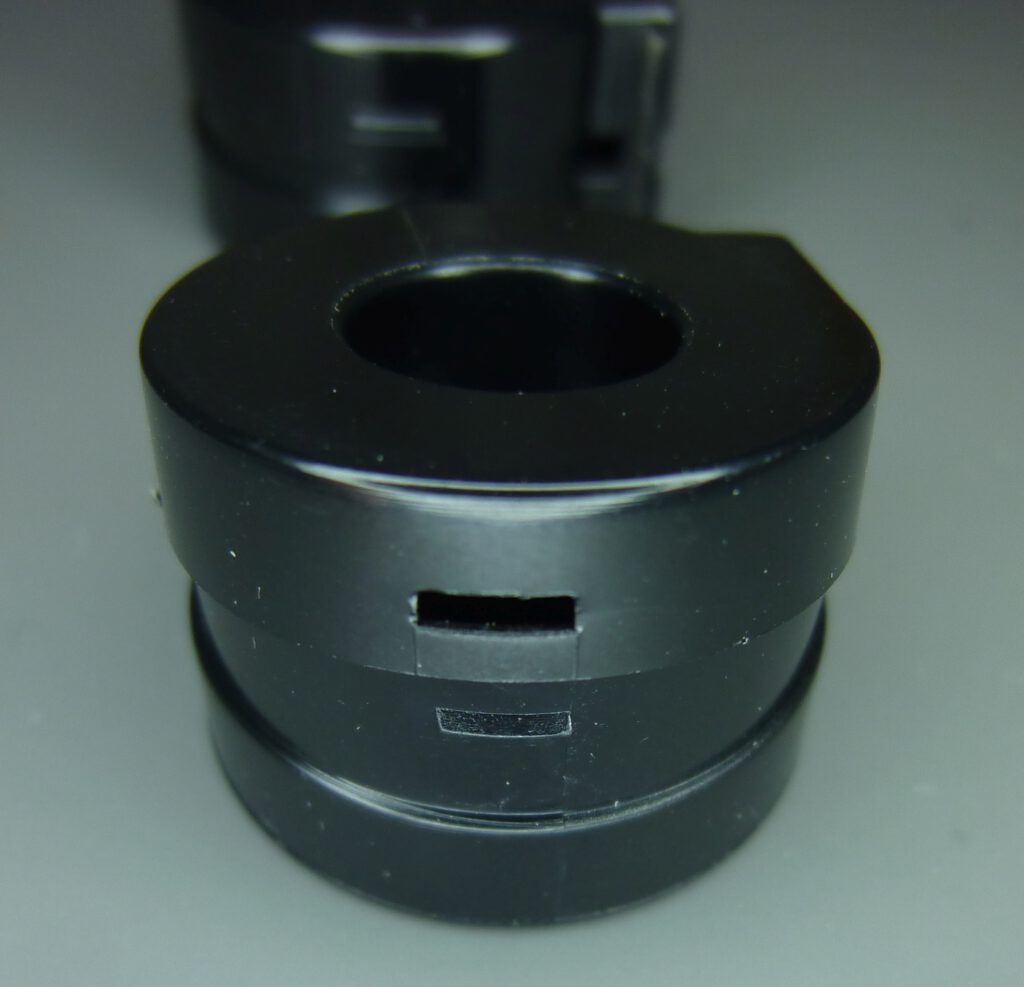
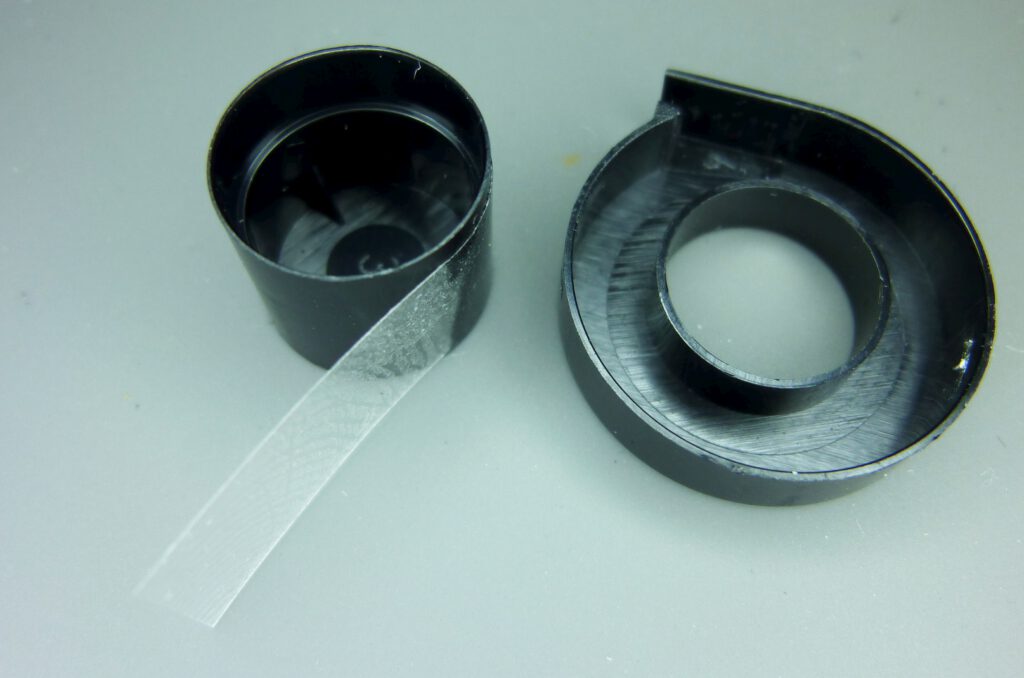
To open a film chamber, carefully press your fingernail into the groove on the housing, underneath the locking tab. Then pull the cap upwards.
Note: It is sufficient to open the latch on one side of the chamber. The lid can then be pulled off by gently tilting it, see picture.
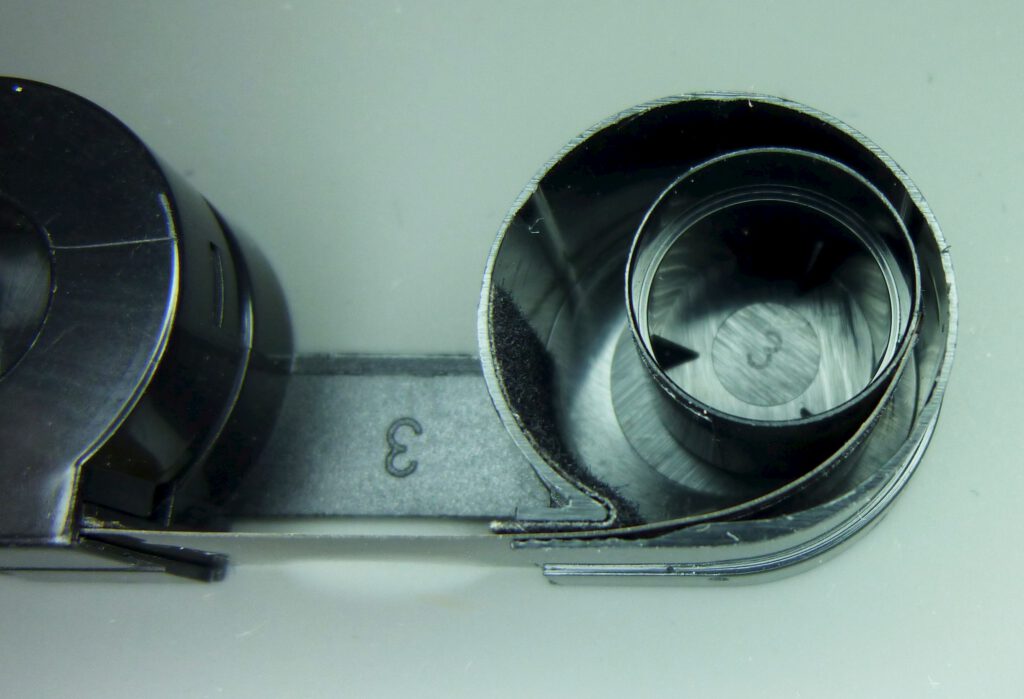
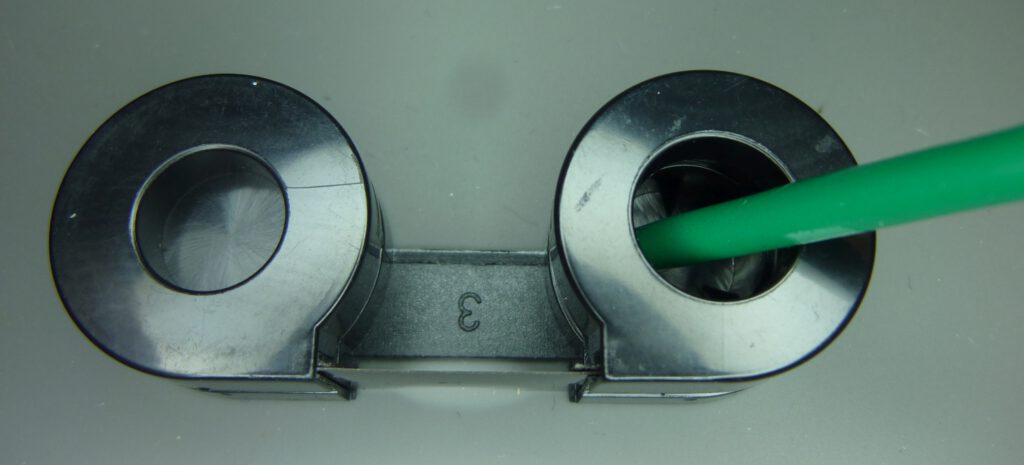
To make things as easy as possible in the dark, you should only open the feeding chamber of the Minox cartridge. This is the chamber into which the film is inserted. The other chamber remains closed so that the two chambers cannot be mixed in the dark:
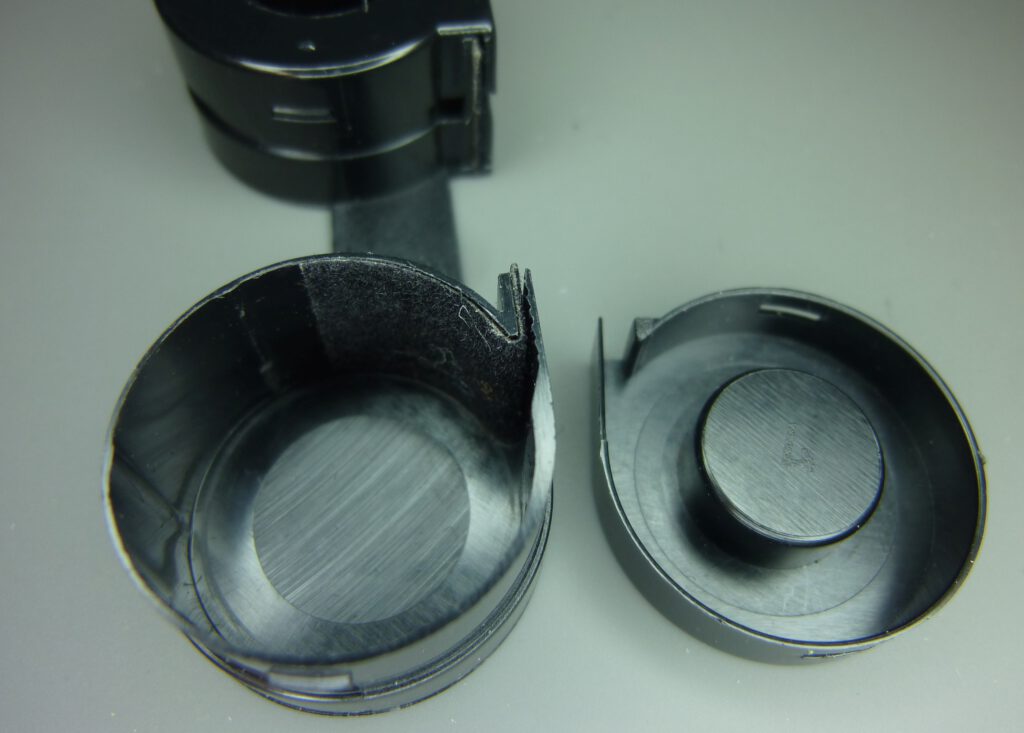
Note the felt light trap in the chamber.
For the following steps, you need complete darkness. You can either carry them out in a completely darkened room or use a changing bag.
We now pull the four film strips together completely out of the take-up cartridge. Then we feel for the marking we made earlier. There we cut off all four strips together.
Throw the two perforated strips on the floor so as not to confuse them with the Minox strips (or put them far away in the change bag).
Assembling the film cartridge part I
Take a Minox film strip, hold the roll by the edge and carefully pull it to the smallest possible diameter. Pull off approx. 30 mm end, take the Minox cartridge in your right hand and insert the roll into the right housing.
Pull the free film end from above through the felt light trap to the left and put on the feeding chamber cover:
Now the critical part, which has to be completed in total darkness, is finished.
Assembling the film cartridge part II
You may carry out these steps in subdued light
Our task now is to attach the free end of the film for the film transport.
Now that the film is completely sealed in the feeding chamber except for the short initial section, we can do the rest of the work in the light. Nevertheless, I would dampen the light as much as possible, i.e. only enough light so that you can just see what you are doing. This is because the gap through which the film is fed to the outside is not perfect, despite the felt seal, so I would avoid too much brightness.
But of course, it’s a huge advantage that you don’t have to do this tricky work in the dark.
Prepare a piece of adhesive tape, the height of the coil core (9 mm), 45 mm long:
Place the prepared tape around the coil core and tape the end of the film. Make sure that the opening of the take-up spool is pointing upwards:
Thread the end of the film into the take-up chamber and insert the spool with film through the felt light trap:
Put on the housing cover of the take-up chamber
Insert the cartridge into the Minox storage box and close it. You will need to center the spool with a rod so that the cover can be fitted:
The cartridge is now fully loaded and should be placed in the film box immediately to protect it against bright light:
If you want to transport the film in the Minox cassette by hand, you can do so very comfortably with an 8 mm dowel:
Video Tutorial
Here you can also find a video by Andrew Long that shows the process in a similar way to the one described here.
Conclusion
The work is actually not very difficult to carry out. The challenge is the work that has to be done in complete darkness. In any case, it is a good idea to practice this process in the light with a piece of exposed film.
- I have no commercial relationship with the manufacturer of the slitter, but procured it at my own expense. ↩︎
Thanks for this! I have this slitter, but I haven’t used it yet because I still have a few rolls of Minox film left. Your detailed explanation is a great help.
The Italian slitter is excellent, but use it carefully to the get the best results. The upgraded crank handle available from the manufactuer is far better than the ungrippy default supplied. It cuts at 9.2mm high.