
Historic pre-1960 cameras often do not have a light meter. Or you have a light meter with selenium cells that no longer works. Then you have to determine the exposure time yourself. Although today’s films can tolerate large exposure errors, it is of course better if the exposure is correct. Then the exposure latitude of the film works like the HDR function on the digital camera.
Since I shoot with historical miniature cameras, I think it would be silly to carry external light meters that are bigger than the camera itself. So it makes sense to use a light meter that I always have with me anyway, namely my smartphone. There are a lot of light meter apps out there, but I personally don’t like most of them that much. Some try to imitate historical light meters with their layout and are therefore confusing. Others have so many unnecessary functions that they are also difficult to use and confusing.
In the end I found the “Light Meter EV for Photography” from JB Mobisoft and have been using it for a long time, especially for the Minox A. The developer is available and even updated it last year at my request so that I can continue to use the app on my old smartphone with Android 8.
Using the app
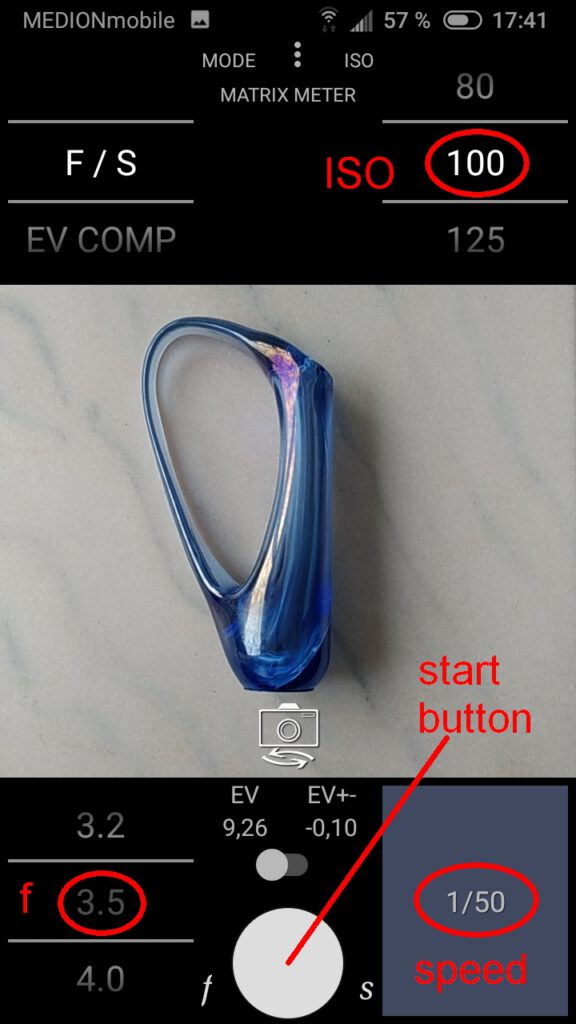
The app is extremely easy to use. You set the Minox aperture f/3.5 and the ISO value for the film speed one time.
Point the smartphone at the subject you want to measure. After pressing the start button, the required exposure time appears. Done.
Additionally displayed values
The measured EV value is displayed above the start button. EV values range from 0 (dark) to 16 (very bright).
To the right, the incorrect exposure is displayed in EV units for the determined exposure time. In our example, setting the camera to 1/50 s would result in an incorrect exposure of -0.10 EV. You would therefore overexpose very slightly. Normally you don’t have to take this value into account unless you have a film with a very small exposure latitude.
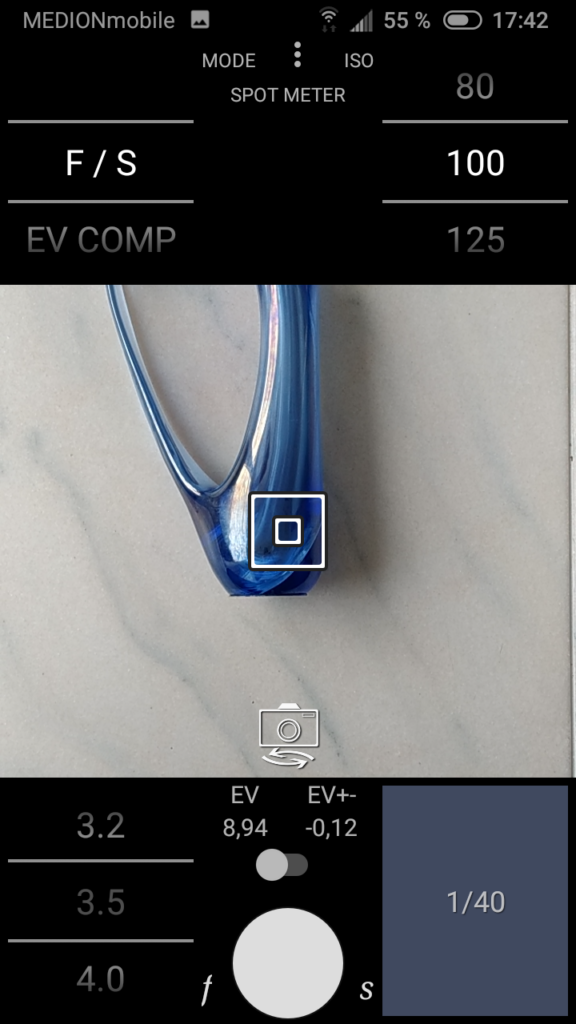
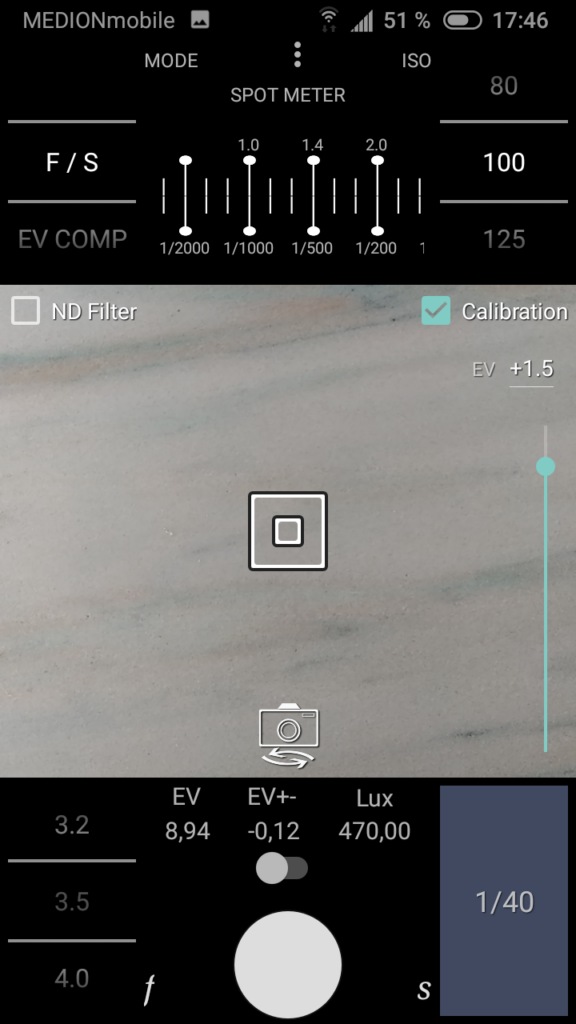
Spot measurement is also possible. To do this, tap on the image area or on “MATRIX METER” at the top. The spot symbol appears and the exposure is then determined for this point only.
Hit on “SPOT METER” to return to the previous mode.
Set options
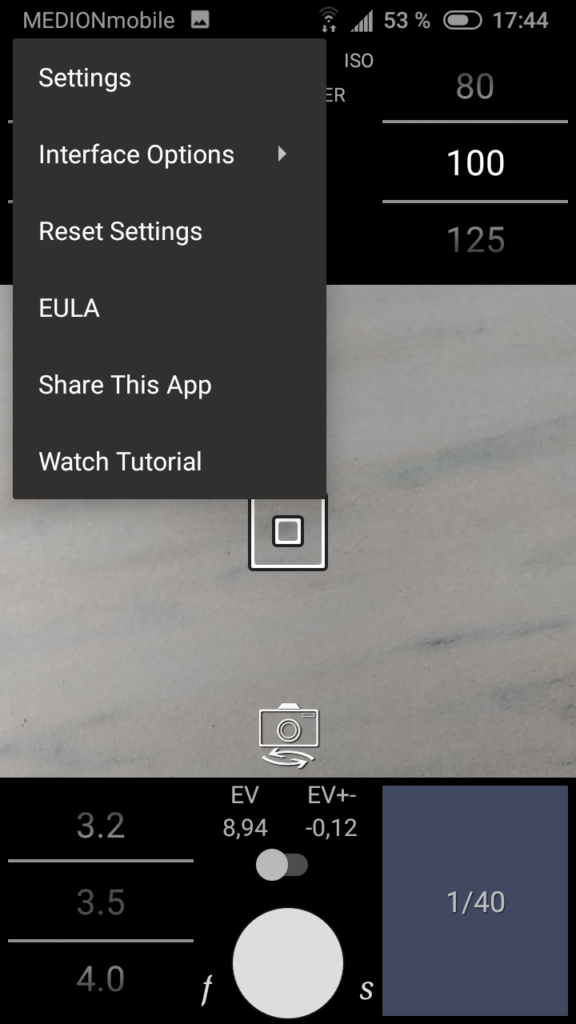
To make the interface work as shown above, you must set the options as follows. To access the options menu, press the three dots in the top center. Then select “Settings”:

Select “Thirds” as the value increment. Leave the other options as they are.
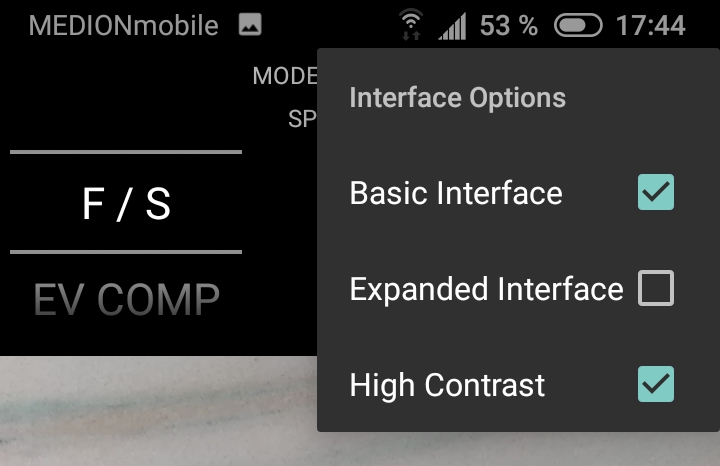
Now select “Interface options” in the main menu:
Select “Basic Interface” if you are working with Minox cameras, as this contains all the necessary information.
“High contrast” is always good, especially outdoors in bright light.
Adjusting (calibrating) the measurement
It is not normally necessary to calibrate the app. You can recognize this by the fact that the camera built into your smartphone takes correctly exposed photos. However, if the films exposed with the app are not optimally exposed, you should calibrate the app.
The ability to adjust the measured brightness value is very advantageous. So if you have another trustworthy light meter or can borrow one, compare the measured value with the app. It may be that the values differ significantly. Then set the Lightmeter app once to this value so that it displays the same as the light meter.
Go to the Settings menu and select “Calibration Range”: Select the middle value (+- 6 EV).
In the “Interface Options” menu, deactivate the “Basic Interface” entry.
You will then see the “Calibration” checkbox and a slider in the image area on the right. You can use this to set the correction value. If you don’t know which value to set, simply try until the app delivers the same value as your external light meter.
A more laborious, but also more reliable method is to create an exposure series with your preferred film and select the best exposed negative. The exposure used for this then gives the calibration value.
So if, for example, the negative exposed at 1/200s is optimal, while the app had specified 1/75s, the app has determined the EV value to be 1.5 too low. The calibration value must then be set to EV +1.5.