I had a Minox A IIIs with an unreliable frame counter. Most of the time, it counted up by one frame when cocking, but occasionally the advance mechanism didn’t work. So I could never really be sure whether the number of frames displayed was correct.
This malfunction can easily be overlooked because you don’t check after each time you push the Minox together to see if the frame counter has continued to turn. This is a critical situation, because it can lead to you taking photos even though the film is already full. Perhaps this is also the case with your Minox and you just haven’t noticed it yet. Maybe you’ve wondered why sometimes the last photos you took are missing from the film. If so, this could be the reason.
You can easily test whether the image counter is working. Follow my instructions here.
Page Contents
How the frame counter works
To understand why this is, we first need to look at how the Minox frame counter works. We are talking here about the Minox A and B. Later models have a modified film advance with freewheel.
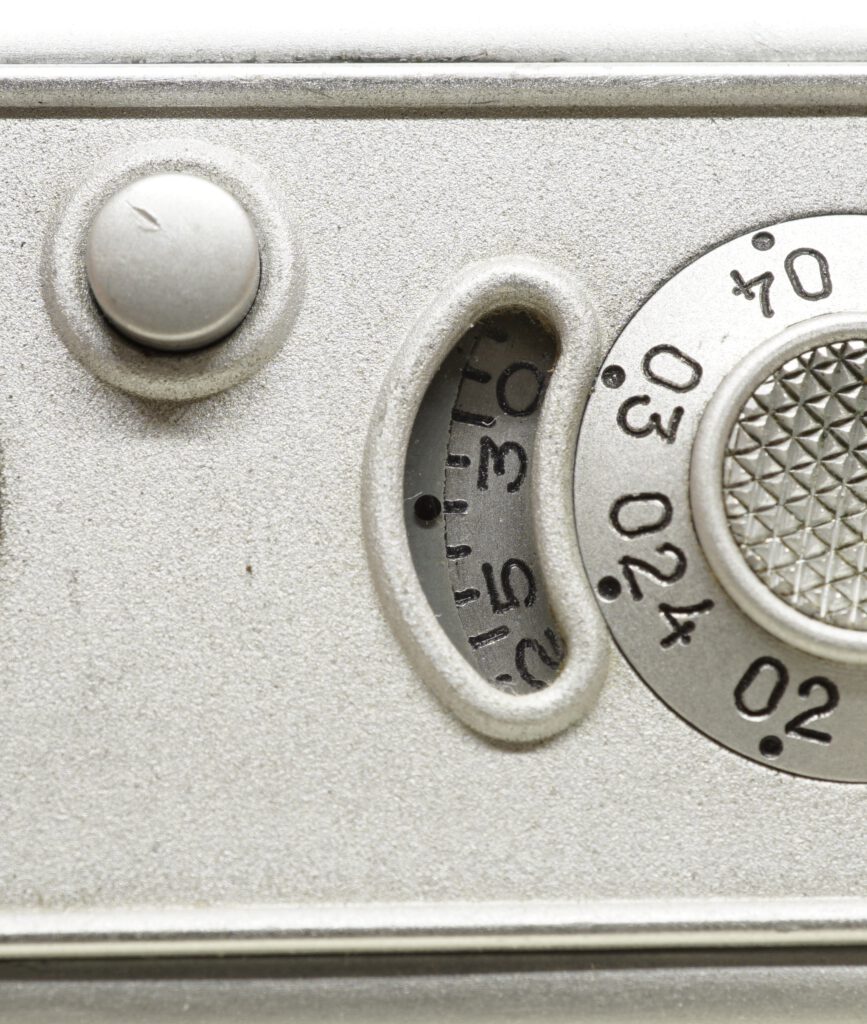
The Minox has the frame counter next to the distance setting dial. This is because this dial is on the same axis as the frame counter’s number dial:
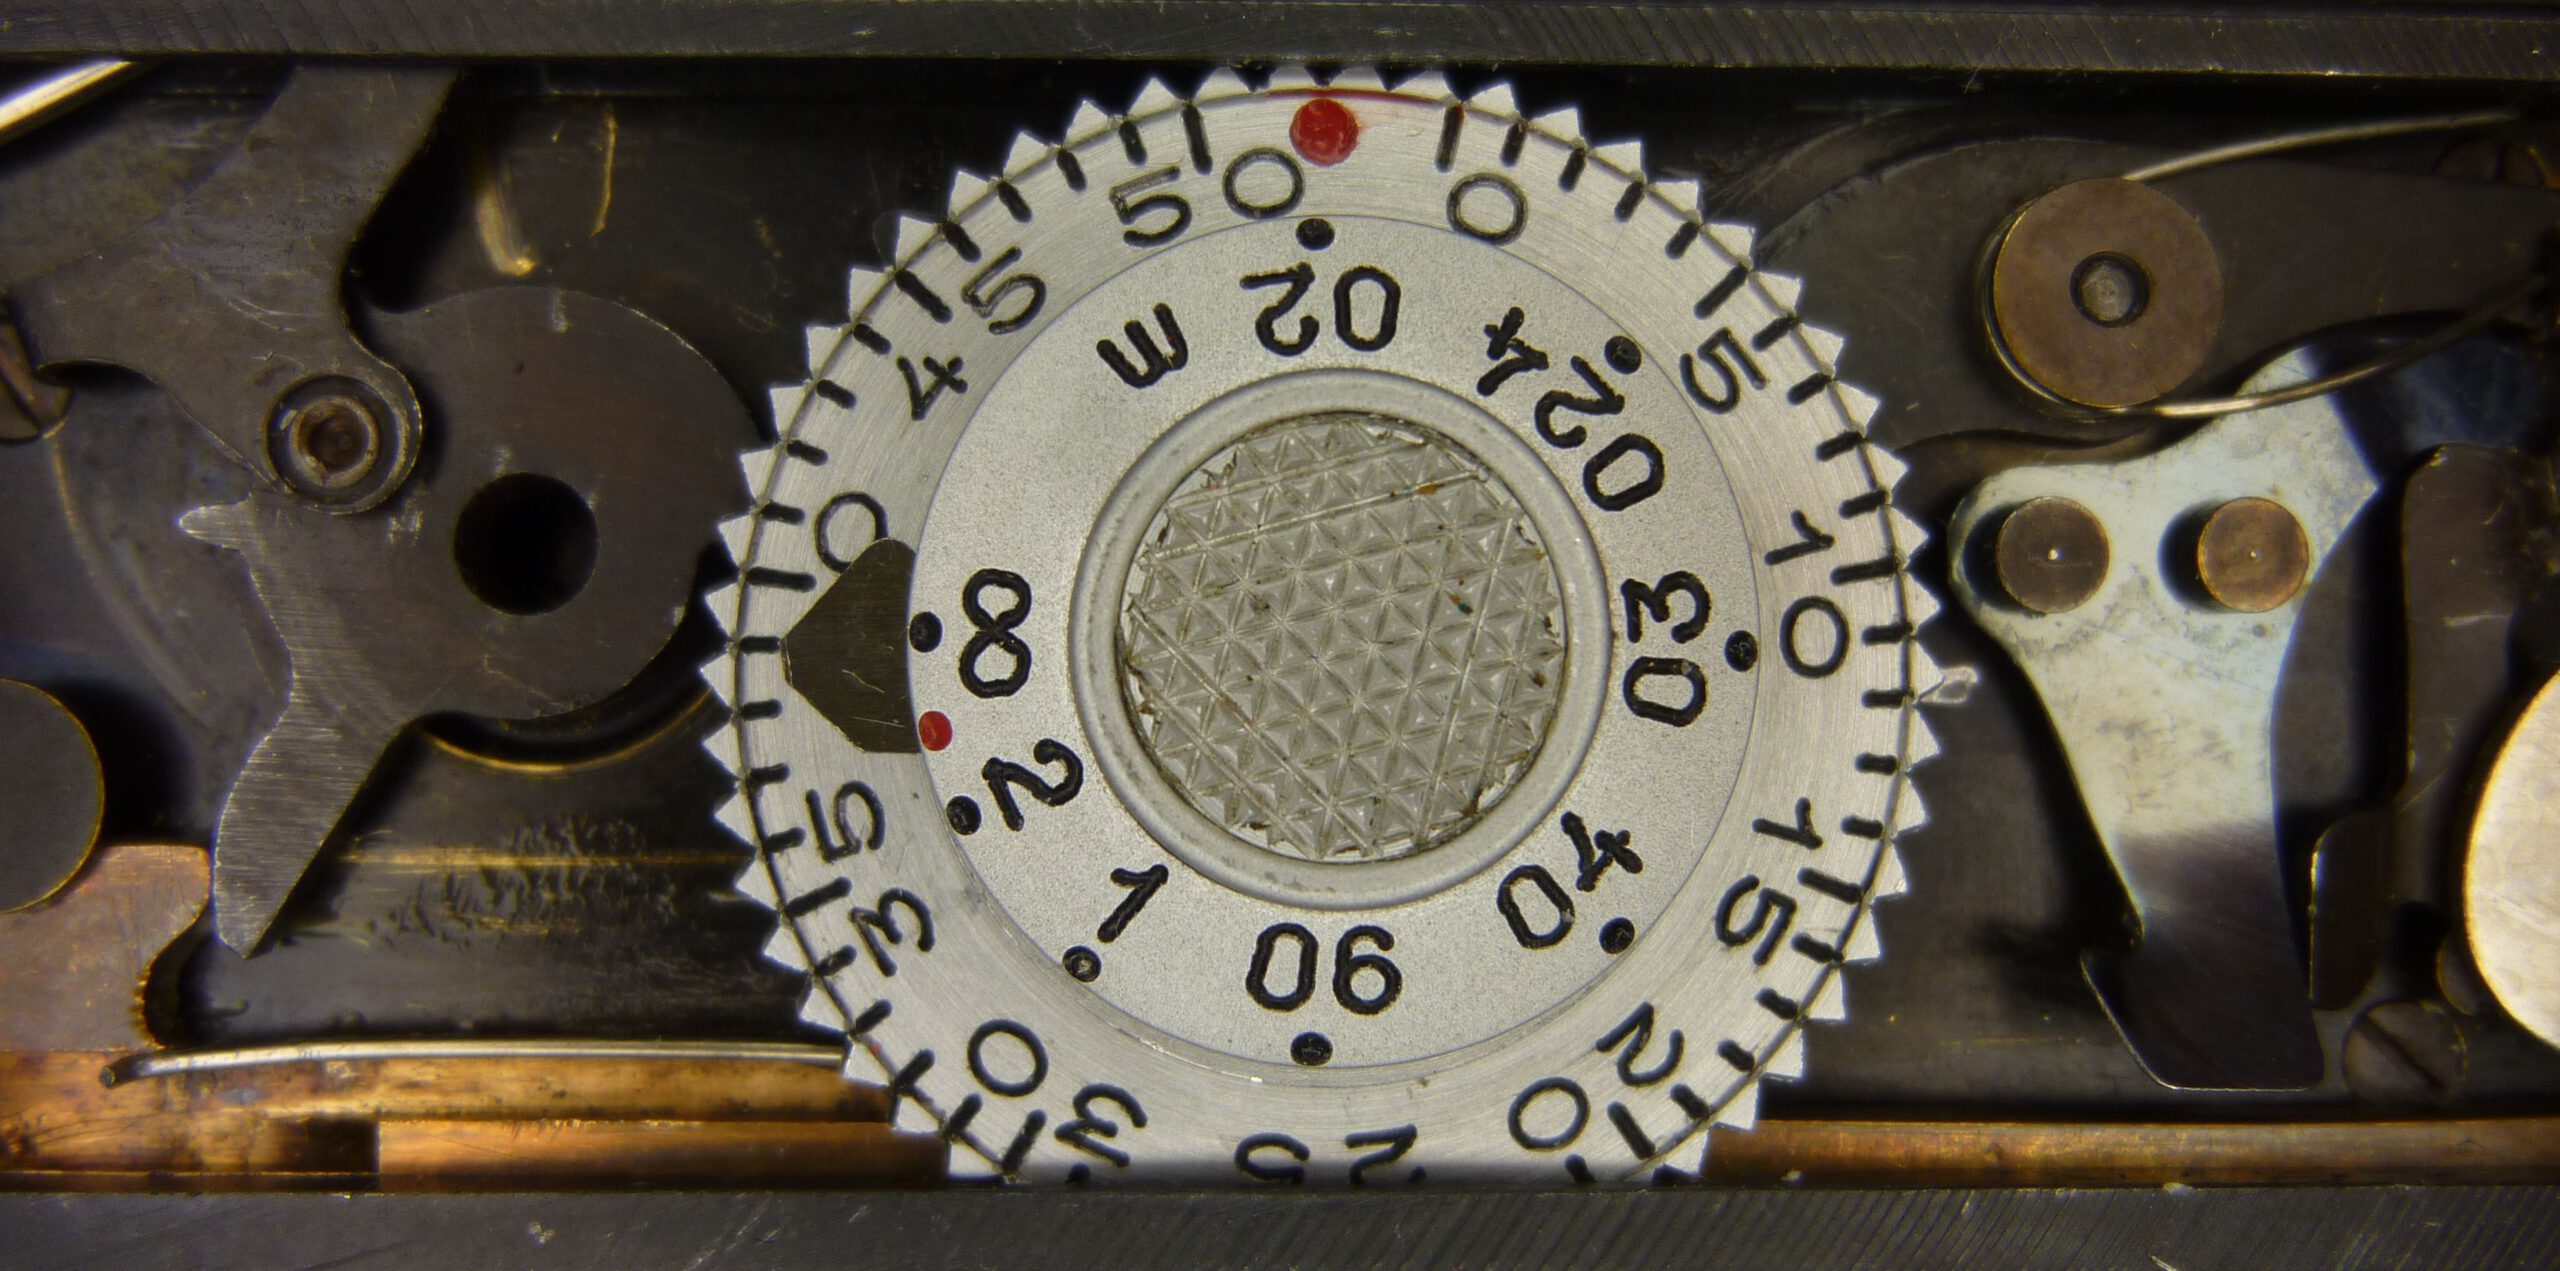
The teeth on the outer edge of the number dial are crucial. During each winding process, the spring hooking arm moves the dial forward by one tooth. I recommend that you read the detailed description of the Minox cocking process again here.
In addition to its other tasks, the spring hooking arm also has the task of turning the frame counter by exactly one frame.

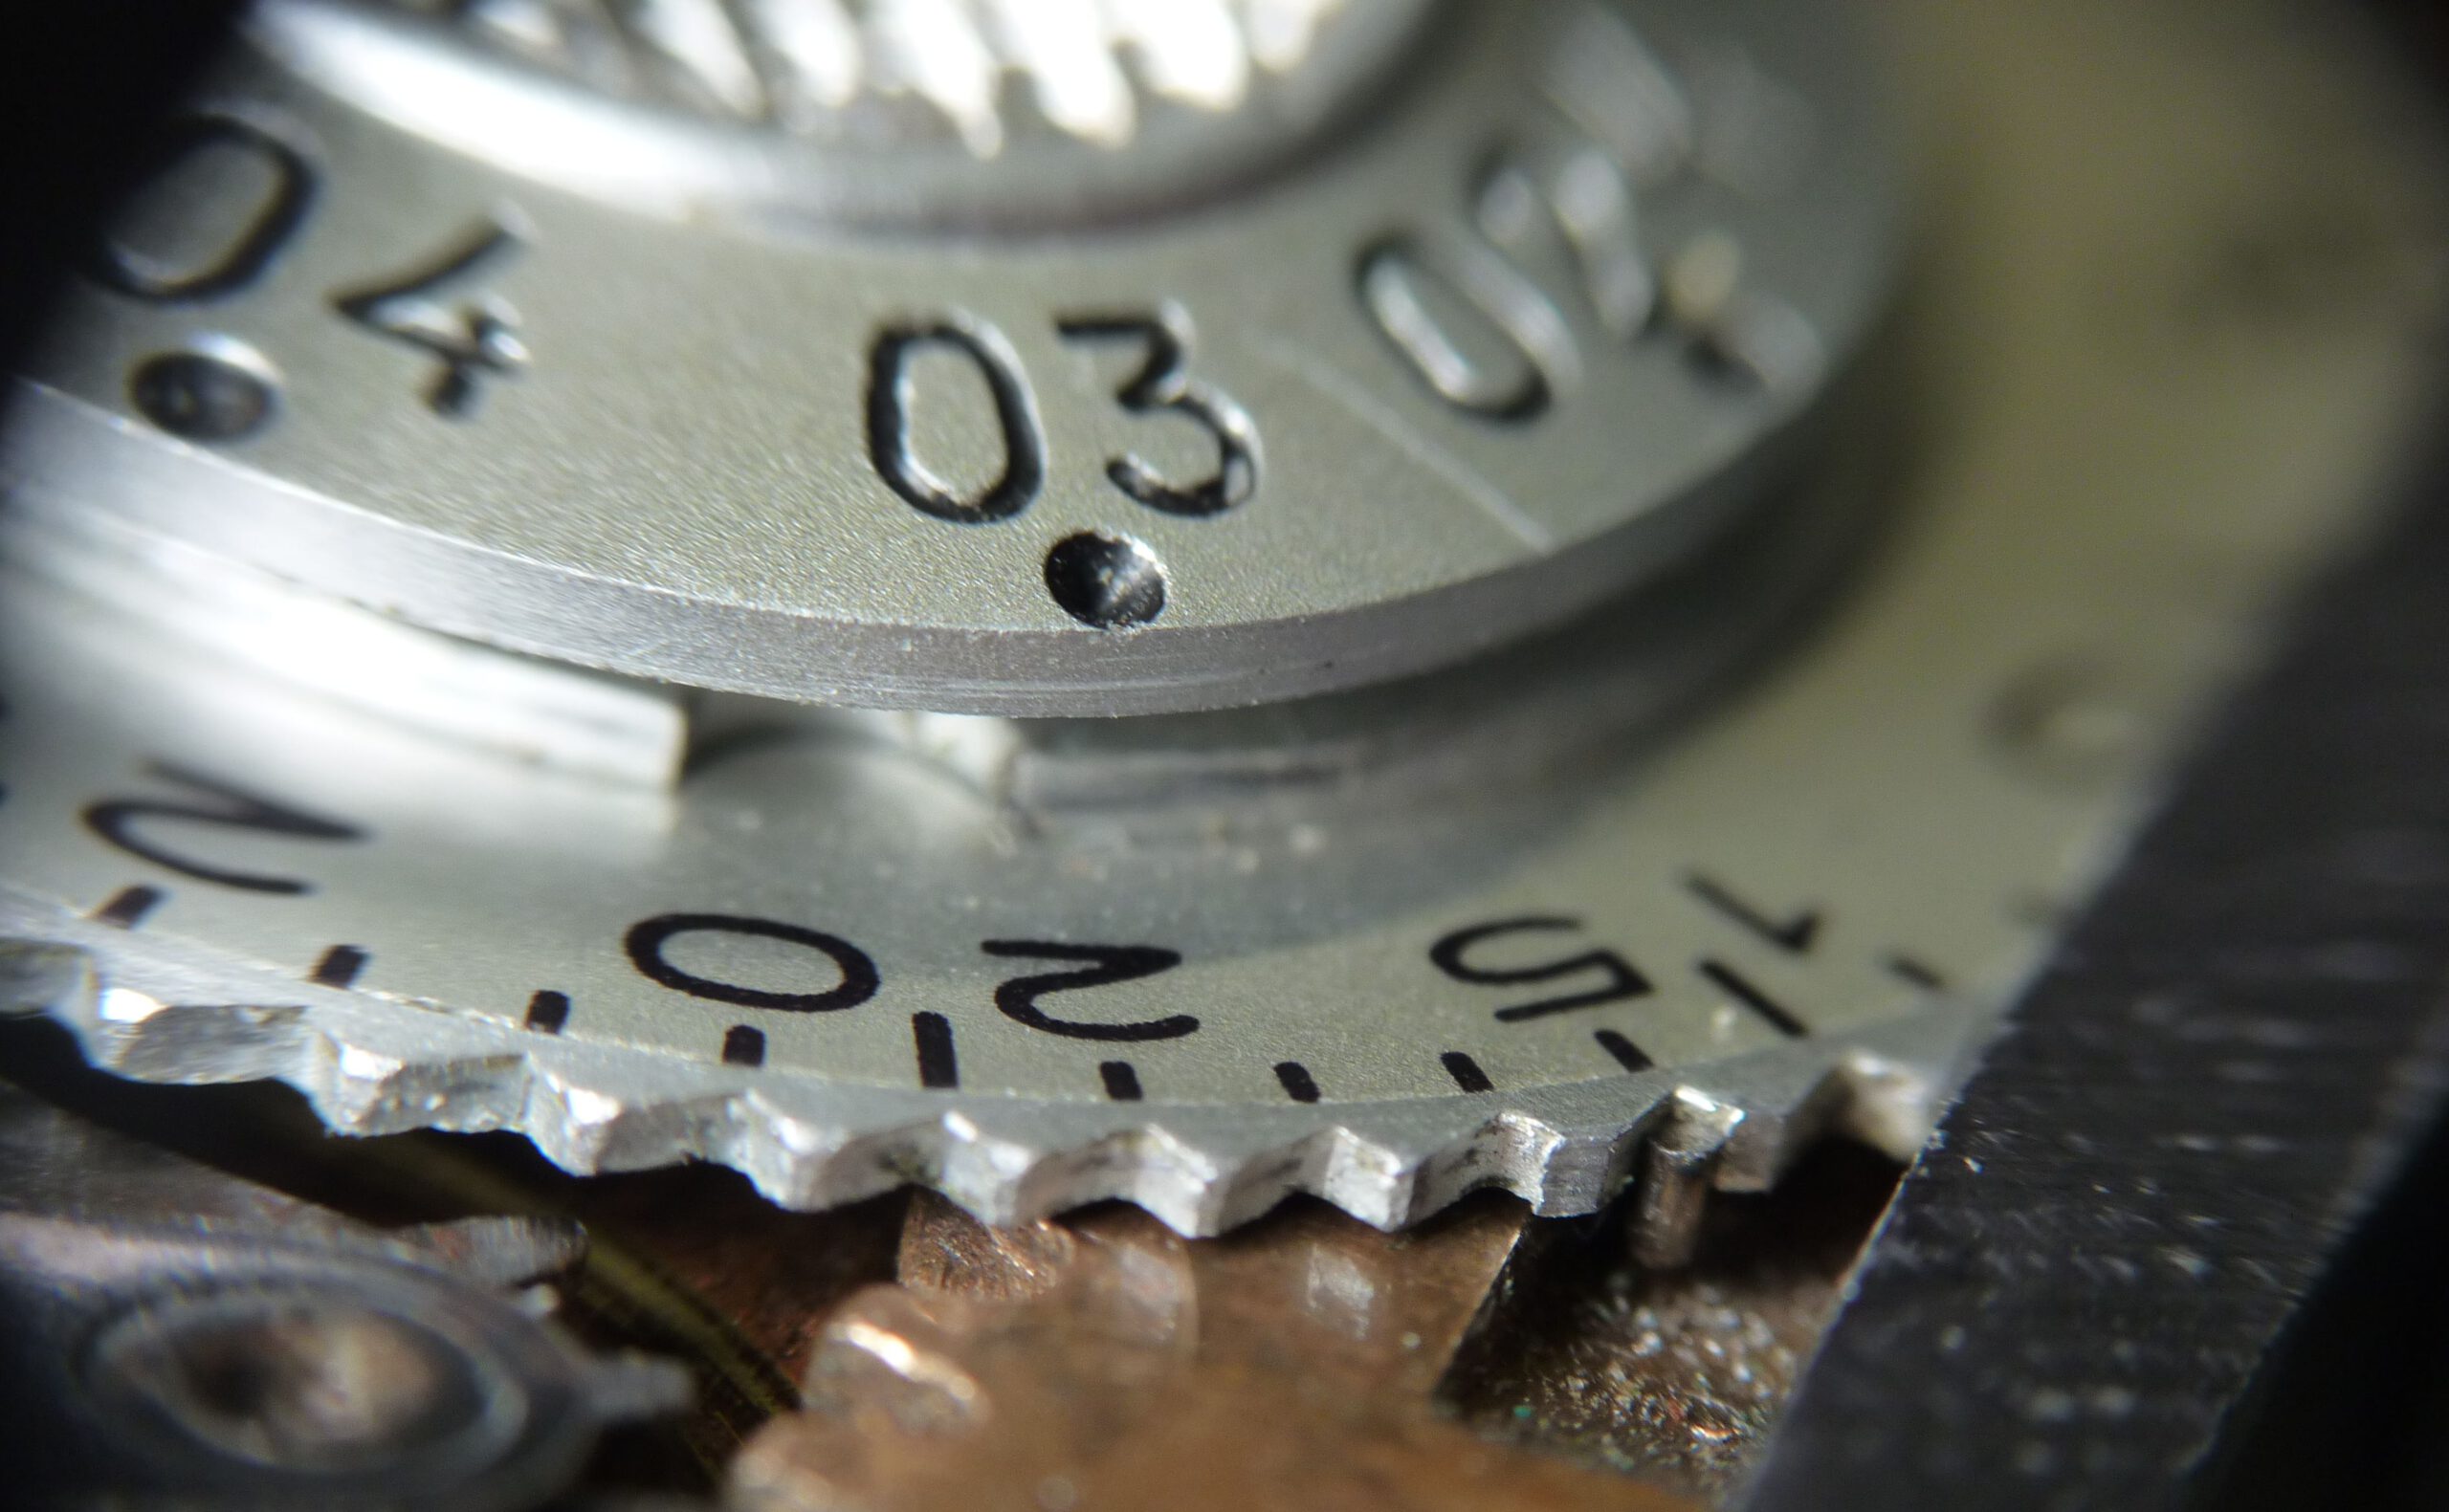
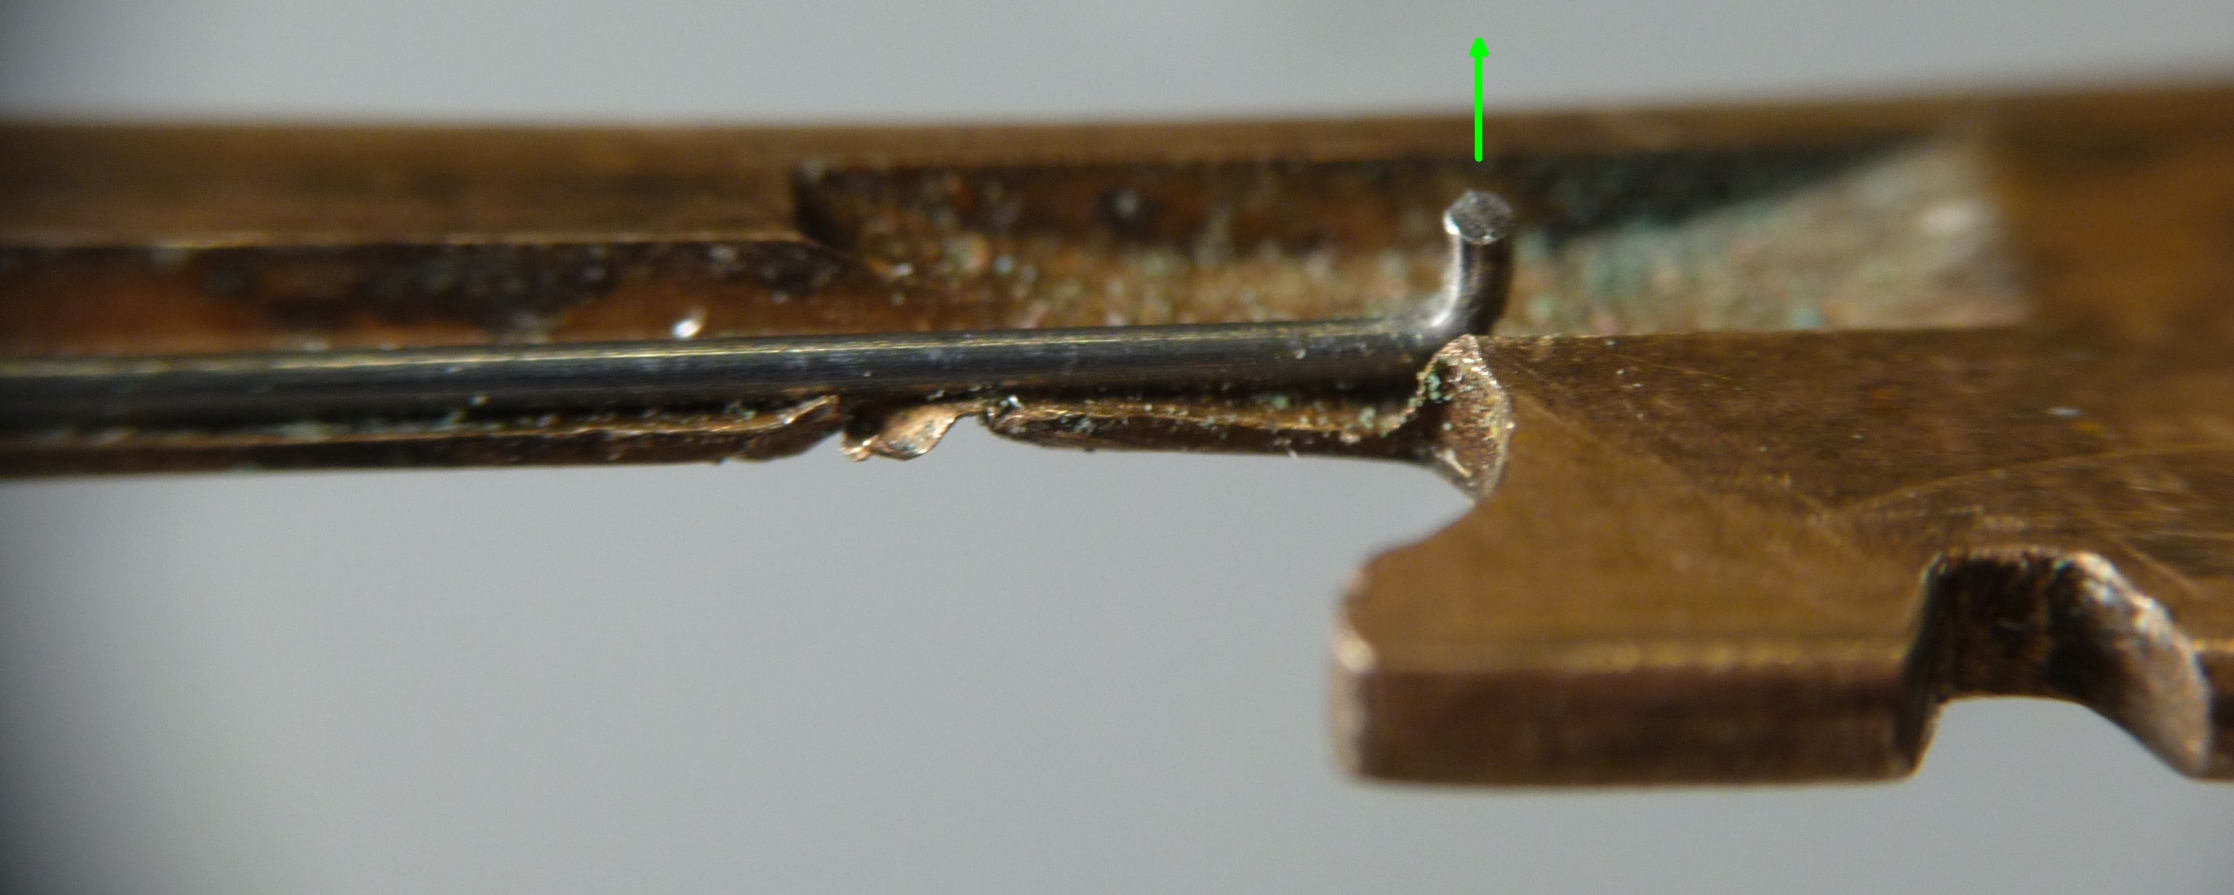
If we look closely, we can see that it has a spring wire bent into a right-angled hook at the end for this purpose (green circle):
During the cocking process, the spring hooking arm moves to the left in the direction of the arrow. Shortly before the end of the movement, the hook engages in a tooth gap and thereby rotates the toothed disc by exactly one division. The spring slides sidewards through elastic deformation in order to be able to follow the tooth gap:

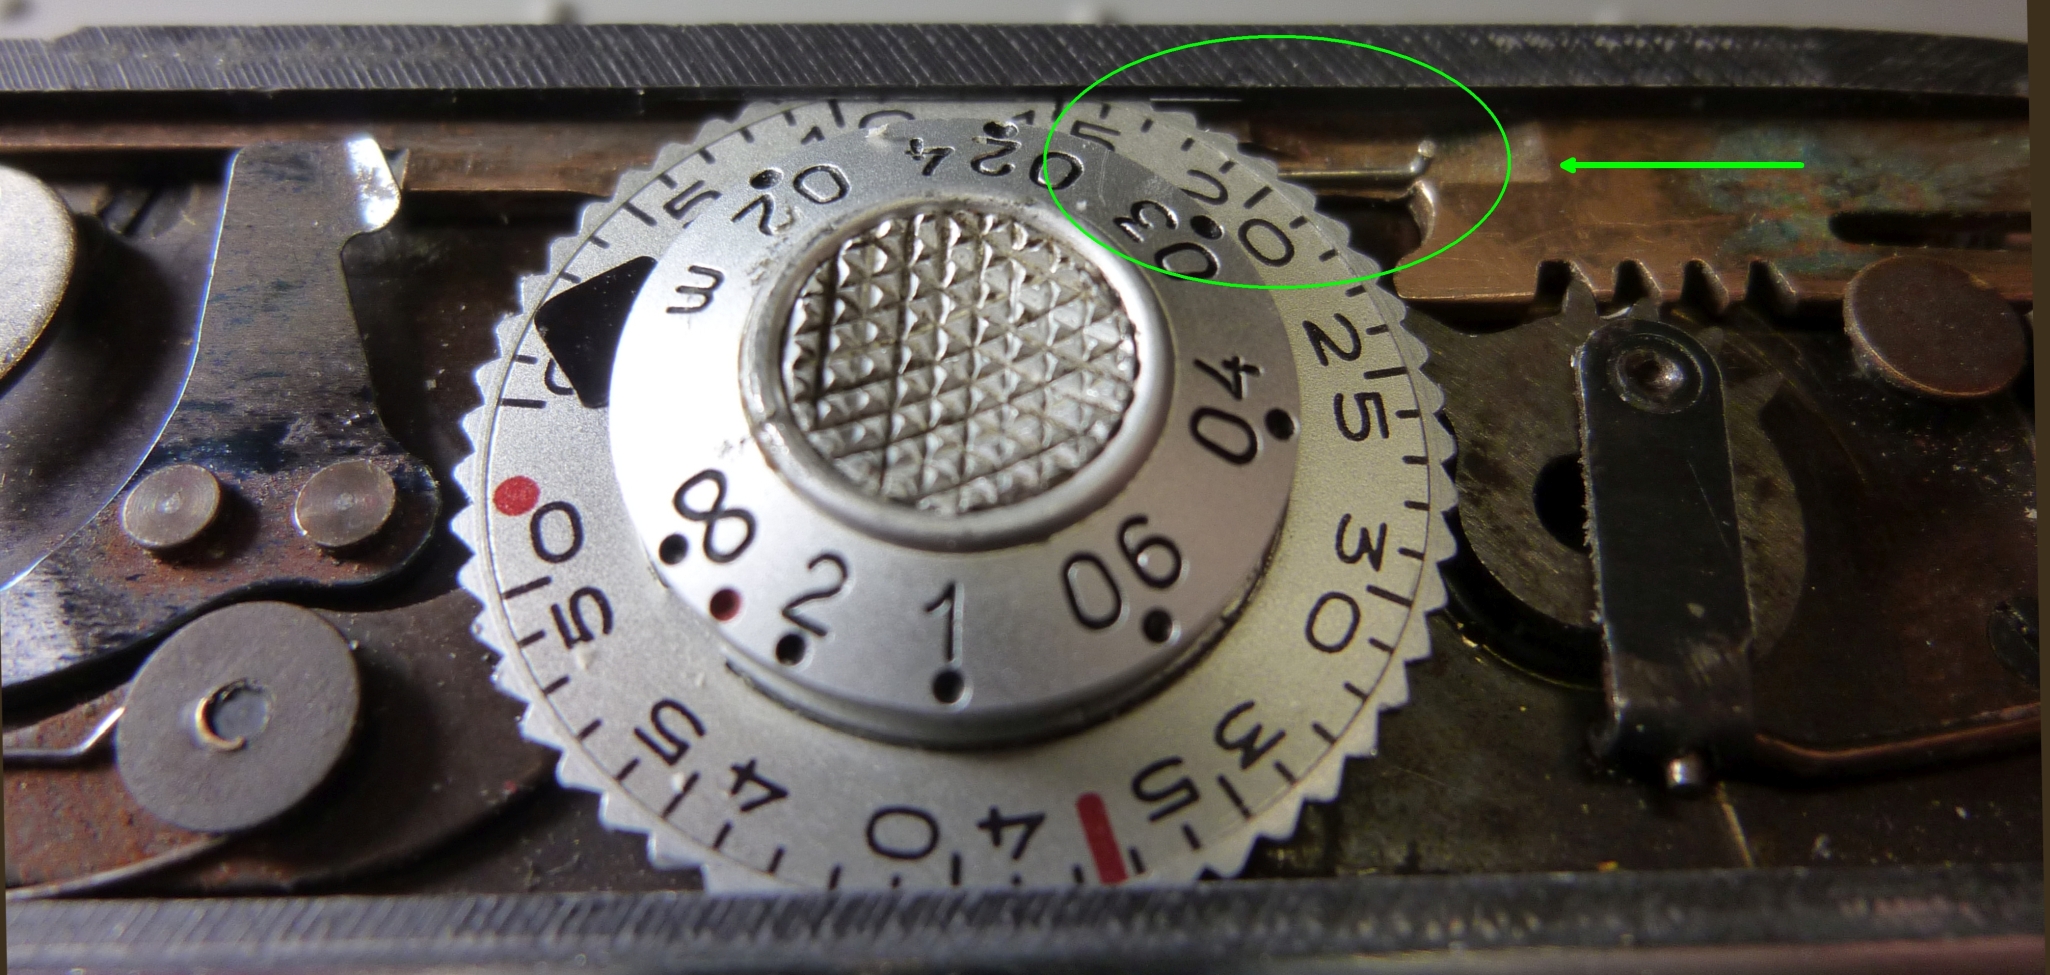
The following close-up clearly shows how the end of the spring wire engages with the tooth gap and rotates the number disc in the direction of the arrow when moved:

The cause of the malfunction
However, on my Minox A, the pin was not high enough and sometimes slipped under the number disc during the cocking process. As a result, the disc did not turn and the counter remained at the same position.
Fixing the problem
Please read our Legal Disclaimer before proceeding.
The repair is simple. Bend the spring wire upward (in the direction of the arrow) until it securely engages with the number disc.
The repair step by step
Open the housing
Remove the bottom part of the housing. Read here in the article on opening the housing how to do it.
It is not necessary to open the control panel of the housing for this repair.
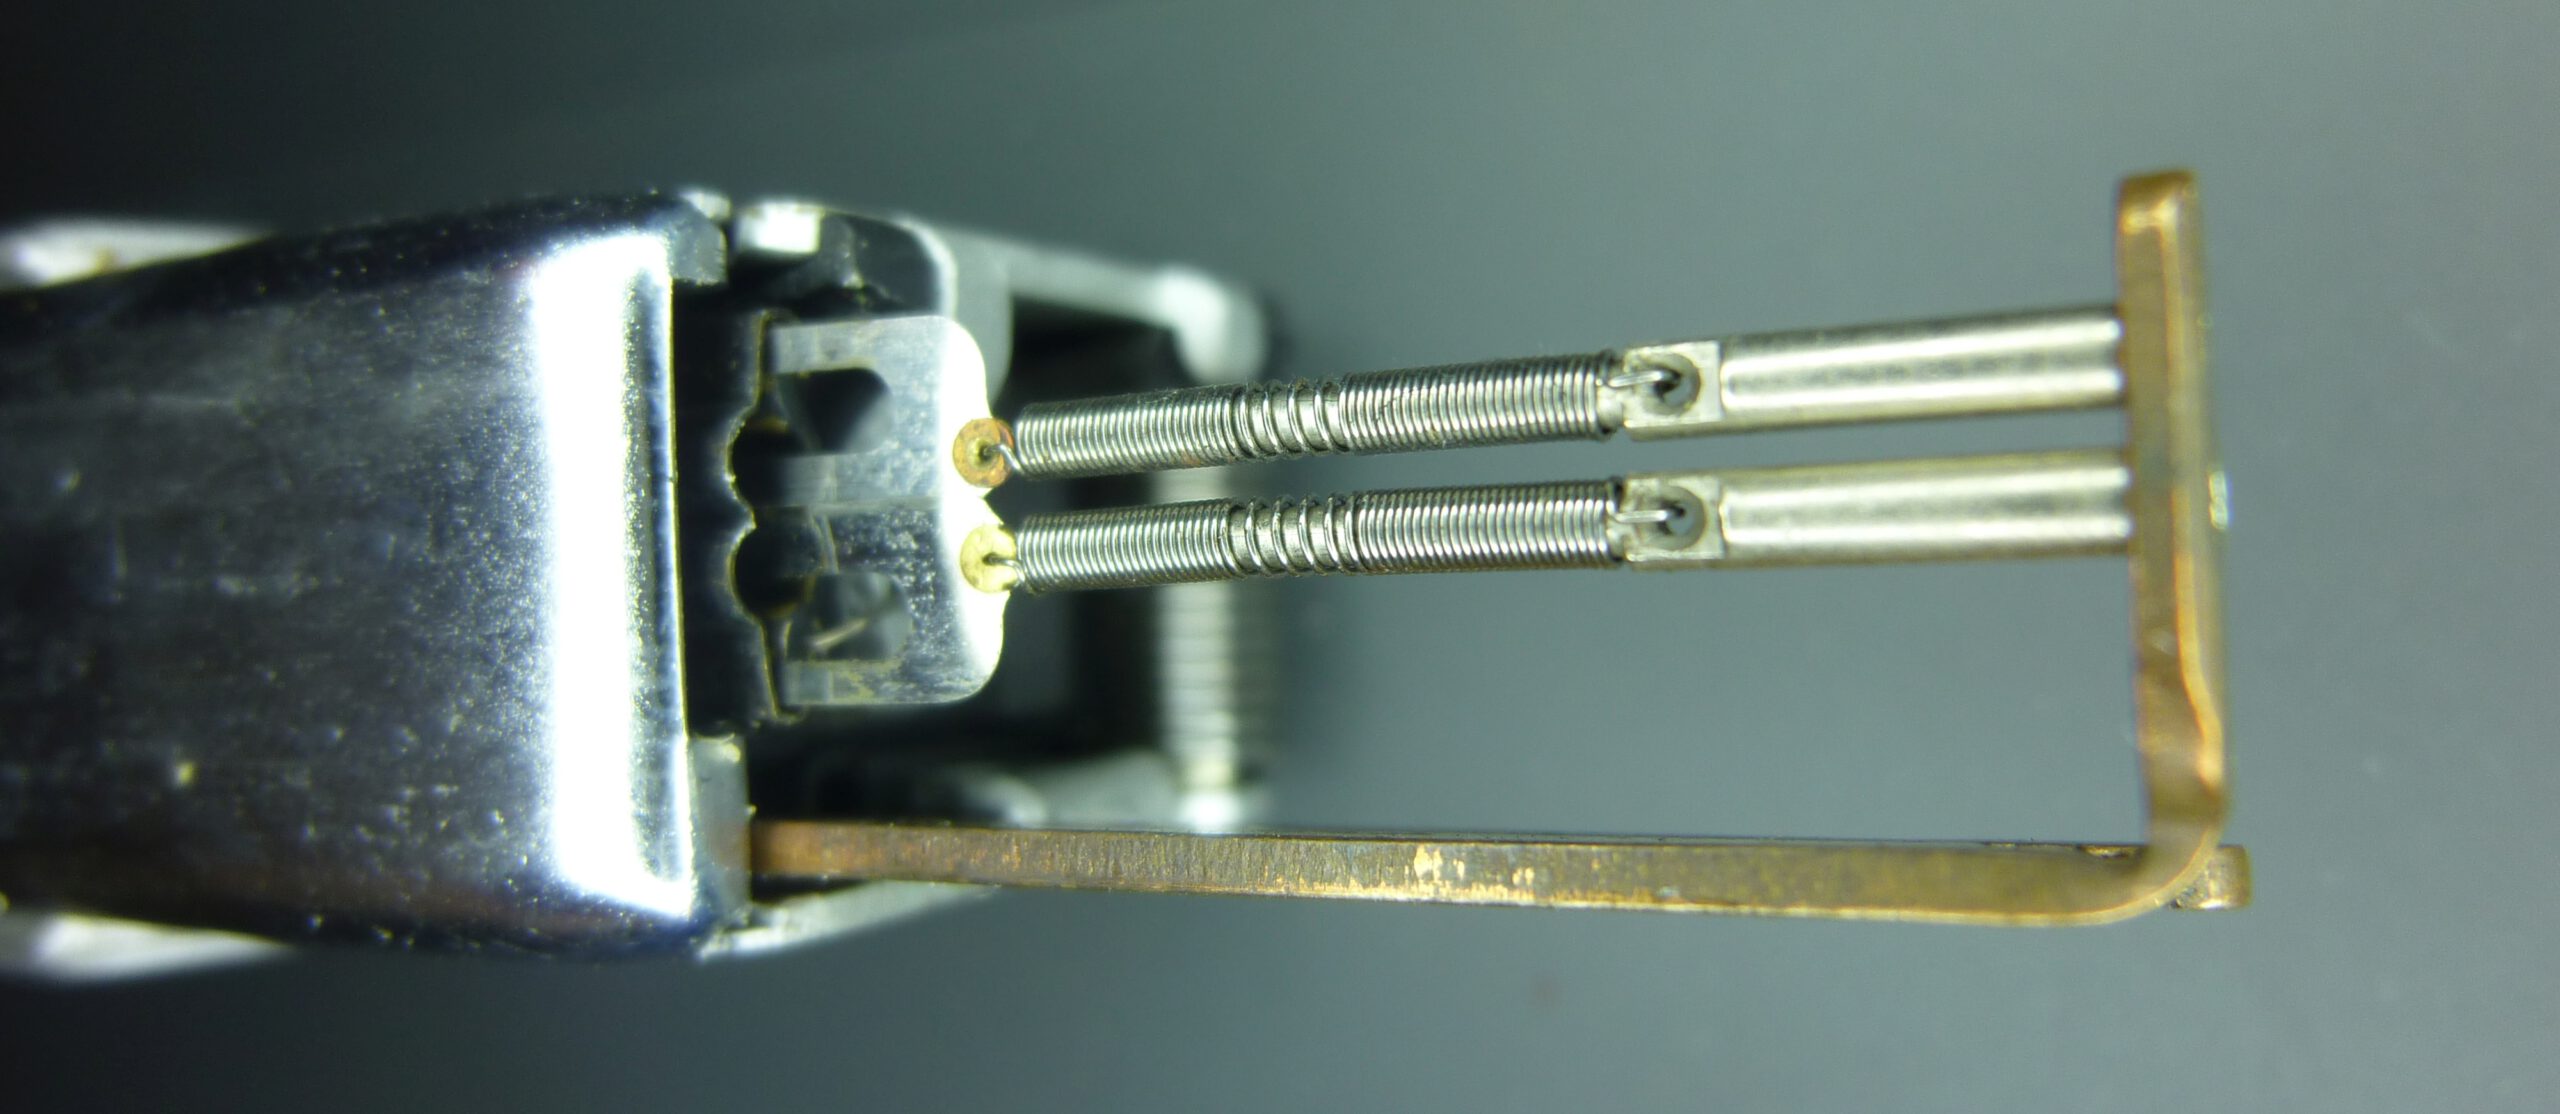
Remove the spring hooking arm
After removing the lower part of the housing, you will now see the brass spring hooking arm. The springs are attached to this arm, which pull the blades into their end position when triggered:
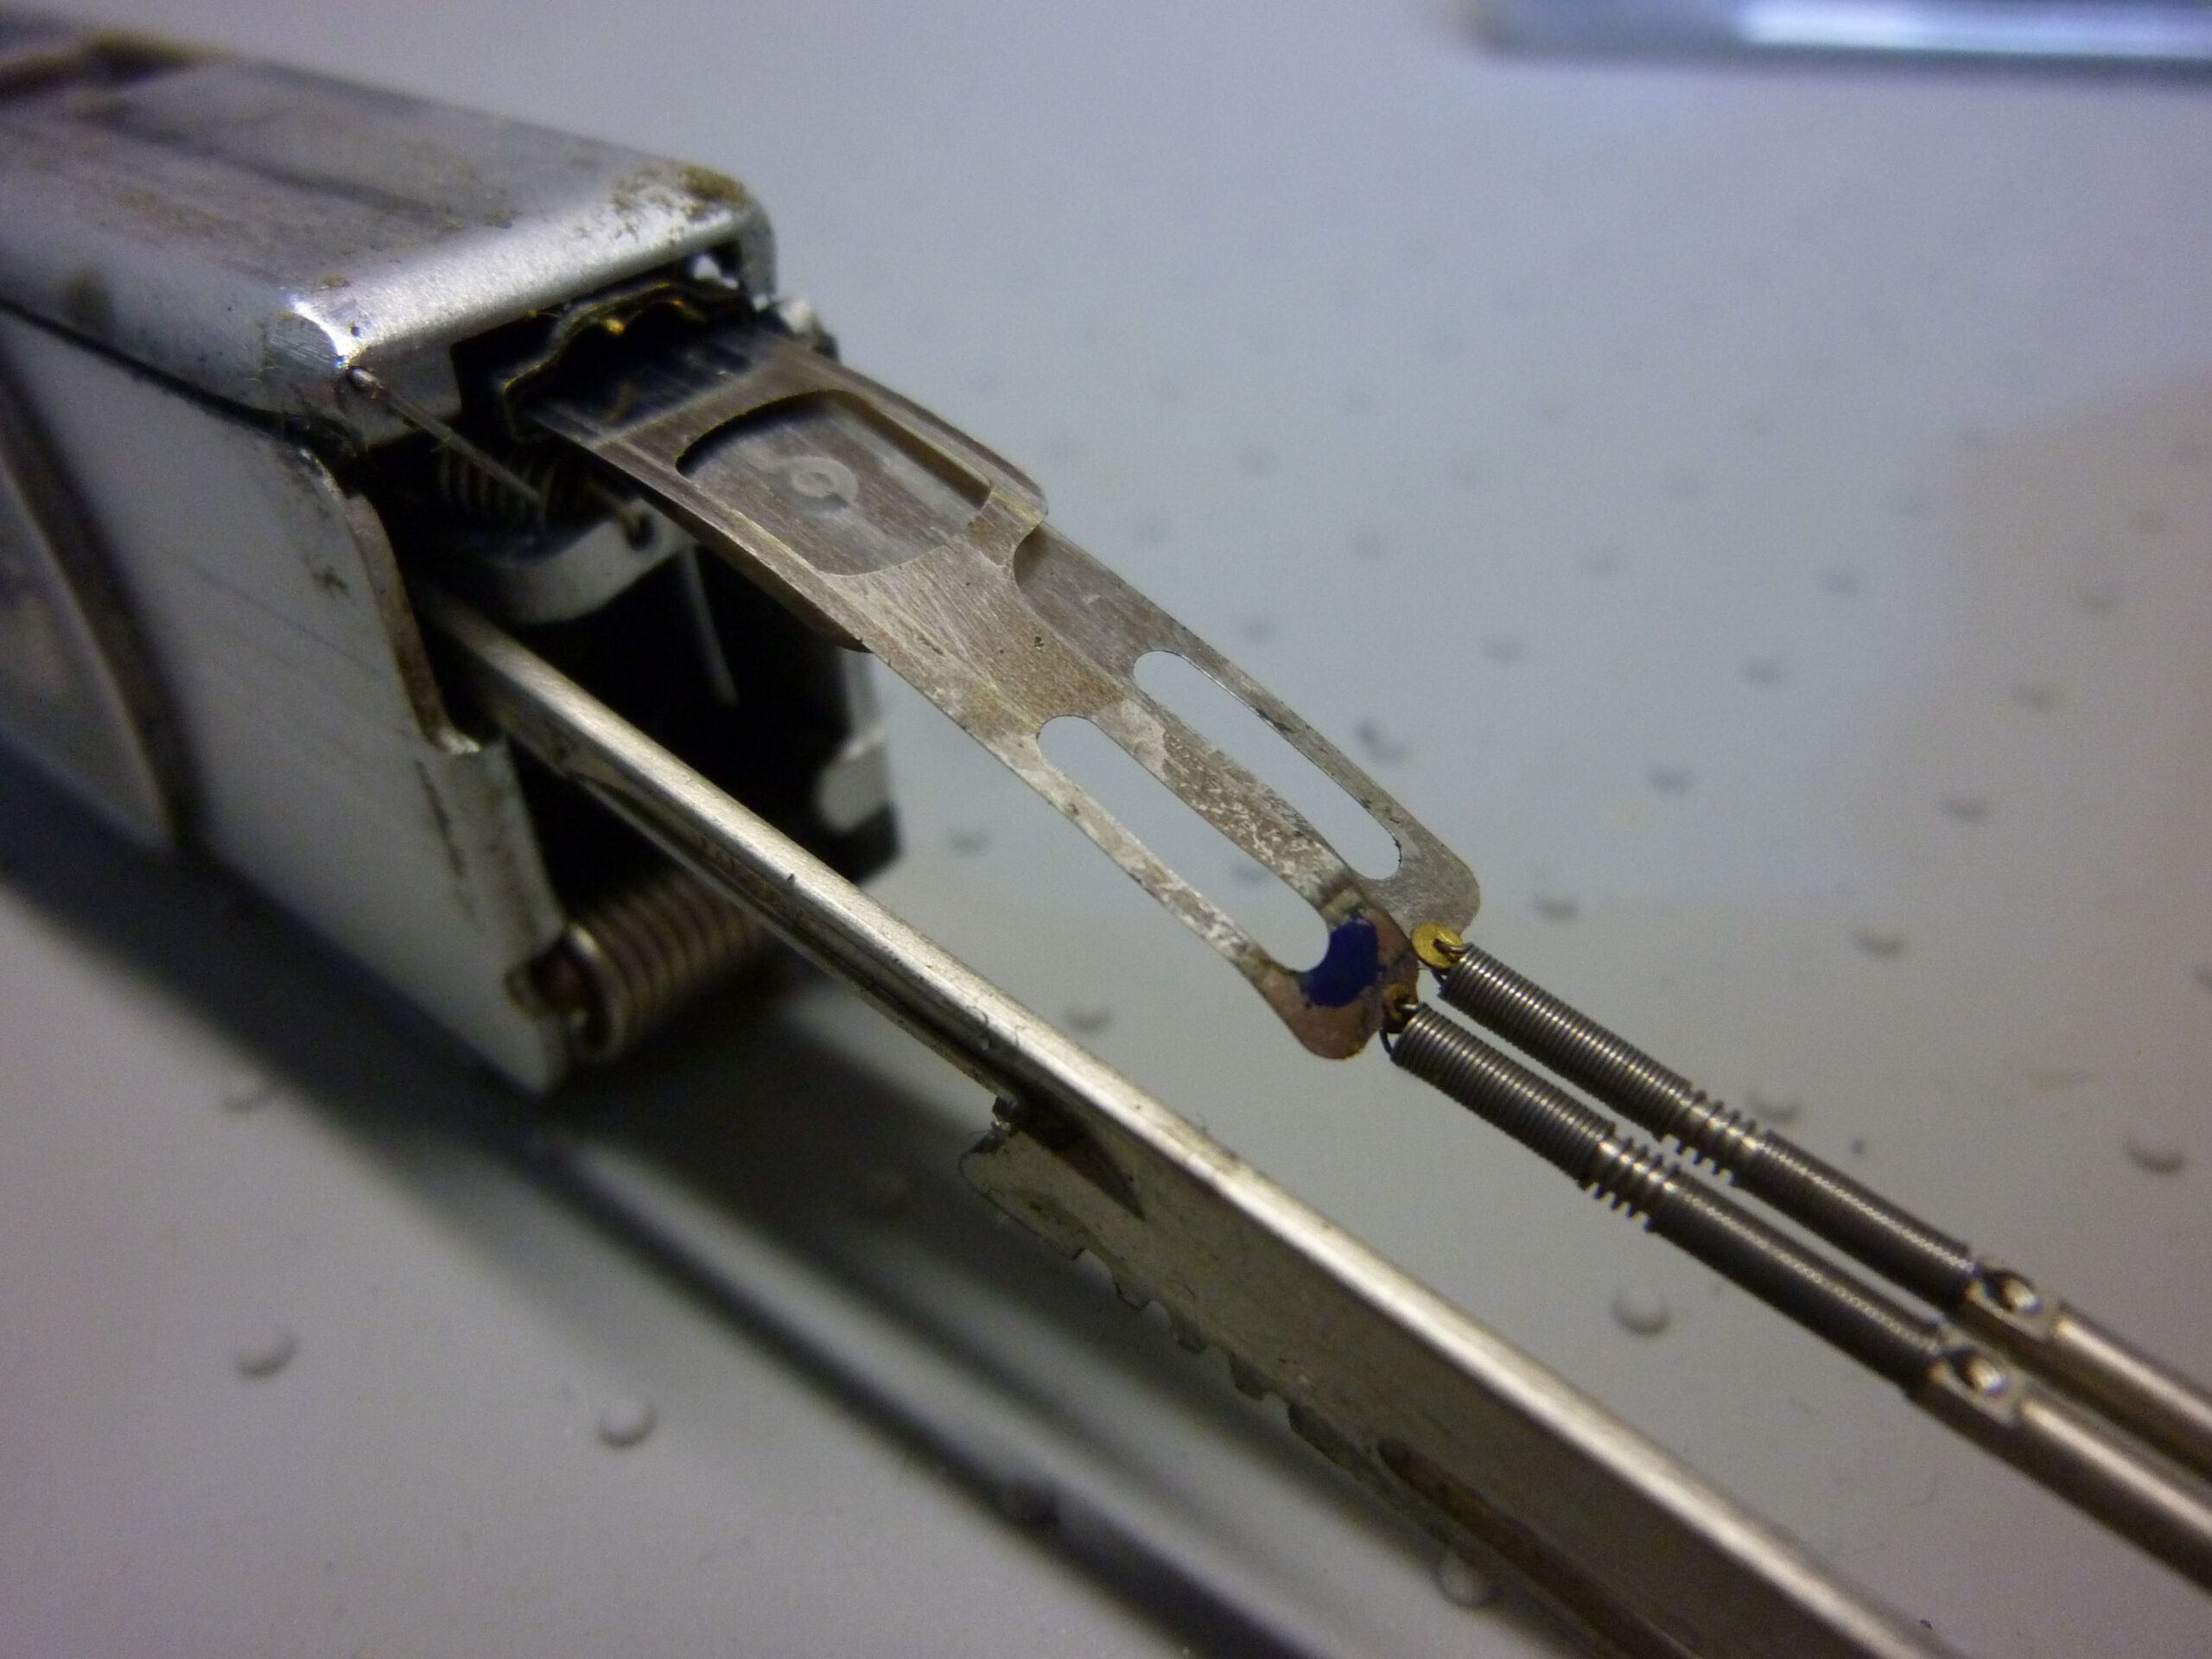
You can now carefully and with little force pull the blades completely out of the housing:
At the end you have the spring hooking arm with the two blades and their springs in front of you.
Caution: when working with the removed blades, extreme care must be taken to ensure that the extremely thin and sensitive sheets do not bend unintentionally!
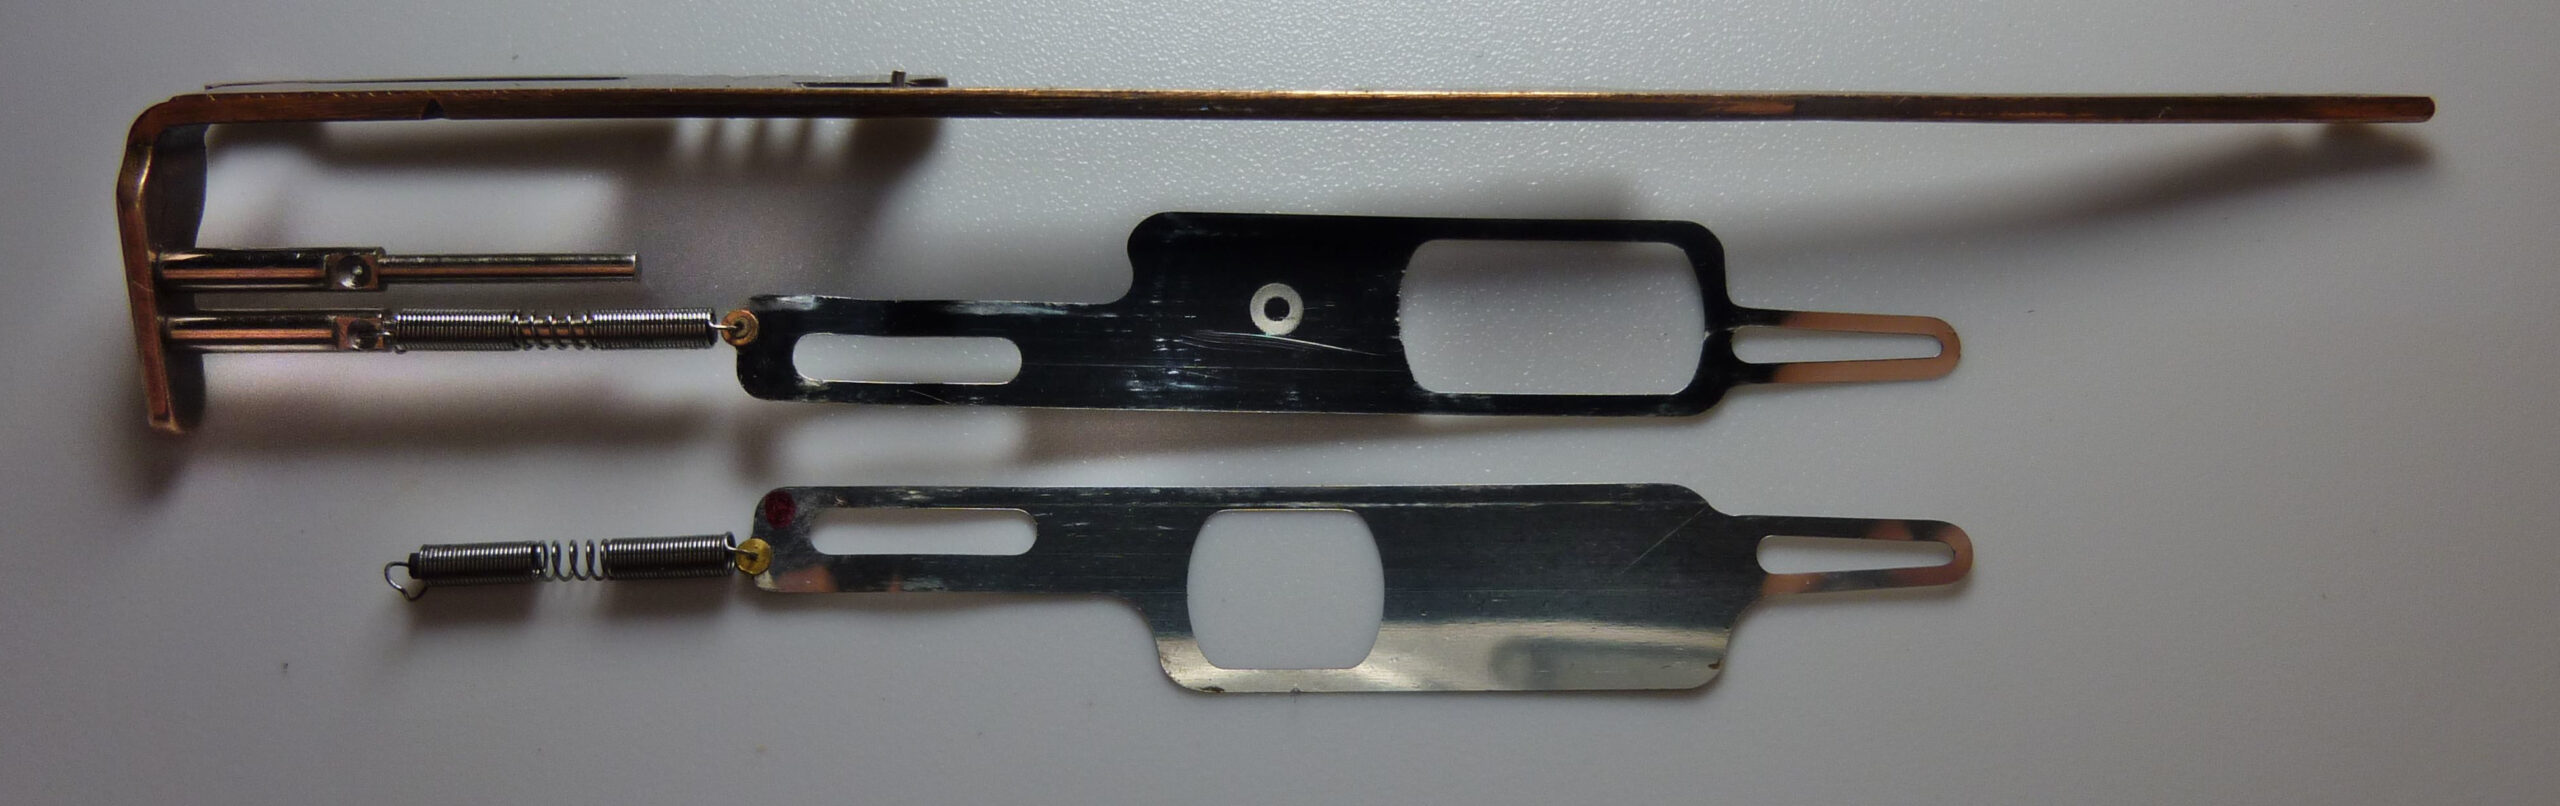
The following image shows the spring hooking arm that has been pulled out. You can see that one blade has been removed. However, during our repair, both blades remain in place!
Adjust the spring wire
Now comes the crucial step in this repair. Bend the spring wire upward (in the direction of the arrow):
This causes the pin to move further up and re-engage with the teeth of the number wheel.
Reassembling the housing
Follow these instructions to assemble the housing.
Testing
Test whether the image counter is working now reliable. Follow my instructions here.
Conclusion
The actual repair of the image counter is simple. However, opening the housing is likely to be a challenge for those who are inexperienced. There is also a risk of damaging the shutter blades during repair. Great care must be taken here.