Ensign Midget 55
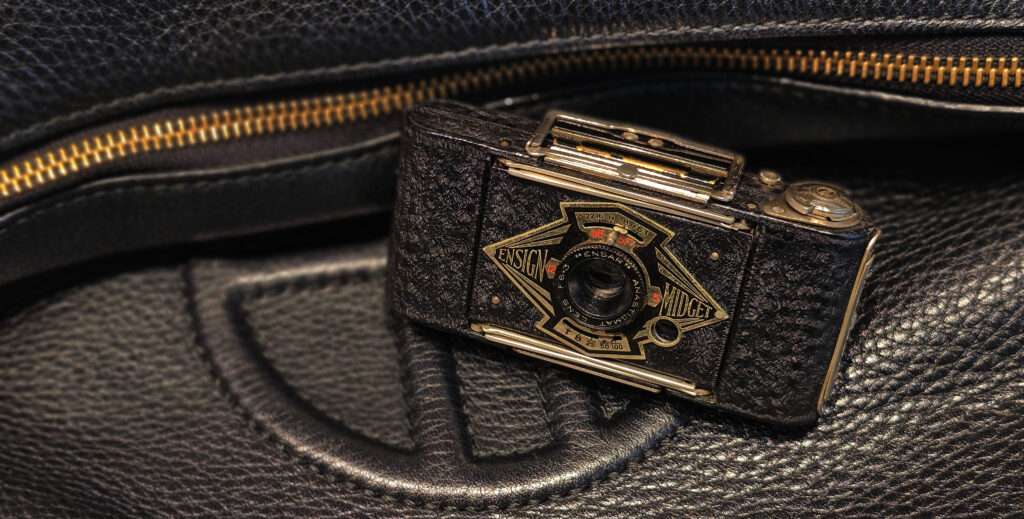
When I visited my friend Burkhard in the spring of 2026, I came across a camera in his collection that I had never seen before. It looked like a beautiful little Art Deco-style toy.
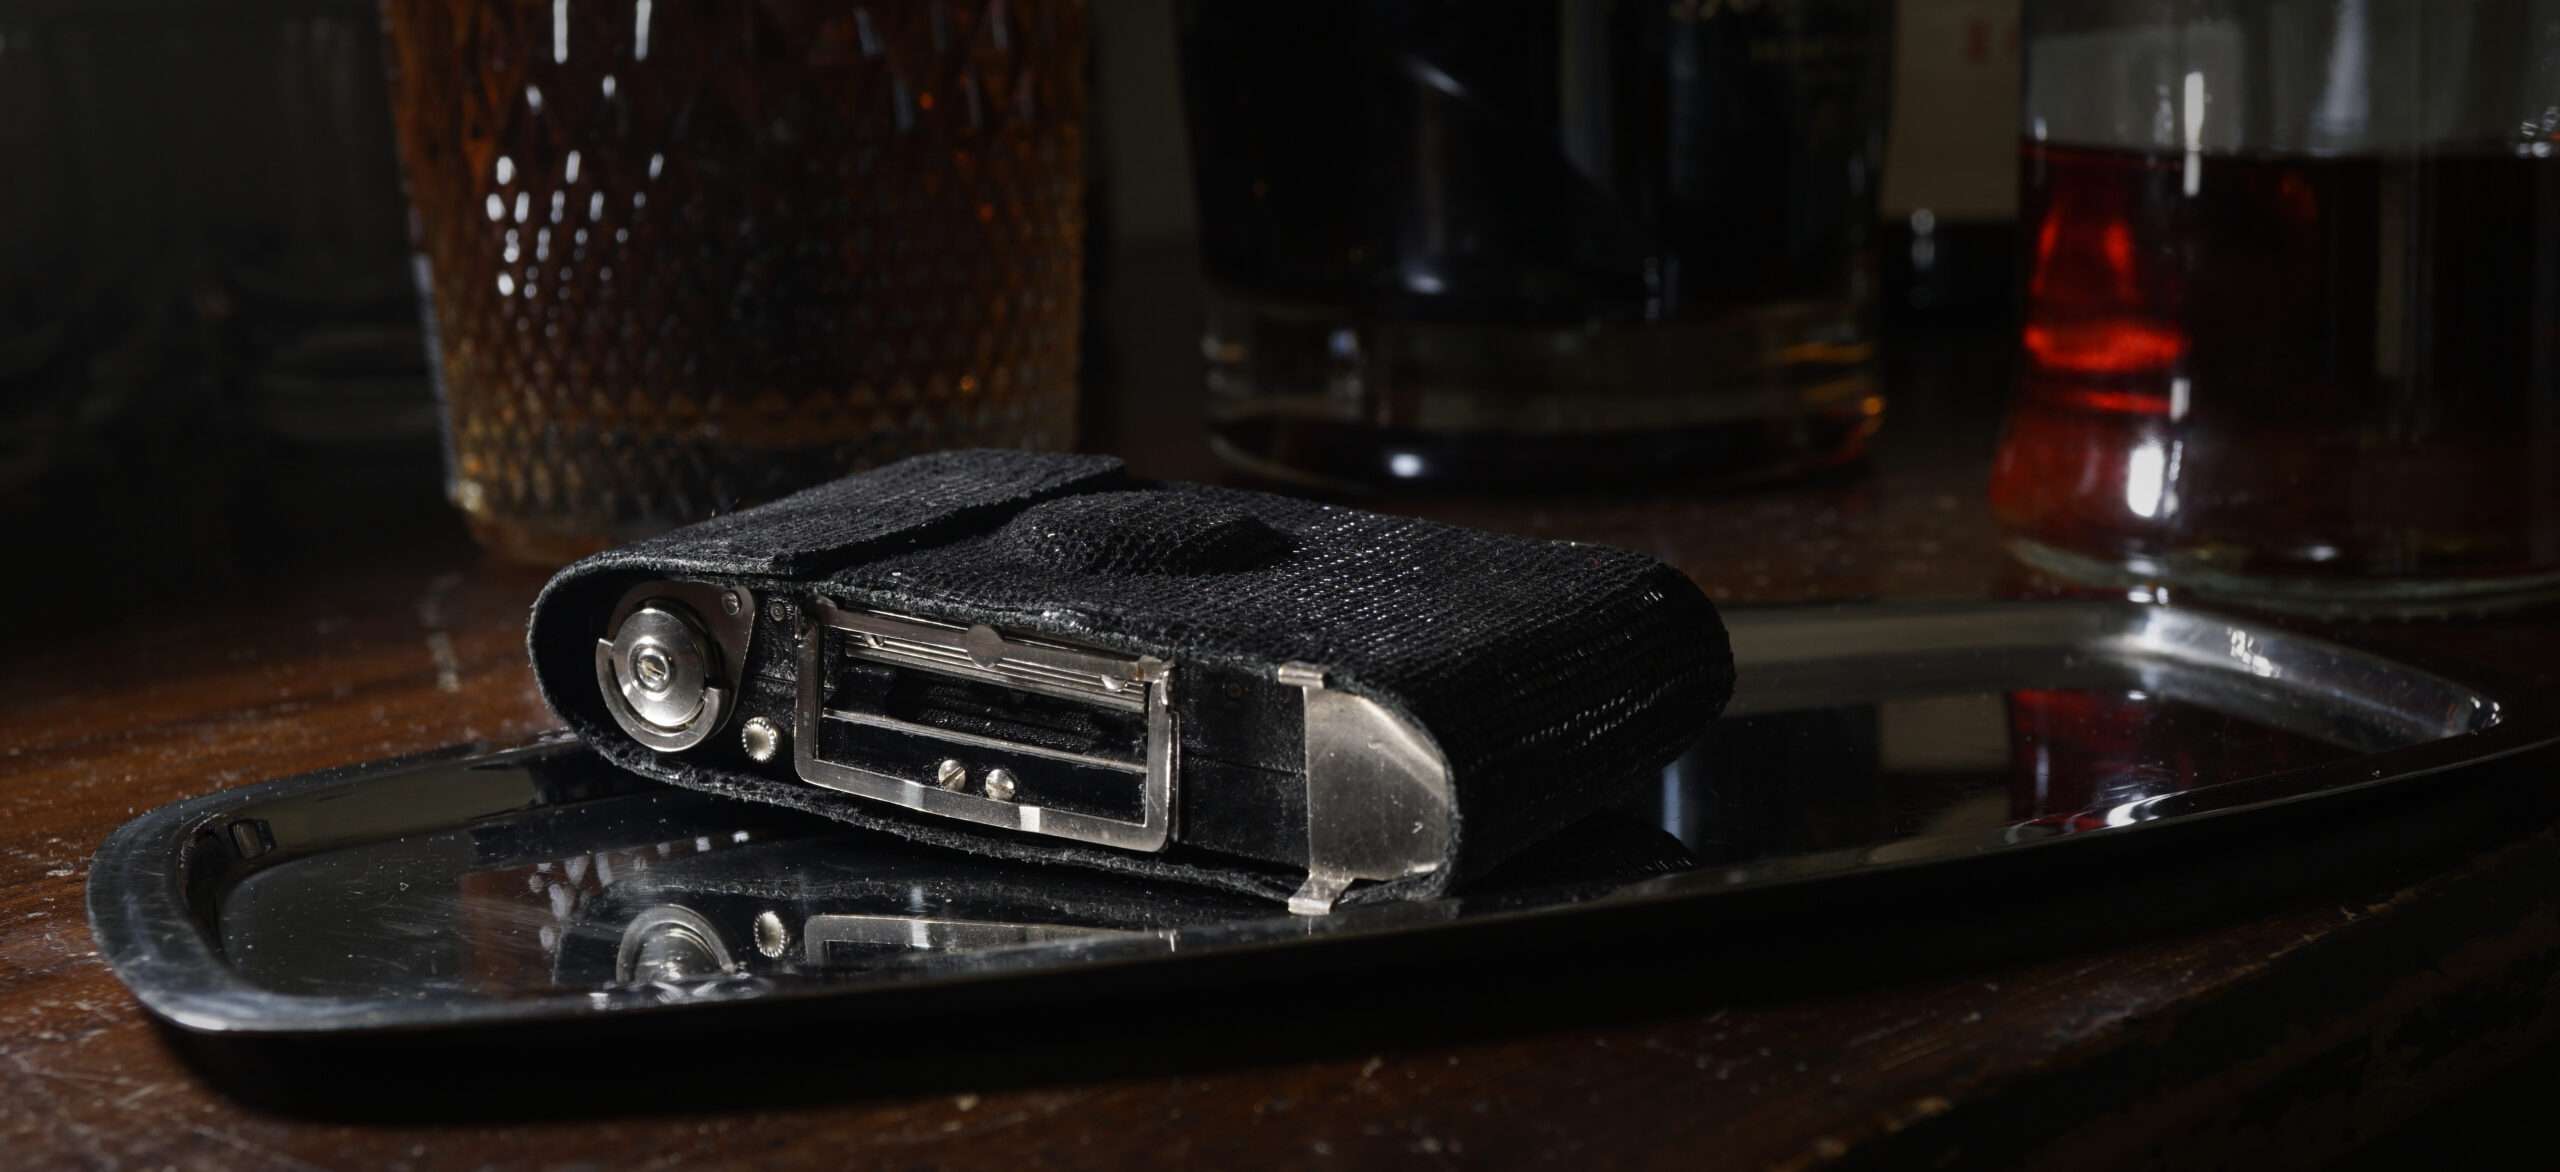
But when I opened the back cover of his Ensign Midget, I was completely blown away. I knew right away I needed a camera like that.
Most of the images in this article can be enlarged by clicking on them.
I just had to have it
The camera was designed as early as 1917, although it wasn’t brought to market until 1934 due to the turmoil of World War I and the Great Depression.
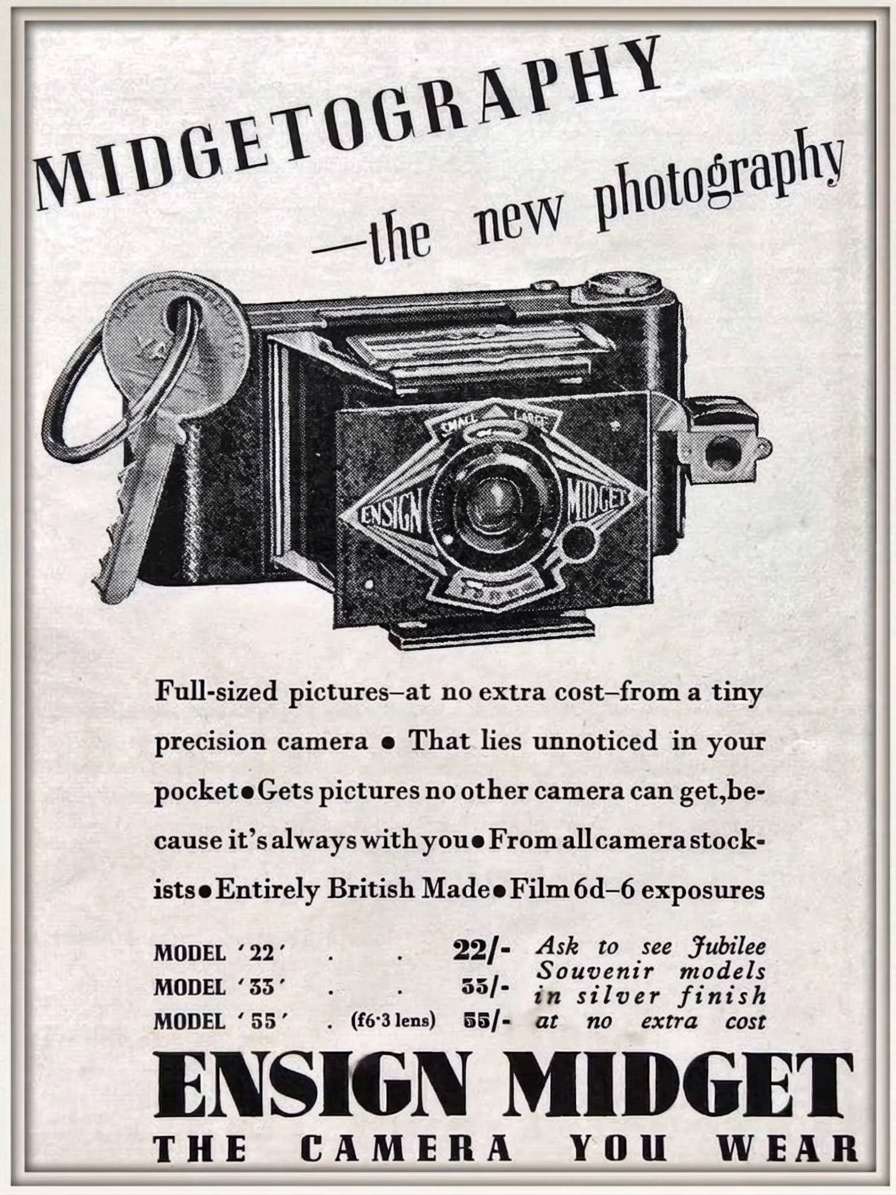
Various models of the Ensign Midget were available. So the first question was which version I should buy. I’d already held the Model 33 in my hands. Its shape was perfect. It felt completely smooth in my hand and had absolutely no protruding parts. Even the lens is slightly recessed into the front plate. However, it had a fixed-focus lens.
The Model 55 has a focus adjustment, but it protrudes slightly from the front plate.
By the way, in 1934, Model 55 cost exactly 55 shillings, which is equivalent to about € 300 in today’s purchasing power.
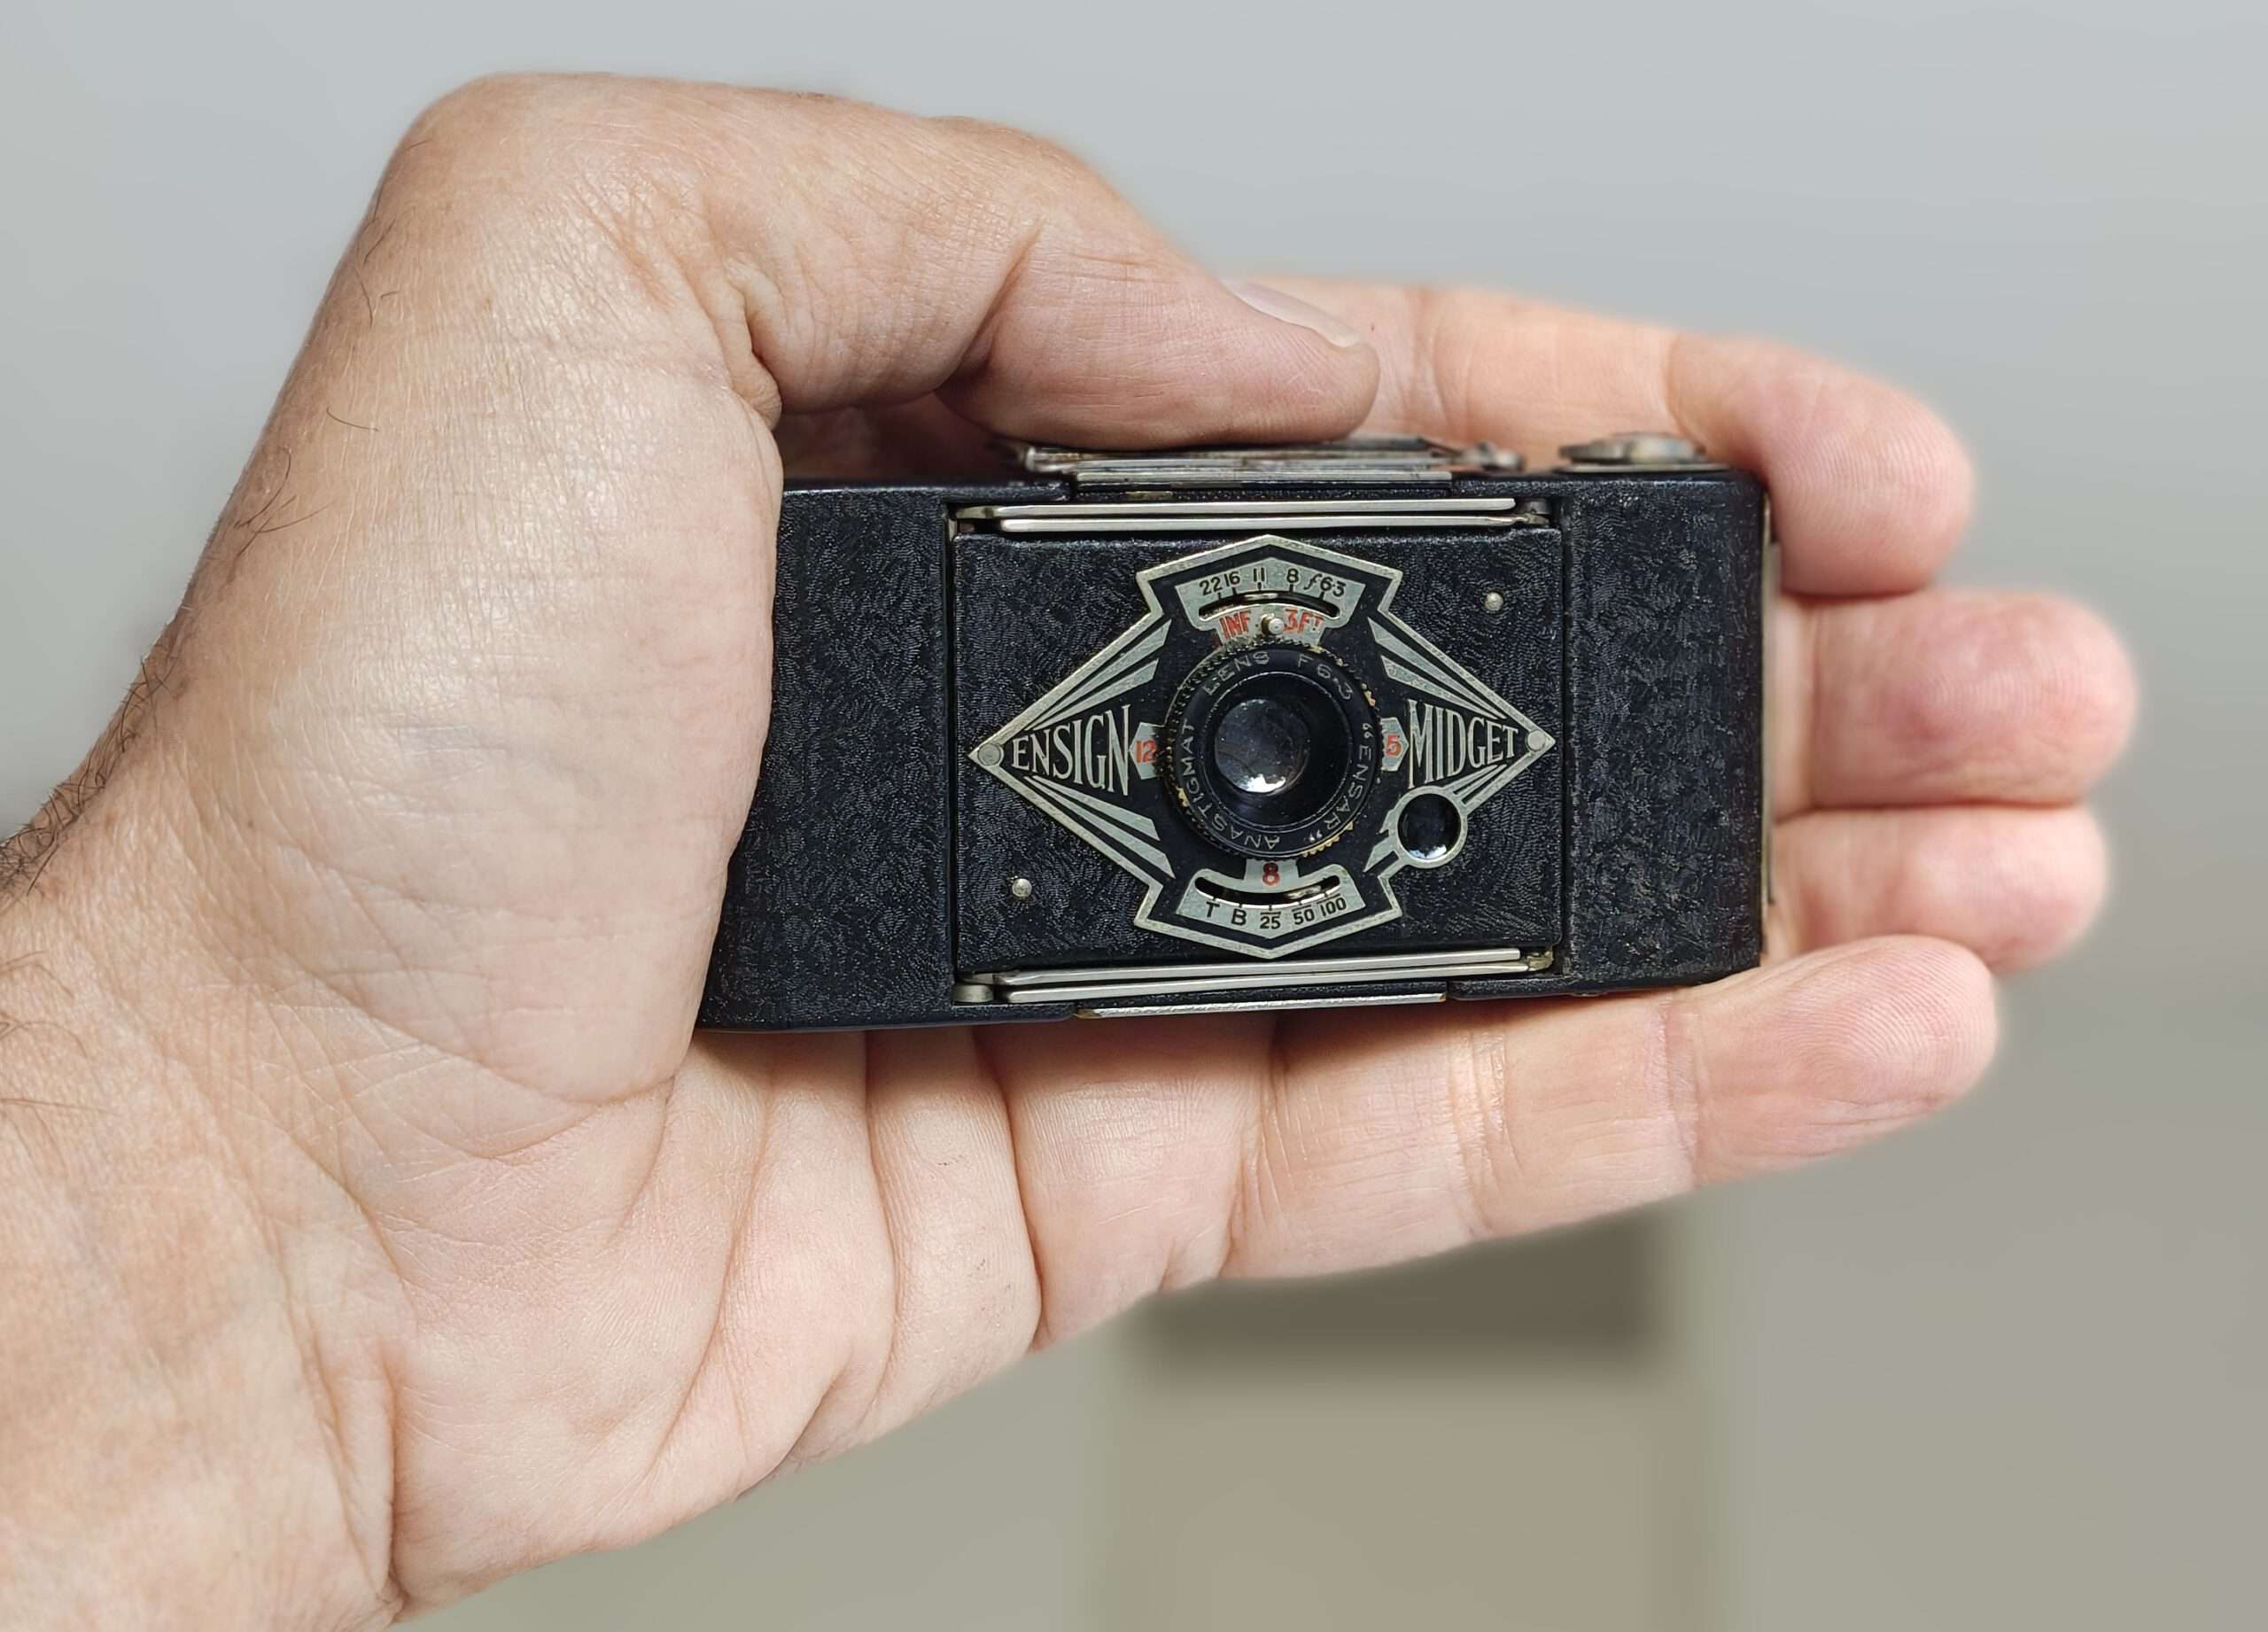
Since the camera was manufactured in the UK and sold mostly there, it’s no surprise that I bought my Midget 55 there (online for £35).
I really wanted the Model 55 because it is the most complete model in the series, with distance, aperture and shutter speed adjustment.
A tiny giant
The dimensions of the Ensign Midget when folded are or 89 × 44 × 18 mm. But when I first saw the camera with its back panel open, it took my breath away.
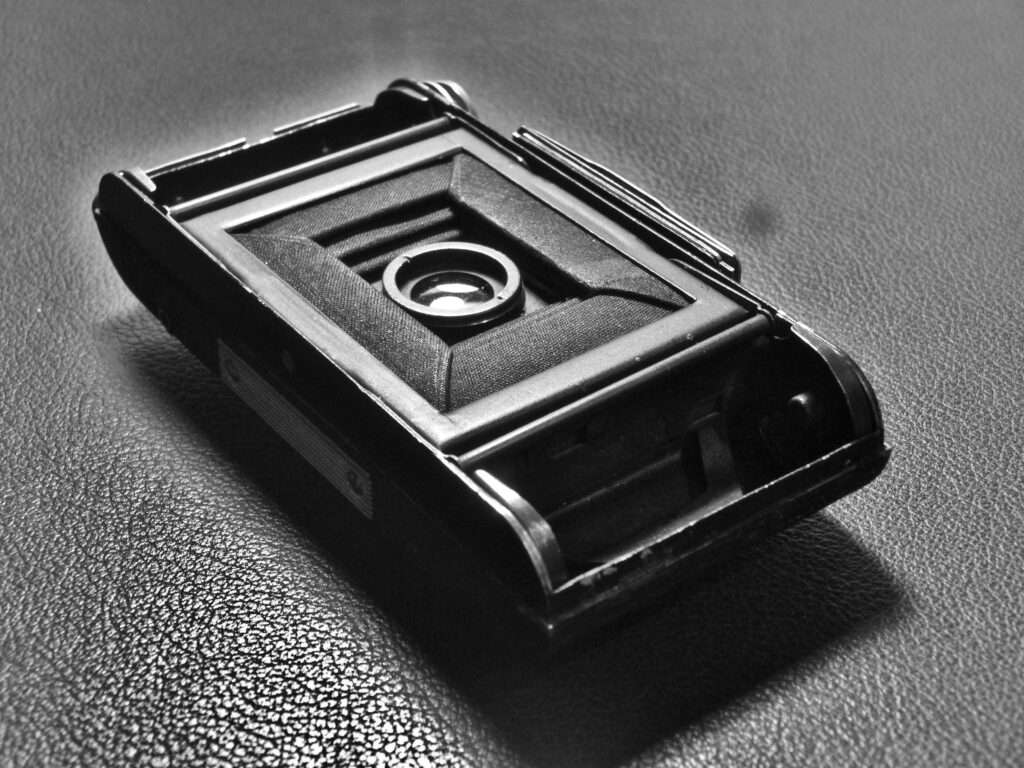
The film window is gigantic! Its dimensions are (41.3 × 31.75 mm). That’s even larger than the 35 mm format.
When viewed from this perspective, the Midget appears in a whole new light. Equipped with a reasonably good lens, this camera should take excellent pictures. We’ll look into this later. For now, however, let’s close the back cover again and turn our attention to the camera’s exterior.
A stylish beauty
The Art Deco style, which reached its peak in the 1920s and 1930s, was characterized by a belief in technological progress and the aesthetics of machinery. It emphasized symmetry, strict geometric lines, dynamic angular forms, and the contrast of high-quality materials. Everyday objects were no longer meant to be merely functional; instead, through elegant design, they were to embody both the technology and the luxury of the new era. In the 1934 Ensign Midget, these central concepts of Art Deco were masterfully applied to a technological consumer product:
“Body throughout made of metal beautifully finished in crystalline enamel and best quality nickel plate … Bellows first quality leather, specially selected.” Ensign catalog
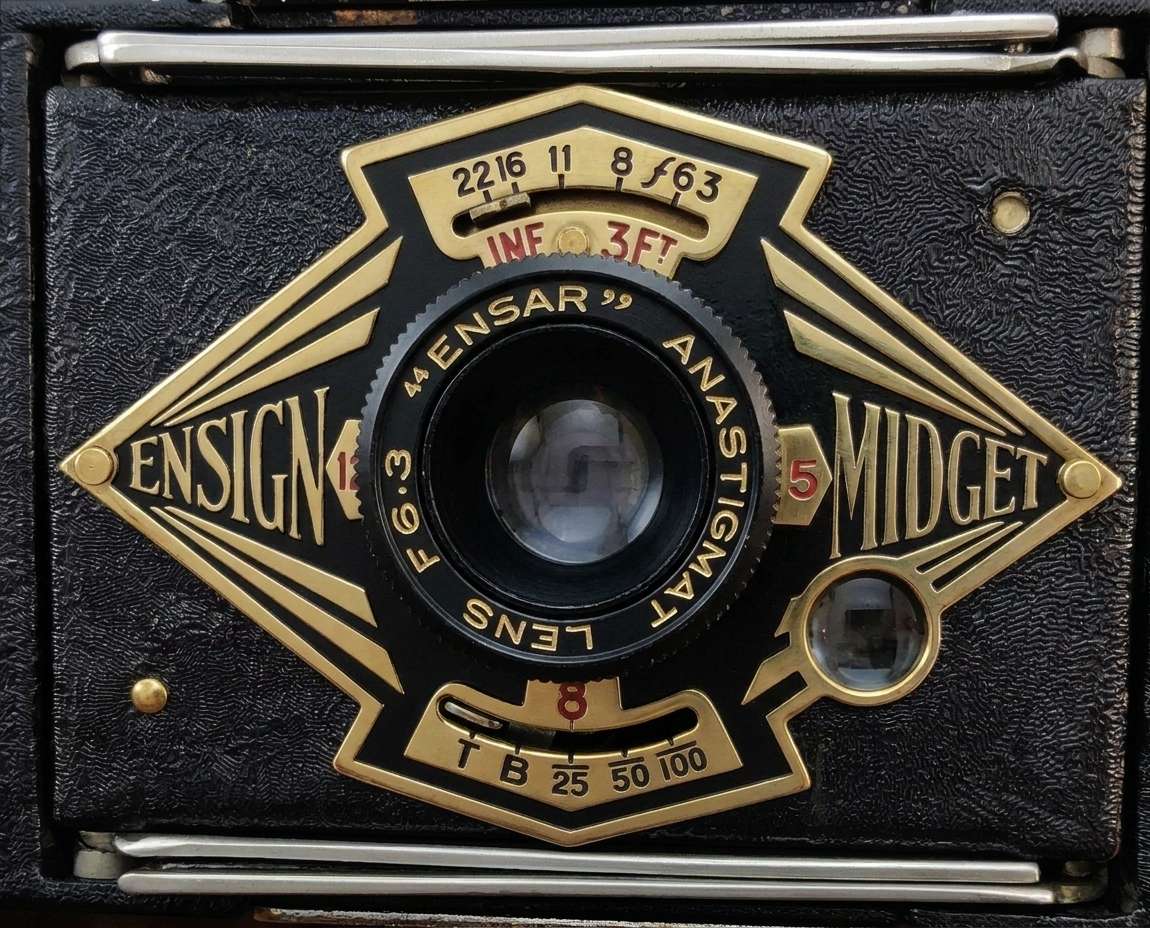
Thus, the camera’s front plate is not merely a plain mount for the lens, but is dominated by a striking, diamond-shaped form. The radial lines radiating from the edges mimic the iconic Art Deco “sunburst” motif, a symbol of new beginnings and energy. The ENSIGN and MIDGET lettering are not labels printed on afterward. They were integrated into the geometry of the beams, with the shape of the letters adapting to the diamond—a typical stylistic device of the era’s poster and architectural art.

Ensign 1935 leaflet, colorized using AI
The interplay between the shiny, gold- and silver-colored metal elements and the deep black, textured silk ripple enamel finish of the body goes far beyond the mere function of a camera body. It gives the camera the look and feel of a sophisticated fashion accessory or a cigarette case.
This design succeeded in transforming a technical instrument into a small, portable work of art that reflects the visual glamour and creative optimism of its era.
Ensign deliberately used this concept in its advertising for this camera:
“You don’t have to CARRY an Ensign Midget. You take it along with you…“
The 1936 Ensign catalog goes on to say:
“The idea was to design a camera so small and light and particularly so thin, that it could be carried always – as part of one’s everyday wear – at the same time a camera at a reasonable price giving first-class results of reasonable size. … enlarged up to 15 x 12 inches and larger … The Ensign Midget is a positive delight to handle – a veritable gem of workmanship “
A delicate craft
Despite its moderate price, the Ensign Midget was an outstanding design and was manufactured with great care and precision. You can see that immediately upon closer inspection.
Look at the struts after pulling out the bellows. The slots in the polished struts are precisely machined:
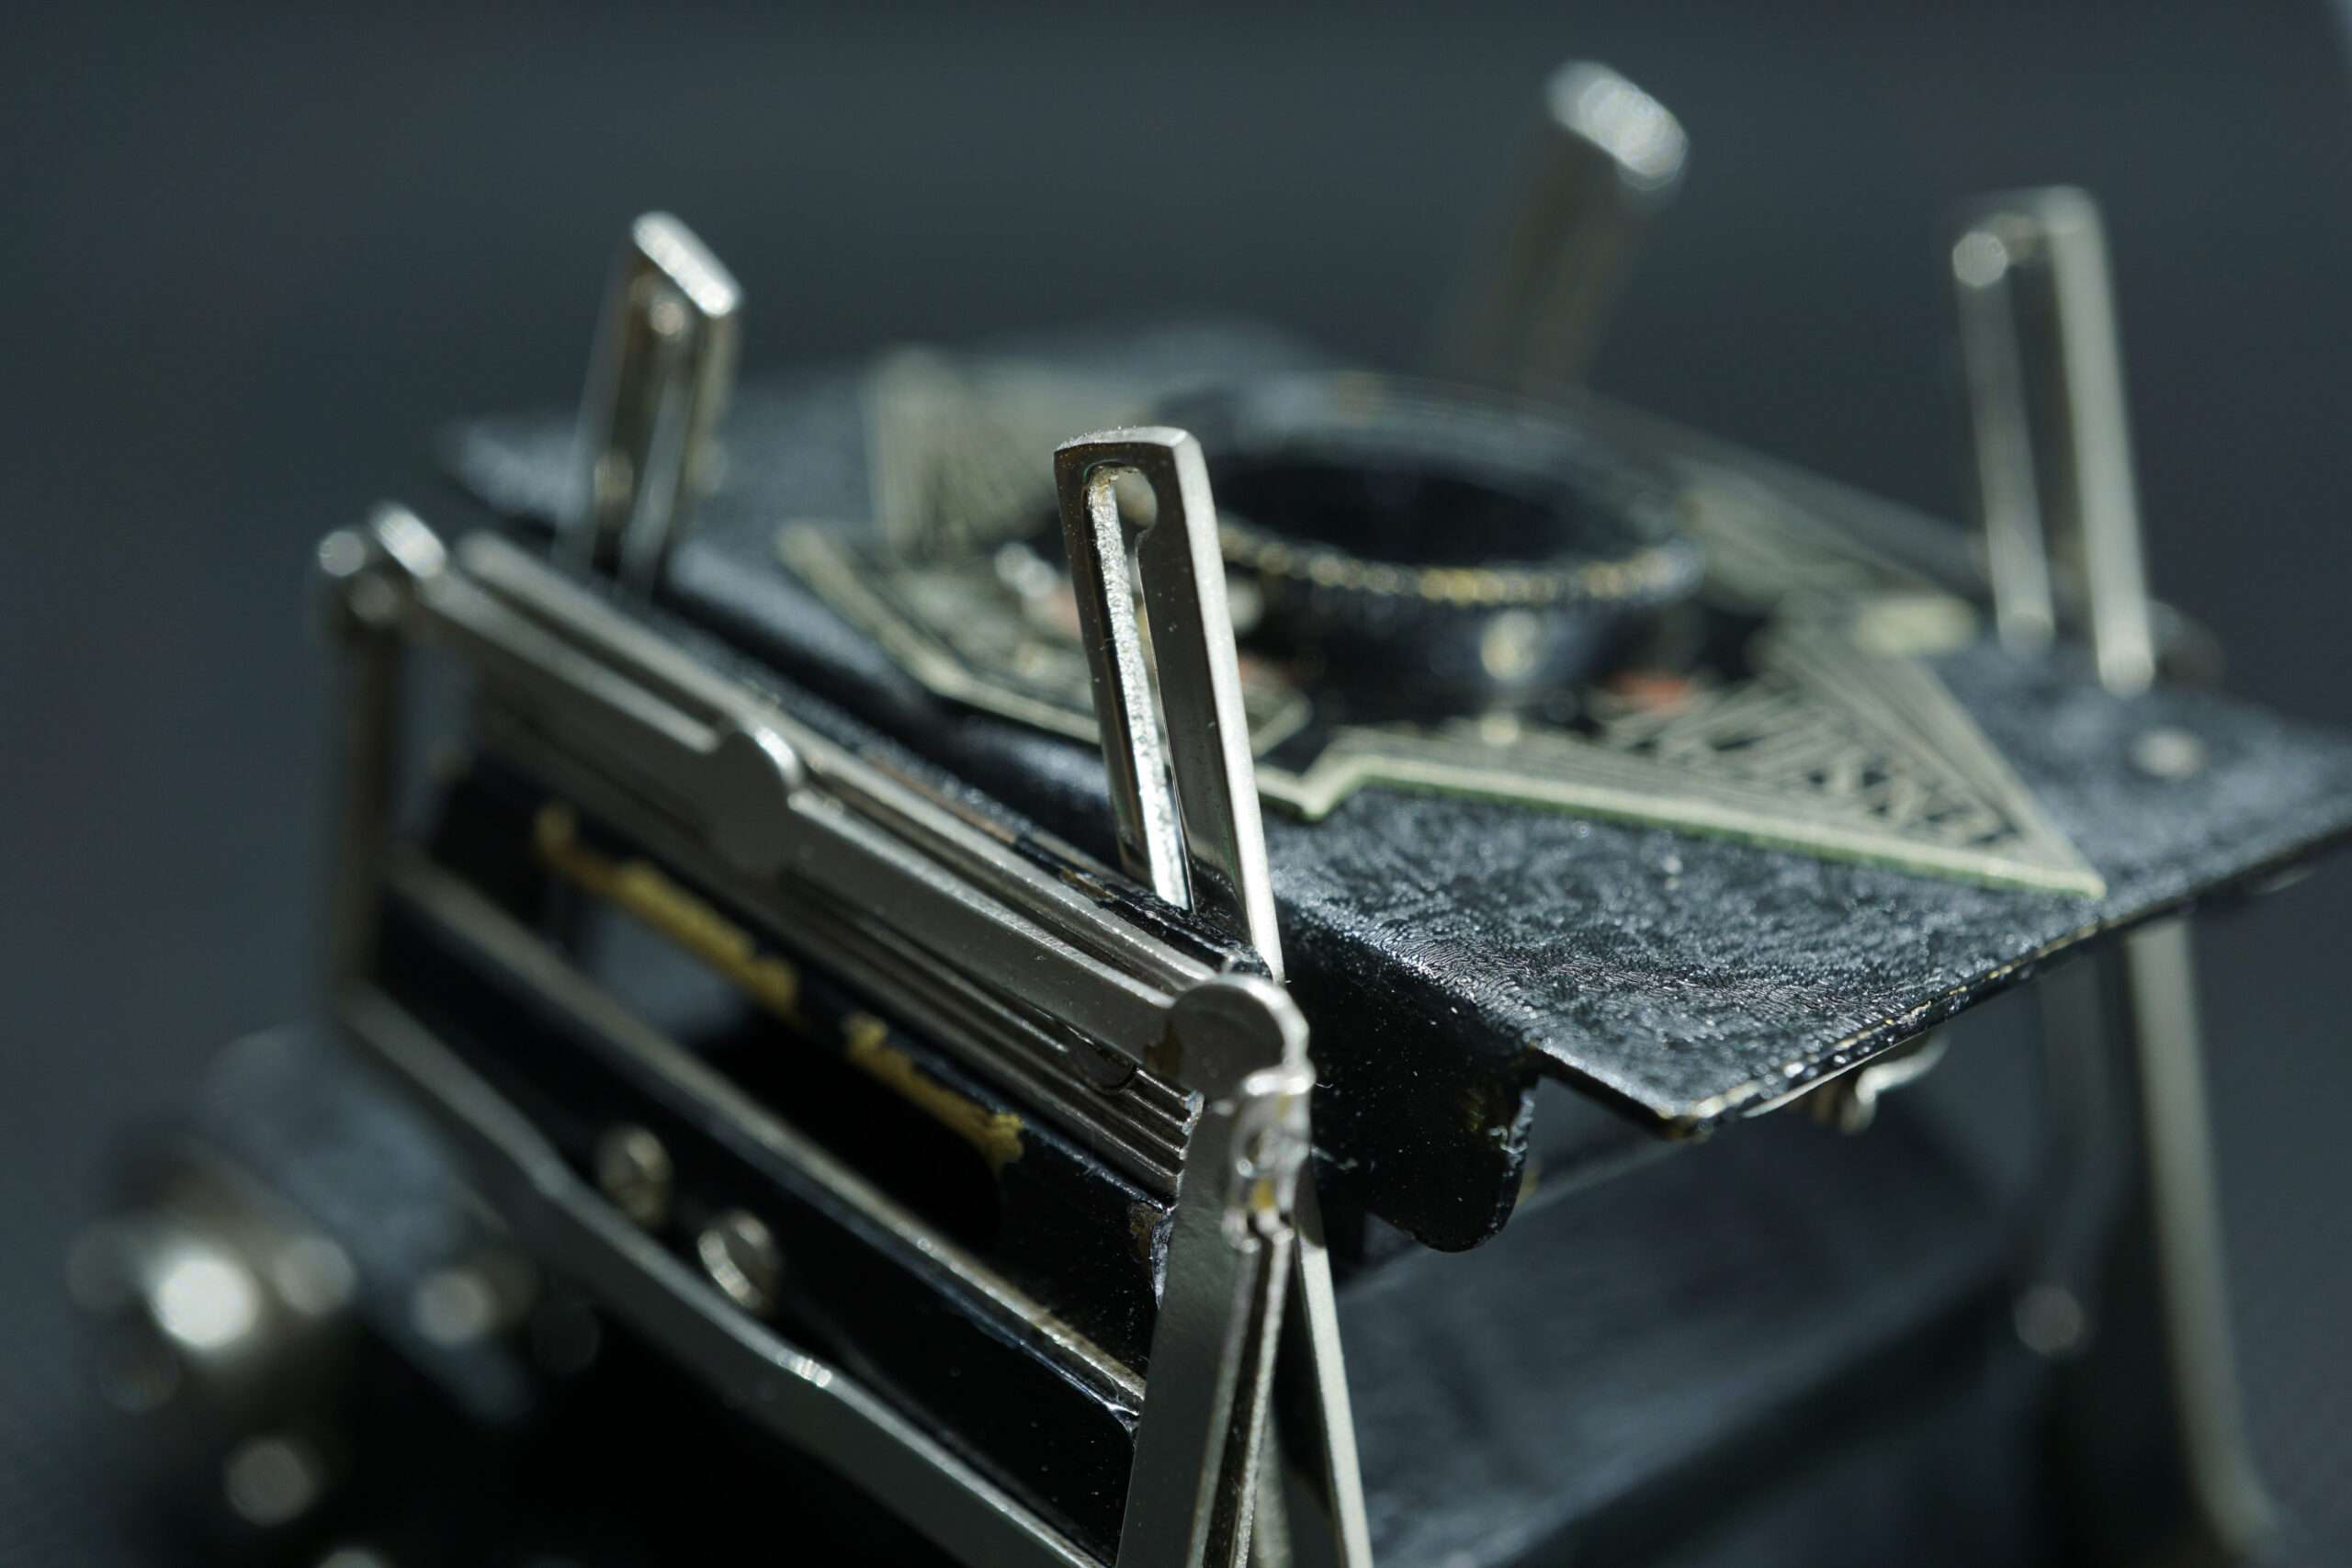
Also note the alignment marks on the guide slots at the ends of the struts. Their precise machining is essential for sharp photos, because the positioning of the lens relative to the film surface depends on them!
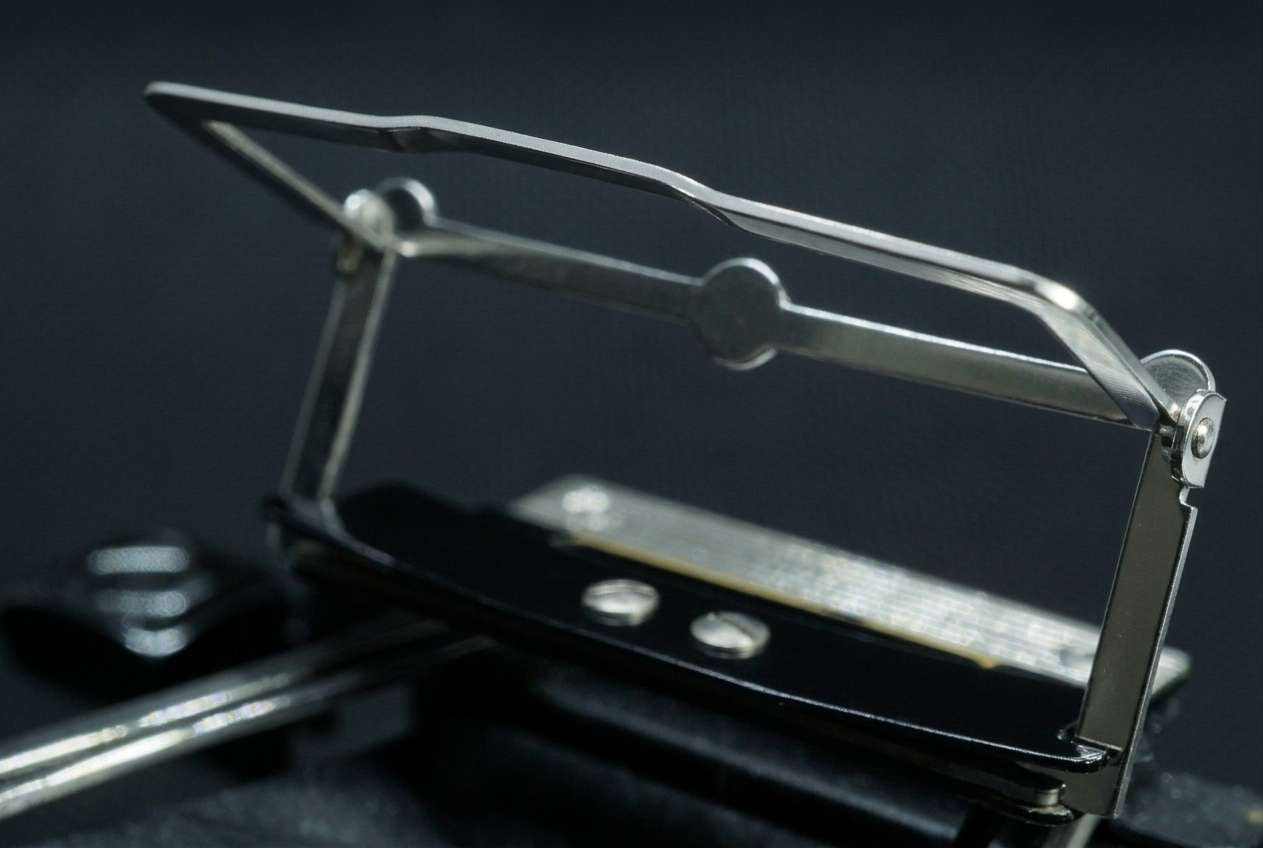
The direct-vision viewfinder is a small mechanical masterpiece. When folded out, the two polished frames snap into place by spring force. With the viewfinder dot in the center, they define a precise frame. Note the tiny, precision-crafted hinge that connects the two frames:
The waist-level viewfinder can be swiveled out from behind the front plate for landscape shots. Here, too, we see carefully crafted parts, including the optics:
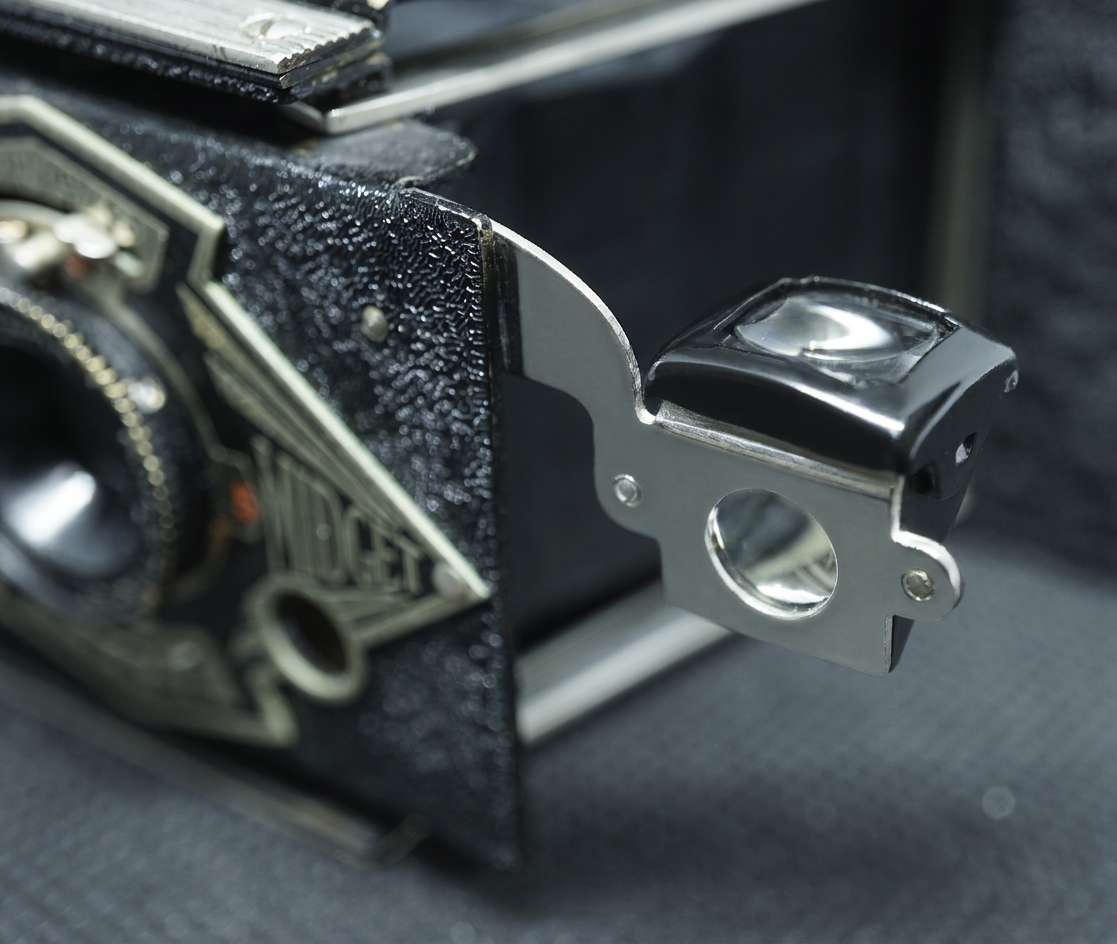
Well-protected when the camera is closed, the shutter release button is located behind the front panel. Its ribbed surface prevents your finger from slipping when you press the shutter release. You do need to apply some force here because the shutter release is self-cocking, meaning the shutter springs are re-tensioned in the process.
Right next to it is the stand. Swivelling this out enables the camera to stand stably on a table or similar surface when in portrait orientation. The camera’s serial number is also stamped there. The serial number of my camera indicates 1935 as the year of production:
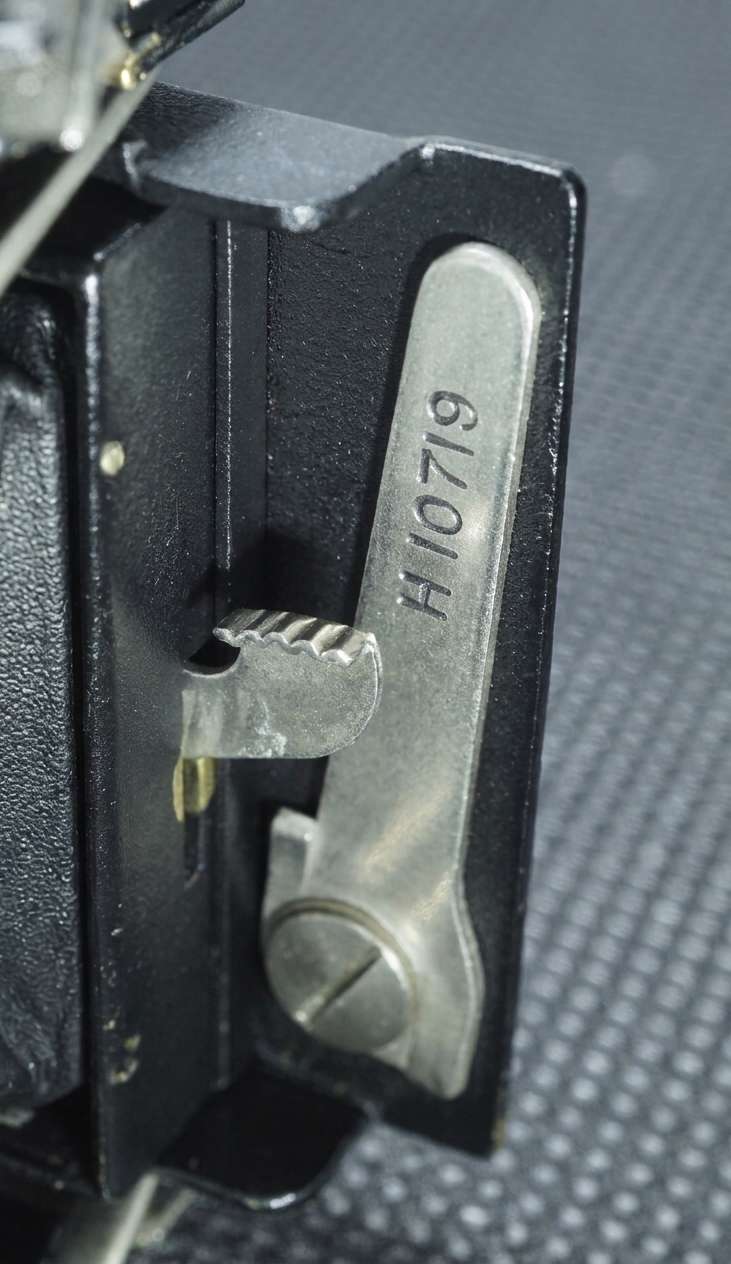
stand for portrait mode with
serial number
The top of the camera has a bright metal folding film advance key on the left. This winder with its fold-out rotating handle is truly a decorative element on the top of the camera. Neatly crafted and polished, it is intuitive to use. The winder is on a ratchet and
will only turn clockwise.
On the side below it, we see the camera’s rear cover locking mechanism, which is also very simple and elegantly designed. It’s just a simple slider that holds the cover securely in place:
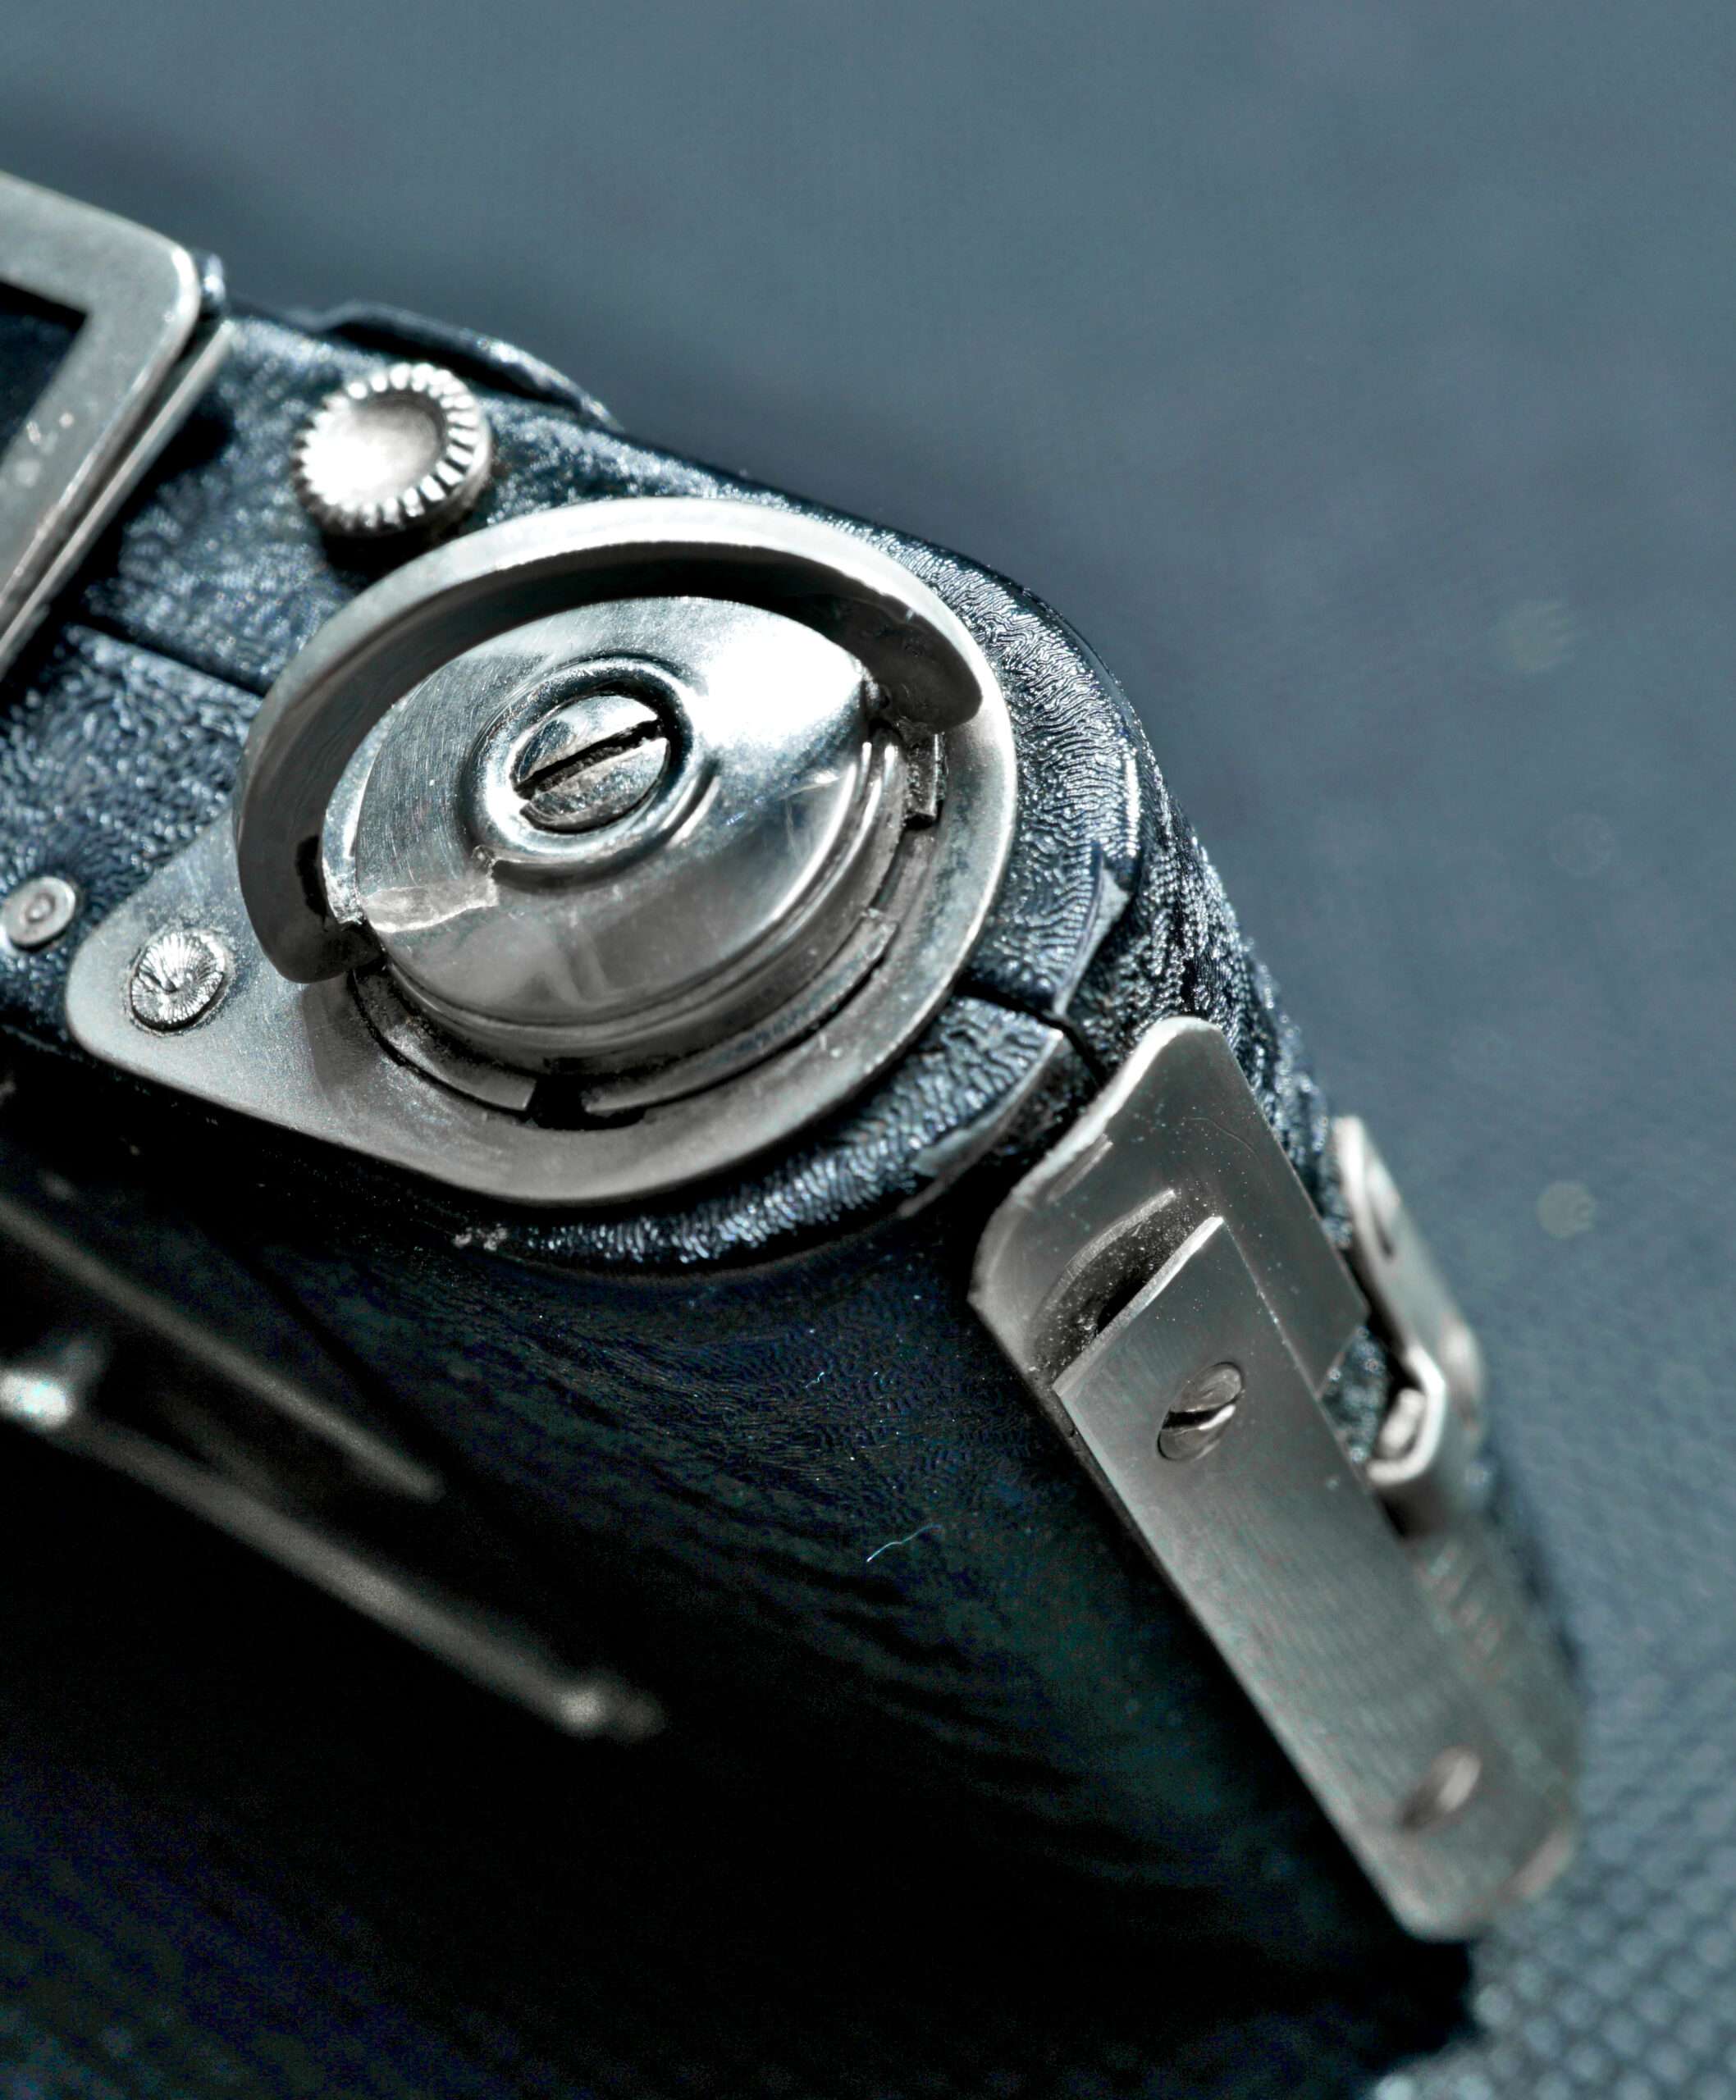
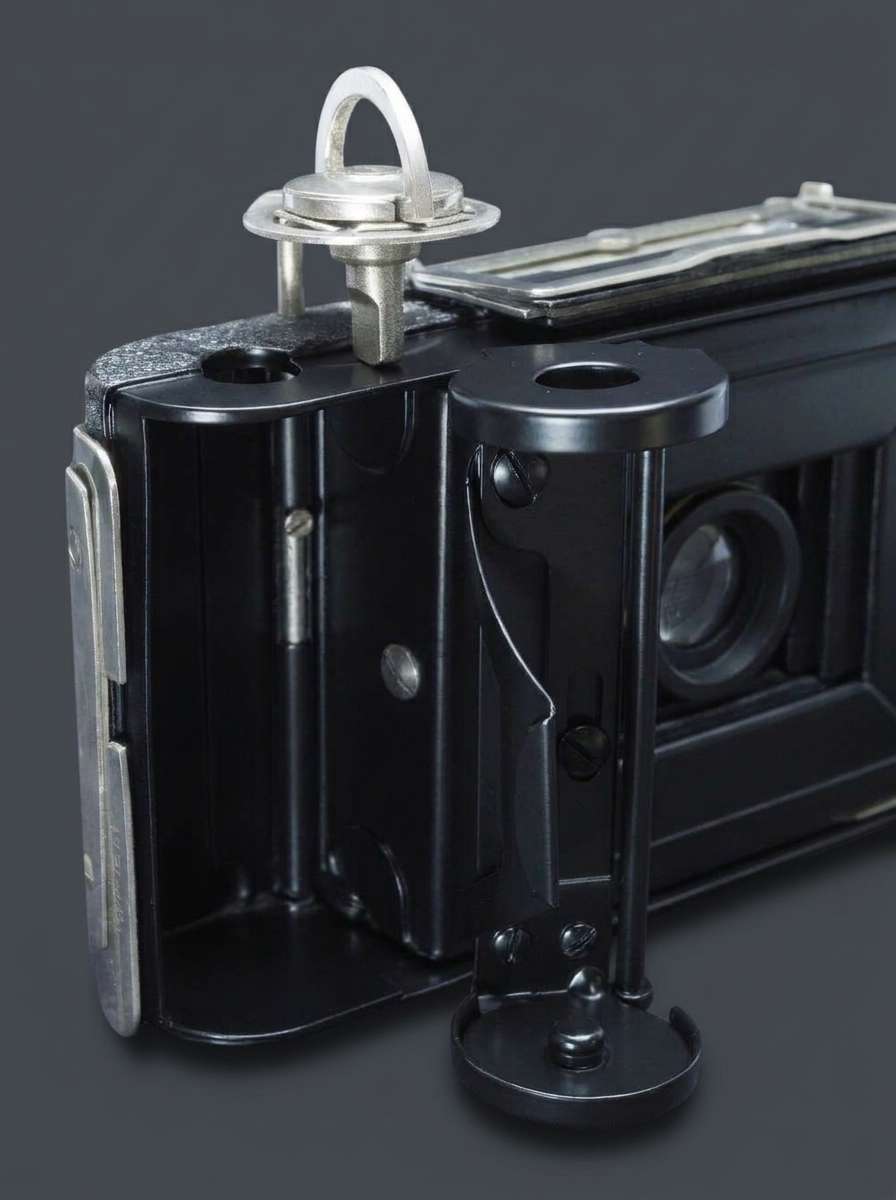
You can immediately see how the winder works in conjunction with the take-up spool when the back panel is open. The winder’s shaft engages with the film spool (not shown here) and winds the film onto it. If you look closely, you can see the ratchet at the top of the winder, which prevents the film from unwinding.
To easily insert the film spool, the holder can be swung out of the housing, and the top cap pulled upward. The entire mechanism is manufactured with great precision, so that all parts move smoothly and fit together without any play. Also note that the spool holder has narrow side walls at the top and bottom to prevent light from entering the film from the edges:
Finally, I’d like to mention the finish of the body. It features a deep black, wavy textured enamel finish known as a ripple finish, which is highly characteristic of fine mechanical equipment at that time. In terms of design, this surface establishes clear connections to the Art Deco movement.
The undulating, repetitive lines create a strongly rhythmic pattern that perfectly aligns with the era’s preference for geometric symmetry and stylized natural forms. Furthermore, due to the glossy enamel surface, the ridges catch the light while the grooves remain in shadow, creating a high-contrast interplay of light and dark. Combined with the polished nickel plates of the camera, this finish appeared both luxurious and modern, embodying the aesthetic of the Machine Age.
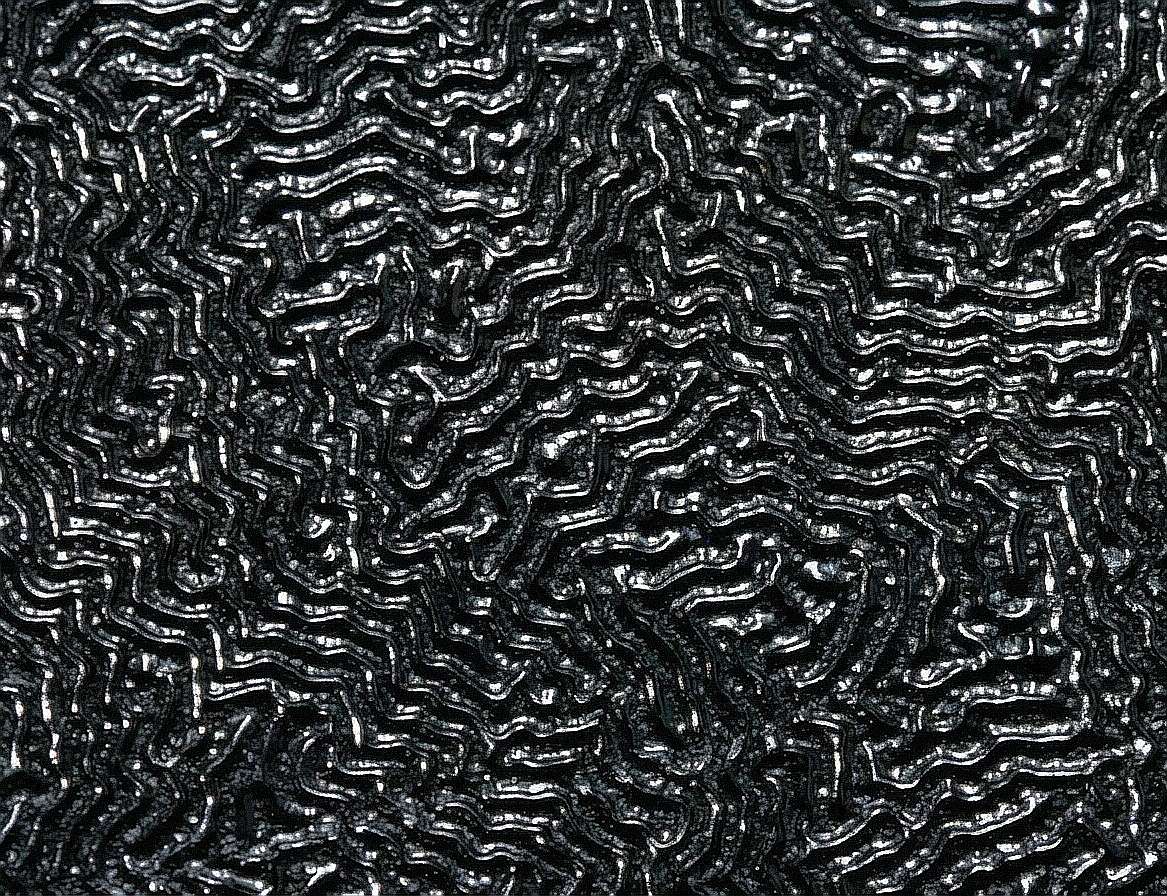
The technical process of this texture relies on a specialized wrinkle paint or ripple enamel process, during which the liquid coating is applied to the sheet steel casing and subsequently baked in an oven at controlled temperatures. As the material dries and cures, varying surface tensions or specific chemical additives cause the coating to shrink and contract, forming these uniform, wavy ridges.
Beyond its aesthetic appeal, the texture fulfilled important functional roles. It made the camera casing highly resistant to scratches, prevented distracting light reflections while shooting, and provided the photographer with a secure, non-slip grip due to the tactile surface.
The handling
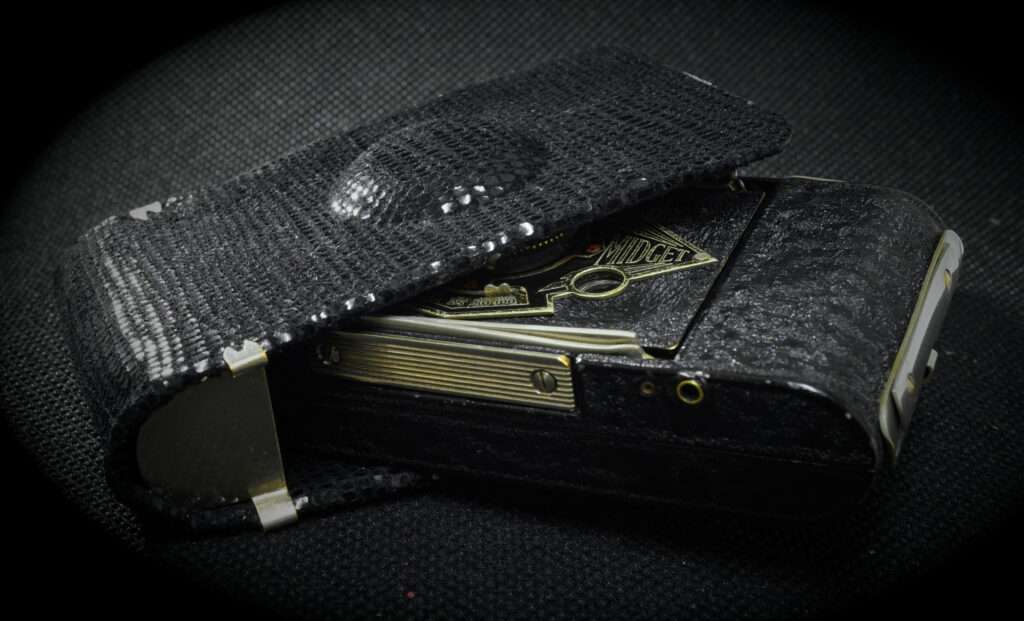
So far, we’ve looked at the details and the camera, ready for transport. Now let’s talk about how to use it.
The most common operations are certainly those that get the camera ready to shoot. But what does “ready to shoot” mean for the Midget? The lens must be positioned correctly—that is, the front plate must be at the correct distance from the film plane. With the Midget 55’s 53 mm Ensar lens, that distance is 53 mm. When the camera is closed and set to infinity, the lens is exactly 9 mm in front of the film.
So we have to pull the front plate out of the camera by exactly 44 mm. This is ensured by the four struts we’ve already discussed in the details section. To prevent light from entering the film from the side, there’s what’s called a bellows. It’s made of leather and expands like an accordion when pulled out. This step is best demonstrated with a video clip:
This takes me 10 seconds, including the time it takes to set up the direct viewfinder. Pay attention to the moment when the front panel snaps firmly into place in the struts.
After that, you can press the shutter button right away to take the photo, provided that the shutter speed, aperture, and (on the Midget 55) the distance are set correctly.
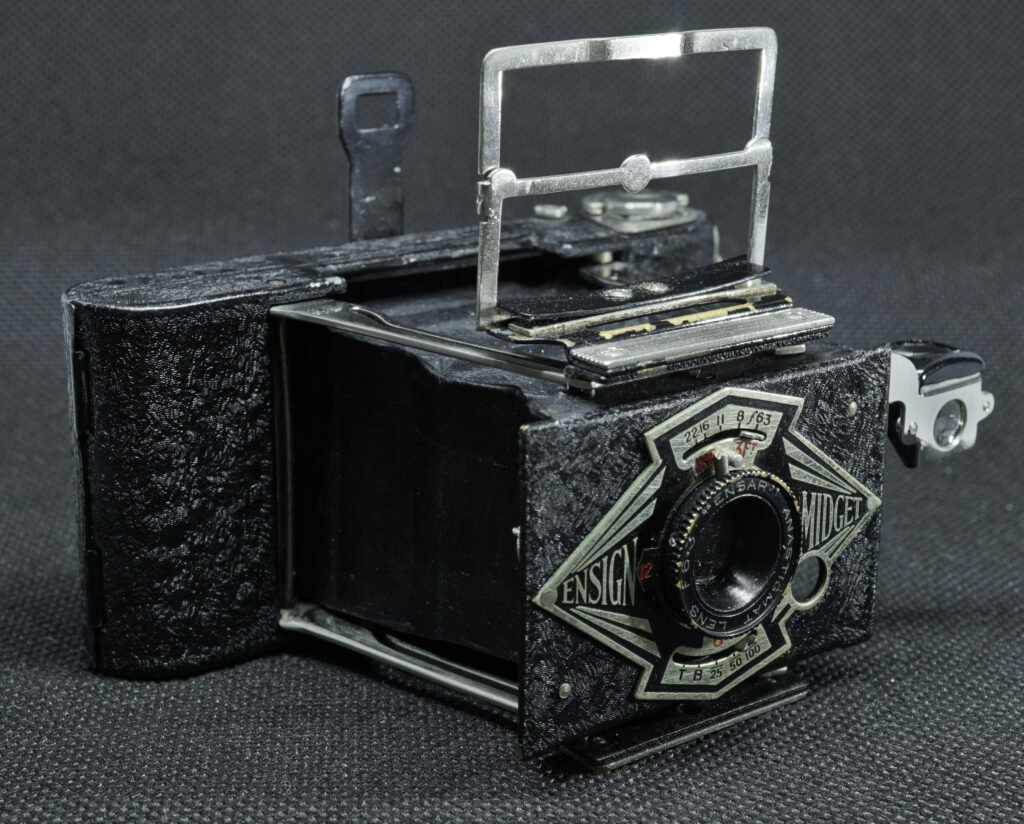
When shooting in landscape orientation, the front plate rests securely on the lower ribbed plate, which is also used to pull out the front panel.
Now you can also see the direct-vision viewfinder, consisting of the large front frame and the rear sight.
To the right of the front panel, you can see the waist-level viewfinder that swings out. We’ll learn more about this later.
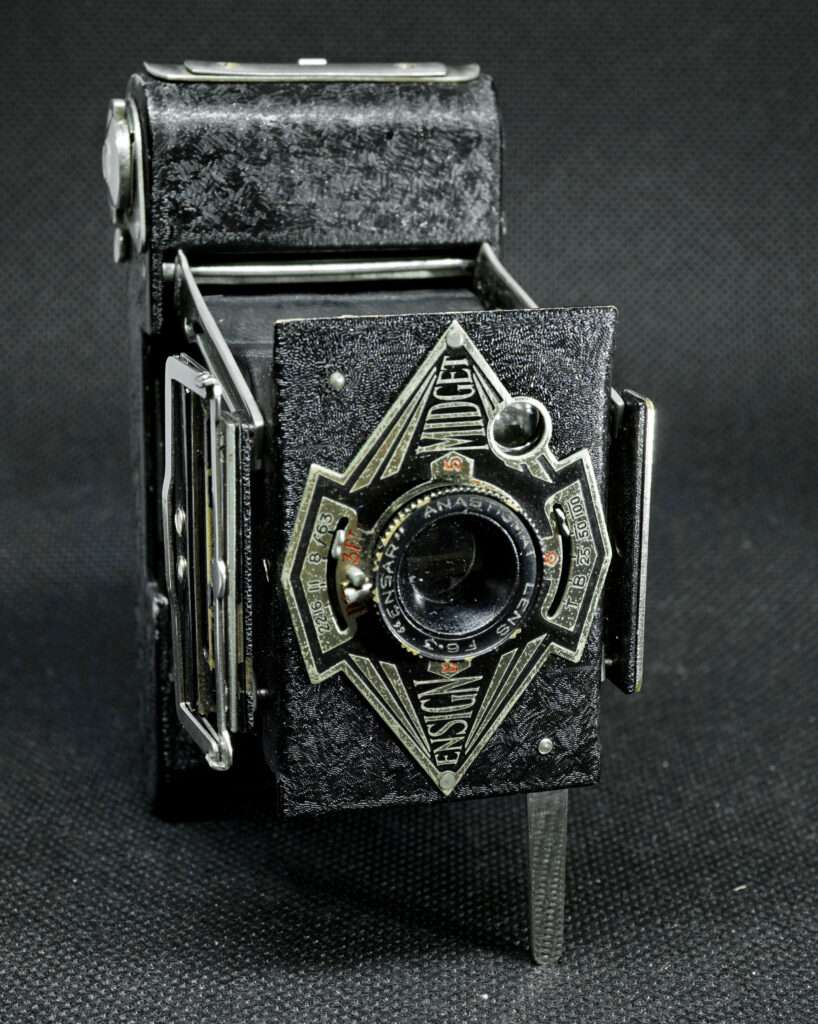
If you want to take photos in portrait orientation, you can swing out the stand.
In this mode, you can use the waist-level viewfinder without swinging it out. It then uses the small round window in the upper right corner of the front panel.
The waist-level viewfinder uses an opening in the front plate for portrait-orientation shots; for landscape orientation, it can be folded out to the side using a small swivel arm:
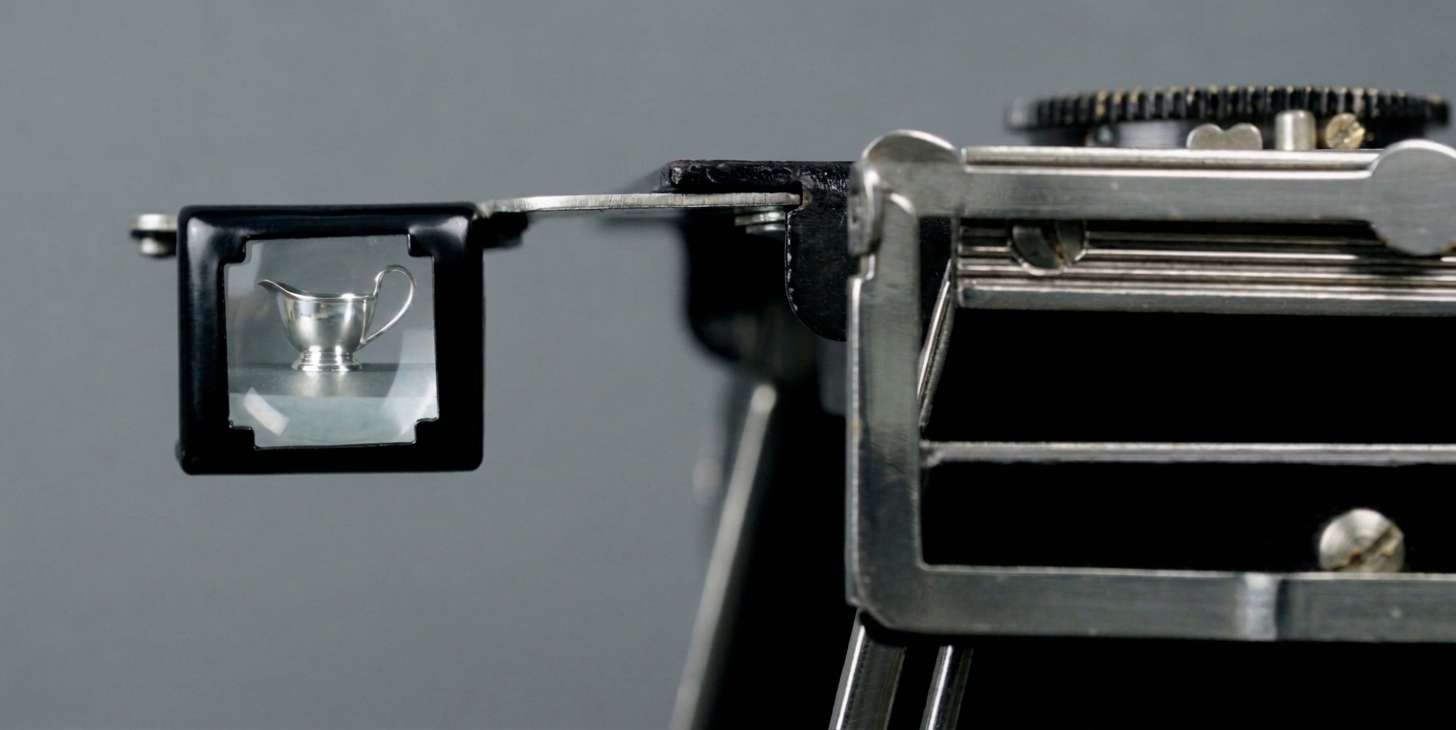
It is a pure bright-view finder – a small lens-mirror system without a focusing screen that produces an inverted image. However, this viewfinder is unsuitable for practical photography. It is far too small and—despite its name—too dark. The view through this viewfinder shown in the image above is unusually clear. This was only possible thanks to elaborate lighting and shooting with a macro lens.
All settings on the Ensign Midget are adjusted on the front panel:
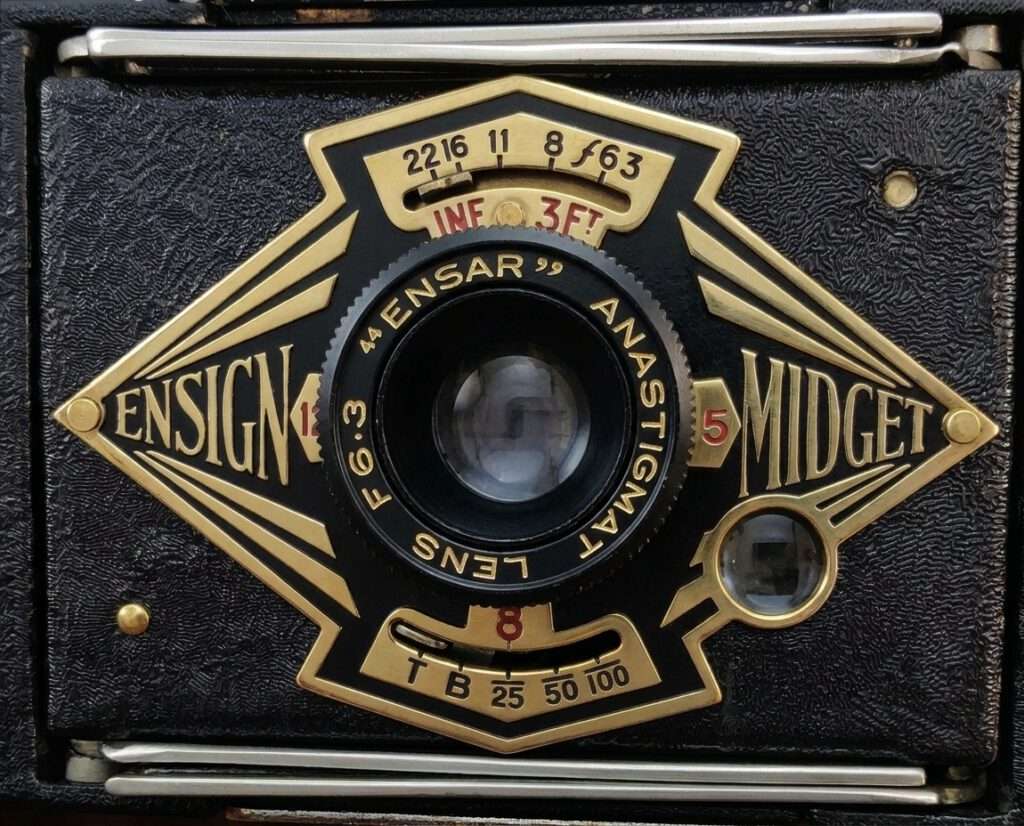
Above the lens is the slider for adjusting the aperture from f/6.3 to f/22 (the Midget 33 has only two settings).
Below the lens, you can set the shutter speeds: “T,” “B,” and the fast speeds ranging from 1/25 s to 1/100 s. However, when I measured the fast shutter speeds on my Midget 55, the settings between 1/25 and 1/100 always came out to about 1/60 s.
The exposure value (EV) describes how bright a scene is: each step up doubles the amount of light. What range of exposure values can the camera cover in this way? At ISO 100 that gives it a usable range of roughly EV 10 to 15.6. The dark end, EV 10, is reached at f/6.3 and 1/25 s, which suits very dim conditions such as deep shade or an overcast evening. The bright end, EV 15.6, is reached at f/22 and 1/100 s, which covers strong sunlight, including reflective surroundings like a beach or snow.
The distance can only be adjusted on the Model 55. This is done by rotating the lens. A mark on the outer ring is rotated to align with the red scale markings for 3, 8, 12 ft, INF (infinity), or any value in between.
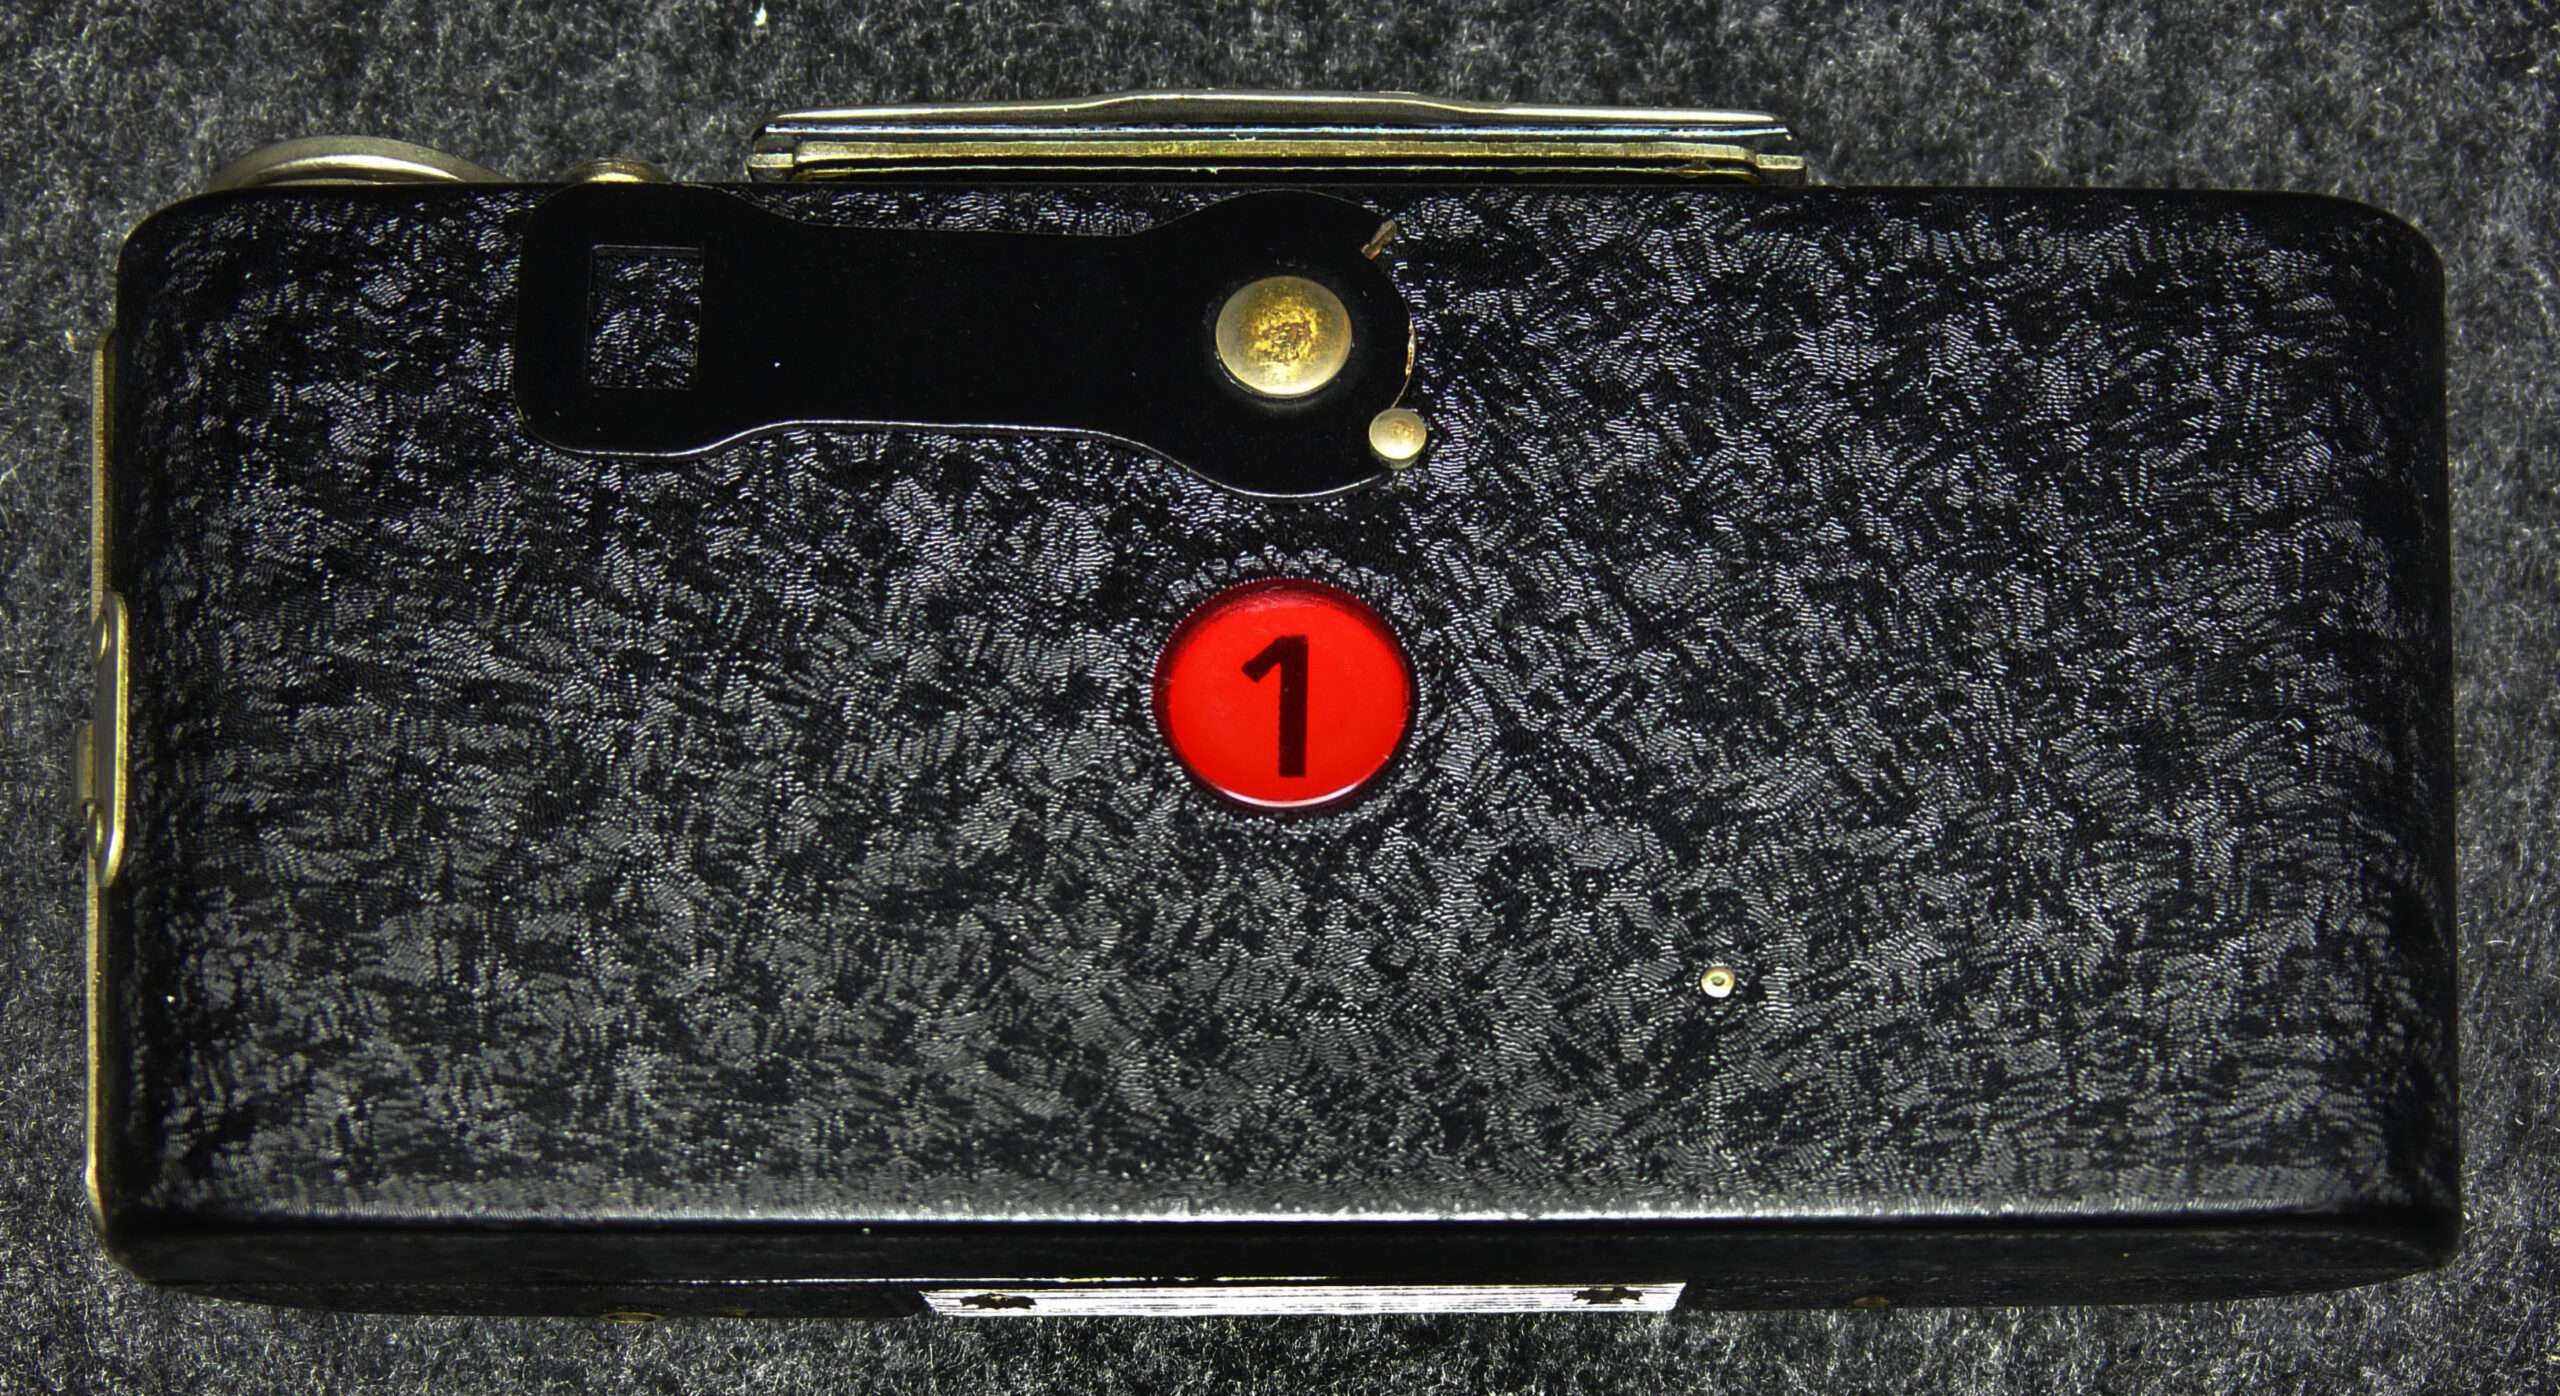
The Ensign Midget can take six pictures on a single roll of film. To advance the film, turn the film winder until the next frame number appears in the window on the back panel. It’s very simple and works great.
Loading a new roll of film is also surprisingly easy. In the past, you could buy ready-made E10 Ensign Lukos film. It was a (35.6 mm) wide roll of film.
To load the film, open the holders for the film spool and the take-up spool. Then lift the top covers slightly and insert the two film spools:
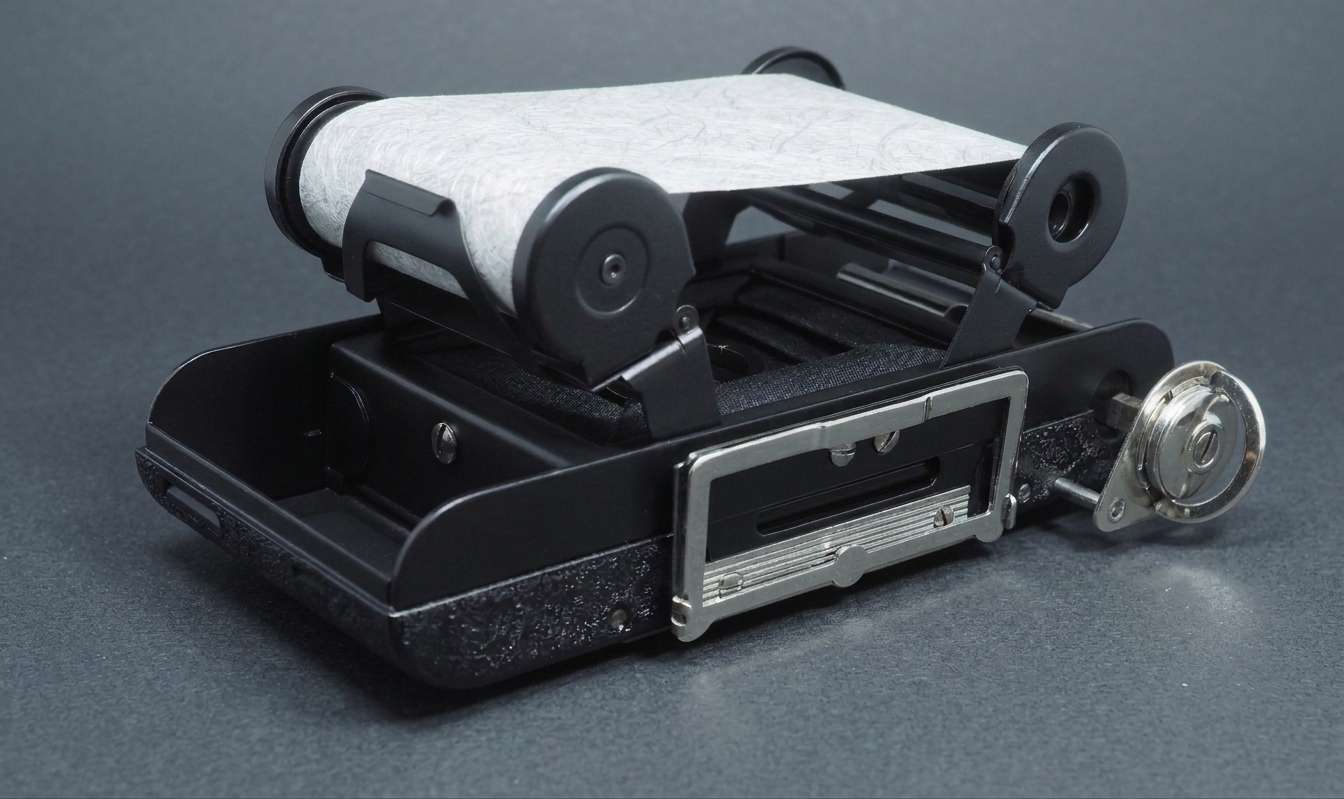
Then close the back panel and secure it.
After taking a photo and advancing the film, the camera must be folded back together before transport. However, because the struts are locked into place on the front plate, you must unlock them first.
This takes a little practice, as all four struts must be pulled outward. Only then can the front plate be slid back onto the body. It’s a good idea to fold in the two frames of the direct-vision viewfinder first so they aren’t damaged during this process. A short video clip also shows how to do this:
The camera is quick and easy to use because its design is exceptionally well thought out. Only the waist-level viewfinder is unusable—but it’s also unnecessary because of the excellent direct-vision viewfinder.
In the following sections, we’ll find out whether the Ensign Midget is also capable of taking really good photos.
The negative’s size
As I mentioned at the beginning, the size of the negative frame was the reason I was so enthusiastic about this miniature camera. One would have to compare the size with other cameras from that era and relate it to their negative formats. Now, have a look at a Minox, an Ensign Midget, and a Leica side by side:
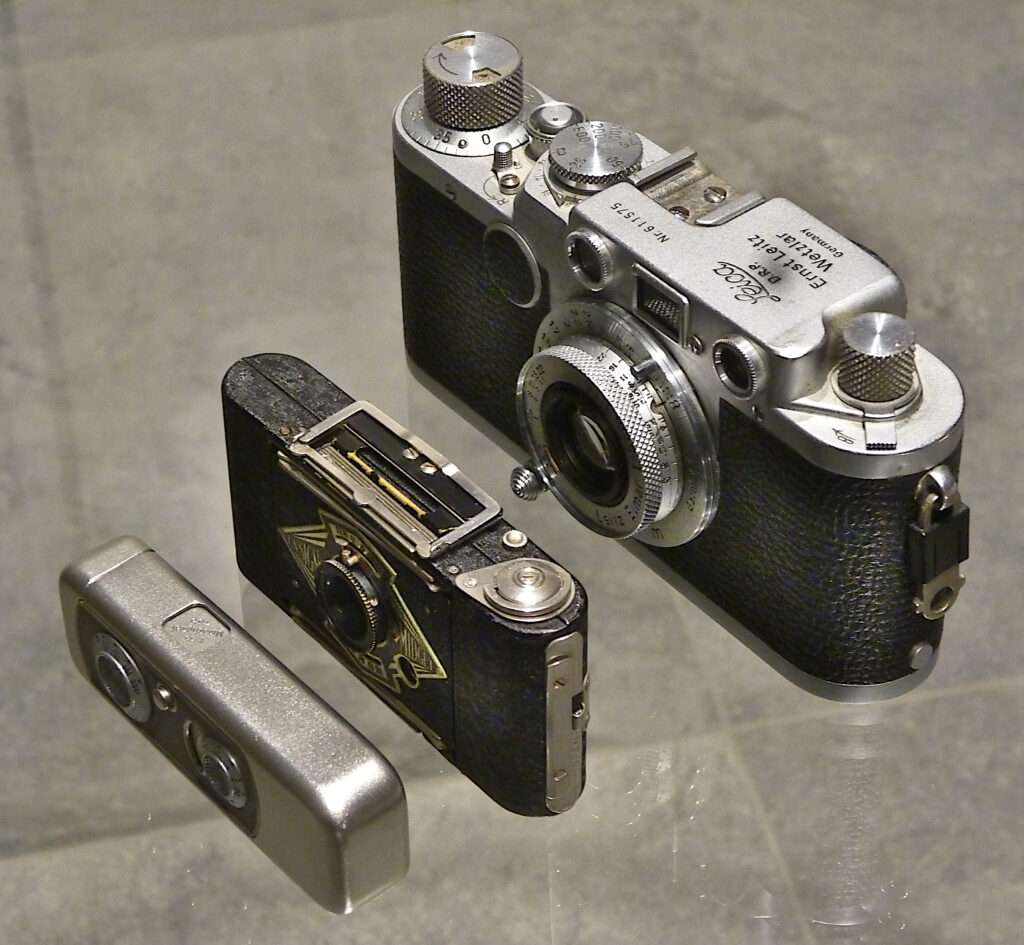
Who would have thought that the Ensign Midget produced the largest negatives of them all? Here is a direct comparison of the three negative formats:
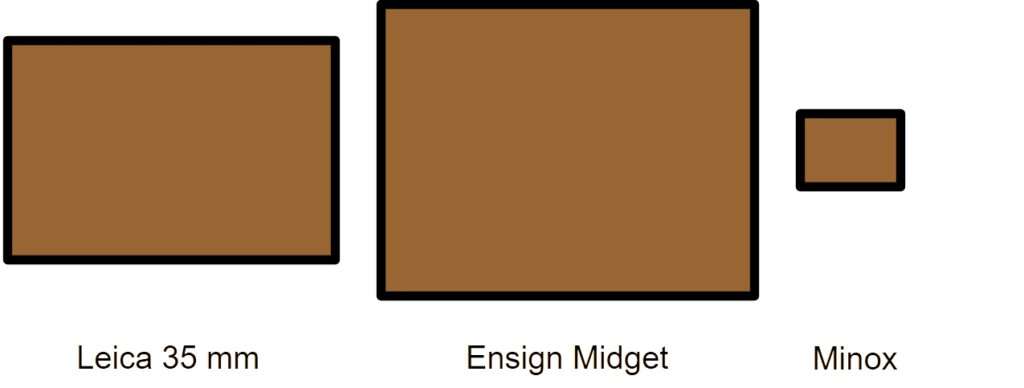
The Midget’s film gate measures 41.3 × 31.75 mm. A Minox negative is only 11 × 8 mm. Multiplying width by height gives the area: 1,311 mm² for the Midget and 88 mm² for the Minox. The Midget’s negative is therefore about 15 times larger (1,311 ÷ 88 ≈ 15).
Area grows with width and height, so a picture that is 15 times larger in area is only about 3.9 times larger in each direction (3.9 × 3.9 ≈ 15). That is the factor by which the Midget would allow enlargements if both cameras had equally sharp lenses and the same film. As we will see next, the lenses are not equally sharp.
How good is the lens?
The Midget model 55 has the best lens in the series. It’s a fully corrected 53 mm Ensar Anastigmat f/6.3 that can be stopped down to f/22.
Since there are no reviews of this lens, I tested it myself. Since I had already tested the lens of the VEF Minox Riga earlier, it’s easy to compare the results. You can find a description of my testing method here. I’ve presented my test results with the Minox here.
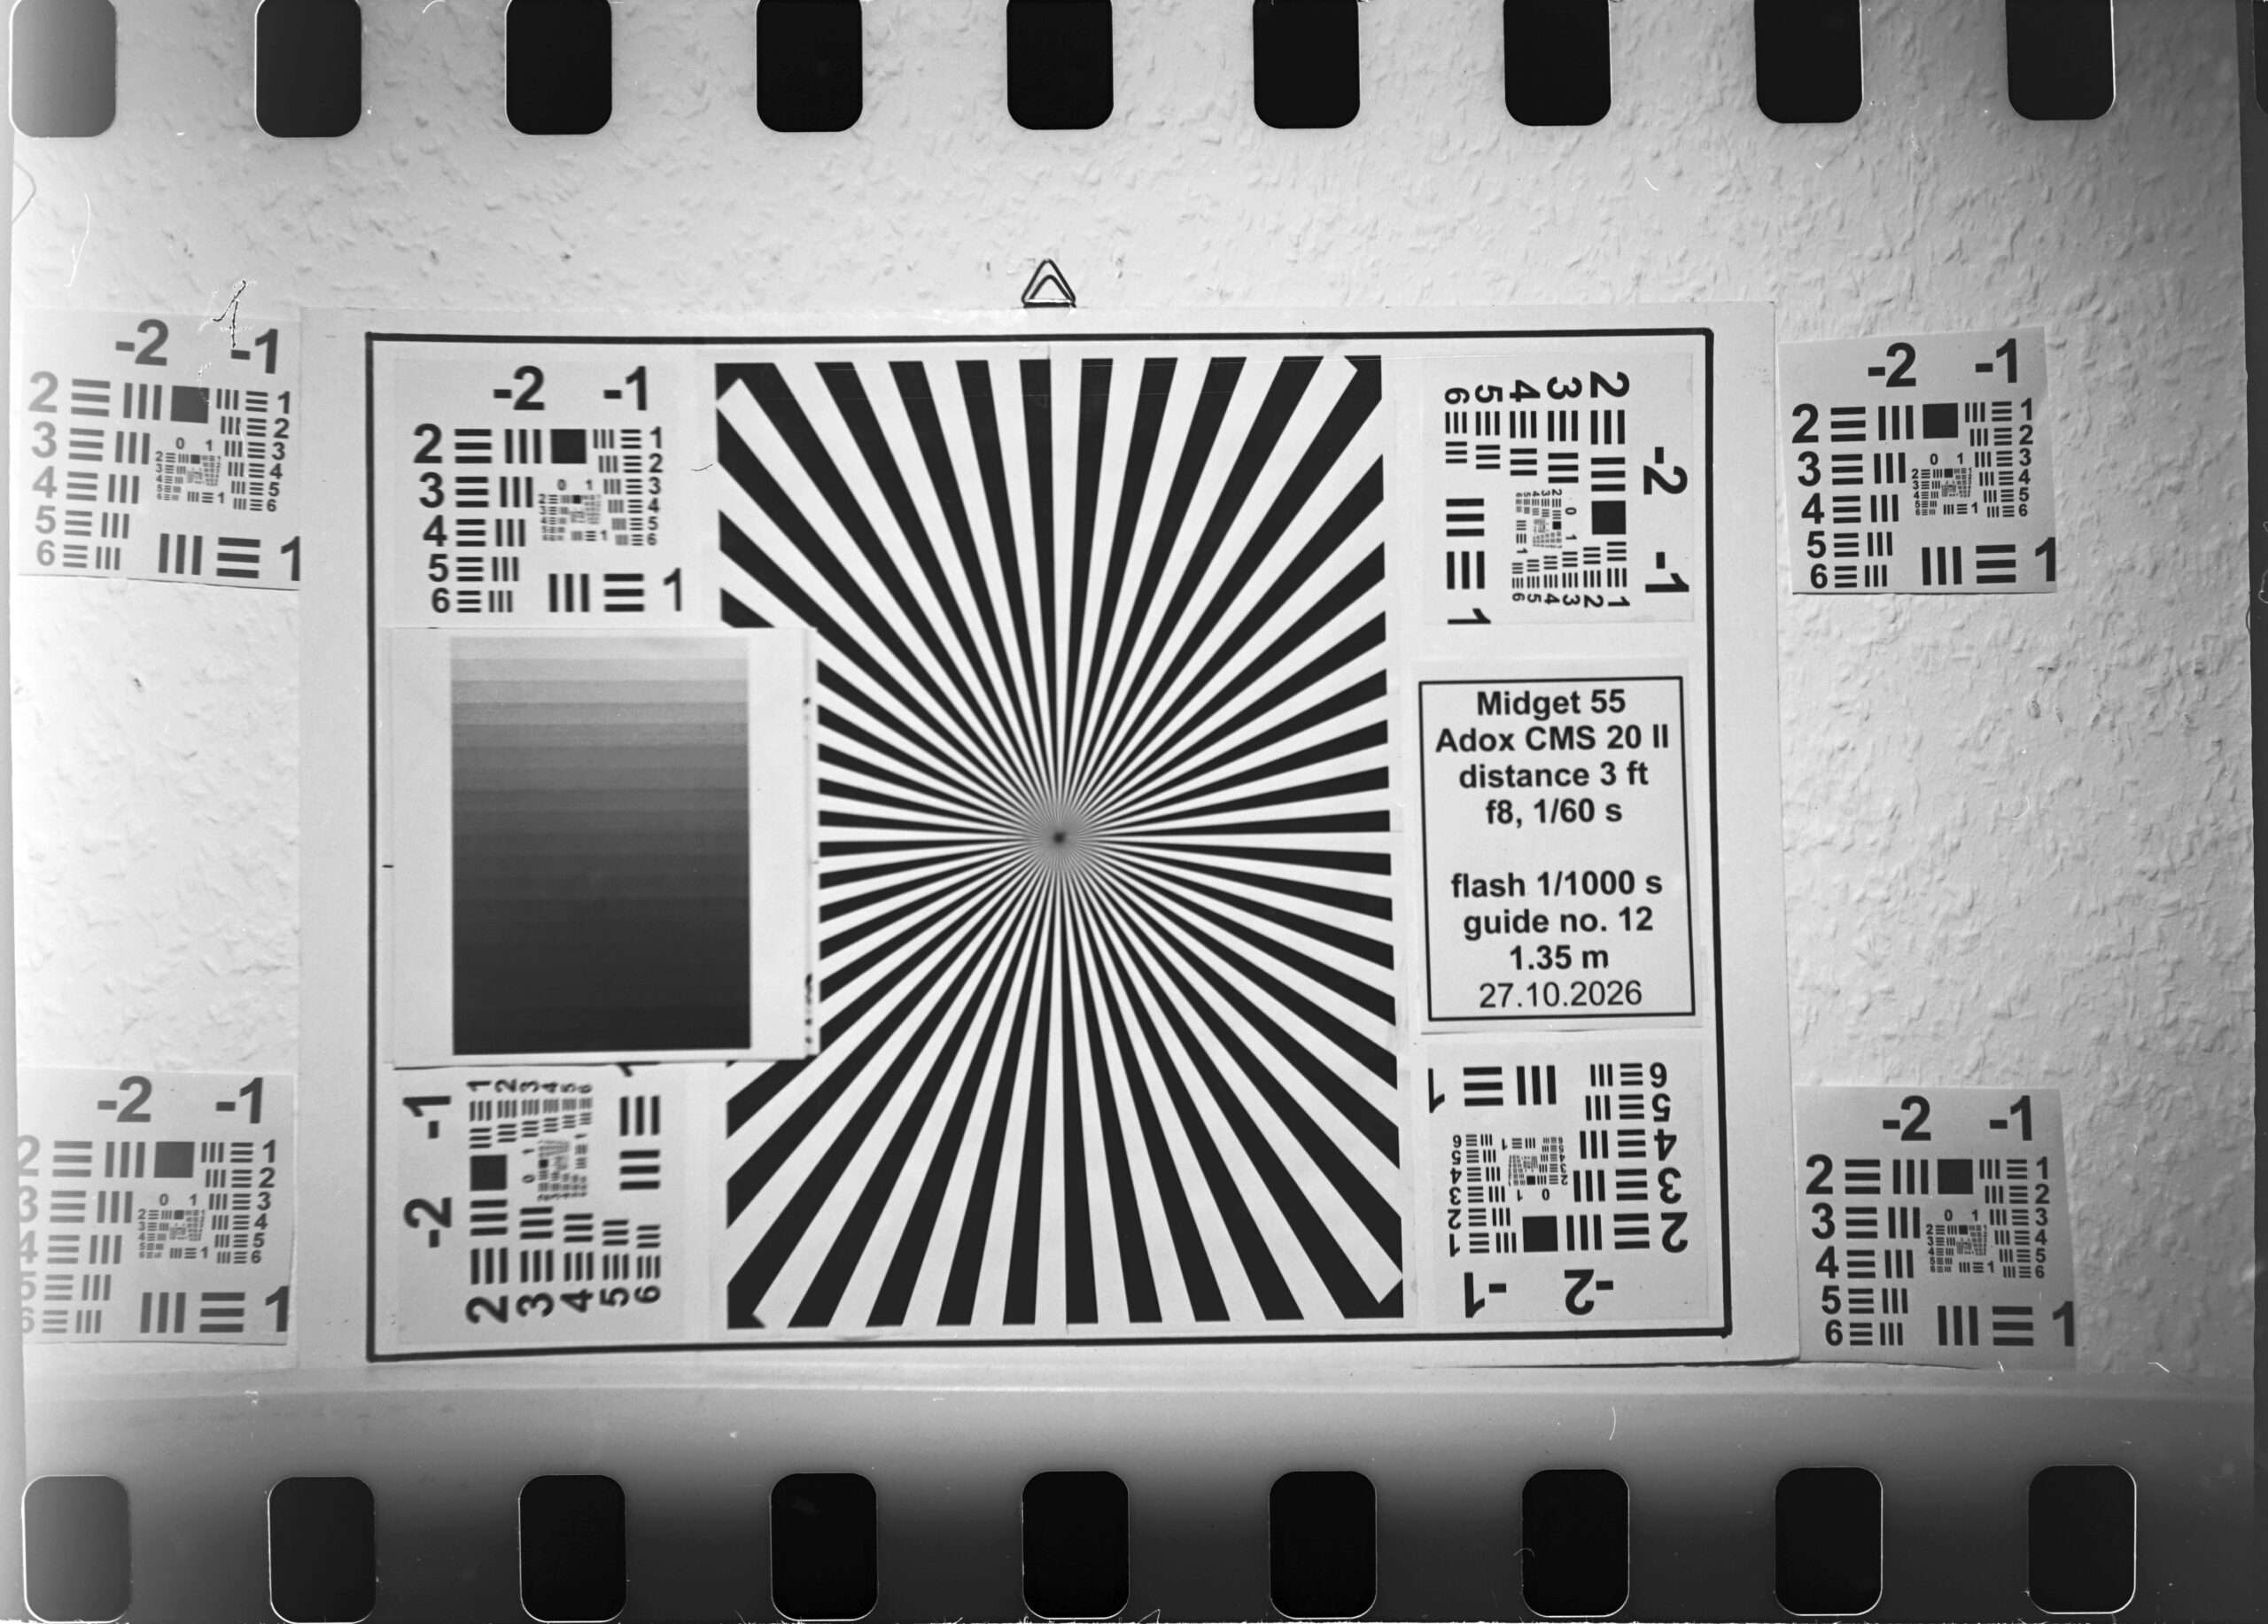
no digital postprocessing
The tests show remarkably good results for the Ensar Anastigmat on the Midget 55. I measured an aerial resolution of 110 LP/mm at the center of the image, which drops to 50 LP/mm at the edges.
By way of comparison: the best all-around lenses of the 1930s—for example, those from Zeiss and Leitz – had resolutions of 130 LP/mm and between 30 and 60 LP/mm at the edges. That doesn’t seem much better than what the Midget achieves. However, it’s important to remember that these top-of-the-line lenses were much faster (up to f/1.5) and therefore naturally contained much larger elements. The small diameters of the Midget are much easier to manufacture.
How good will the photos turn out?
How much detail a negative actually holds depends on the lens and the film. I explained in Resolution in photography how the two combine into the system resolution.
I measured the aerial resolution of the two lenses with a test chart (method). The Ensar reaches 110 LP/mm in the image center, the Minostigmat of the VEF Minox 225 LP/mm. For the film I use Kodak Ektar 100 with 105 LP/mm. This gives:
Midget: 1 / (1/110 + 1/105) ≈ 54 LP/mm
Minox: 1 / (1/225 + 1/105) ≈ 72 LP/mm
The Minox lens is twice as good, but the film pulls the two cameras much closer together.
Now the negative’s size comes into play. At a viewing distance of 25 cm the human eye resolves about 5 LP/mm. A negative with 54 LP/mm can therefore be enlarged 54 ÷ 5 = 10.8 times without the print looking blurry at 25 cm:
| Camera | System resolution | Enlargement | Maximum print |
|---|---|---|---|
| VEF Minox | 72 LP/mm | 72 ÷ 5 = 14.4 | 158 × 115 mm |
| Ensign Midget | 54 LP/mm | 54 ÷ 5 = 10.8 | 446 × 343 mm |
The Midget print is about 2.8 times wider than the Minox print, which is roughly 8 times the area. The negative is 15 times larger, but the weaker lens takes back part of that advantage. (Note: The sample image below is intended solely to illustrate the different image sizes and was not taken with either a Minox or a Midget):
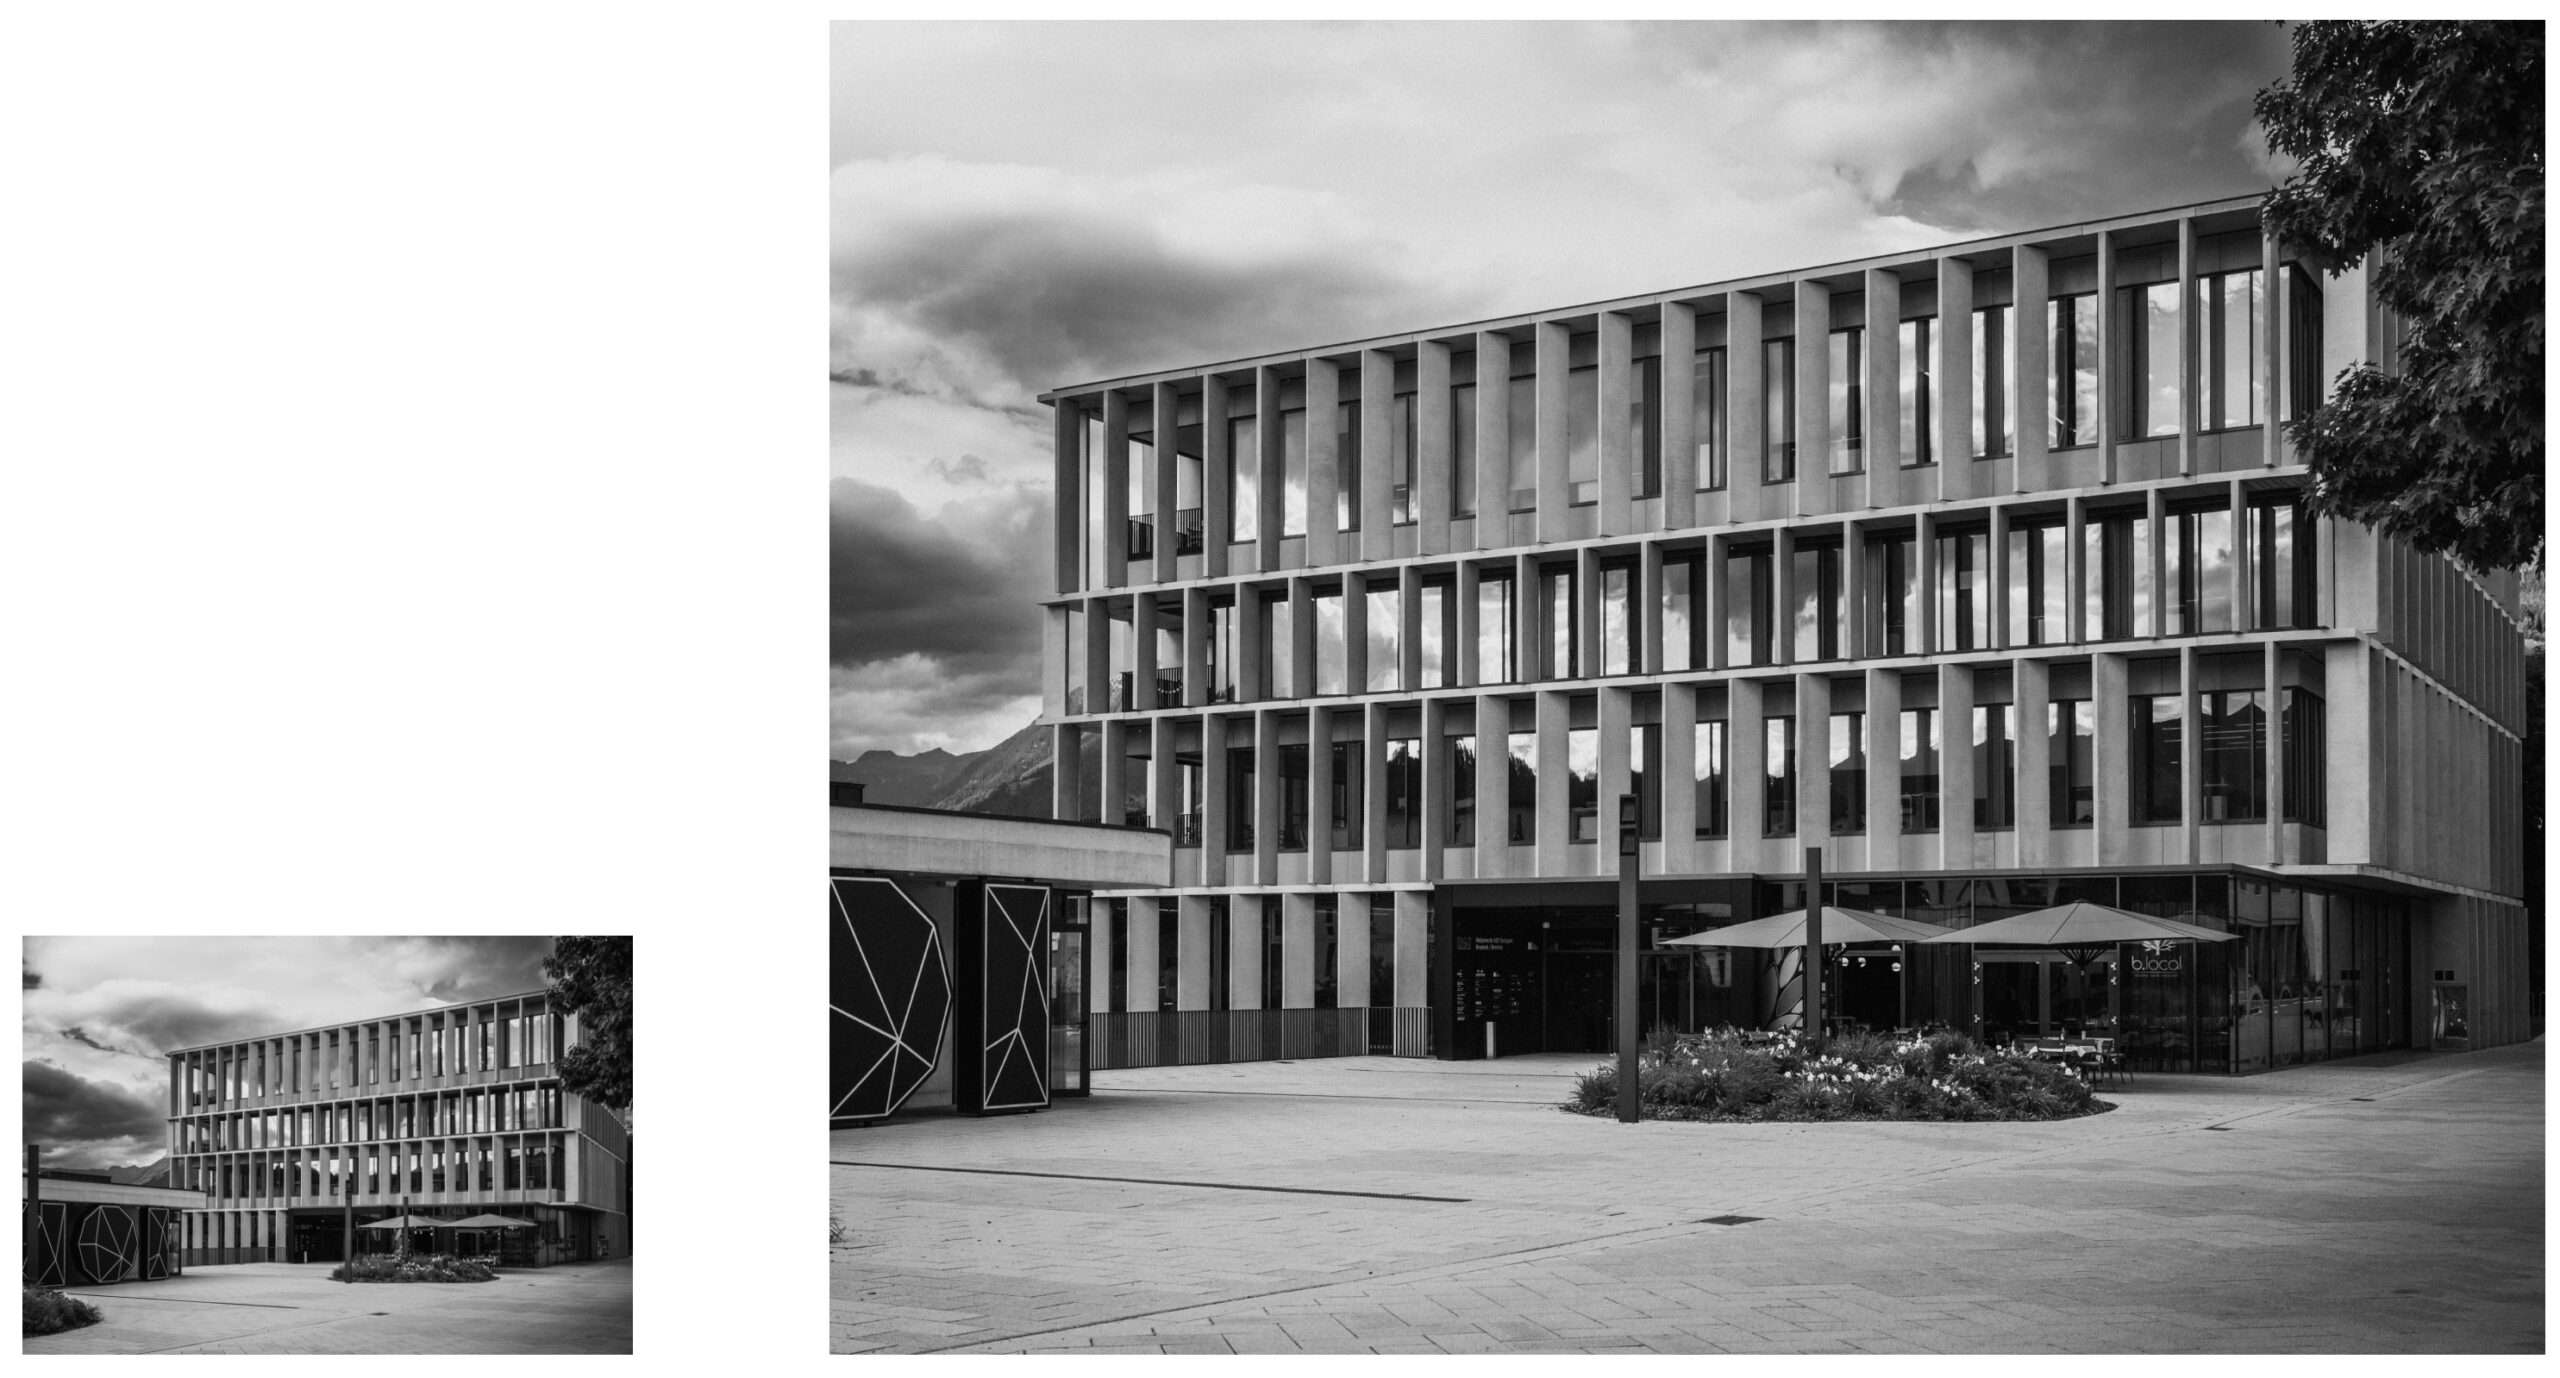
Above, we see the print sizes for VEF Minox: 158 mm x 115 mm, Ensign Midget: 446 mm x 343 mm, based on system resolution: Minox 72 LP/mm, Midget 54 LP/mm; viewing distance 25 cm; eye 5 LP/mm.
The difference in size is dramatic!
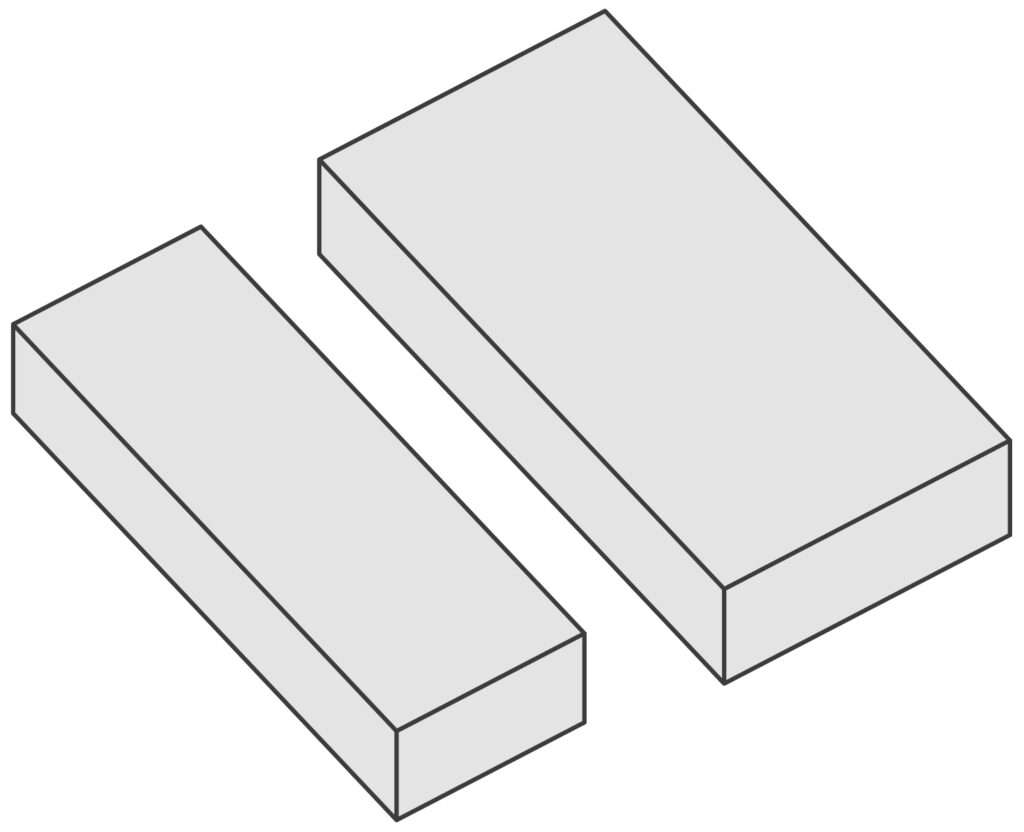
Compare the sizes of the two cameras again. The Ensign Midget isn’t much bigger than the Minox, but it produces much larger images.
The catalog citation “The idea was to design a camera … giving first-class results of reasonable size. … enlarged up to 15 x 12 inches and larger …” holds up.
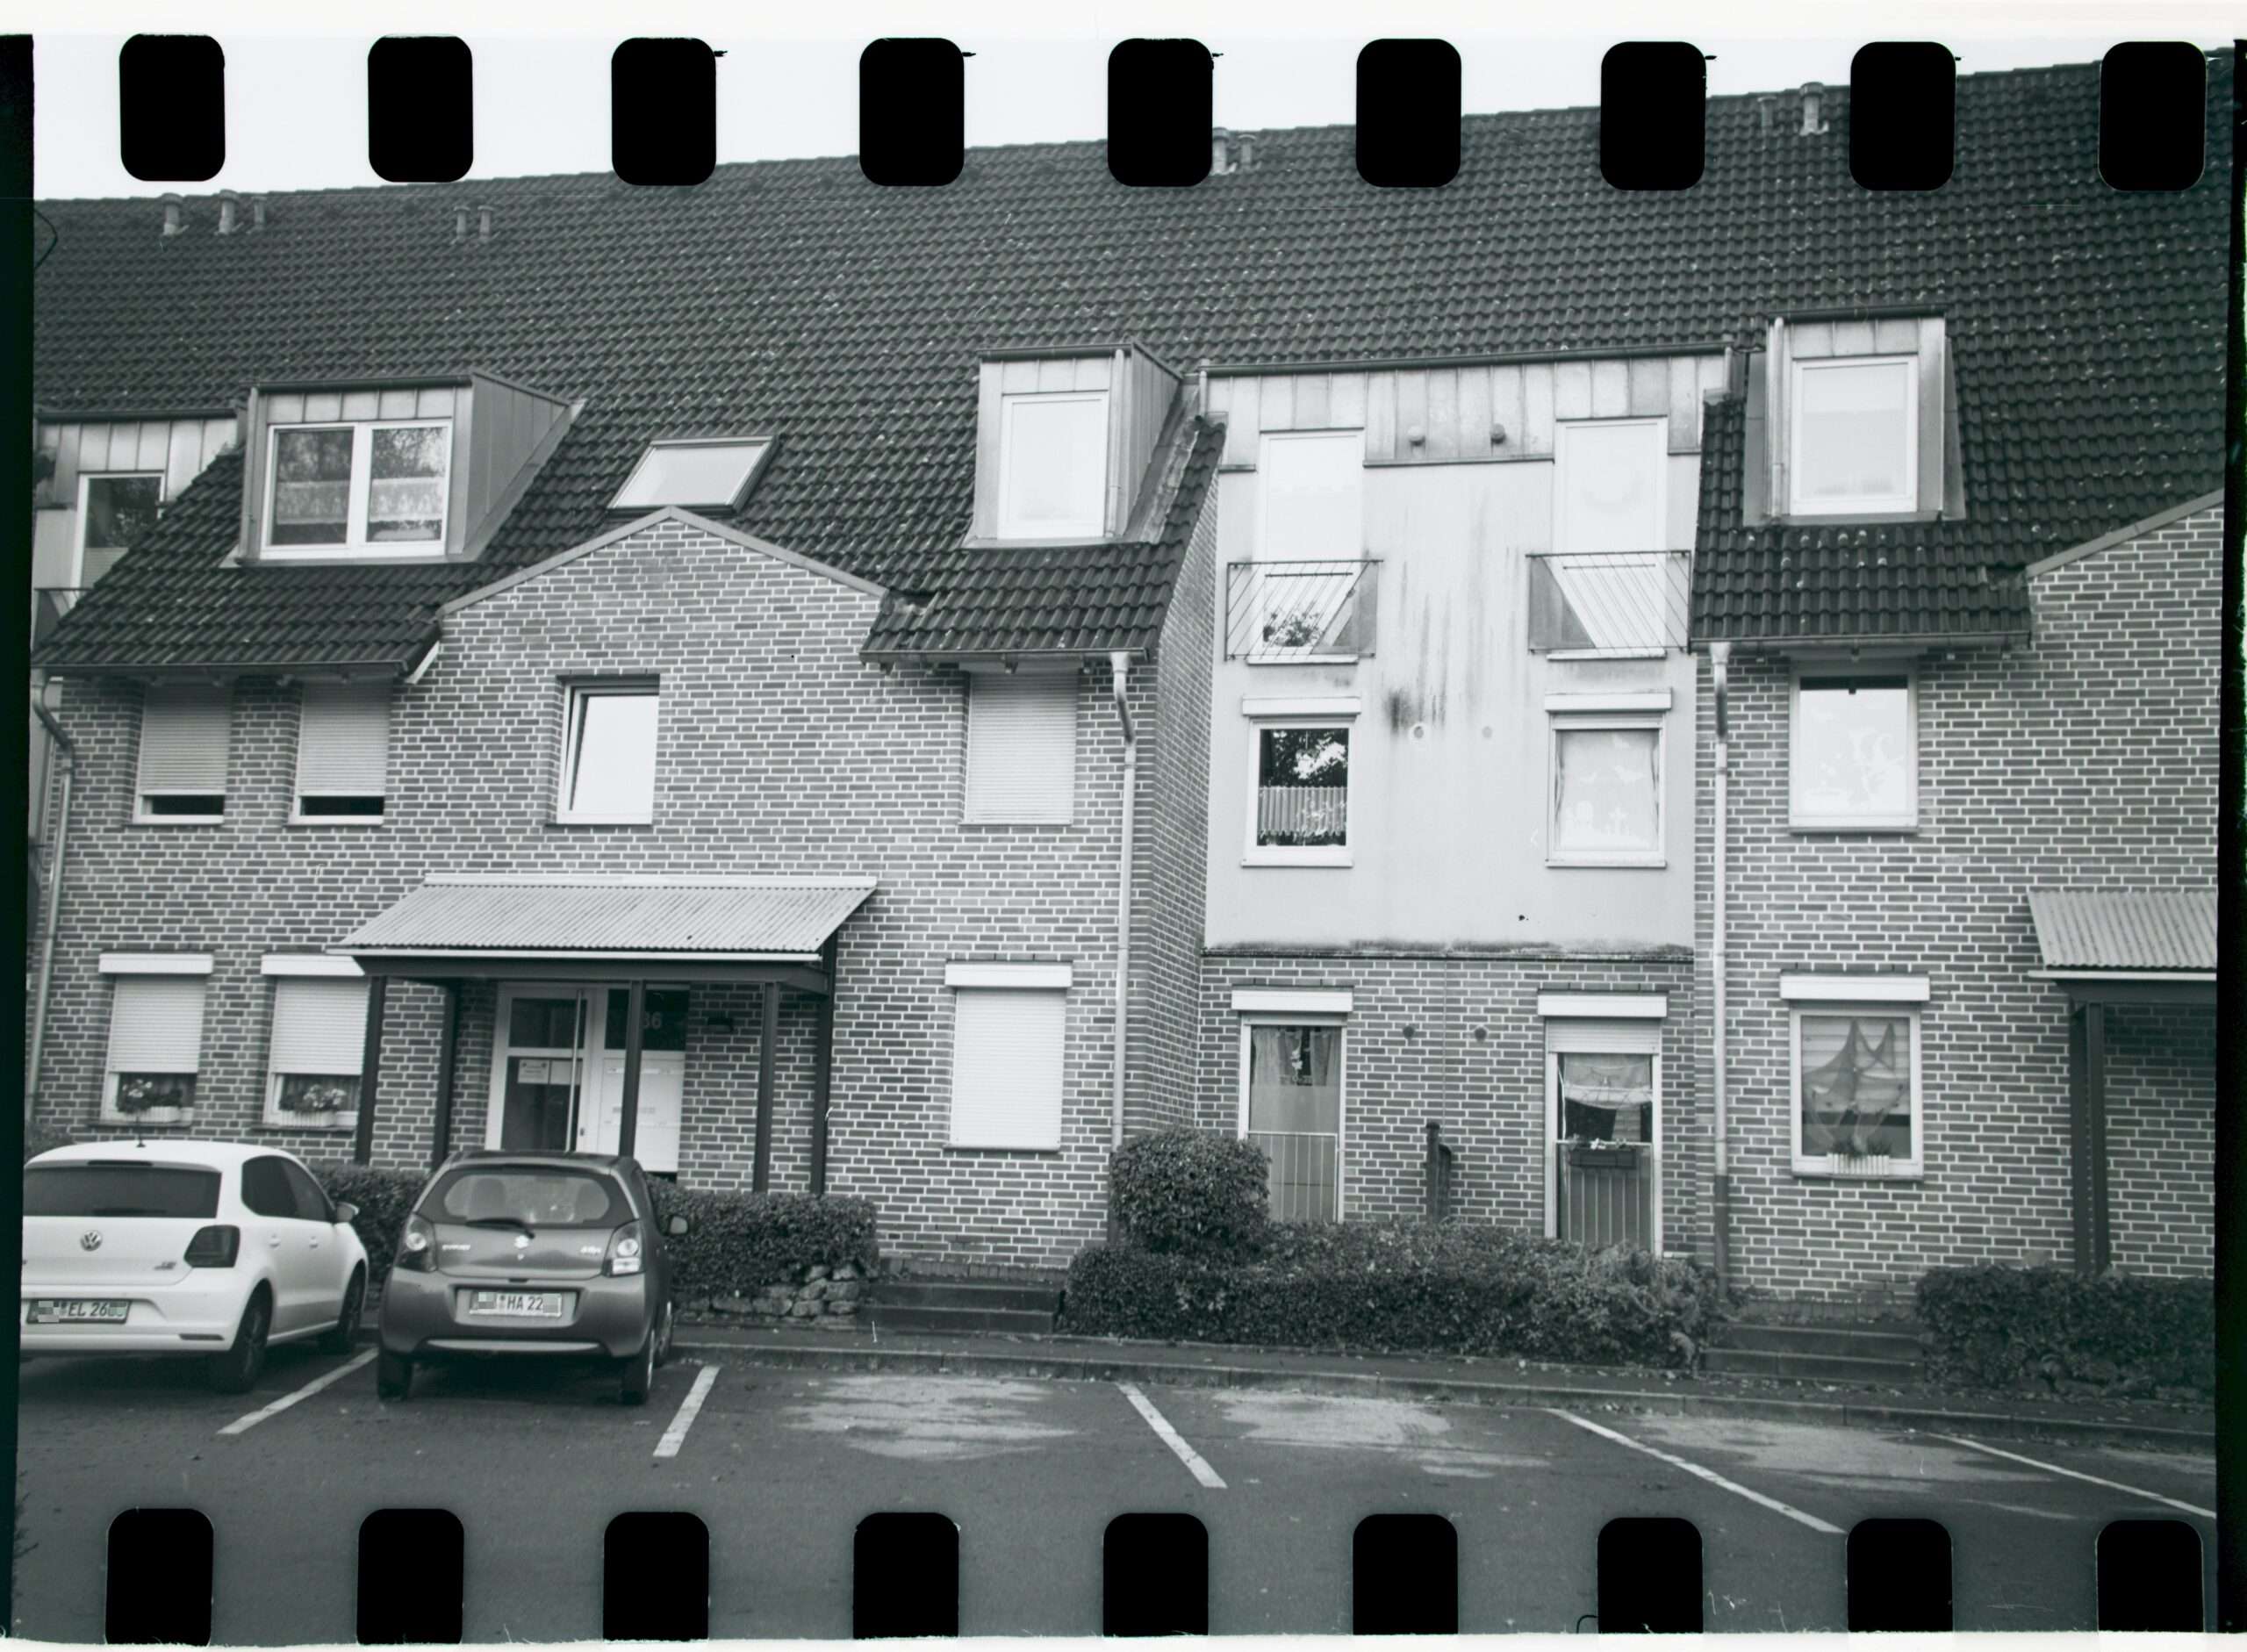
To conclude, here’s an original photo I took with my Ensign Midget 55. Since I used standard perforated 35mm film, the image extends right up to the perforations:
Sample photos
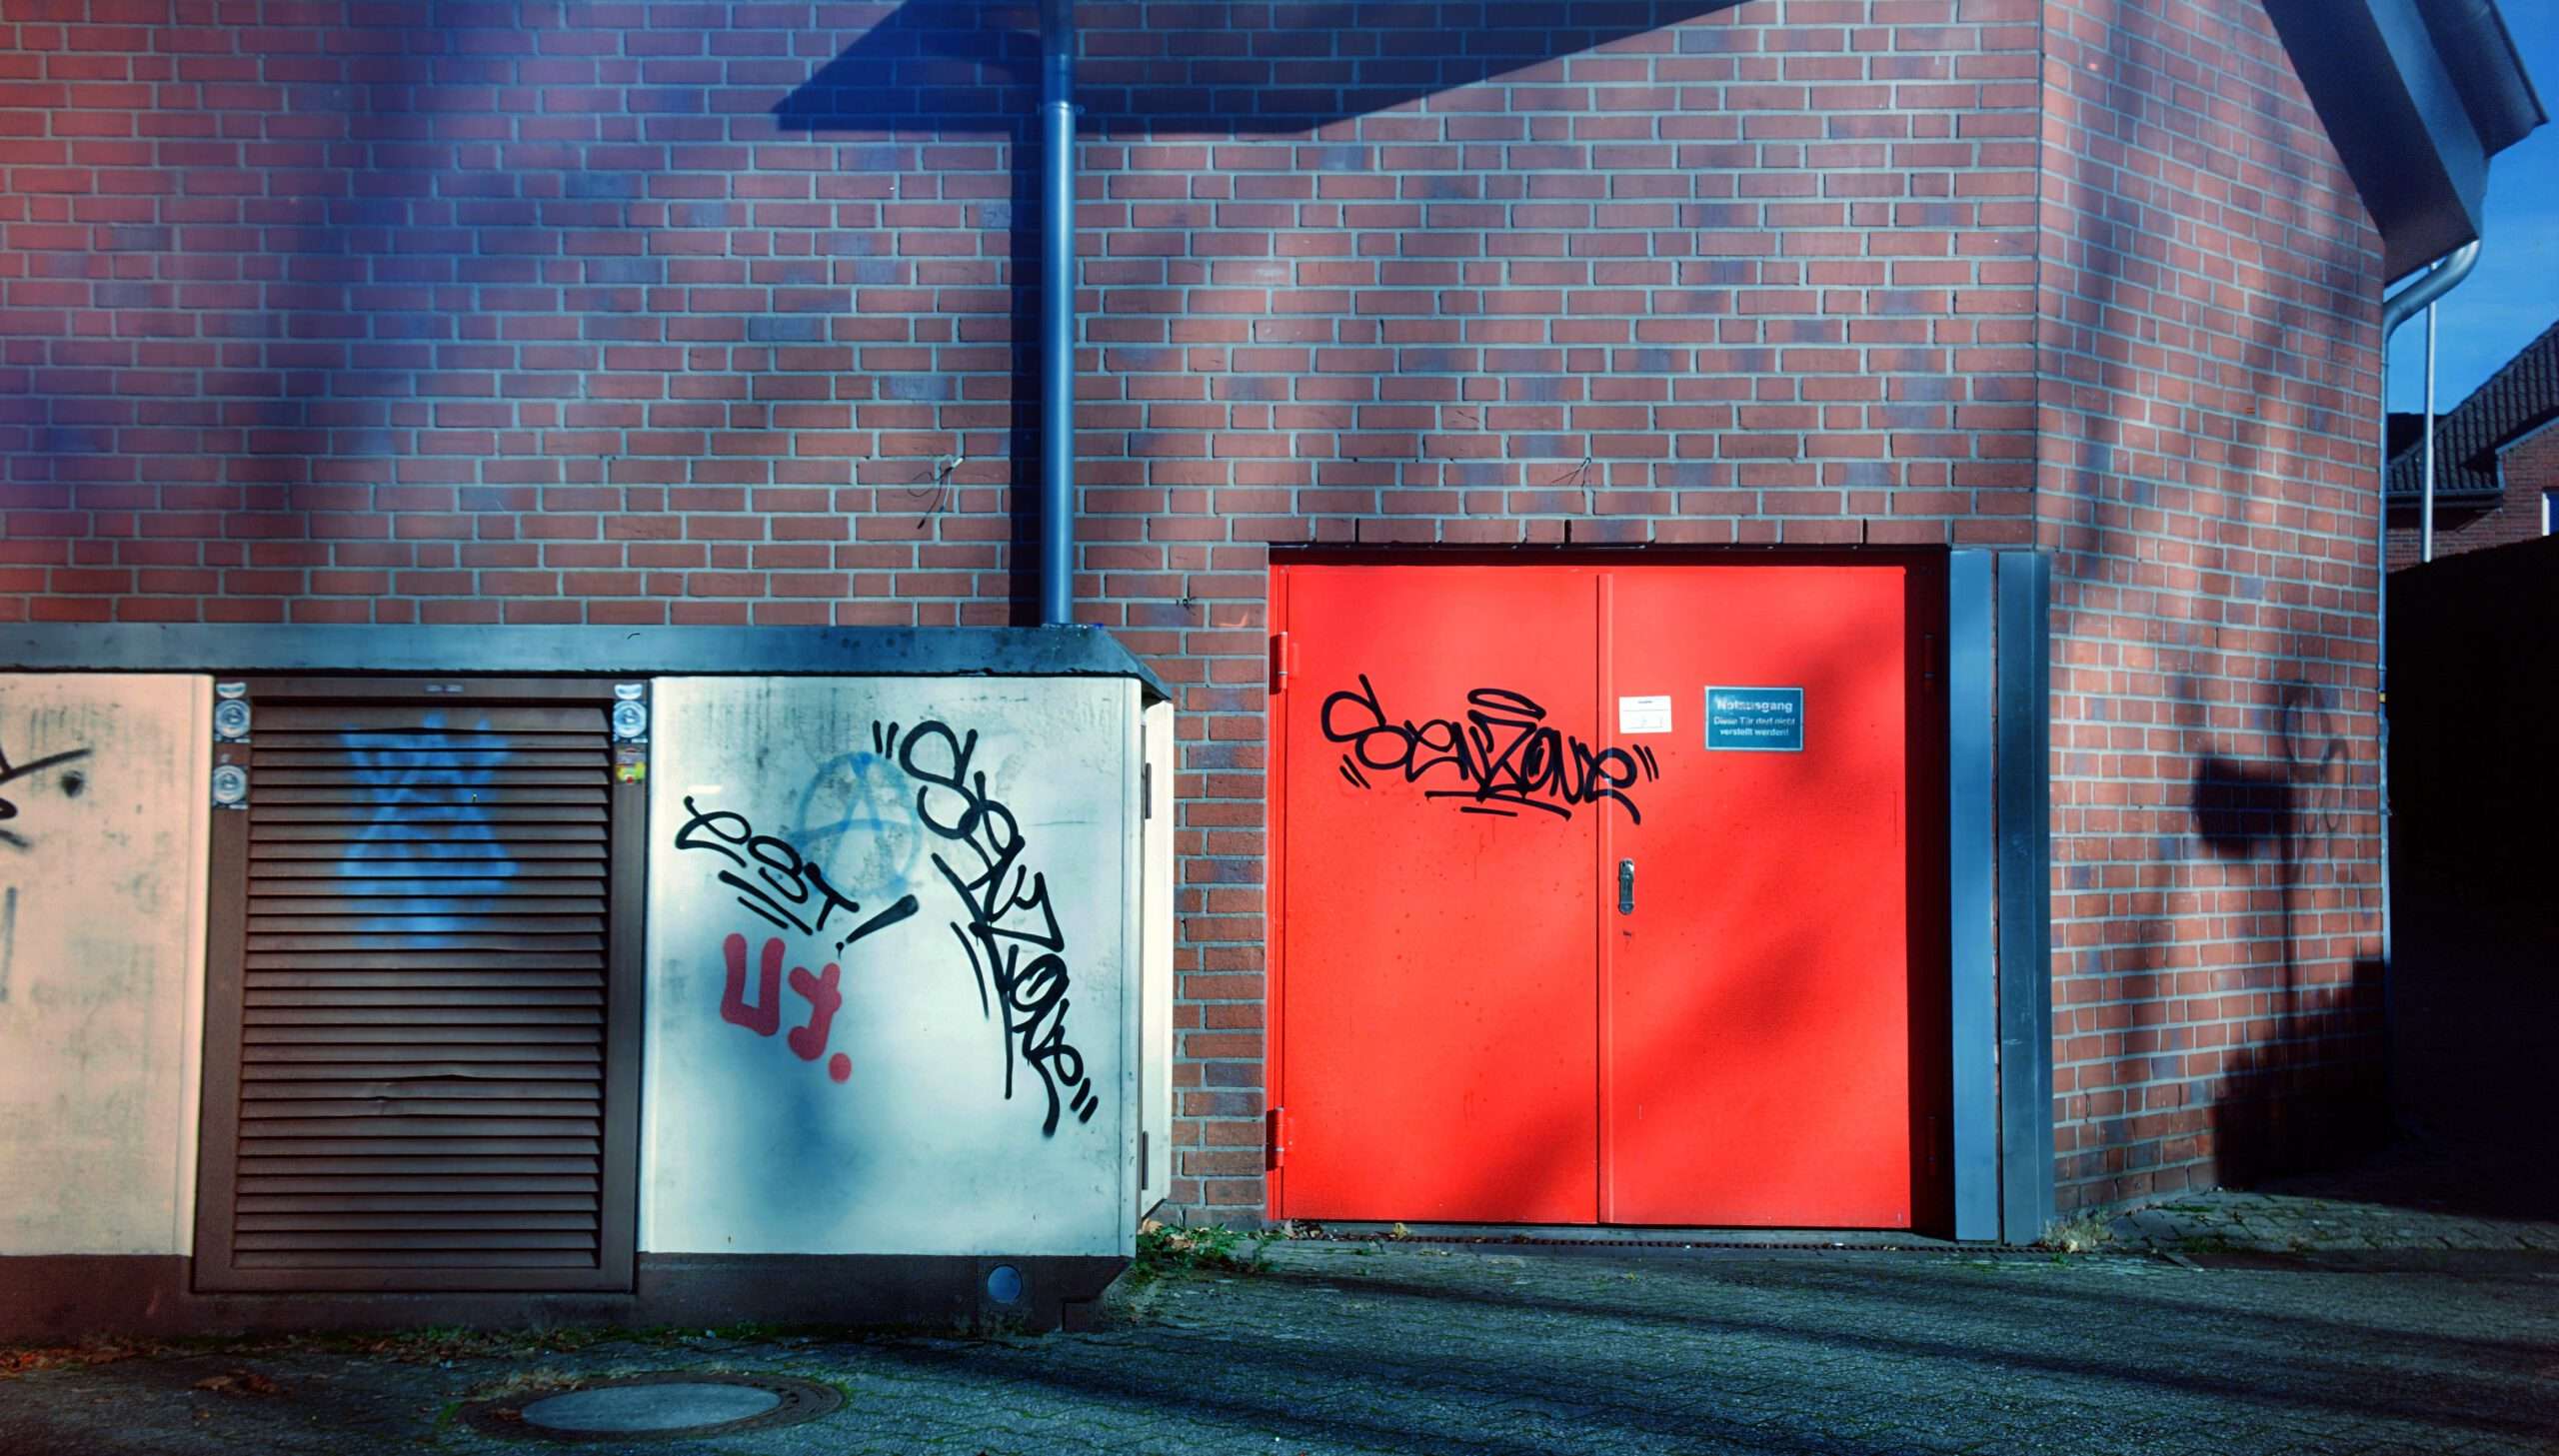
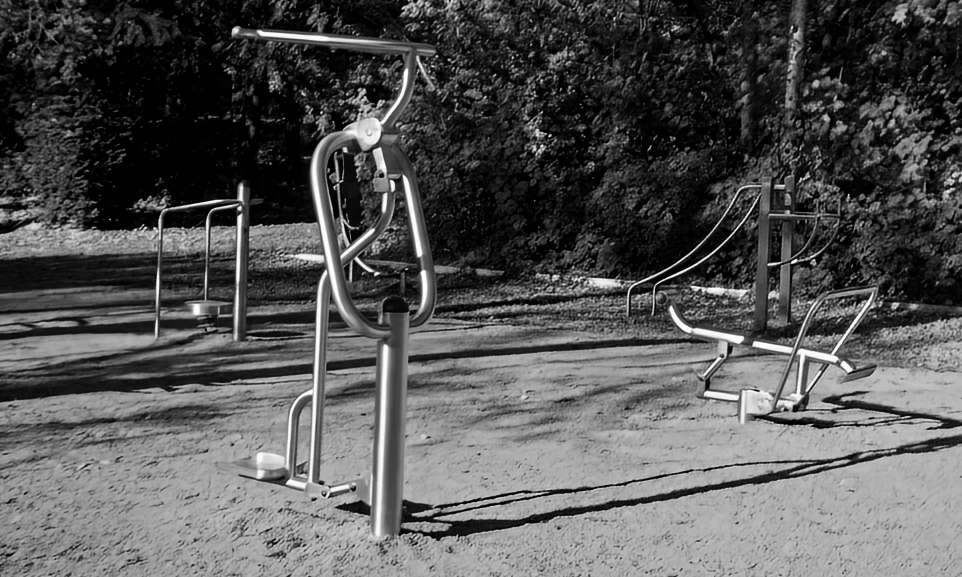
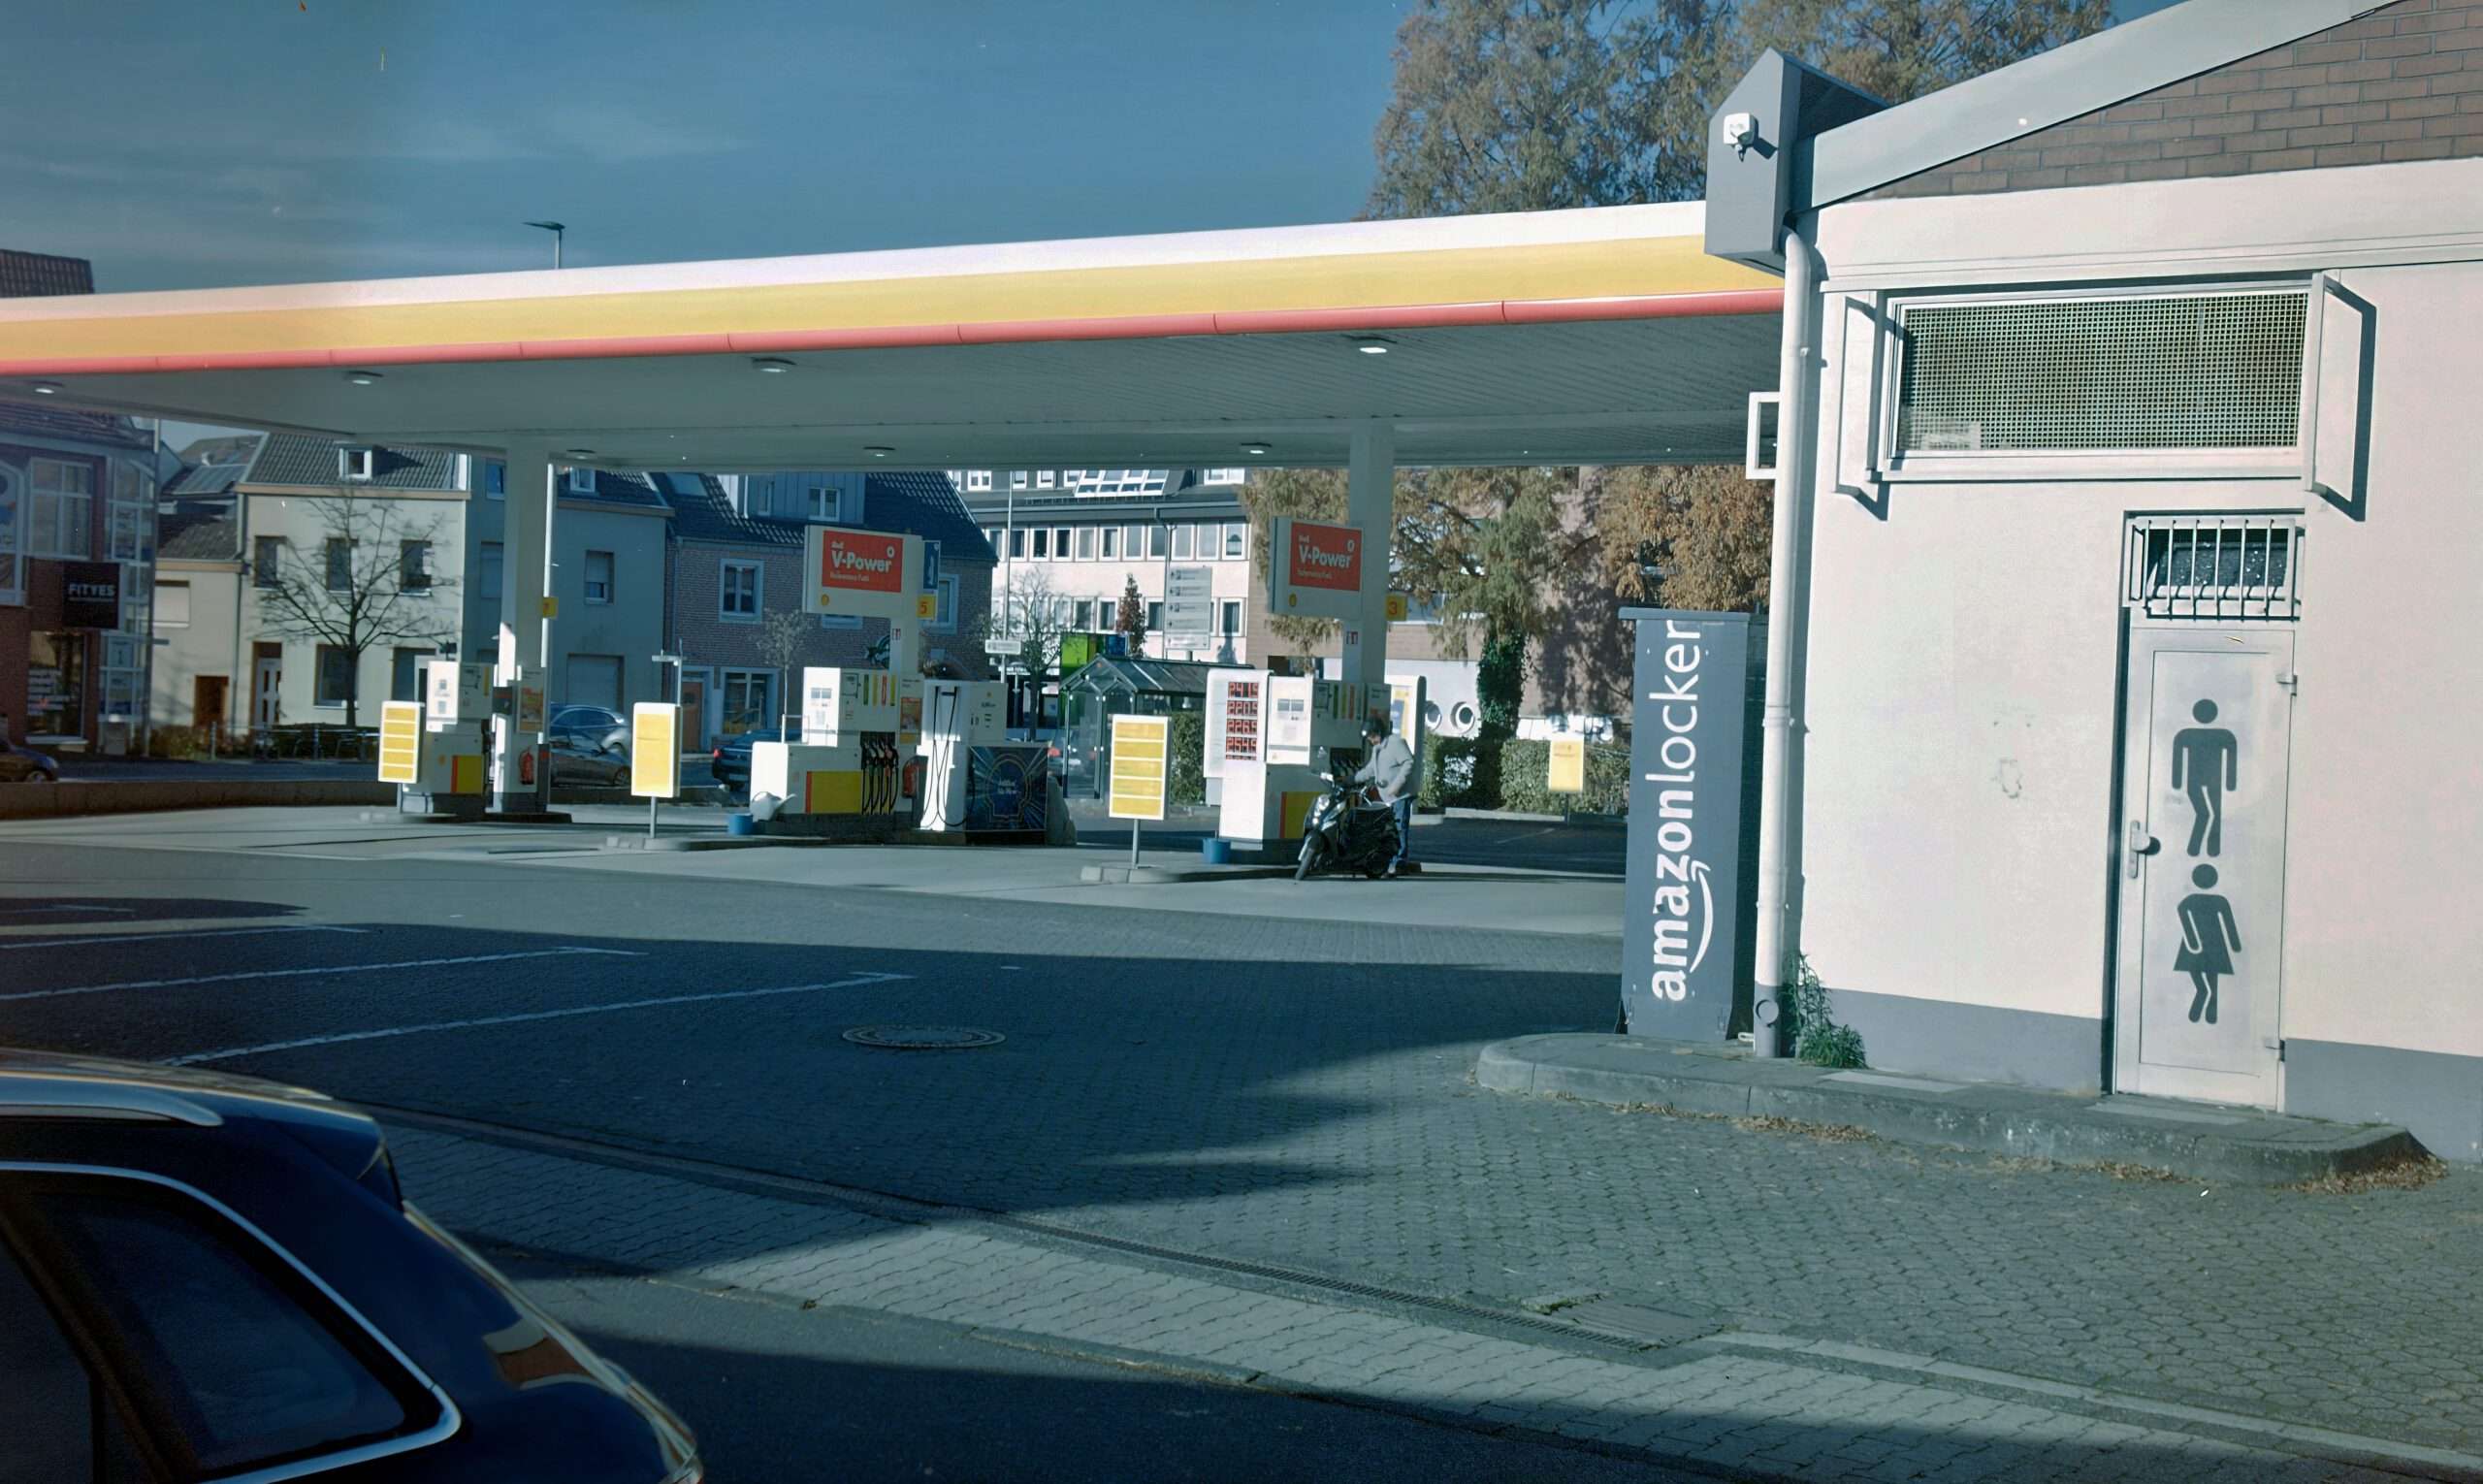
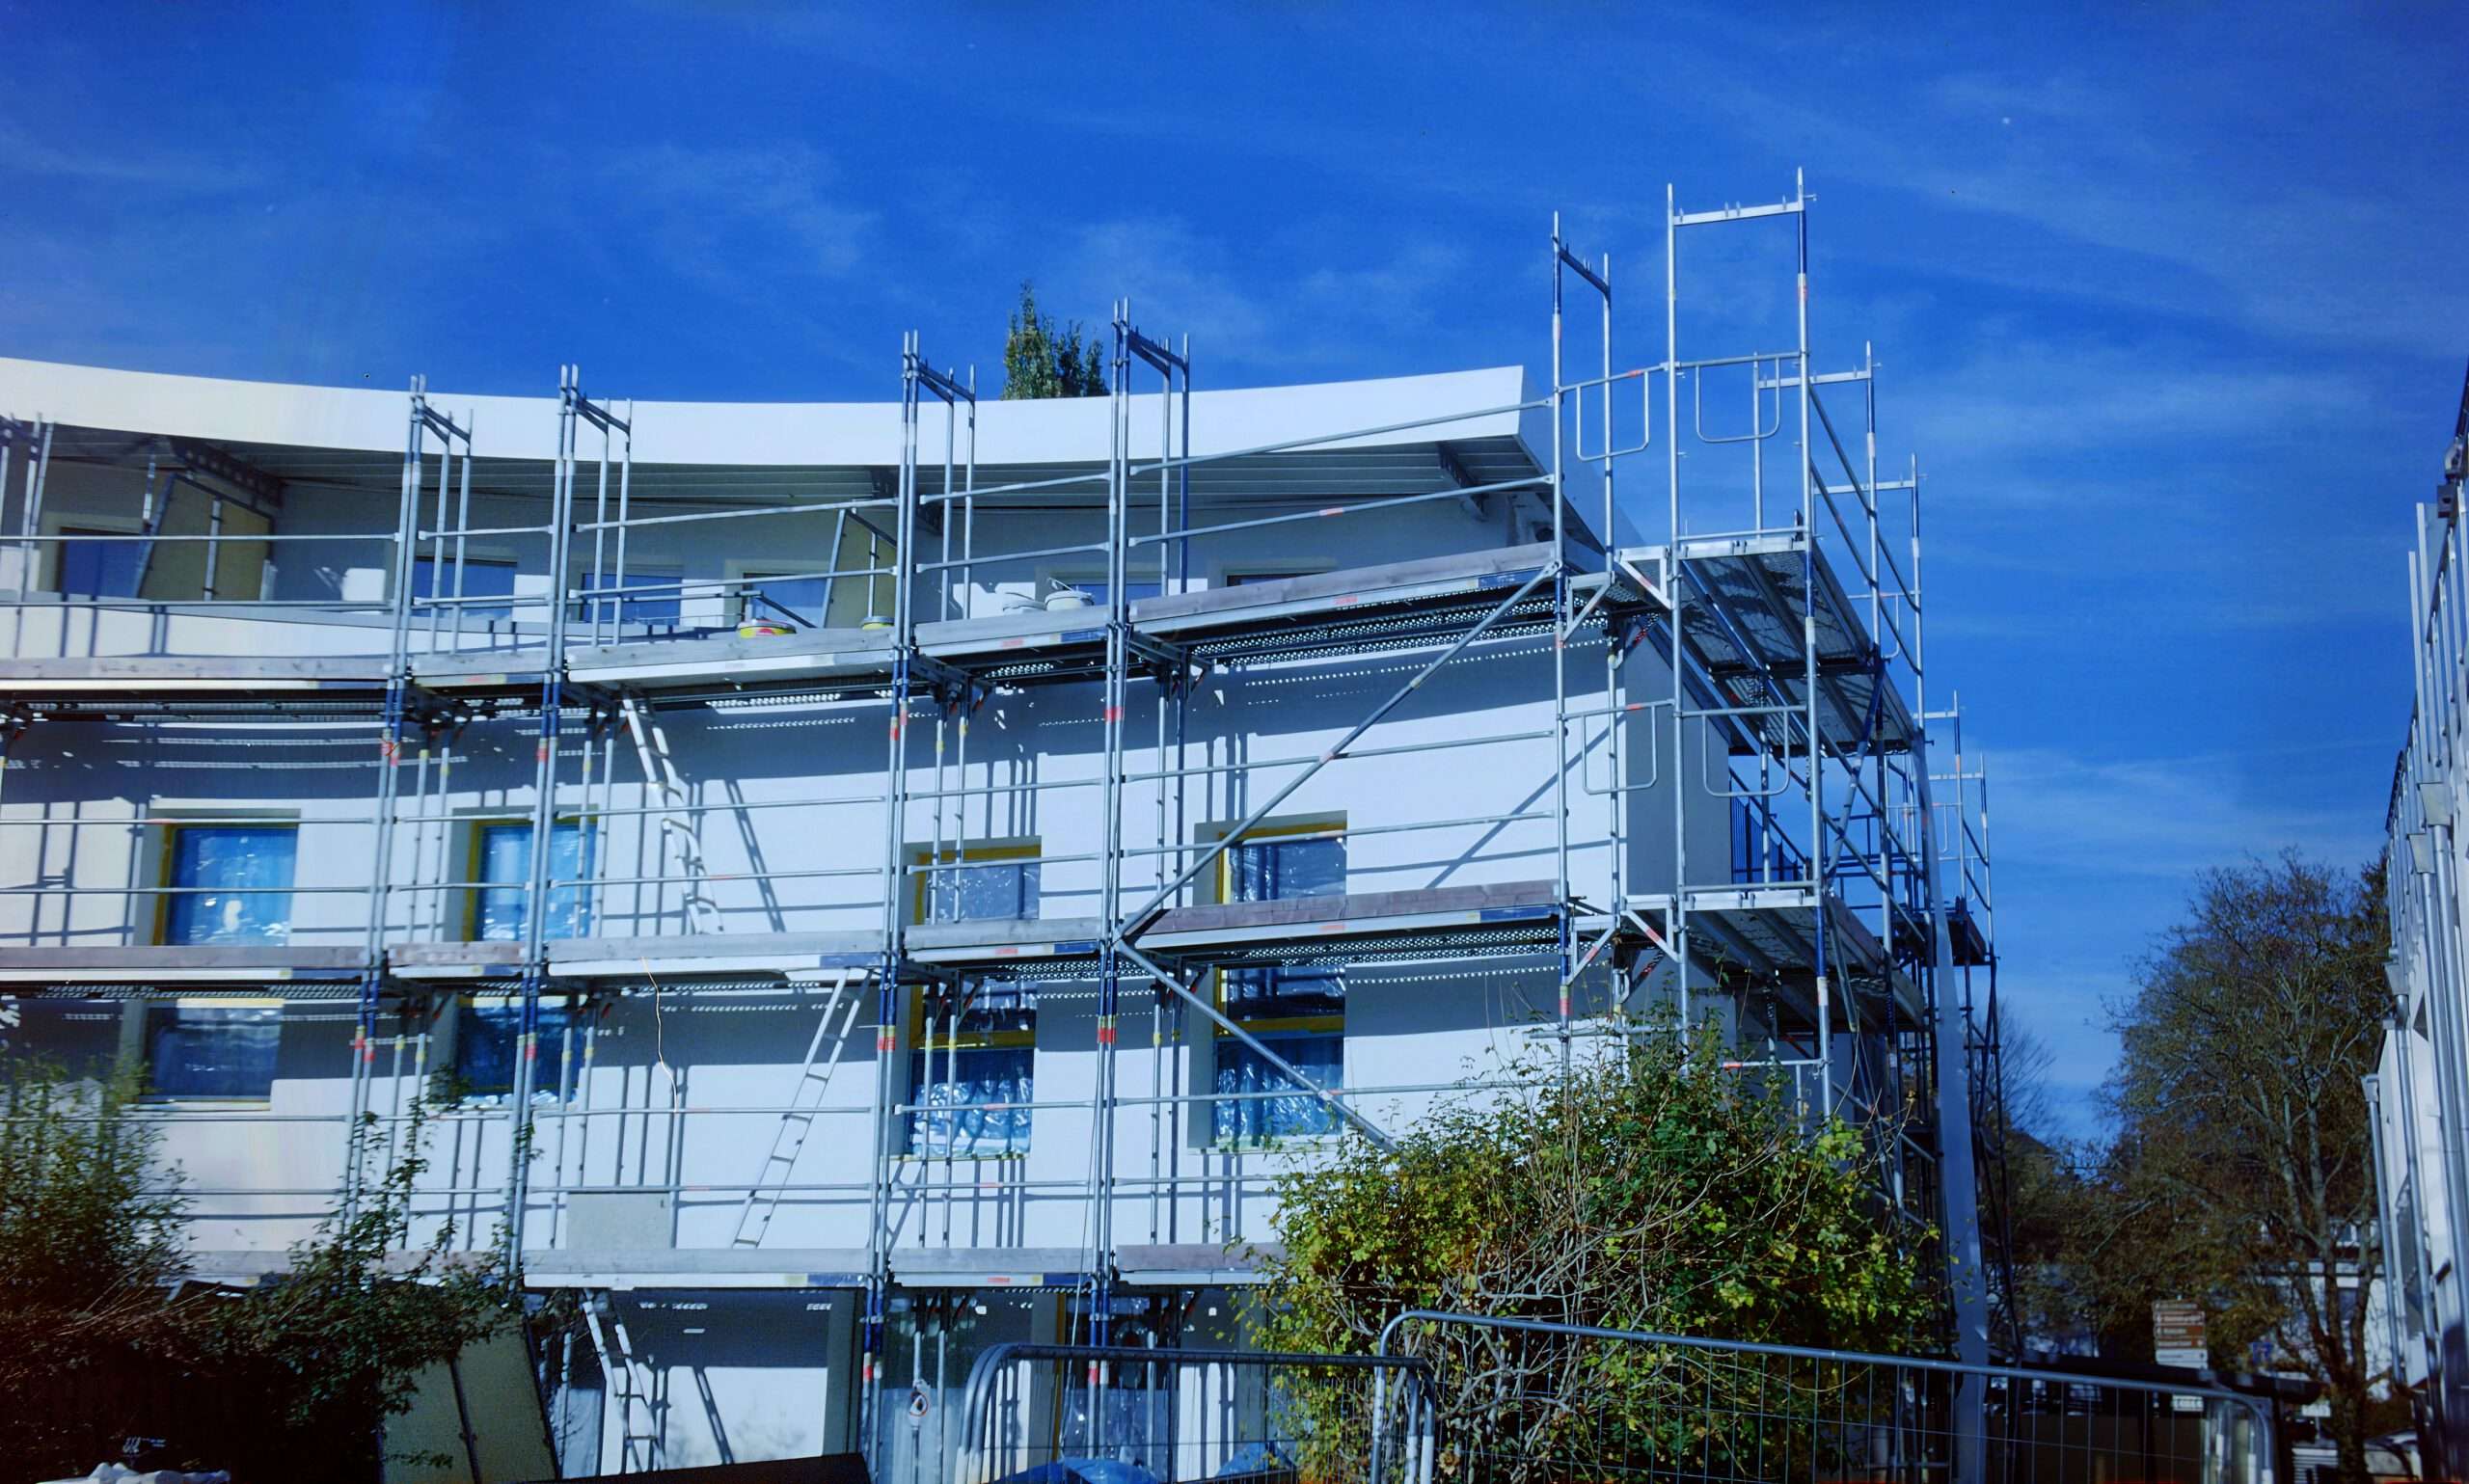
I took the following photos with my Ensign Midget 55. I used Kodak Gold 200 film and digitized the negatives by photographing them with a Sony Alpha 6000. The digitized negatives underwent digital post-processing. I also cropped out the parts of the frames that extended into the perforations.
The photos were taken at an aperture of f/8 and a shutter speed of 1/60 s
(click to enlarge):
Conclusion
The Ensign Midget is an extraordinary camera for several reasons:
It holds the record for the most efficient pocket camera of all time. No other camera that can be hidden in the palm of your hand produces such a large, highly detailed negative.
In terms of its effectiveness, the camera was far ahead of its time when it was designed more than a century ago.
In addition to its technical sophistication, the Midget captivates viewers with its striking Art Deco aesthetic. In keeping with the spirit of this movement, the camera visually celebrates the modern age of machinery.
Last but not least, despite its high quality, the camera was also affordable.