Defective shutter blades are a common problem with 8×11 Minox cameras. Fortunately, replacing them is not particularly difficult.
The shutter blades are the most mechanically sensitive component of the Minox. They are made of 0.4 mm thick stainless steel and weigh just 0.08 g. One of the most common defects in a Minox is that the plates bend when cocked or when the shutter is released.
Please read our Legal Disclaimer before proceeding.
Page Contents
The damage pattern
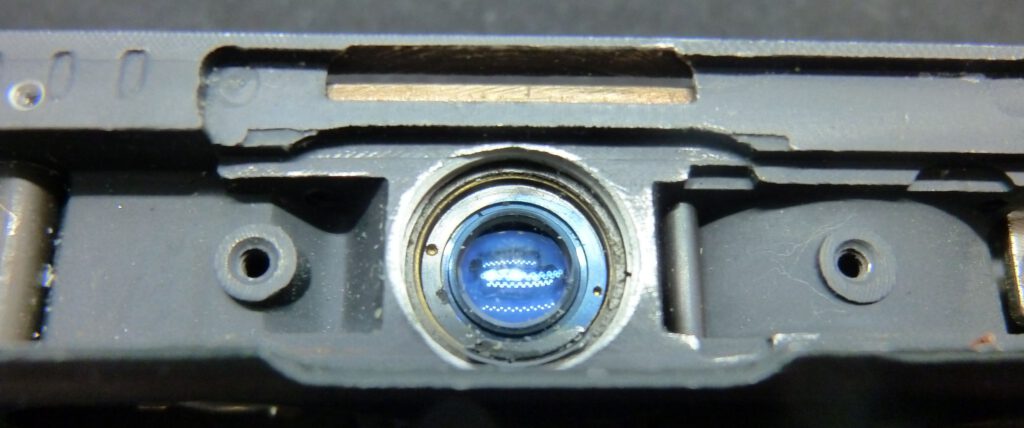
You will notice the damage when the camera can no longer be pushed together completely. You can often see the stuck blade in front of the lens:

You can see in the picture above how the closing blade (2) got stuck in the guide. The reason for this was that theeyelet of the blade was damaged and was no longer sliding in the guide.
The repair
The decisive factor for the repair is whether the blade can still be pulled out of the guide or not. To determine this, it is sufficient to remove the bottom part of the housing. Read here in the article on opening the housing how to do it.
Case 1: Pull out the blades
Caution: when working with the removed blades, extreme care must be taken to ensure that the extremely thin and sensitive sheets do not bend unintentionally!
After removing the lower part of the housing, you will now see the brass spring hooking arm. The springs are attached to this arm, which pull the blades into their end position when triggered:

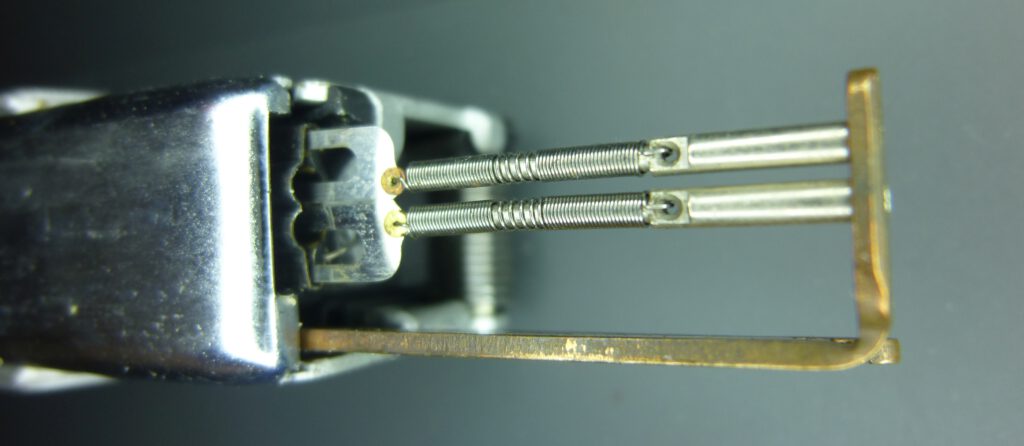
If you are lucky, you can now carefully and with little force pull the blades completely out of the housing:
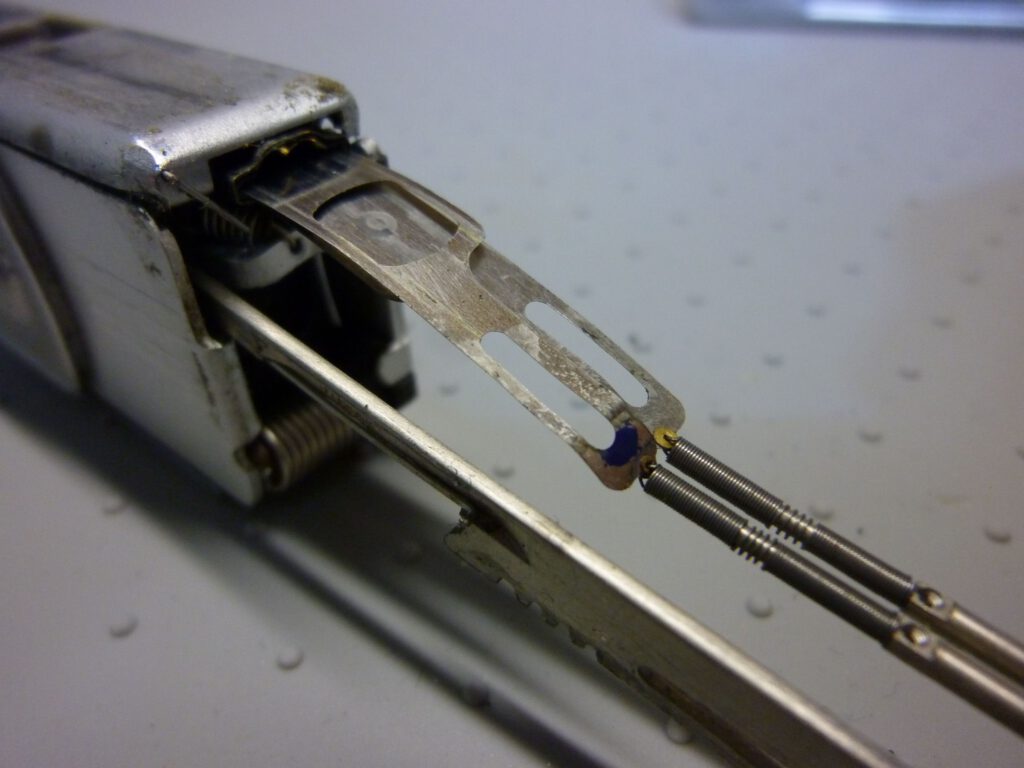
At the end you have the spring hooking arm with the two blades and their springs in front of you:

In the picture above, a spring and blade have already been removed. This is not that easy. Although the springs are only hooked in, they are so tight that you need a needle or similar to release them from the spring hooking arm:
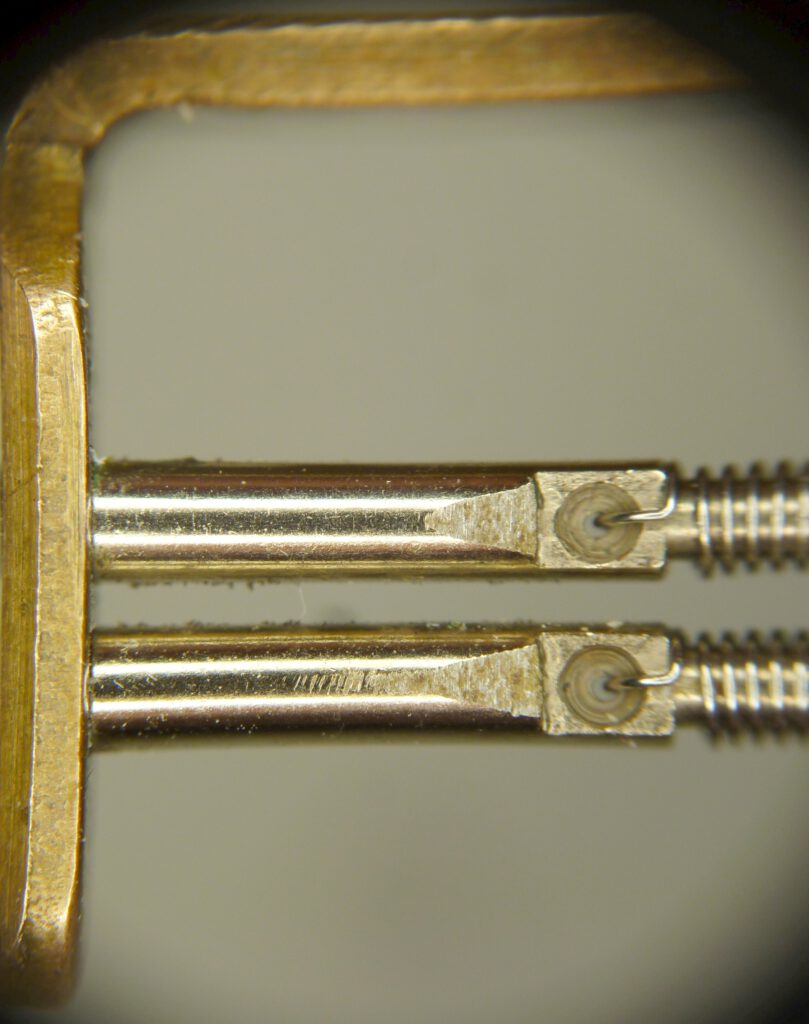
Case 2: Remove front panel
If the blades cannot simply be pulled out, it is necessary to remove the front panel. This gives you better access to the blades. Here I describe how to remove the front panel. Then the camera looks like this:

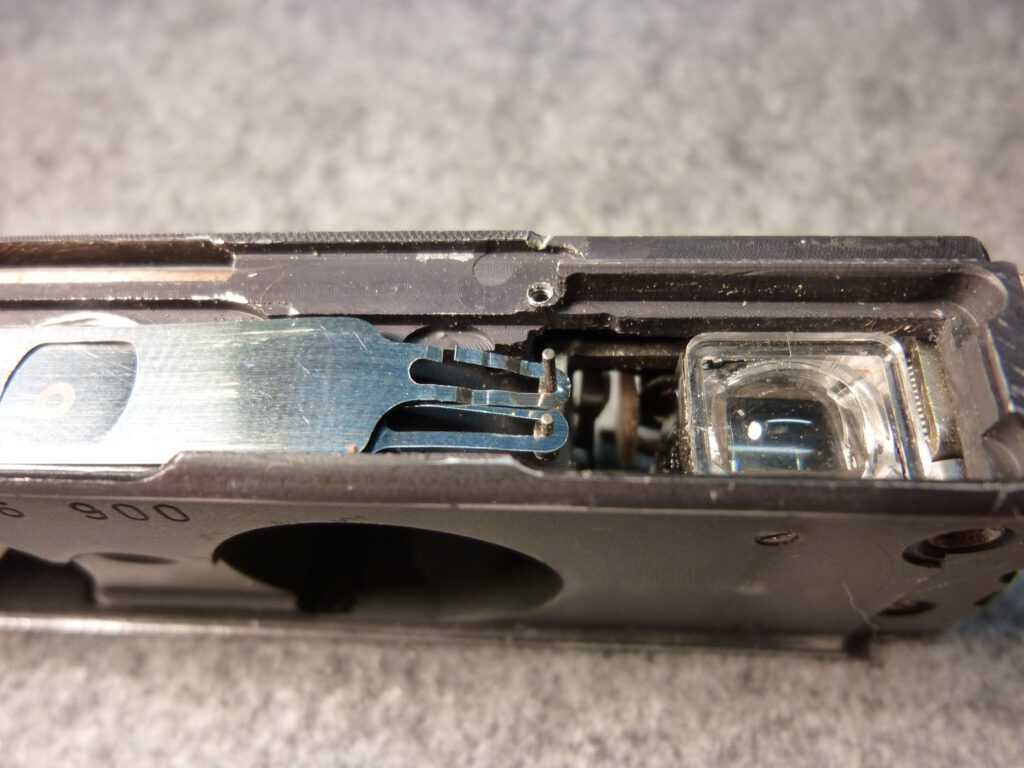
If the blades are damaged, they are usually bent or torn on the side facing the viewfinder. This is the reason why they cannot be pulled out with the spring hooking arm. There are now three options for getting the blades out anyway.
Let’s first take a look at actual damage. To do this, I removed the guide for the blades. But you shouldn’t do that. I only did it once for visualization purposes:
Option 1: Pull out to the left
It is easy to imagine that the torn eyelet cannot be pulled to the left through the guide, but gets caught there. In such a case, you could try to cut off the defective eyelet and then pull the blades out to the left through the guide.
Option 2: Pull out to the right
If it cannot be pulled out in this way, you can try the second option. To do this, cut off both eyelets of the springs with the reinforcements on the left-hand side of the blades. Then you can try to pull the blades out of the guide to the right:
Option 3: Open the guide
If this does not work either, the third option is to remove the entire guide including the blades. The guide is attached to the camera housing with two screws. However, the screws are covered by the blades. To access them, you have to carefully cut open the blades at these points. You can then open the screw underneath.
You can then open the guide and remove the blades:
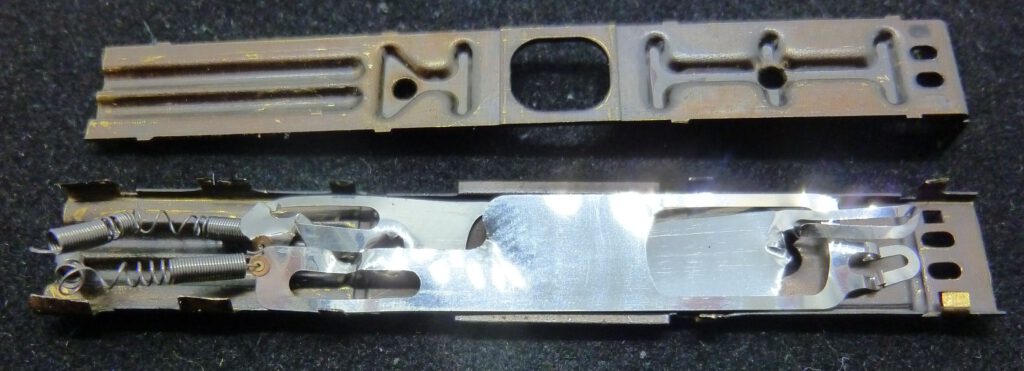
As you can see on the lower guide plate, the two parts of the guide are attached to each other with tabs. These tabs must be bent over to open the guide.
Straightening the blades (case 1)
If the blades are only bent but otherwise undamaged, you can try to straighten the plate. The aim here is to bend the blades so smoothly that they run easily in the guide again. I have successfully done this with the following method.
First, I built a tool with which you can roll over the blade with great pressure to straighten it. It consists of a small ball bearing that I attached to a pin. I use a small ground and polished granite tile from the DIY store as a base:
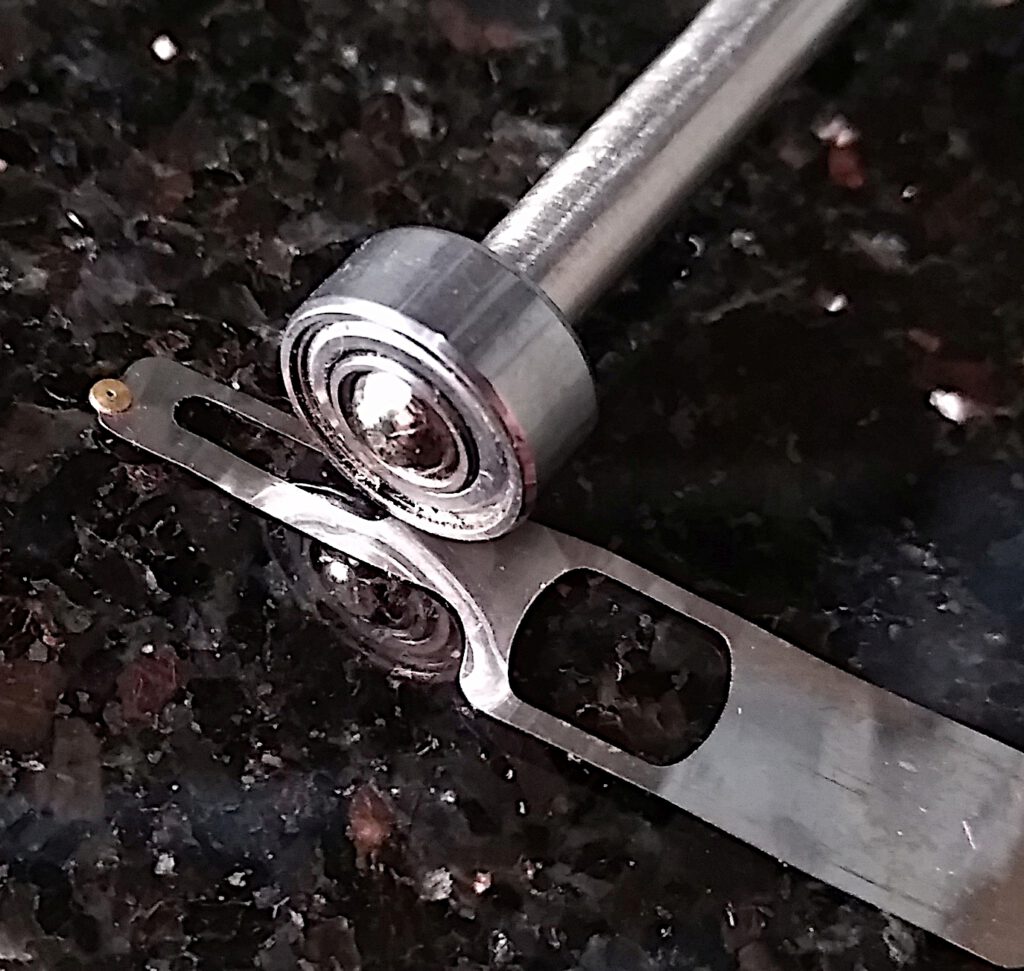
To prevent the ball bearing from tilting when rolling, I fitted a second ball bearing of the same size at the end of the pin. This way I always have line contact between the ball bearing and the blade.
Now roll over the bent areas of the blade with great pressure. Then turn the blade to the other side and straighten it from there too. Do this until the blade no longer has any sharp bends. The blade as a whole may retain a slight bend. It is important that it runs as smoothly as possible in the guide.
Then push the blades together with the spring hooking arm back into the camera and reassemble the housing. Be particularly careful when inserting the blades into the guide so as not to bend them.
Procurement of spare parts (case 2)
The big problem is that Minox no longer offers original parts for the 8×11 Minox models.
However, there is still a source in the USA that offers self-manufactured blades for the Minox A, B, BL and a different version for C/LX,TLX,CLX or AX. The experience reports are consistently good. They are even said to be somewhat more robust than the originals. Unfortunately, shipping and customs duties to Germany are higher than the price of the blades themselves.
Another way to get intact blades is to buy used cameras where the blades are still in good condition. You could argue that you might as well buy a new used Minox. However, it may still make sense. Minox A cameras in good condition will be considerably more expensive than Minox B cameras. That’s why I’ve already bought cheap Minox Bs with damaged exteriors or other problems but with a working shutter in order to install the blades in a Minox A. Another reason could be that you already have a special relationship with the camera and therefore want to repair it.
In such a case, it is best to remove the guide at the same time, as it works well with the blades. But this is not absolutely necessary, it also works with the existing guide. You can even try to transfer the spring hooking arm, including springs and blades, from one camera to the other. Then you don’t even have to remove and reinsert the springs.
This exchange definitely works between Minox A and , probably also BL (I have not tried this). The Minox C, LX and AX have a different blade shape, so the exchange with A or B will not work.
Finalizing the repair
Once the intact blades have been attached to the spring hooking arm via the springs and are back in the guide, everything can be reassembled and tested.
Installing the blades
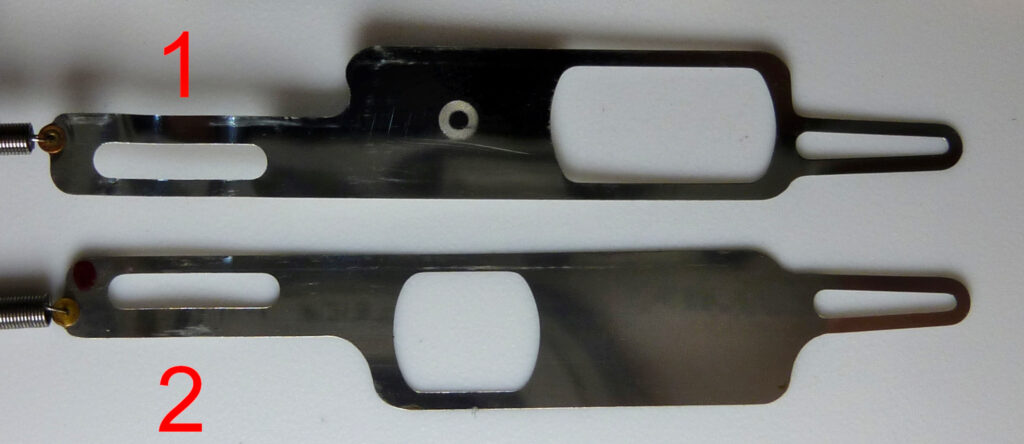
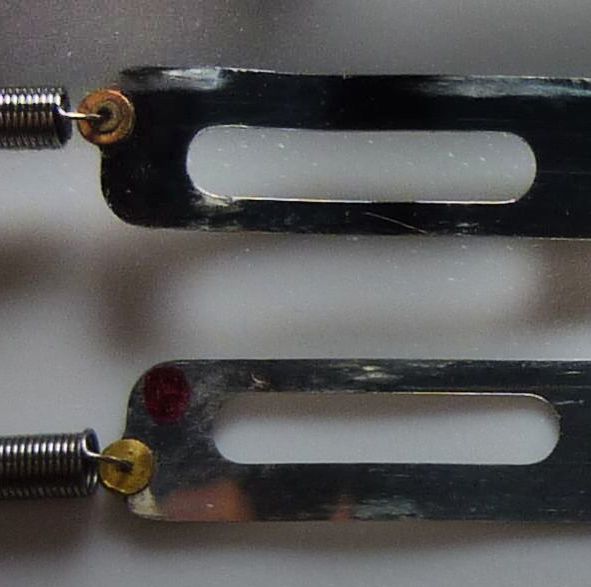
The best way to do this is to carefully clamp the camera body in a vice. This is because you need both hands to push the spring hooking arm into the housing and the blades into their guide at the same time. Great care must be taken not to bend the blades. Also pay attention to the positions of the blades: Blade 1 must be under blade 2. Only then will the small circle on blade 1 be visible in the window of blade 2.
When inserting the spring hooking arm into the housing for the first time, proceed very slowly and carefully. Watch from the front all the time to see whether the blades run smoothly in the guide without bending. At the end of the movement, the two pins should slide into the eyelets of the blades.
Assembling the housing
Testing
Test the shutter blades by first carefully pulling the camera apart and pushing it back together again. Check whether you can see the small circle in front of the lens indicating that the shutter is cocked.
Set the shutter speed to “B”. Press and hold the shutter release button. Check that the lens is fully open. Release the shutter release button. The lens must now be closed again. Cock the camera slowly and carefully. Observe the blades through the glass window in front of the lens.
If this has worked, test all exposure times. Try to determine whether the opening time is plausible from the slow to the fast shutter speeds.
It is best to measure the shutter speeds afterwards..
Conclusion
The repair of shutter blades on the Minox is feasible. However, you have to handle these wafer-thin plates very carefully so as not to damage them during the repair.
Obtaining replacement blades can be a problem, especially outside the USA.
For those who have never done it before, opening the housing could also be a challenge.
