
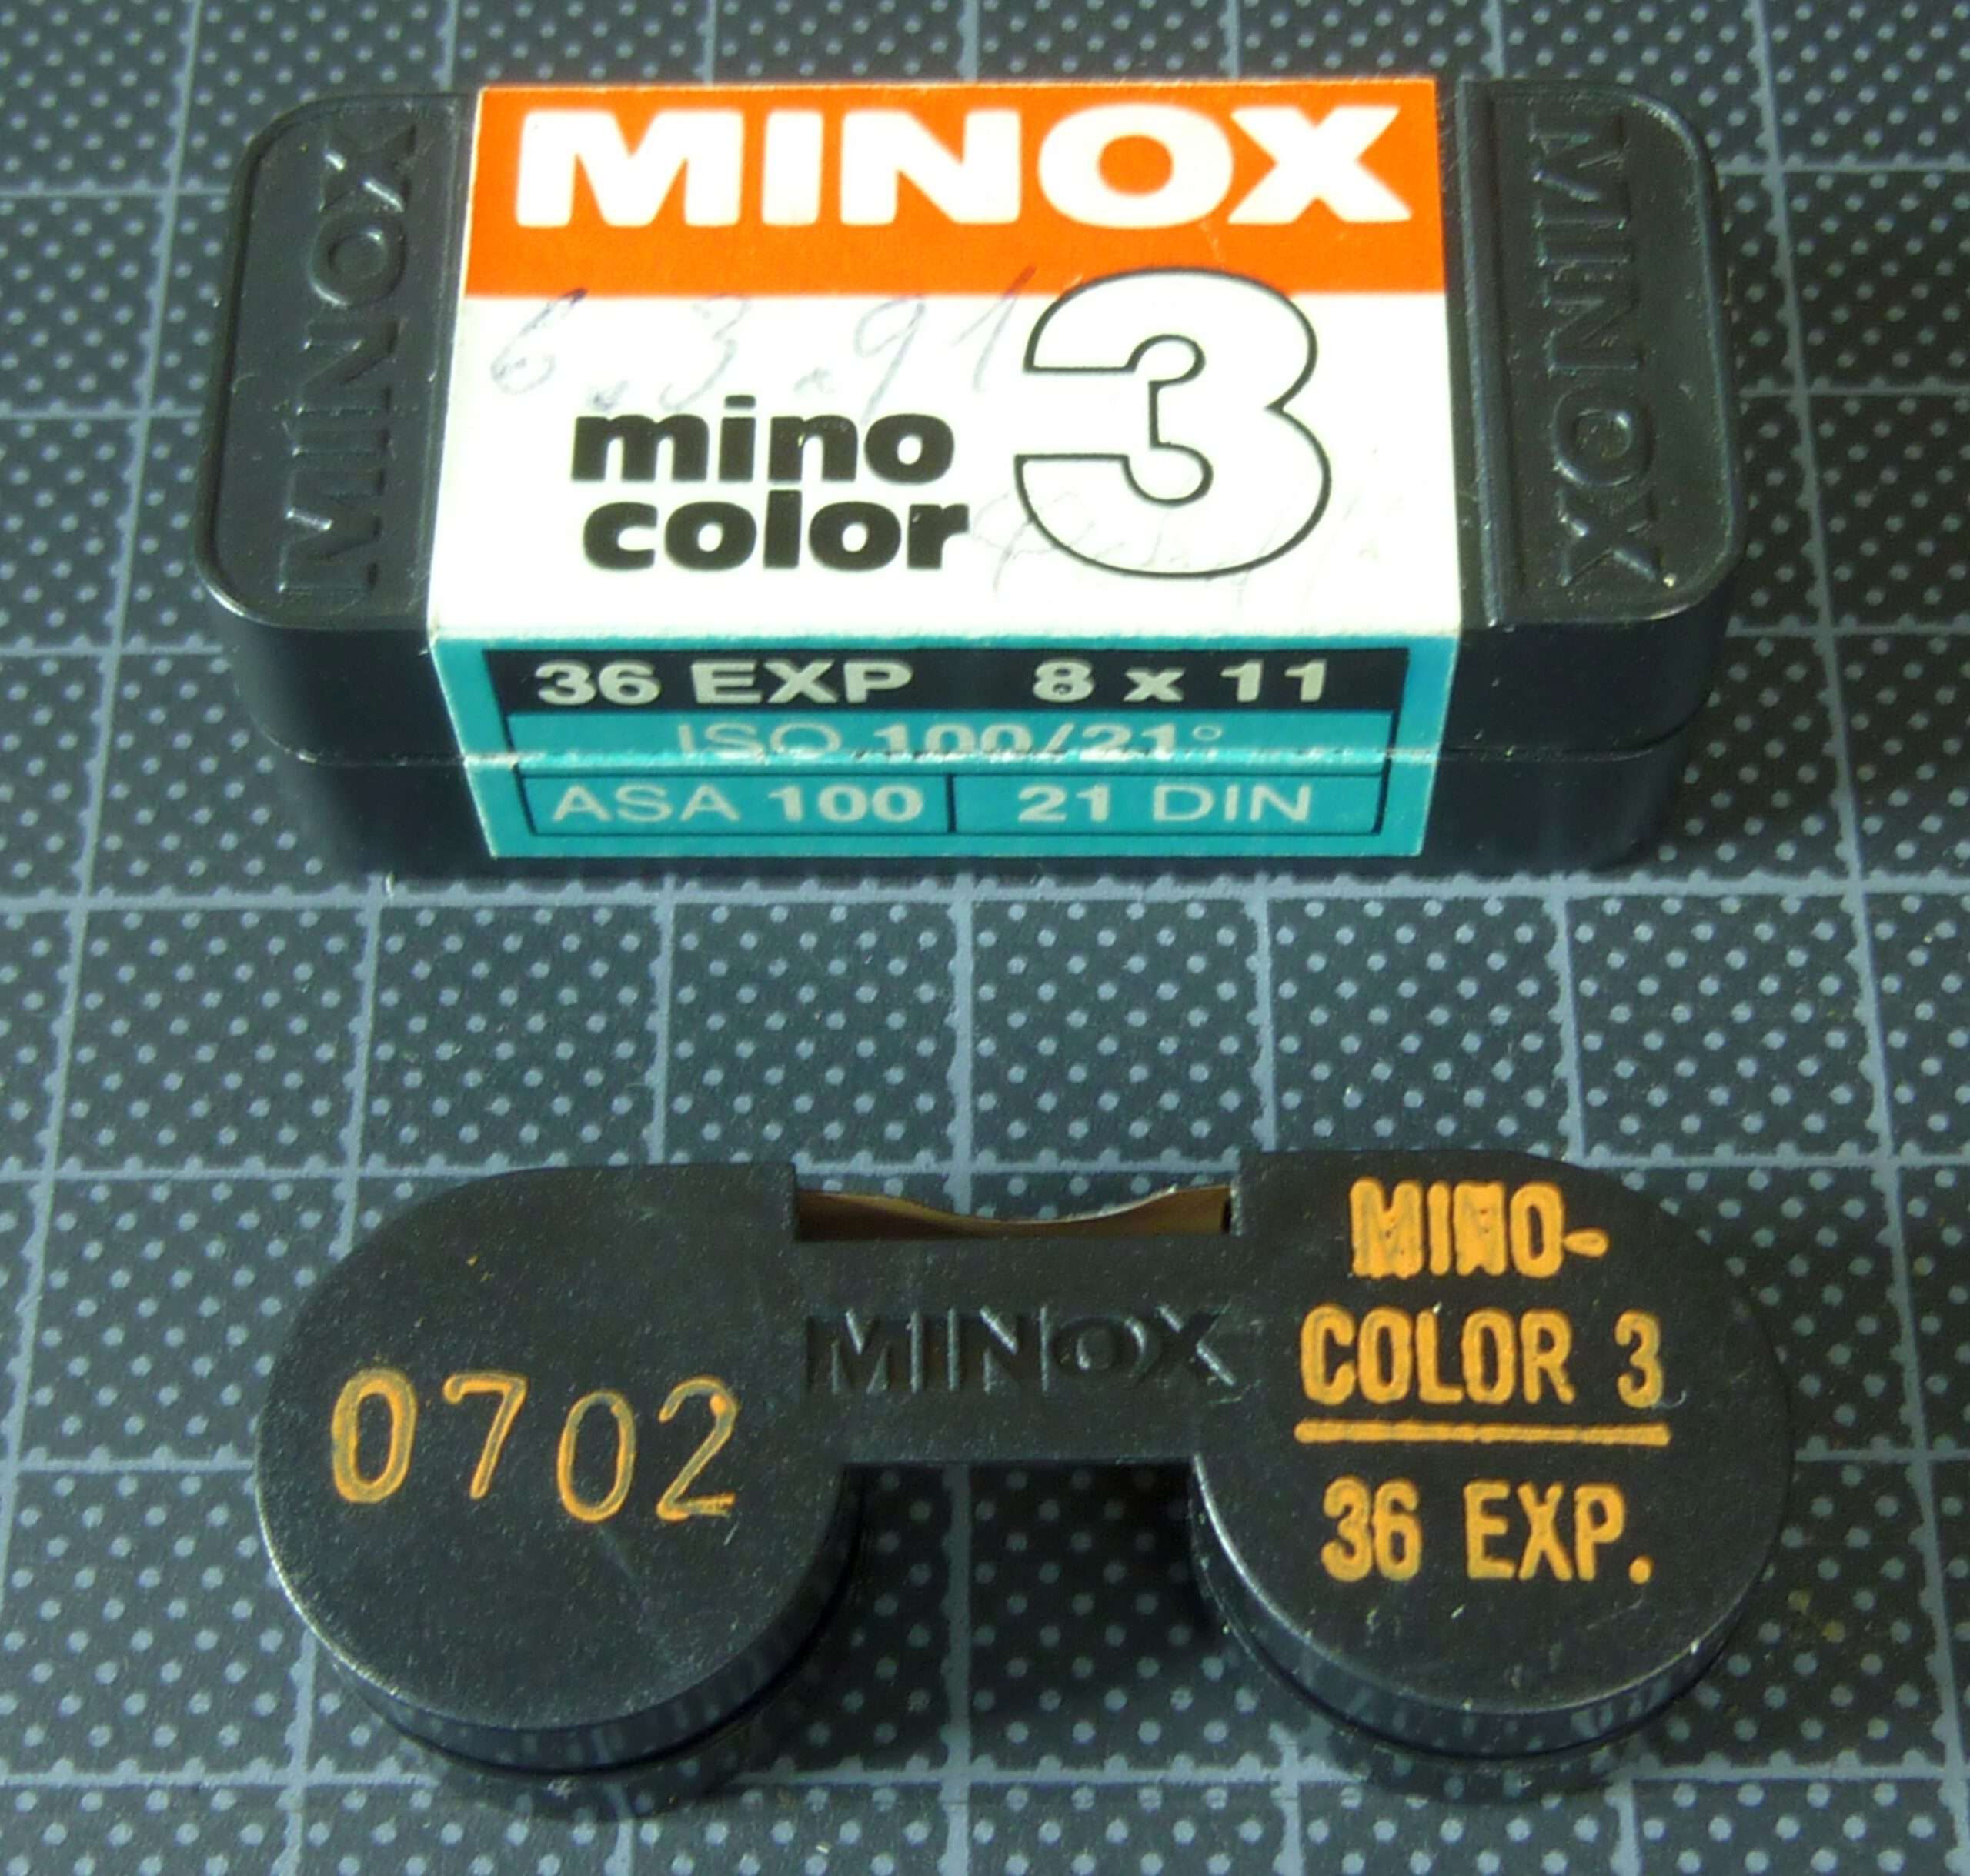
Here you will find accurate, illustrated information on the Minox film in relation to the frame counter. In concrete terms
- how to load a Minox film into a the camera and what mistakes to avoid. If you are only looking for the instructions to insert a Minox film correctly, look here.
- how the exposures are arranged on a Minox film strip
- the dimensions of a Minox film
- the maximum length a Minox film
Page Contents
Introduction
Although great importance was attached to ease of use in the design of the Minox, the correct way to load the film is described briefly and poorly in the operating instructions. And that has serious consequences.
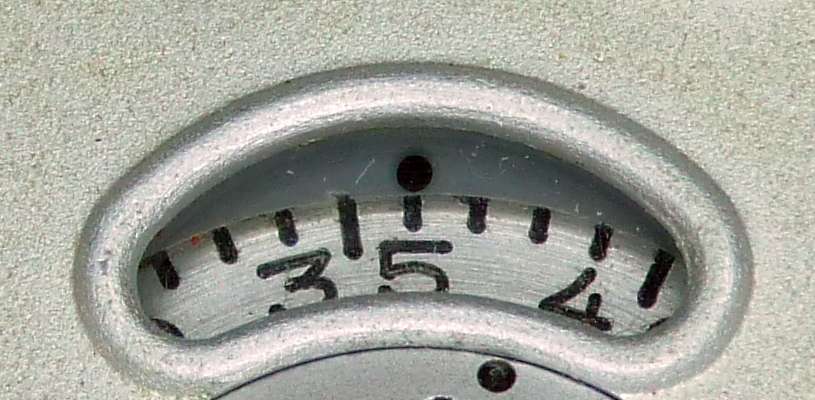
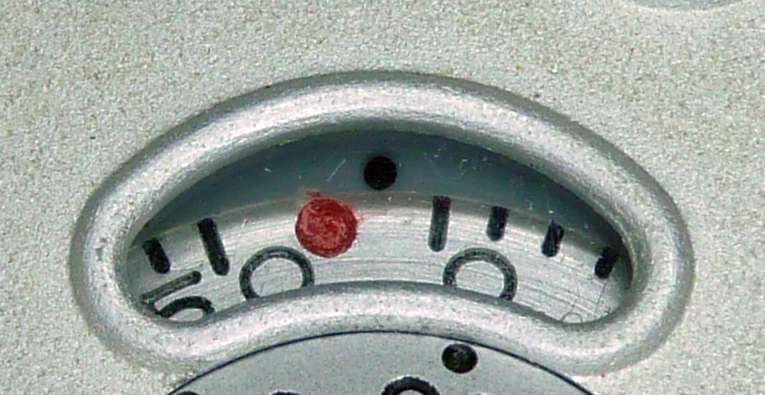
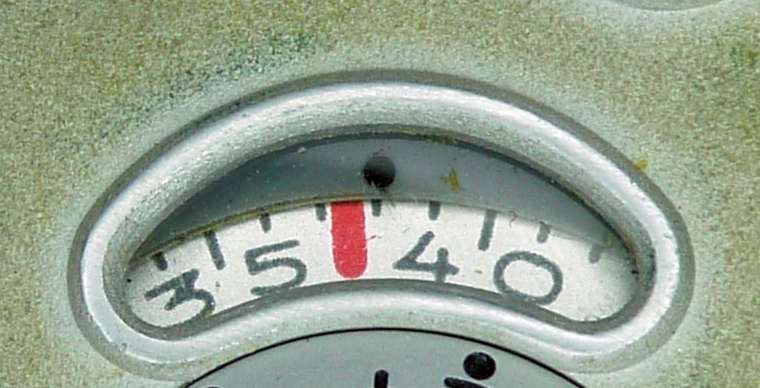
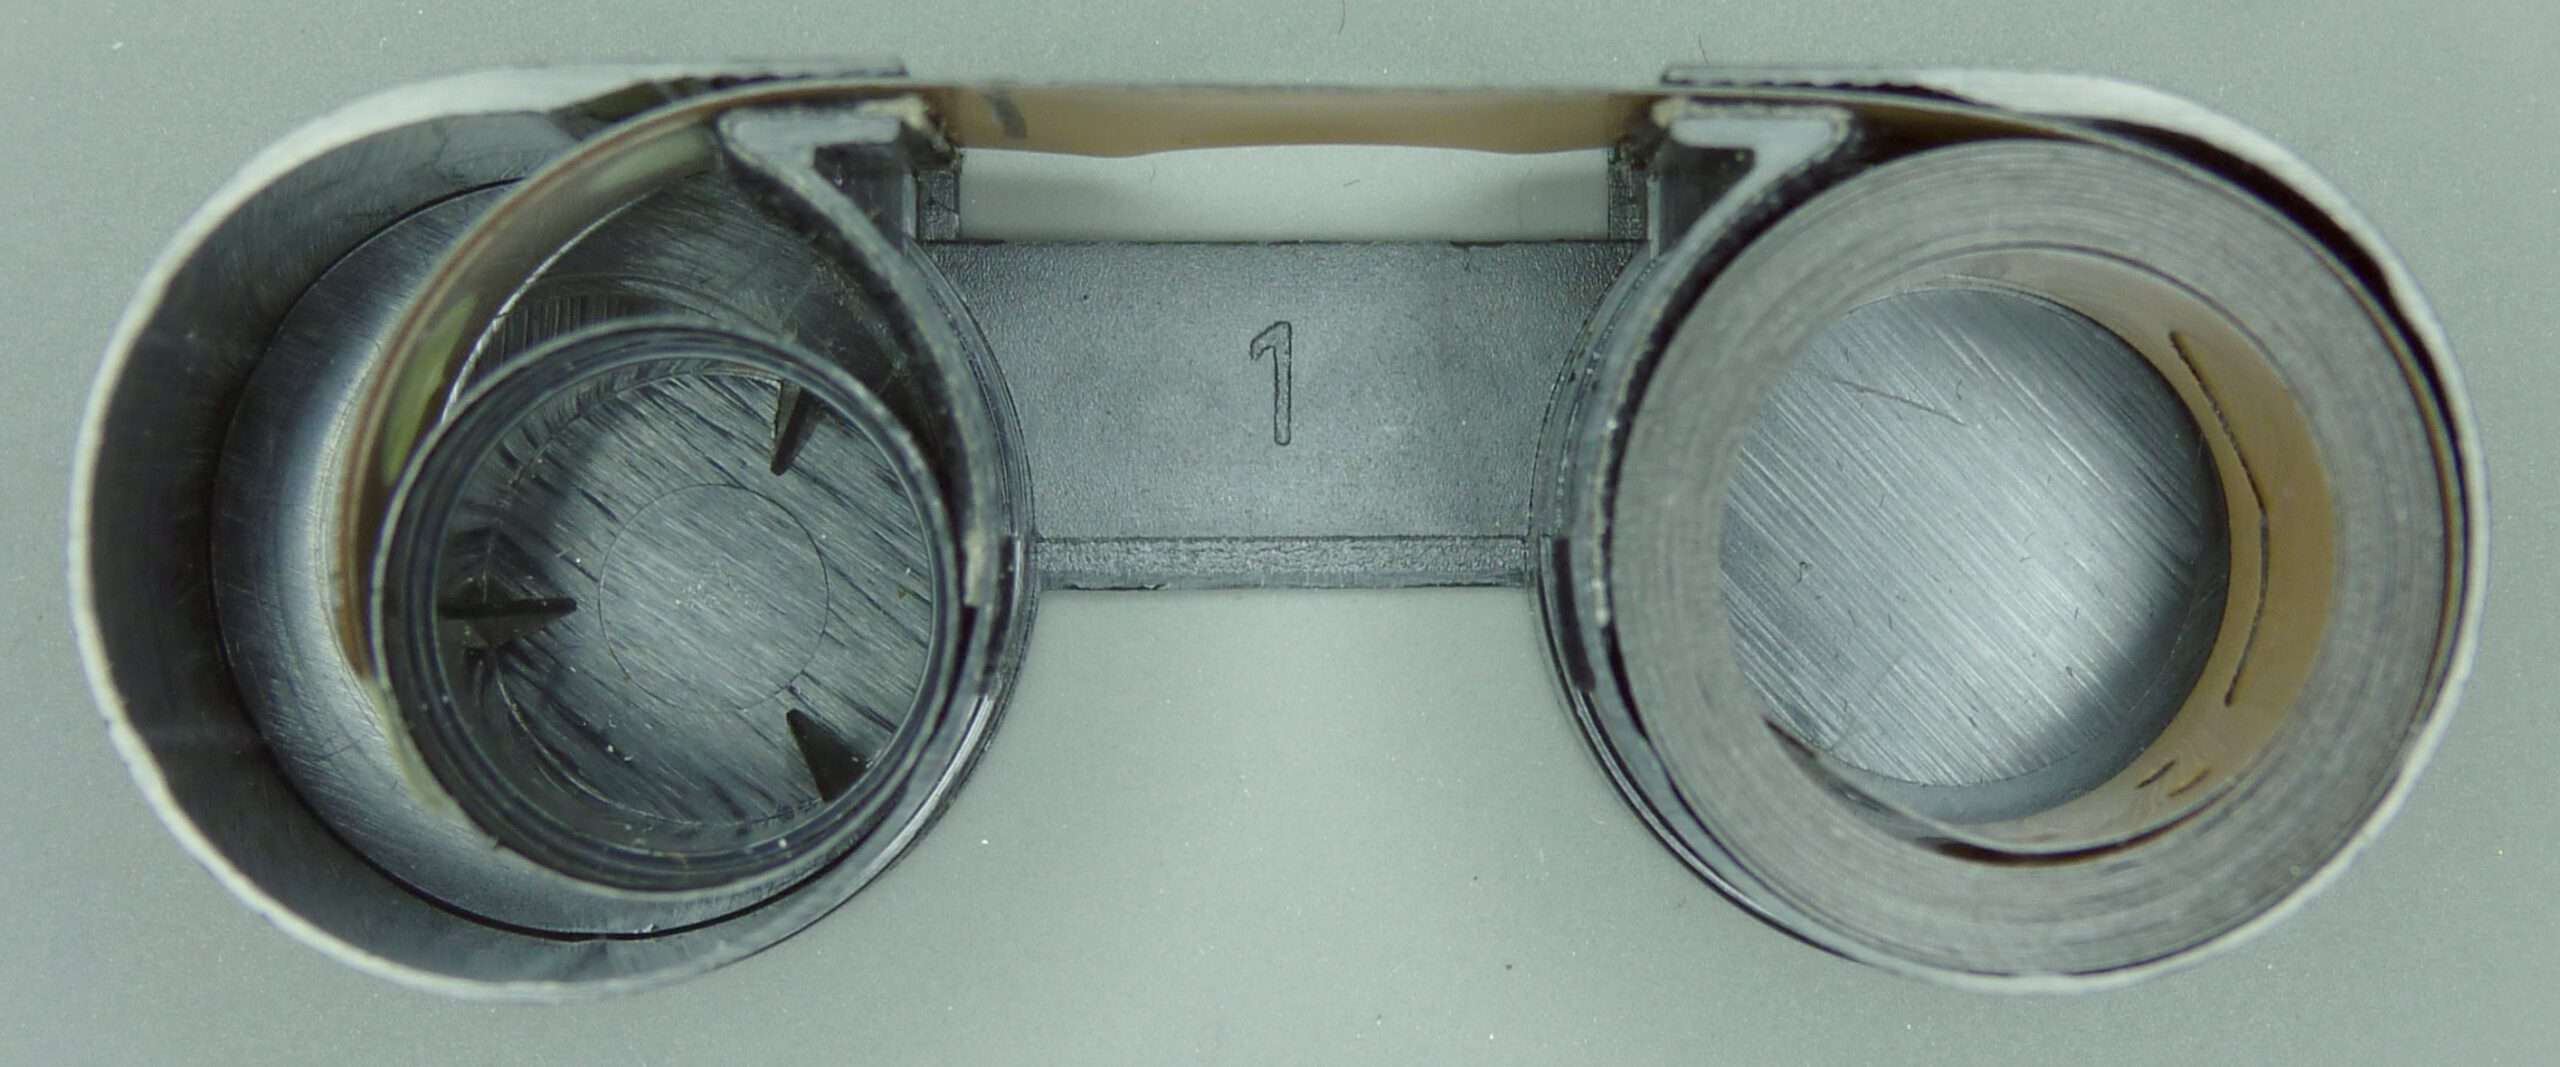
Even though I had been working intensively with Minox cameras for several years, I always loaded the film incorrectly. Why is that? The reason is the misleading labeling of the frame counter. See for yourself:
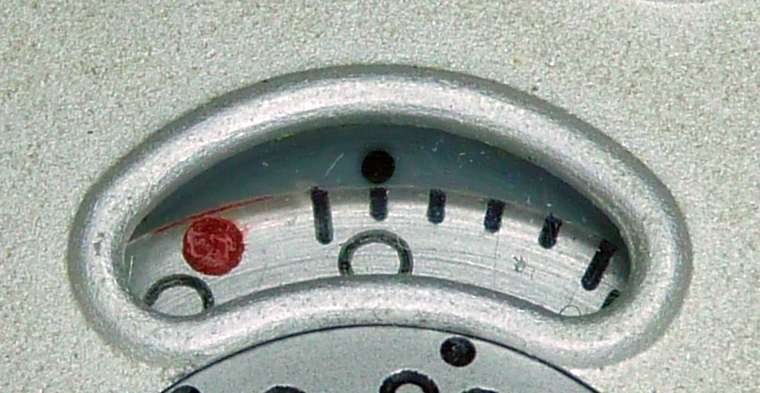
What would you say, which image number does the counter show?
Position 0? Wrong!
It’s position 1.
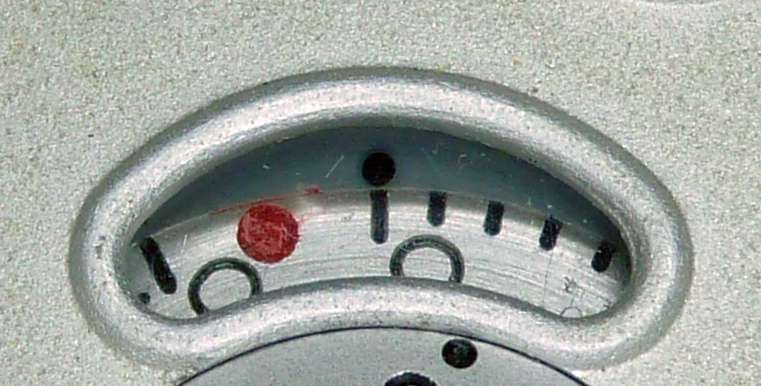
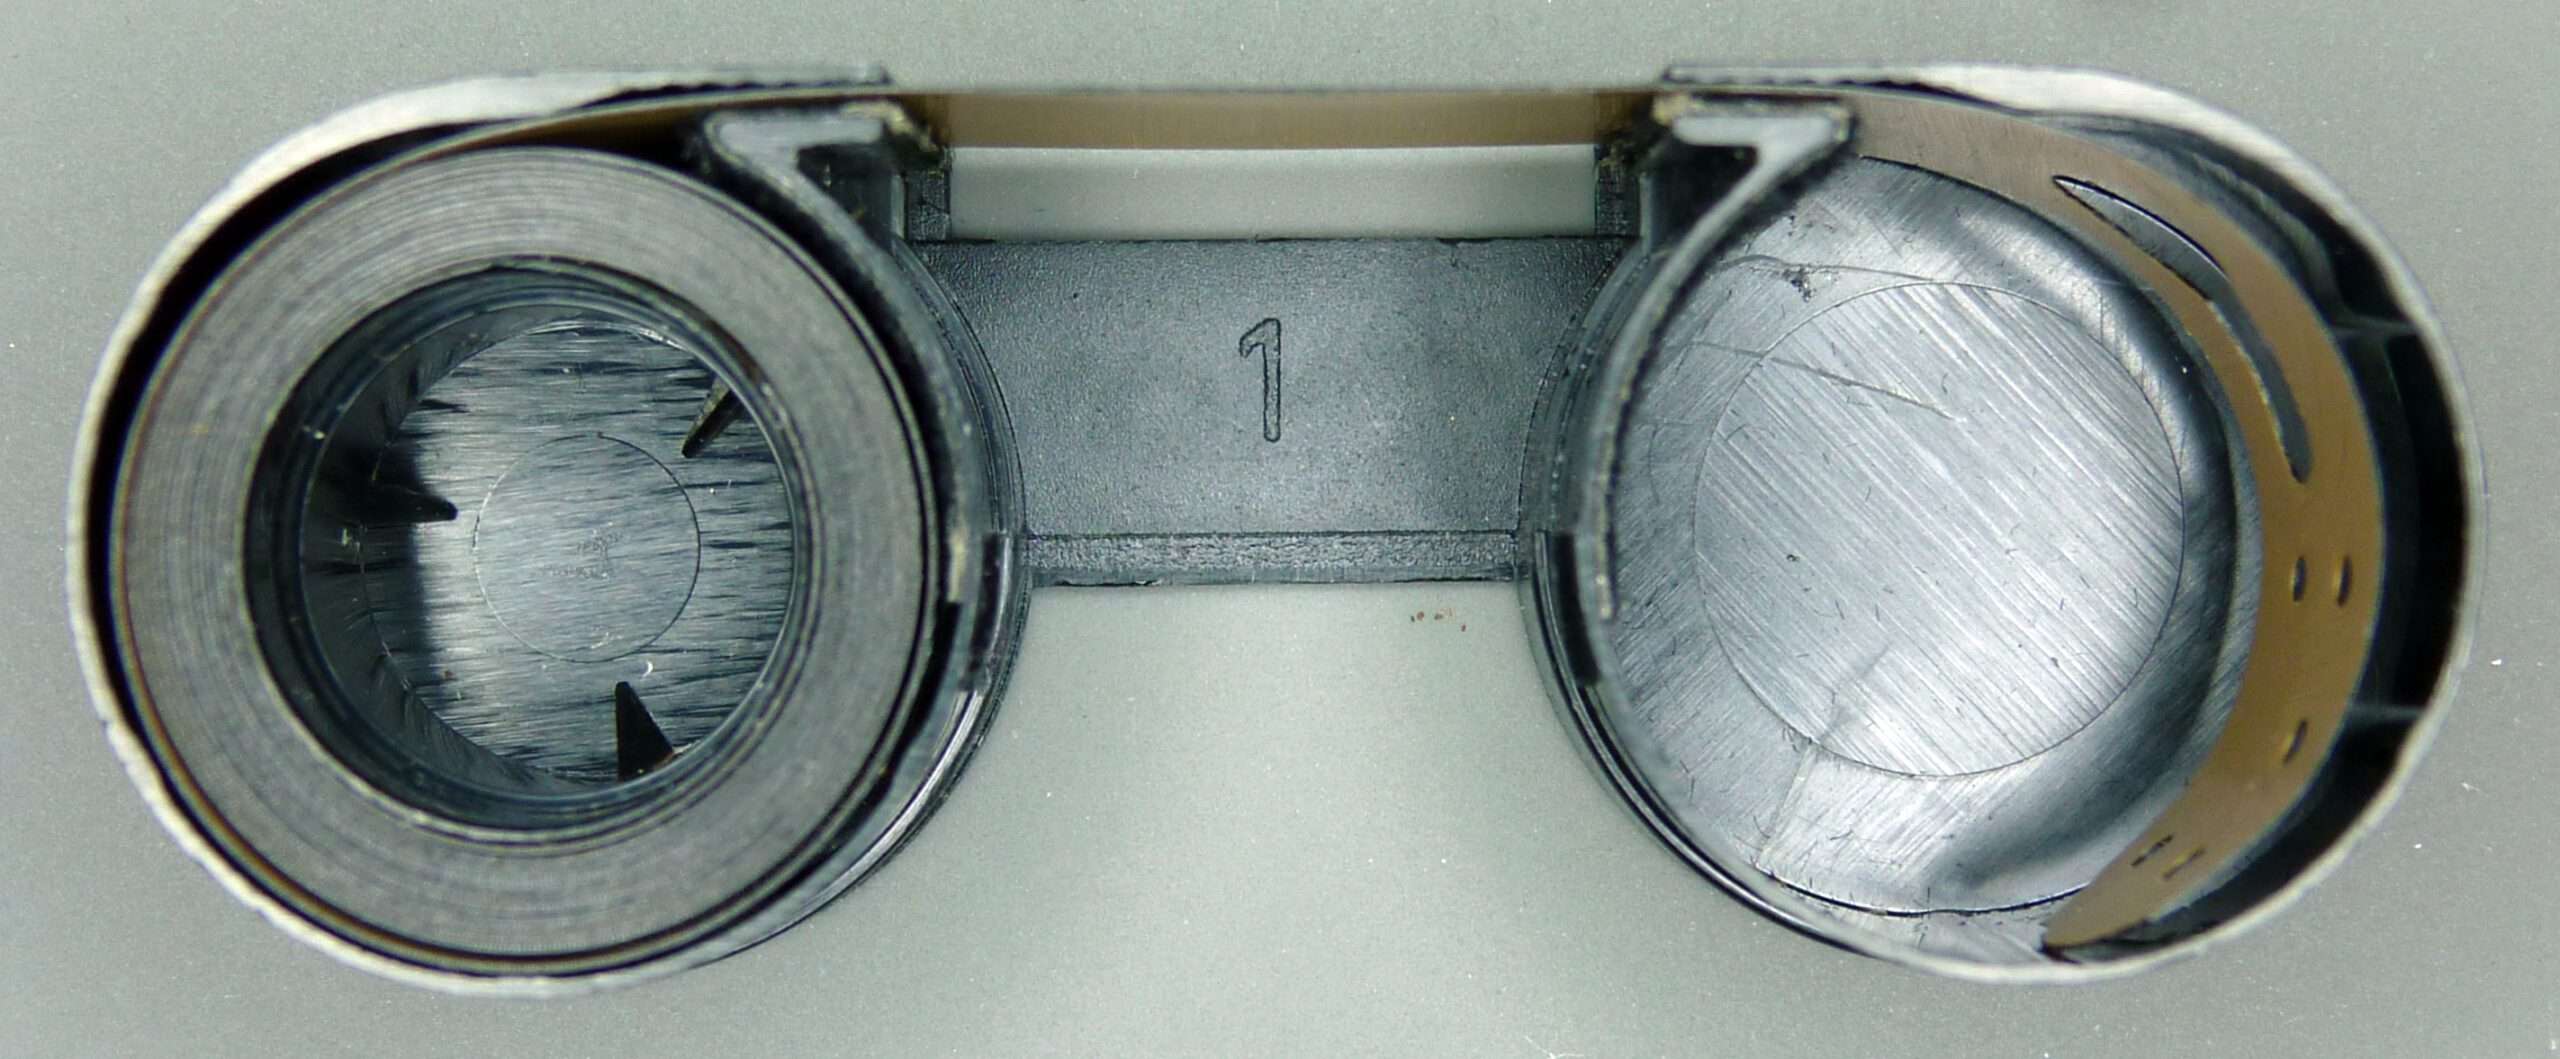
The displayed 0 belongs to the long mark to its left. The same applies to image position 6:
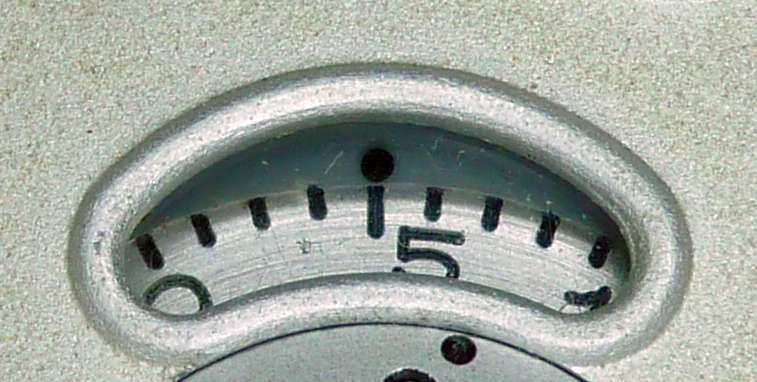
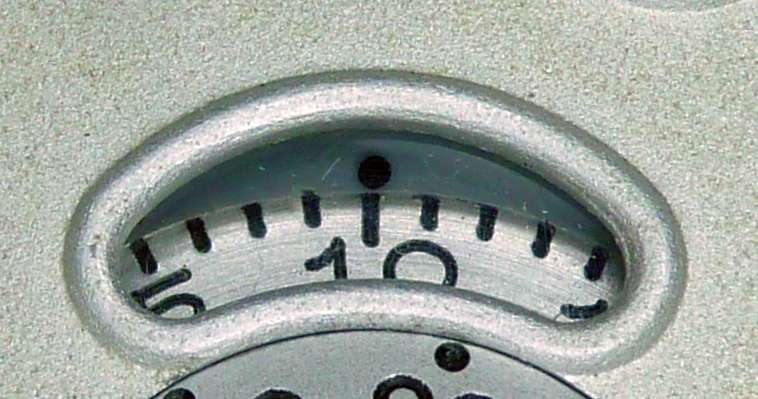
After that, the numbers become double digits and things look better:
Now you might think, well, the frame counter isn’t that important to me, I can keep track of my shots without it.
That may be true for many cameras, but not for a Minox. Here, the frame counter must always match the film strip. Why? We’ll see in the next chapter.
The explanations in this article apply to the Minox A, Minox B, and VEF Minox Riga and a 36 exposure film. All other Minox models have a different frame counter.
What is the framer counter used for?
First of all, it is important to note that this is not a frame counter but a film advance counter. Nevertheless, we will use the usual term frame counter here. It shows how many times the film has been transported. Always keep in mind:
The Minox frame counter shows how many times the film has been transported.
The difference is important because with the Minox A, B, and Riga models,
the film is always being advanced when the camera is pushed together, even if no photo has been taken. Pulling the camera apart does not advance the film.
With the Minox, the frame counter has two very different functions. It is important to understand this.
How many photos have I taken so far?
The frame counter indicates the number of exposures already made on the film. Each mark represents one exposure. Always? No! Assume that we see this on the counter:
When the camera is closed, the number 5 means that we have already taken 5 exposures.
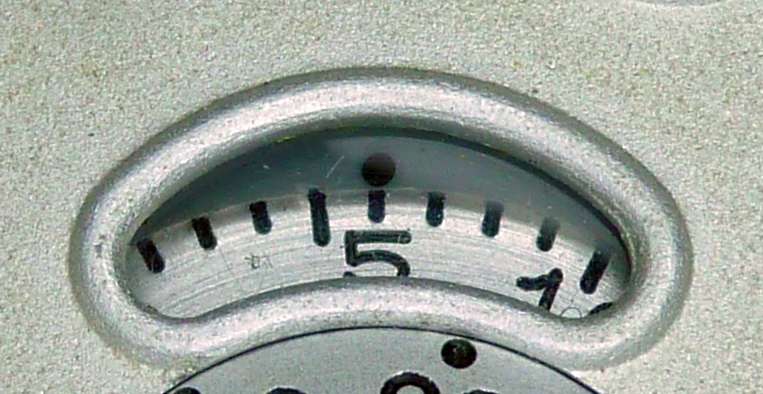
When the camera is open, the meaning of the number depends on whether the shutter has already been released:
- Position 5 before releasing the shutter means that we have taken 5 pictures so far and transported them into the cassette. The film is ready to take the 6th picture.
- After releasing the shutter, we still see the number 5 in the same place. This is not true since we have already taken 6 photos, where the 6th shot is still in front of the lens.
- When we now close the camera, the film is transported and the counter moves from 5 to 6, indicating that 6 photos have been taken:
This means that only when the camera is closed, the number of pictures already taken is always displayed correctly.
Correct film feeding
The second function of the frame counter is to control the film transport length.
With perforated film, it is easy to transport the same length of film after each photo by always transporting the same number of holes in the perforation through a gear wheel.
The Minox uses unperforated film. From today’s perspective, this is a decisive advantage over other subminiature cameras that only work with perforations. This is why you can make your own film for Minox cameras by cutting it to size. Adding a perforation would be impossible.
The lack of perforation requires a special design for film transport. Minox cameras have a patented mechanism that ensures to feed the film in steps of equal length, in spite of the increase in diameter of the film roll wound on the spool.
For this purpose, the information from the frame counter is used to control the advance of the film depending on the number of photos already taken.
The frame spacing between the negatives is kept uniform by a cam disc, which compensates for the increased thickness of the exposed film spool towards the end of the film. Without this control, the spaces between the negatives would become larger and larger towards the end of the film.
Left: supply chamber, right: take up spool
If you are interested in how this control system looks inside the Minox, you can find my detailed description with pictures and videos here.
What happens if I insert the film incorrectly?
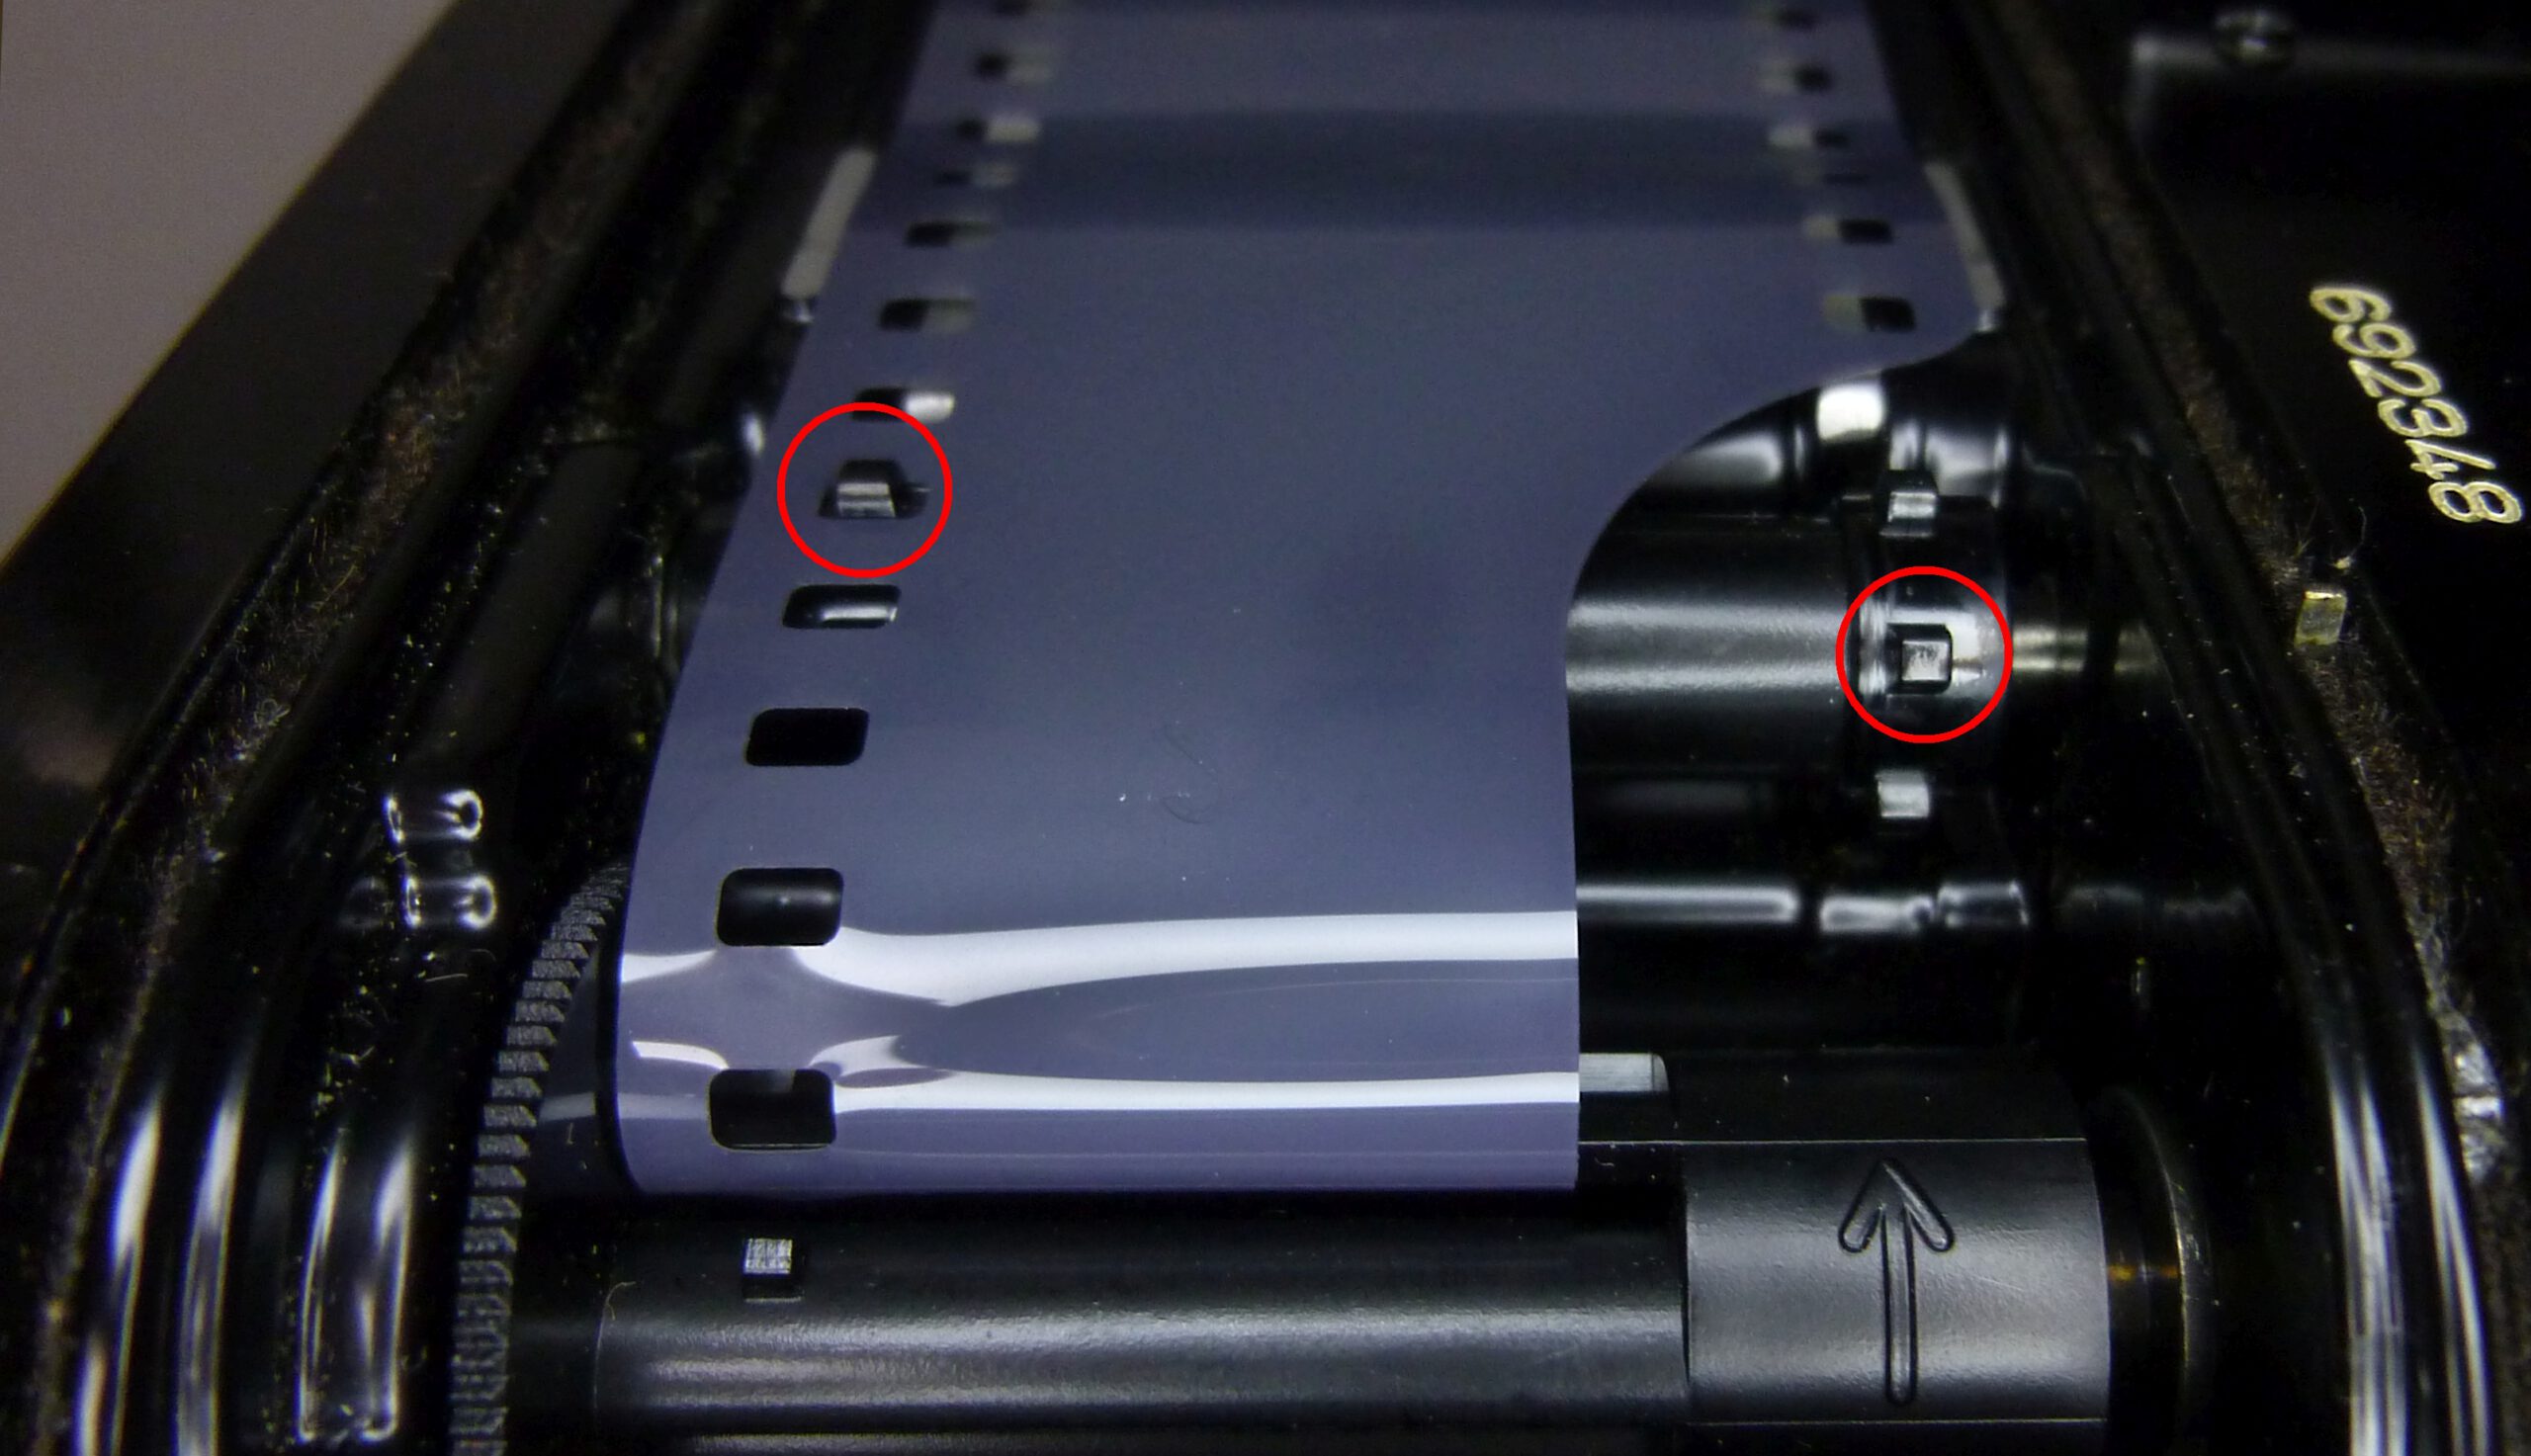
Of course, this film alignment only works if the film is inserted in the designated position, namely at the red dot. If this is not observed, the negatives will overlap on one part of the film, while the spacing will be too large on the other.

Inserting the Minox film correctly
Although the film cassette protects the film from light in principle, it should not be exposed to strong light. Therefore, perform steps 5 and 6 in dim light.
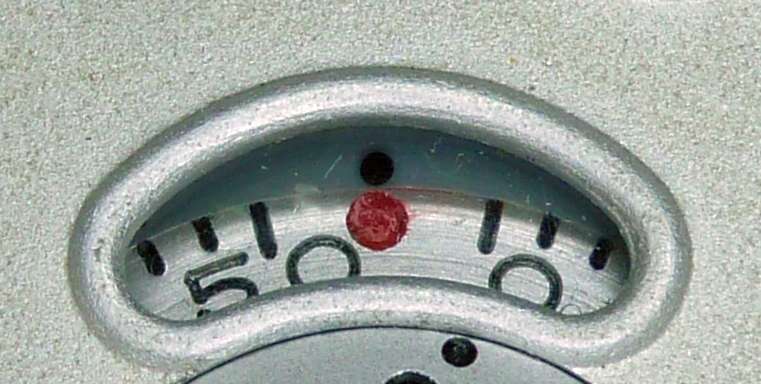
- Set the frame counter to the red dot.
The frame counter can only be moved by pulling out and pushing in the camera. Tip: It is sufficient to pull the Minox apart and push it together by just 3 mm. The movement does not have to be carried out completely.
- Pull out camera.
- Slide open back cover
- Push back camera 3 mm to open the film gate.
For Minox B, hold the camera with one end at the chain end, hold the viewfinder end – not the exposure meter end – with your other hand and push the camera inward slightly. - Take the film cassette out of the box and drop it into the film chambers.
- Close back cover.
- Push in the camera. Now the exposed film leader is transported into the cassette. Note that the frame counter has advanced by one.
- Pull out and push in the camera once. This transports another piece of film into the cassette as a safety margin. The film is now positioned at the point where image 1 is to be captured. The frame counter has advanced by one and indicates 0:
The camera is now ready to take the first picture. When you want to take the first picture, pull out the camera and shoot the picture. If you then press the camera together again, picture 1 is transported into the cassette, and the film is ready for image 2. Note that now the frame counter shows 1, indicating that one picture has been taken so far:
Removing the Minox film from the camera
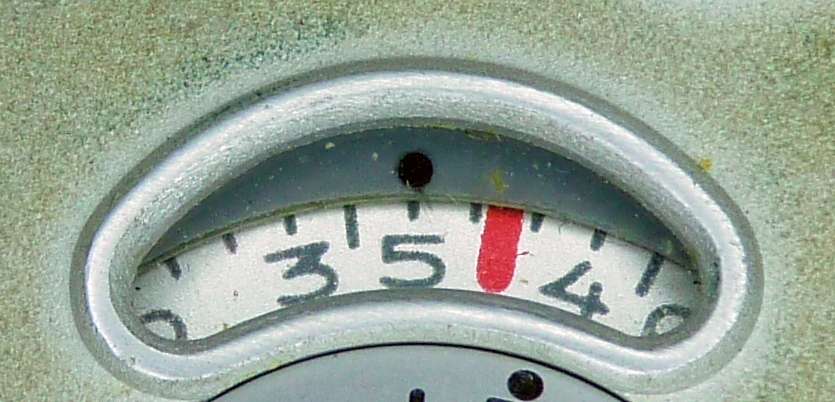
- As soon as the frame counter indicates that 36 pictures have been taken, we stop taking pictures:
- To ensure that no light can fall on the last photos despite the seals, the film should be transported twice more. This creates a safe distance from the last images.
So pull out and push back the camera once. The counter advances to position 37:
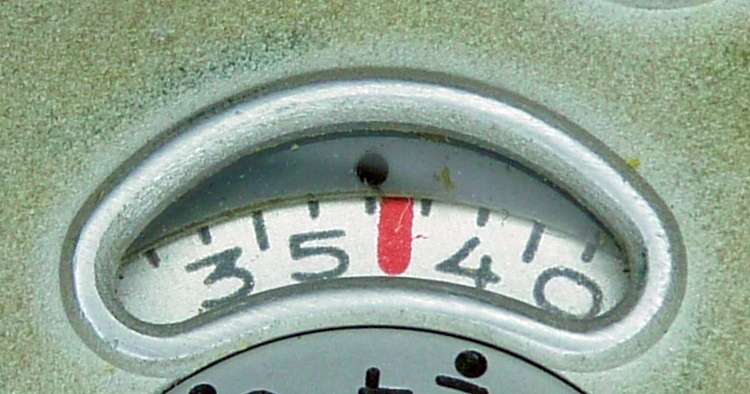
- Pull out and push back the camera once again. Now we are at position 38.
Caution: Do not advance the film beyond frame 38. Otherwise, the end of the film will disappear into the cassette and will no longer be visible. As a result, the end of the film will no longer seal the cassette slot light-tight. Light can penetrate and cause streaks of black on the film.
Now we can open the film chamber and remove the film.
Caution: Remember to open the film gate as you did when inserting the film; otherwise, the film will be jammed by the pressure plate and will not come out. So push back the camera 3 mm to open the film gate.
Hint: If the film does not come out even when the gate is open, there is a trick. Take a 50 mm piece of film from a scrap piece. Insert one end from behind under the bridge of the cartridge. Then pull up the cassette with the two ends of the strip:
Changing a partially exposed film
Changing a partially exposed Minox film is complicated, and I would advise against it. However, if you still want to do it, you must observe the following.
Although the Minox film cassette is perfectly suitable for removing a partially exposed film and reinserting it later, it requires a few steps:
- After the last exposed shot, transport the film twice more.
- Make a note of the frame counter reading.
- Remove the film
- Insert the new, unexposed film. Proceed as described above in the section on inserting film.
- When the film is full, remove it as described above.
- To finish exposing the partially exposed film, set the frame counter to 3 marks before the previously noted counter reading and close the film chamber. This will transport the film once.
- Now transport the film twice more. Only then will unexposed film be in front of the lens.
Why is it necessary to advance the film three times? When the partially exposed film is removed, the film loosens on the take-up spool. To tighten it again, an additional transport process is required after reinserting the film.
Frame counter and film
It is difficult to imagine where the film strip actually is when the frame counter is at a certain position. This question is particularly interesting when inserting and removing the film. It is also important to know if you want to cut Minox films yourself.
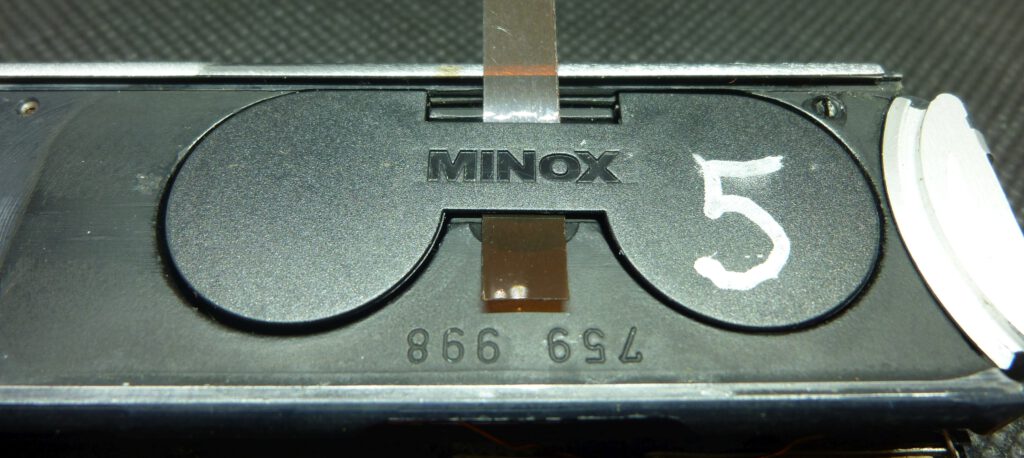
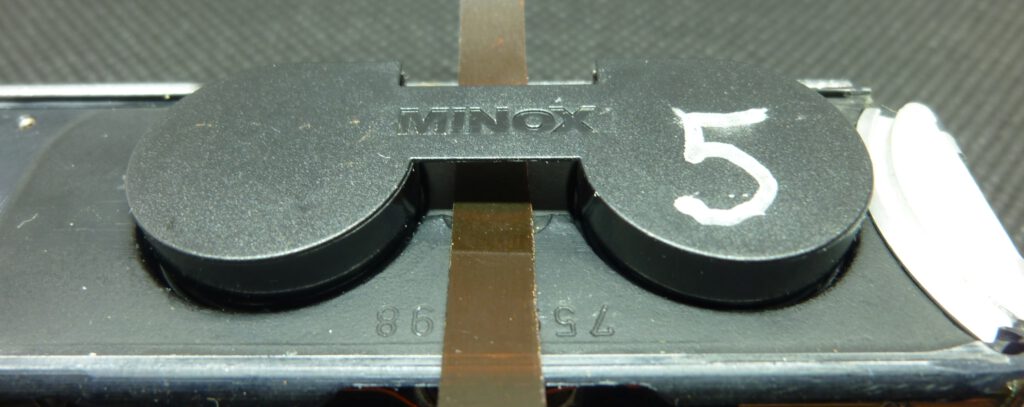
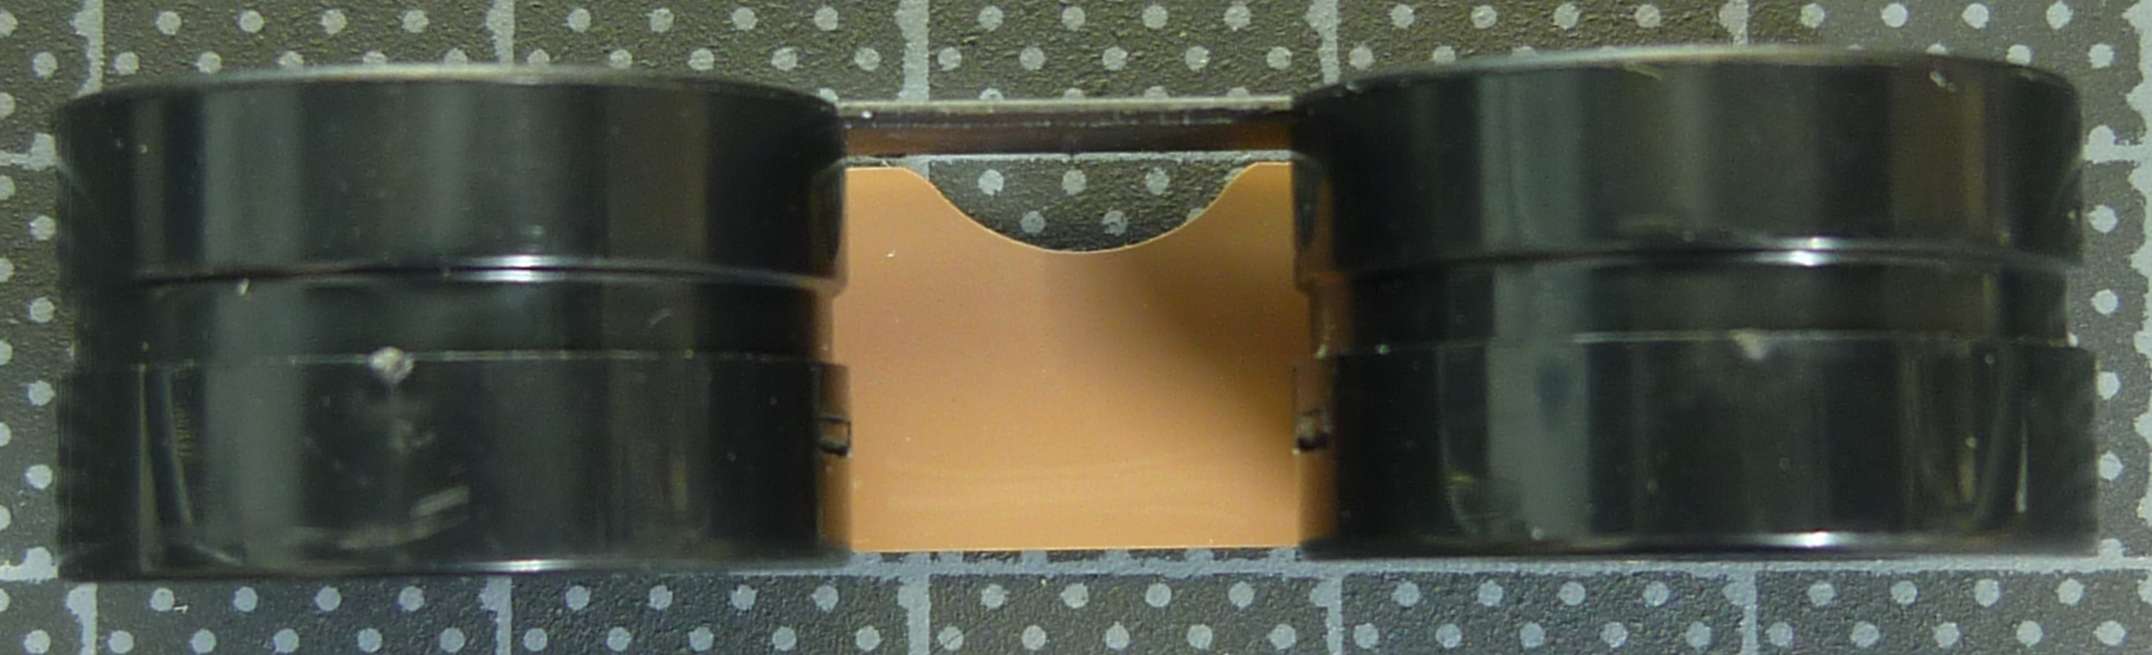
Here we see a Minox cassette from the side, with a view of the section of film facing the lens:
But a drawing is much more expressive than a photograph. At the top, you can see the film strip with the image frames, and at the bottom, the corresponding frame counter position. The dark rectangles with the symbol represent the piece of film between the two spools that is exposed when the film is outside the camera:

As you can see, there is an unexposed empty frame before picture 1. This is caused when inserting the film by closing the film chamber and then opening and closing the camera once again.
When the frame counter reads 36, the unexposed frame after picture 36 is located in front of the lens. Transporting the film twice results in the second empty frame. When removing the film, the dark rectangle representing the exposure of the free film between the spools is created last. The frame counter is then at 38:

Another interesting question is how the images of the entire film are distributed on the negative strip. This is answered in the following chapter.
Specifications of a Minox film
Over time, there have been many different films for the 8×11 format. Minox offered black-and-white films, but also colour negative and slide films. They were available in lengths for 15, 30, 36 and 50 exposures.
Today, the most important length is the 36-exposure film. Only this length is still commercially available. This length is also ideal if you want to cut the film yourself. That’s why I’m going to explain the actual dimensions of this film here.
I’ll also show you how the images are arranged on the film strip when you take a photograph. For the crucial sequences when inserting and removing the film, I’ll also show you the frame counter.
The external dimensions of a Minox film
I measured the dimensions myself on this original Minox film:
The beginning and end of the film strip look like this:

This Minox film has the following main dimensions:
- Width: 9.2 mm
- Thickness: 0.14 mm
For comparison, the thickness of current films:
Kodak Ektar 100: 0.155 mm,
CineStill 50d: 0.15 mm,
Adox CMS 20: 0.095 mm,
Agfa APX 100: 0.13 mm - Total length: 590 mm
There were also original Minox film variants with a length of 570 mm.
Minox history
Why does the Minox B have a mark for 36 exposures, but the Minox A does not?
In the 1950s, negative film was used almost exclusively for black-and-white photography. Colour negative film only became affordable at the end of the decade. However, as we have seen above, it was thicker. A colour negative film with 50 exposures would not fit into the Minox cartridge. That is why these films were offered with 36 exposures, and why the Minox B, released in 1958, received the red mark for 36 exposures.
Another difference at that time, unlike today, was the much lower exposure latitude compared to black-and-white film. That is why the Minox B was also equipped with a built-in exposure meter.
The position of the frames
Since I couldn’t find complete information about Minox film anywhere on the internet, I recorded all the dimensions of a real film. They are shown in the following drawing. These are my own measurements taken from the original film shown above.
I was also interested in how the photos are stored sequentially on the film. In addition, I have recorded the numbers displayed by the frame counter at the respective film position.
To my knowledge, this representation has not been available anywhere else to date (click to enlarge):

What conclusions can we draw from this?
- For those who submit the film for development using my method at any C-41 process lab, the first measurement is particularly important. This is the lead-in from the start of the film to the first image. It is approximately 45 mm. The lab requires 30 to 35 mm of lead-in, so this is sufficient.
- The shutter opening in the camera body has a width of 13.2 mm (internal dimension).
- There is one unexposed frame between the exposed start frame and the first image
- After the last (36th) exposed frame, there are two unexposed frames.
- The distance between the last exposed image and the end of the film is 71.5 mm.
- The average space between two frames is 2.2 mm.
Please note: all measurements after the first film transport are theoretical average values.
The spacing between the frames
I thought long and hard about how to calculate the distance between exposures. Taking all circumstances into account, I settled on 2.2 mm, as shown in the previous chapter. Here, I will explain how I arrived at this value.
The design value for the spacing

A technical drawing from 1938 for the negative sleeves for the VEF Minox Riga shows the theoretical measure for the negative spacing. It is 2.3 mm, see the picture on the right.
This measurement is not achieved exactly in practice. The reason for this is the Minox-specific film transport.
Although this mechanism is manufactured with the highest precision, it is inevitably subject to tolerances in the components and assembly. In addition, there is the age and condition of the camera. Wear and lubrication condition of the mechanical parts significantly affect the length of the film feed.
In addition, the drawing actually only applies to the VEF Minox Riga. The value intended for the Minox A and Minox B is unknown.
Measured spacings from the field
In order to be able to make a practical statement here, I measured spacings on negatives that I exposed with different Minox models on different types of film.
The measurements represent the distance between negatives in mm on the film strip, with an overall median of 2.2 mm across 229 samples. The average deviation from this value is quite high at 0.7 mm. This means that distances of 1.5 mm to 2.9 mm occurred frequently.
| n | Mean | Median | Std. Dev. | |
|---|---|---|---|---|
| All measurements | 229 | 2.14 | 2.2 | 0.74 |
The films I measured were self-produced using Kodak Ektar 100, CineStill 50d and ADOX CMS 20. I used a VEF Minox Riga and two Minox A cameras.
To determine whether the varying spacings were due to the cameras or the film types, I carried out the following two evaluations.
Among the camera models, the Riga model achieves a median spacing of 2.2 mm with the lowest variability indicating the most consistent and generous frame separation.
| Camera | n | Mean | Median | Std. Dev. |
|---|---|---|---|---|
| Minox Riga | 59 | 2.34 | 2.2 | 0.35 |
| Minox A 1 | 63 | 2.26 | 2.3 | 0.61 |
| Minox A 2 | 107 | 1.92 | 2.1 | 0.86 |
Legend:
n: Number of measurements taken
Mean: Average distance between negatives (in mm)
Median: Middle value when all distances are sorted
Std. Dev.: How much the distances vary (in mm)
The first A model follows closely with a median of 2.3 mm and moderate consistency, while the second A model shows the lowest median spacing at 2.1 mm and the highest variability, suggesting potential issues with frame advance precision or more frequent overlaps.
Regarding film types, ADOX CMS20 stands out for its exceptional consistency, with the lowest standard deviation of 0.16 and a median of 2.2 mm, making it the most reliable for uniform negative spacing.
CineStill50d tends toward slightly wider spacing (median 2.3 mm), whereas Ektar 100 (median 2.2 mm), being the most tested film, exhibits the greatest variability, likely influenced by camera-specific behaviors.
Overall, for optimal and consistent negative separation around 2.2–2.3 mm, combining the Riga or A1 camera with ADOX CMS20 film is recommended to minimize overlap risks and ensure reliable scanning or printing.
| Film | n | Mean | Median | Std. Dev. |
|---|---|---|---|---|
| Ektar100 | 172 | 2.15 | 2.2 | 0.79 |
| ADOX CMS20 | 35 | 2.18 | 2.2 | 0.16 |
| CineStill50d | 44 | 2.19 | 2.3 | 0.57 |
The good values of the ADOX CMS 20 are probably due to the low film thickness and the associated higher flexibility of the film strip.
The two colour negative films are almost twice as thick and may exhibit pronounced stick-slip behaviour in the film feeding chamber.
How much film fits in a Minox cassette?
For anyone who cuts and assembles their own Minox film, the question arises as to the correct or maximum length. I recommend the following:
- If you use modern color negative films such as Kodak Ektar 100 or CineStill 50d, use the length specified above of 590 mm. You will get 36 exposures.
- If you use a thin and flexible film such as ADOX CMS 20, you can go up to 775 mm. You will get 50 exposures.
Here is my explanation:
The maximum film length is limited by the take-up chamber of the Minox cassette. This is where the film is wound onto the take-up spool. When the coil becomes so thick that it touches the wall of the chamber, it cannot be wound any further.
Let’s have a look at the open film cassette. The image on the right shows the Minox film presented above (length 590 mm), completely wound onto the take-up spool.Note the small gap between the coil and the housing:
take-up chamber (left) empty
feeding chamber (right) full
take-up chamber (left) full
feeding chamber (right) empty
The diameter of the take-up chamber is 15 mm, the core diameter of the take-up spool is 10 mm. To determine the maximum length a film can have, you need to calculate the diameter of the coil depending on the film length and thickness. The diameter of the film coil must therefore always be less than 15 mm.
This formula calculates the outer diameter of a coil when a film of thickness t and total length l is wound onto a core with diameter d₀:
\[ d = \sqrt{d_0^2 + \frac{4 \cdot t \cdot l}{\pi}} \]d: Outer diameter of the finished coil (in mm), must be less than 15 mm
d₀: Core diameter of the spool (10 mm)
t: Thickness of the film (in mm)
l: Total length of the wound film (in mm)
π ≈ 3.14159
Let’s first consider colour negative films, specifically Ektar 100, because it is slightly thicker than CineStill.
Kodak Ektar 100, 36 exp., l = 590 mm, thickness = 0.155 mm:
We can see that it just fits into the take-up chamber. Experience confirms that it works. However, it must not be any longer than this.
Now half as thick high-resolution black-and-white film.
ADOX CMS 20, 36 exp.., l = 590 mm, thickness = 0.095 mm:
As you can see, there is still some space left in the chamber. So let’s try 50 exposures.
ADOX CMS 20, 50 exp.., l = 590 mm + (50 – 36) * 13.2 mm = 774,8 mm, thickness = 0.095 mm:
This film’s length also fits in. The film could even be longer. The problem, however, would be that the frame counter only goes up to 50 shots.