What happens in the Minox when you turn the distance dial? A small mechanical work of art, crafted with the highest precision, begins to move. Read the easy-to-understand explanation here.
But if you want to know what distance to set, you’ll find the answers here.
Page Contents
Why a distance dial?

Cameras can only focus on one distance. All image elements that are exactly at this distance will be sharply depicted in the photo. Everything in front of or behind this distance will be more or less blurred.
In order to have the desired subject clearly and distinctly in the photo, a camera must therefore have a distance setting for the lens.
The situation
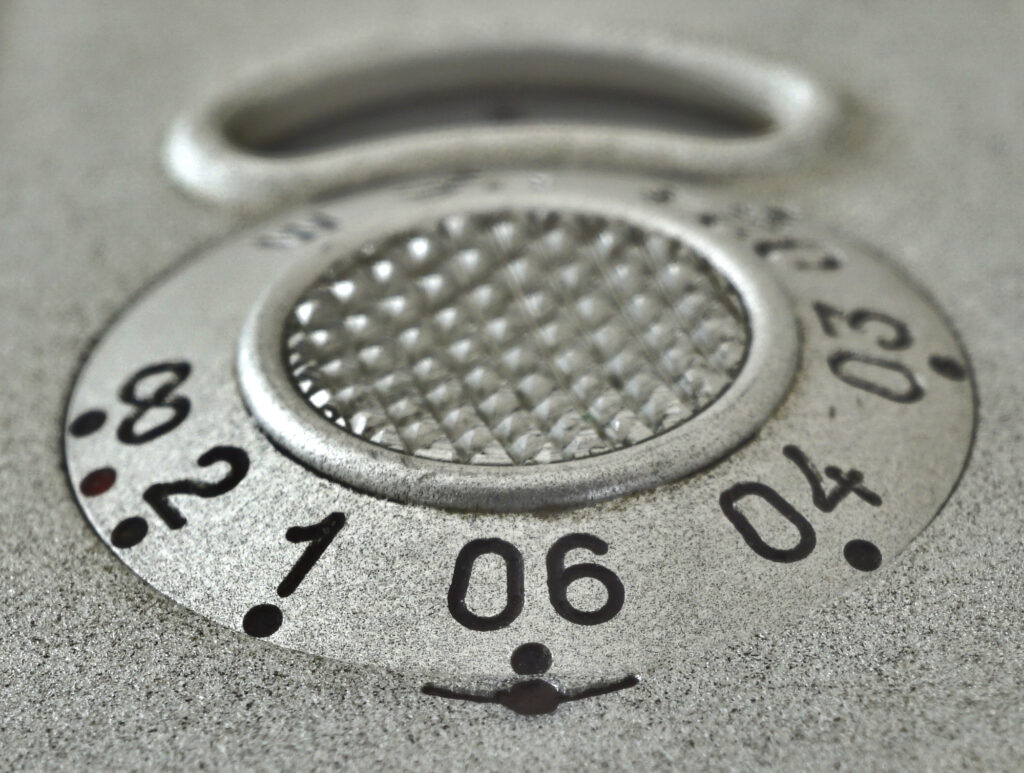
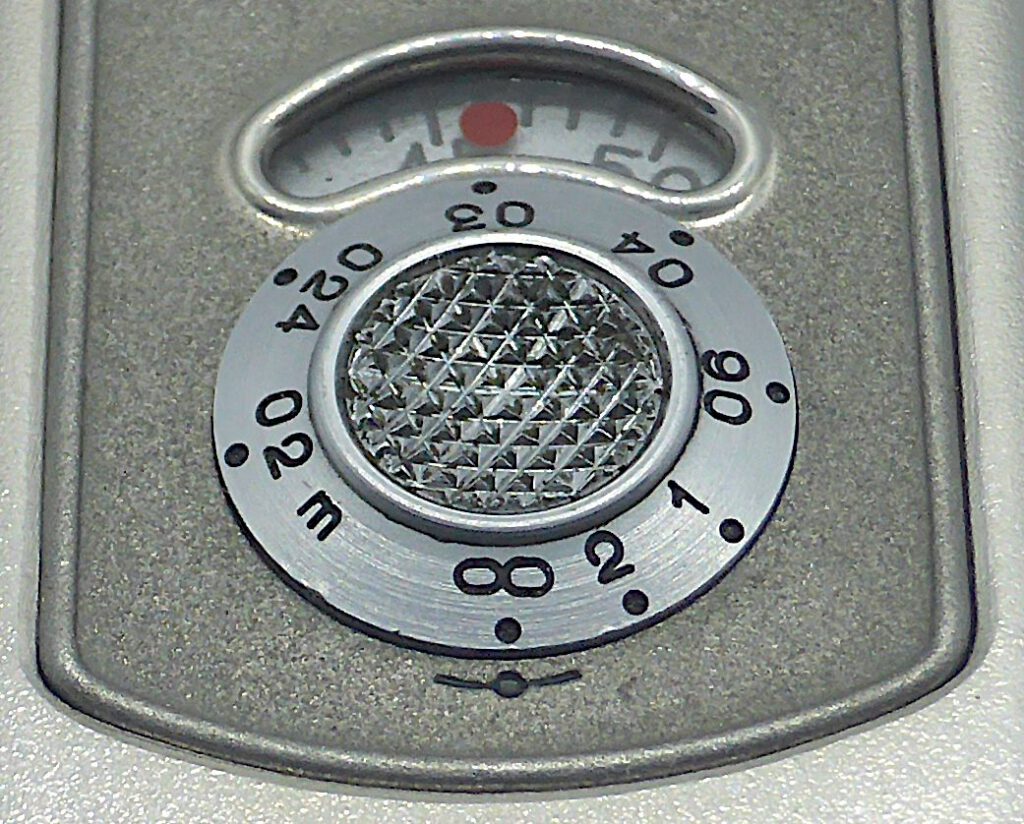
This is a Minox camera. There are two dials. The distance dial is the left one:

Now let’s take a look inside a Minox. Here we see in blue the part of the film that is supposed to capture the current image. The two large circles on the right and left are the film spools. The lens is located inside the red circle. The light comes from below through the lens onto the film:

Now we come to the crucial task of adjusting the distance on a Minox. The lens must be moved back and forth in the direction of the red arrows to adjust the focus. The distance between the lens (red circle) and the film (blue line) is decisive for the sharpness.
To adjust the distance of a camera, it must be possible to change the distance between the film and the lens. We are only talking about very small changes in distance. Let’s calculate how small.
The task
Let’s now ask ourselves how far the lens needs to be moved at most. The answer may surprise you. It’s only 1.2 mm. This movement must be very precise so that it corresponds to any desired distance between 0.2 m and infinity.
For those who are interested, here’s the reasoning behind it. To explain this, we need to look at some physics, specifically optics. Using the Gaussian lens formula, we can calculate the image distance for any given distance setting.
The Minox has a focal length of 15 mm and a minimum focus distance of 0.2 m. With Gauss, we can now calculate the required distance between the lens and the film (image distance) for all distances indicated on the Minox distance dial.
| Distance (m) | Image Distance (mm) |
|---|---|
| 0.20 | 16.22 |
| 0.24 | 16.00 |
| 0.30 | 15.79 |
| 0.40 | 15.58 |
| 0.60 | 15.39 |
| 1.00 | 15.23 |
| 2.00 | 15.11 |
| infinity | 15.00 |
The distance dial must move the lens by no more than
16.22 – 15 mm = 1.22 mm.
The center of the range is at approximately 15.6 mm.
If we look in the table, we see that the corresponding distance is 0.4 m. Therefore, 0.4 is exactly in the middle of the distance dial between 0.2 and infinity.
The challenge

With normal cameras, you turn the lens to move it back and forth. This turns the lens into or out of the camera body like a screw.
With the Minox, however, the lens is located deep inside the camera. In addition, the distance dial is at right angles to the lens axis. When you turn the distance dial, the lens should move forward or backward:
The solution
Let’s now take a look at how the inventor of the Minox solved this problem back in the 1930s.
The lens and its mount
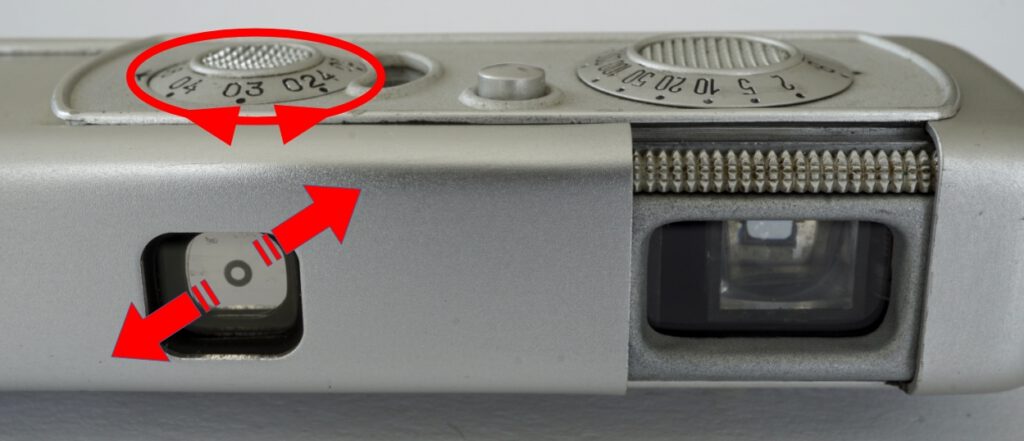
In the photo above, the shutter hides the actual lens. So let me show you the Minox lens in its disassembled state. With a diameter of 4 mm, it is really tiny:

What you cannot see here is that the lens has a thread on the outside, which is used to screw it into the camera body. As with normal large cameras, Minox also uses the screw effect here. A large rotational movement is thus translated into a very small forward or backward movement. This rotational movement controls the lens shift with great precision.
The idea and the patent
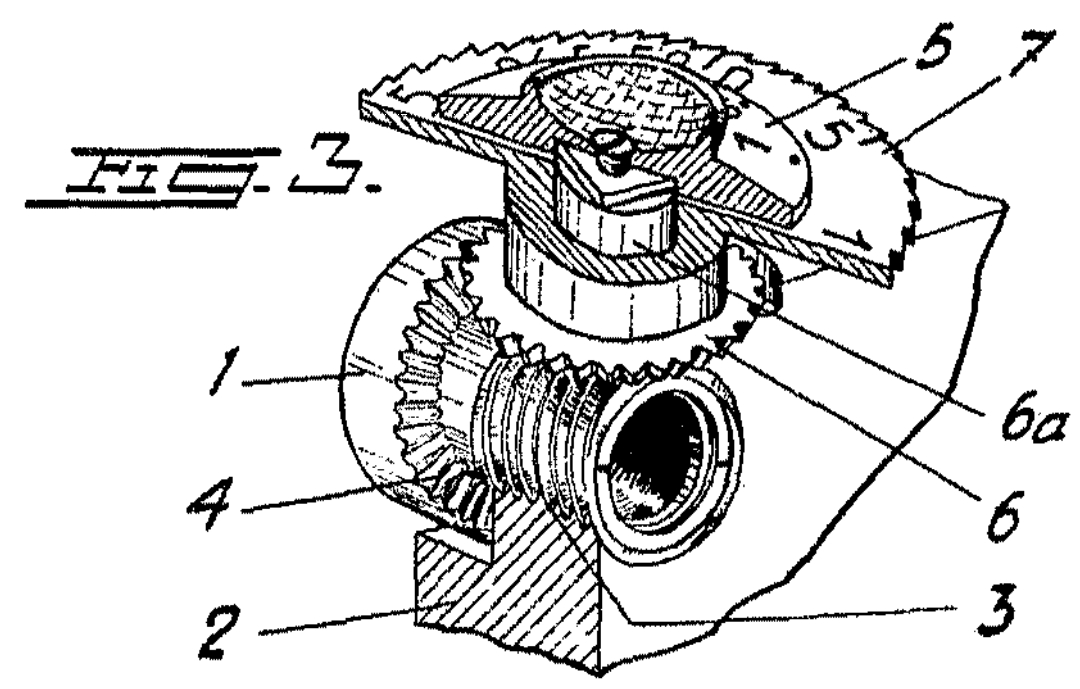
To achieve this, Walter Zapp, the inventor of the Minox, came up with a clever solution and applied for a patent in 1938. In it, he writes:
“The mount 1 of the lens 9 is mounted in a fixed camera body 2 by means of an adjustment thread 3. It is also equipped with a conical gearing 4. A conical gearing 6 located on the underside of the distance dial 5 engages with the gearing 4. When the distance dial 5 is turned, the mount 1 participates in the rotational movement and pushes the mount back and forth.”

The realization
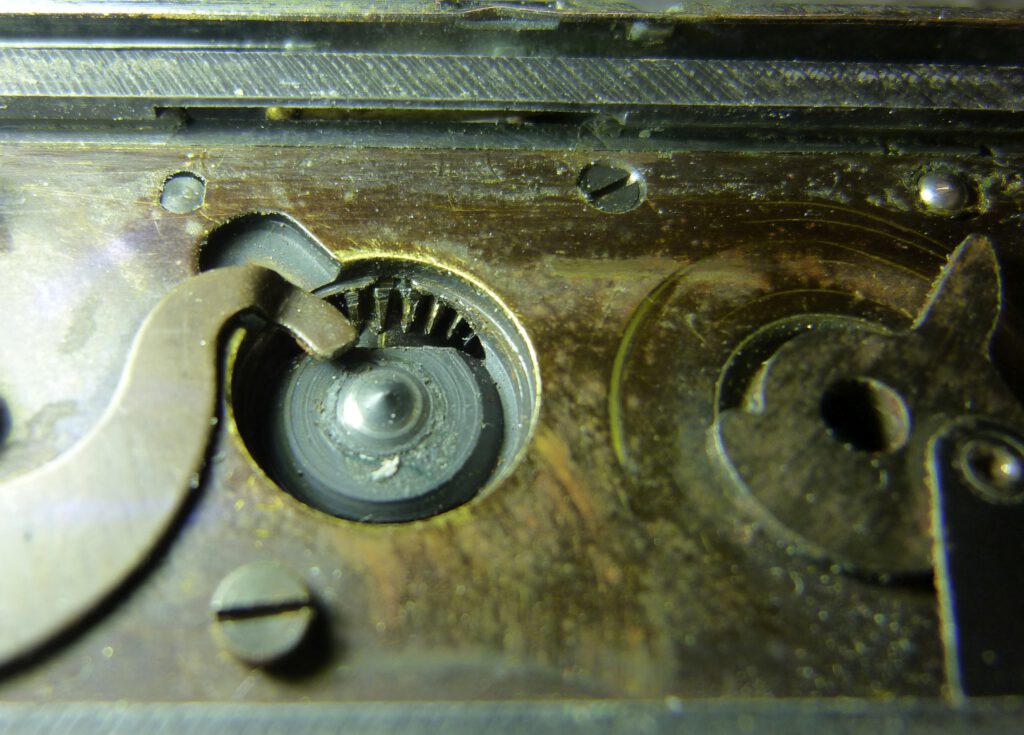
The bevel gearing 4 (“conical gearing”) is clearly visible in the photo of the lens above. The following photo on the left shows the bevel gear 6 on the underside of the distance dial.
If you open the Minox and remove the distance dial, you can clearly see the gear ring 4 of the lens. This is exactly where the teeth 6 of the distance dial engage, see photo on the right.

The following video shows the lens of a Minox as I turn the distance dial back and forth. As you can see, this causes the lens to rotate. If you look closely, you can also see the lens moving back and forth:
The user experience
By turning the distance dial on the Minox, the photographer ultimately decides that we should see the first strawberry in focus rather than the third.

Conclusion
The mechanism presented here is simple in principle, but elaborate to implement. In the Minox, the distance setting is
- extremely miniaturized
- very accurate in adjusting the lens
- made of high-quality materials and
- manufactured with great precision.
I don’t know of any other camera that adjusts the distance using this principle. If you know of any others, please leave a comment below.
Also interesting
If you are interested in photography with a Minox, you will find useful information here.
Here you can see what photos look like when the Minox distance setting is defective and how to repair it.