
Page Contents
The exposure latitude of the film
If you want to take pictures with a Minox A, Minox AX or even a Riga Minox, you have to determine the exposure time yourself. However, the following considerations are also interesting for exposure with Minox B, BL, C, LX and EC. Either for manual exposure (except EC) in certain situations or when setting the ISO value.
Today’s color films
Black and white films have always had a certain exposure latitude. Today’s color negative films have a very large exposure latitude compared to the 1950s.
Take a look at the following series of exposures made by Canadian Film Lab (canadianfilmlab.com) with four different modern negative films (Fuji 400H, Portra 160, Portra 400, Portra 800):
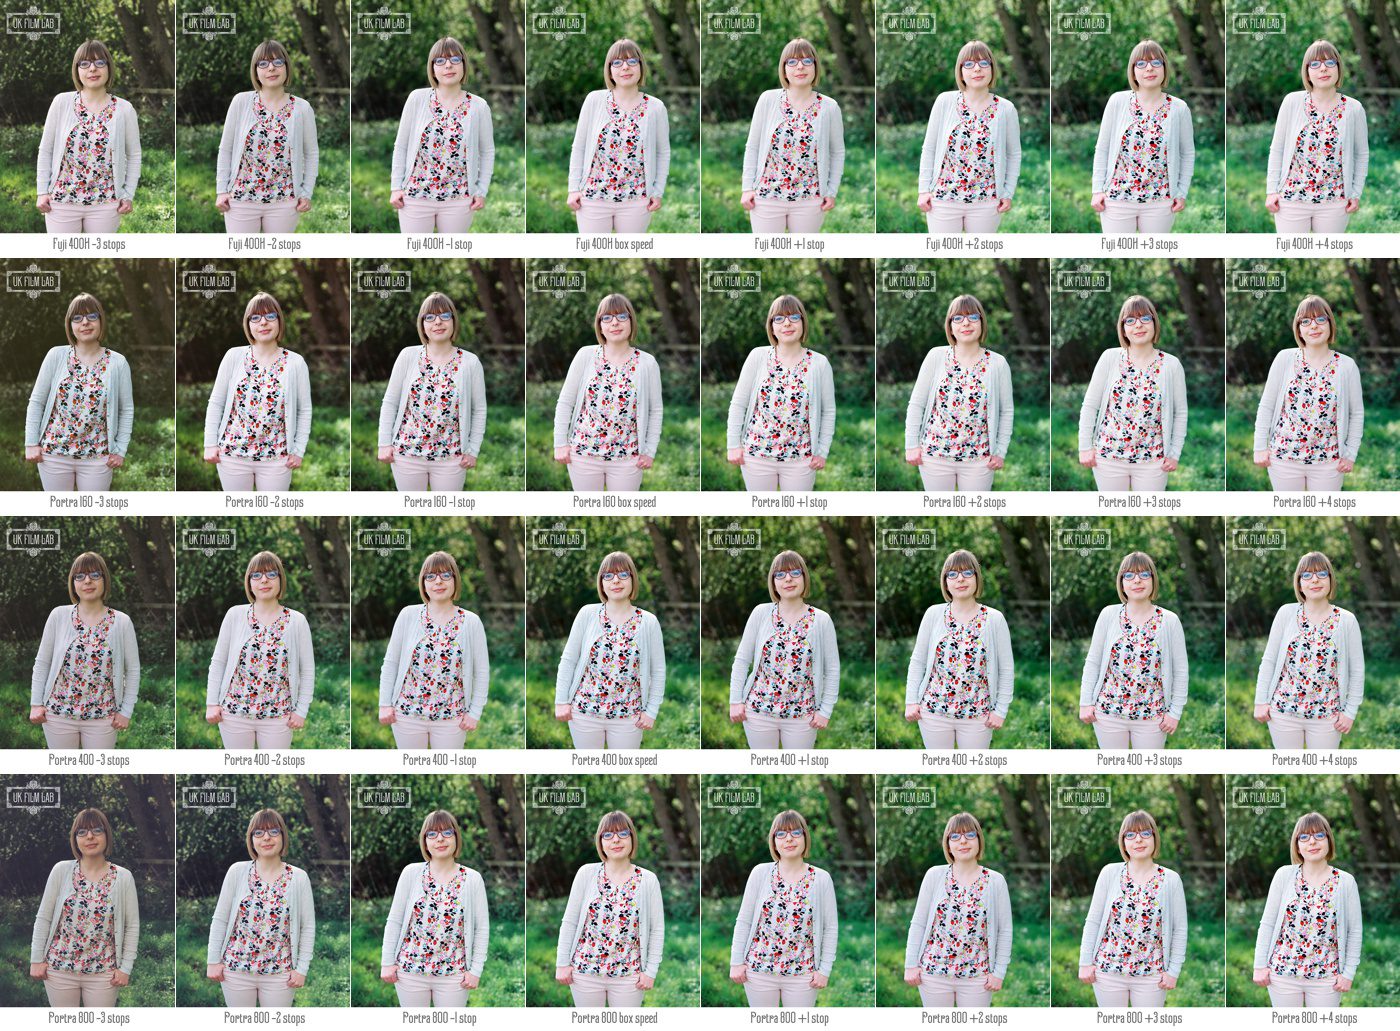
The exposure brackets range from an underexposure of 3 f-stops to an overexposure of 4 f-stops. The images shown above are usable across a total of 7 f-stops!
… and the Minox shutter speeds?
What does that mean for us? Let’s take the exposure times of a Minox A IIIs. They range from 1/2 s to 1/1000 s, i.e. 9 f-stops. If we were to set a 1/100 s, we would still have usable images from 3 f-stops down (1/1000 s) to 4 f-stops up (1/5). So regardless of whether the optimum exposure time is 1/5 s or 1/1000 s, the image would still be OK at 1/100 s. That is fantastic!
You don’t believe me? OK, I tried it out and took some test photos. You can find the proof here in my article.

It would be even better to choose 1/50 s, because the films would rather be overexposed than underexposed. However, the higher risk of blurring due to camera shake at the lower exposure time speaks against this.
However, you must keep the following in mind. Strictly speaking, this large exposure latitude only applies to the above-mentioned films tested. You should expose an Ektar 100 perhaps more precisely. There I would assume -1 f-stop up to +2 f-stops. But at least 3 exposure stops. At 1/100 s this ranges from 1/20 s to 1/200 s.
Practical considerations
Then, of course, you have to realize that especially in scenes with a high contrast range, you need the exposure latitude of the film to capture the shadows and highlights of the individual image well. The image shown above in the test series had a low contrast range, so it was unproblematic in this respect.
It therefore makes sense to determine the optimum exposure time or at least to narrow it down a little. This brings us to the following methods.
Determining the correct exposure time
Estimating the exposure time
The methods described below can result in exposure times that are so long that it is no longer possible to expose them by hand. I have explained here at what point you need to use which accessories to still get sharp photos.
Rule of thumb
Gray wall, Android app “Lightmeter”
100 ASA, f 3.5 -> 1/2000 s
The easiest way is to estimate the exposure time using the Sunny 16 rule. As the Minox only has one aperture value, the application of the rule is simplified as follows. Exposure time in full sunshine (light value 15)
speed = 20 * ASA value of the film used
for example for a 100 ASA film:
20 * 100 = 2000 (1/2000 s)
Thank you xkaes from subclub.org for this method.
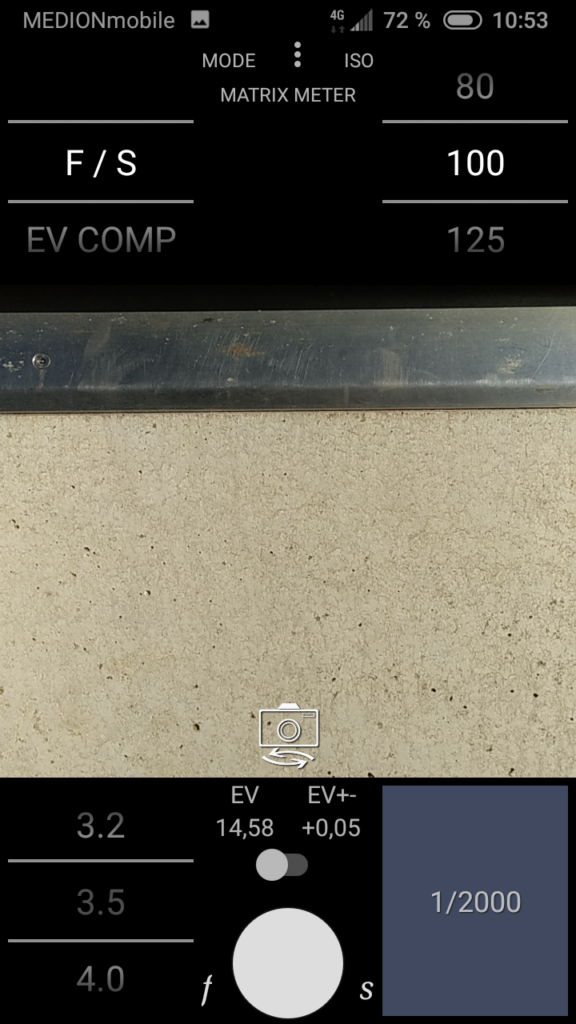
The screenshot on the right shows the Android app “Light Meter EV for Photography” set for Minox with a 100 ASA film. I took the measurement on a gray wall with a cloudless sky in Germany in the morning at the end of September. The value corresponds exactly to the method above.
Light value table
With a little practice, you can use the following table to estimate the exposure time yourself. The table applies to the Minox A IIIs, the Riga Minox and all other Minox models with an aperture of 3.5 and for films with 100 ASA. You can easily convert other film speeds.

VEF Exposure table
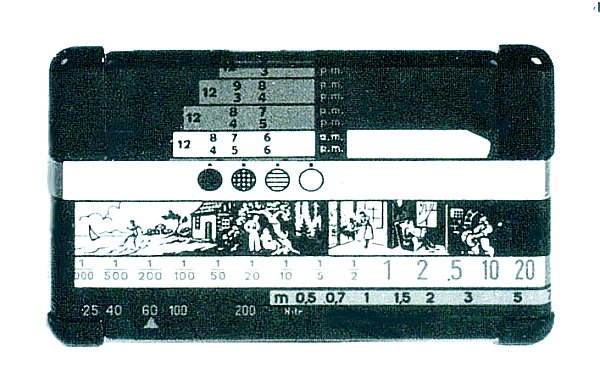
VEF already supplied an exposure table for the Riga Minox.
The aperture (f/3.5), film speed and month were set on the back of the table. On the front, you select the time of day (morning, afternoon), weather and location (sea, mountains …). The exposure time can then be read off.
Measuring the exposure time
You can use a light meter for measuring, either an external one or a built-in one (with the Minox B, BL, C, LX or EC).
The most convenient way to measure exposure accurately is with a smartphone app. Since you always have your phone with you, this is the most practical way.
There are many lightmeter apps, but I personally prefer this one.
The best and most stylish external light meter for the Minox A IIIs and the Riga Minox is the Minox exposure meter. This device has been specially developed for the Minox A and manufactured by Gossen:
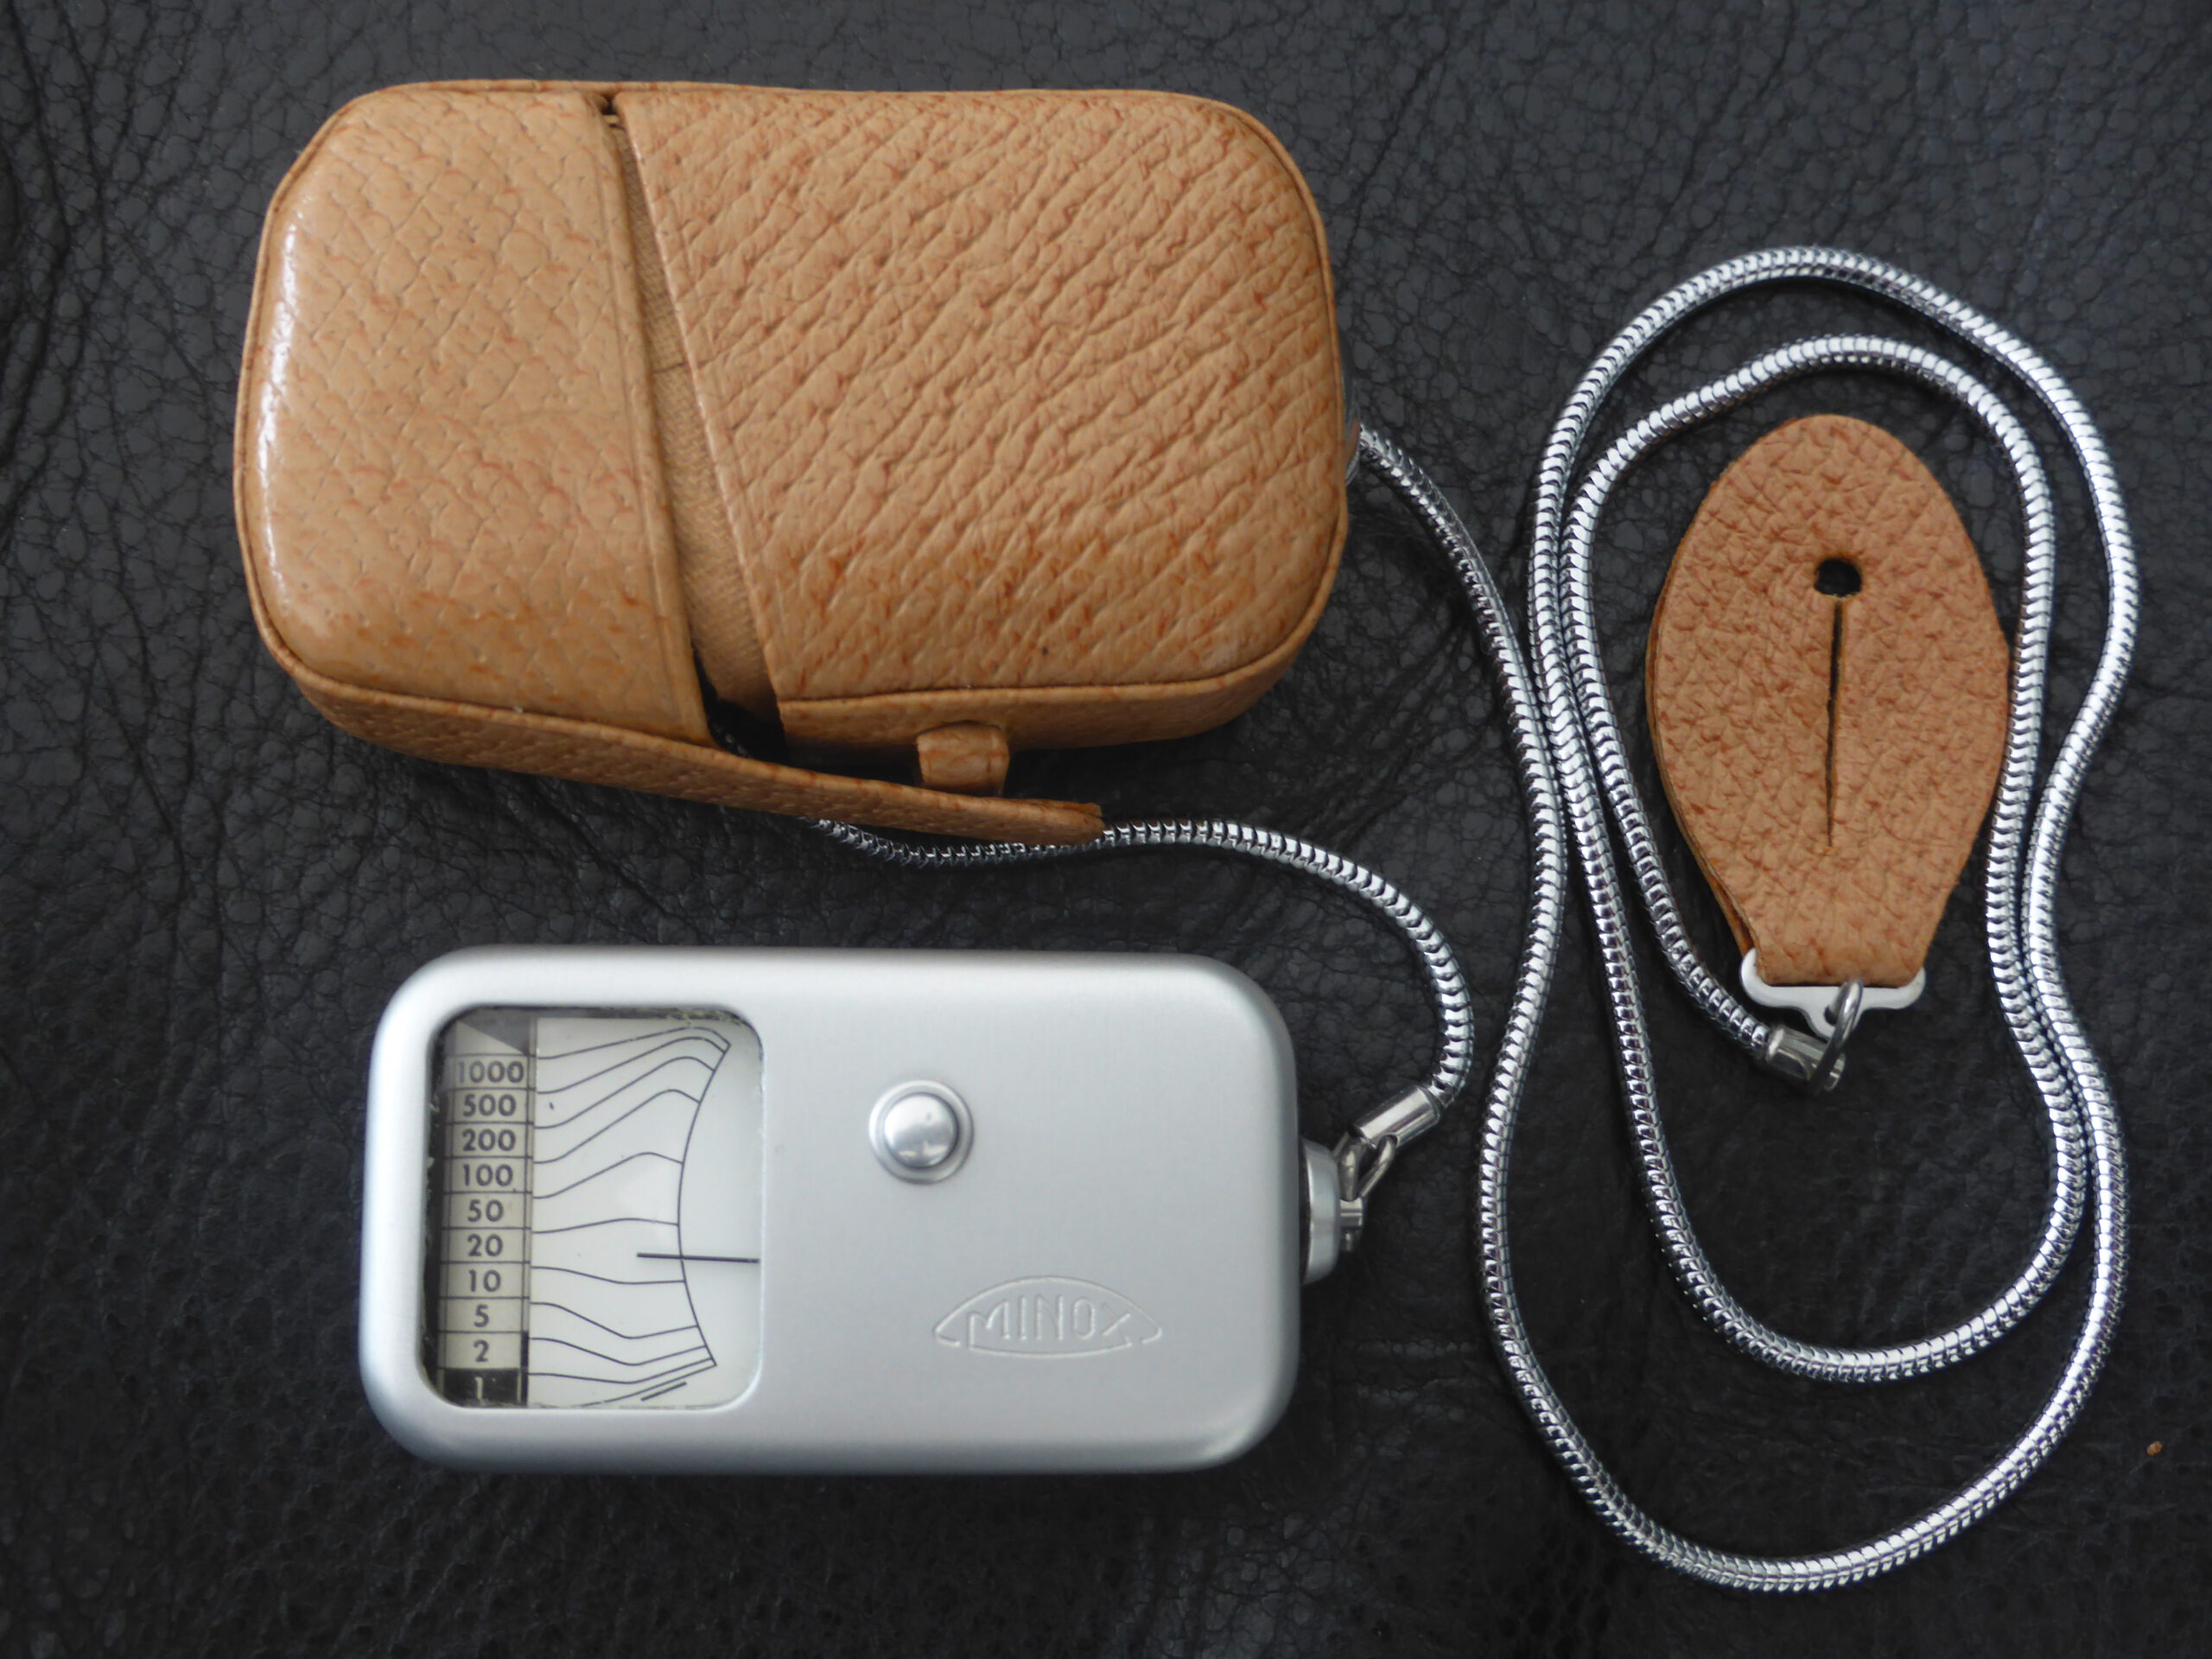
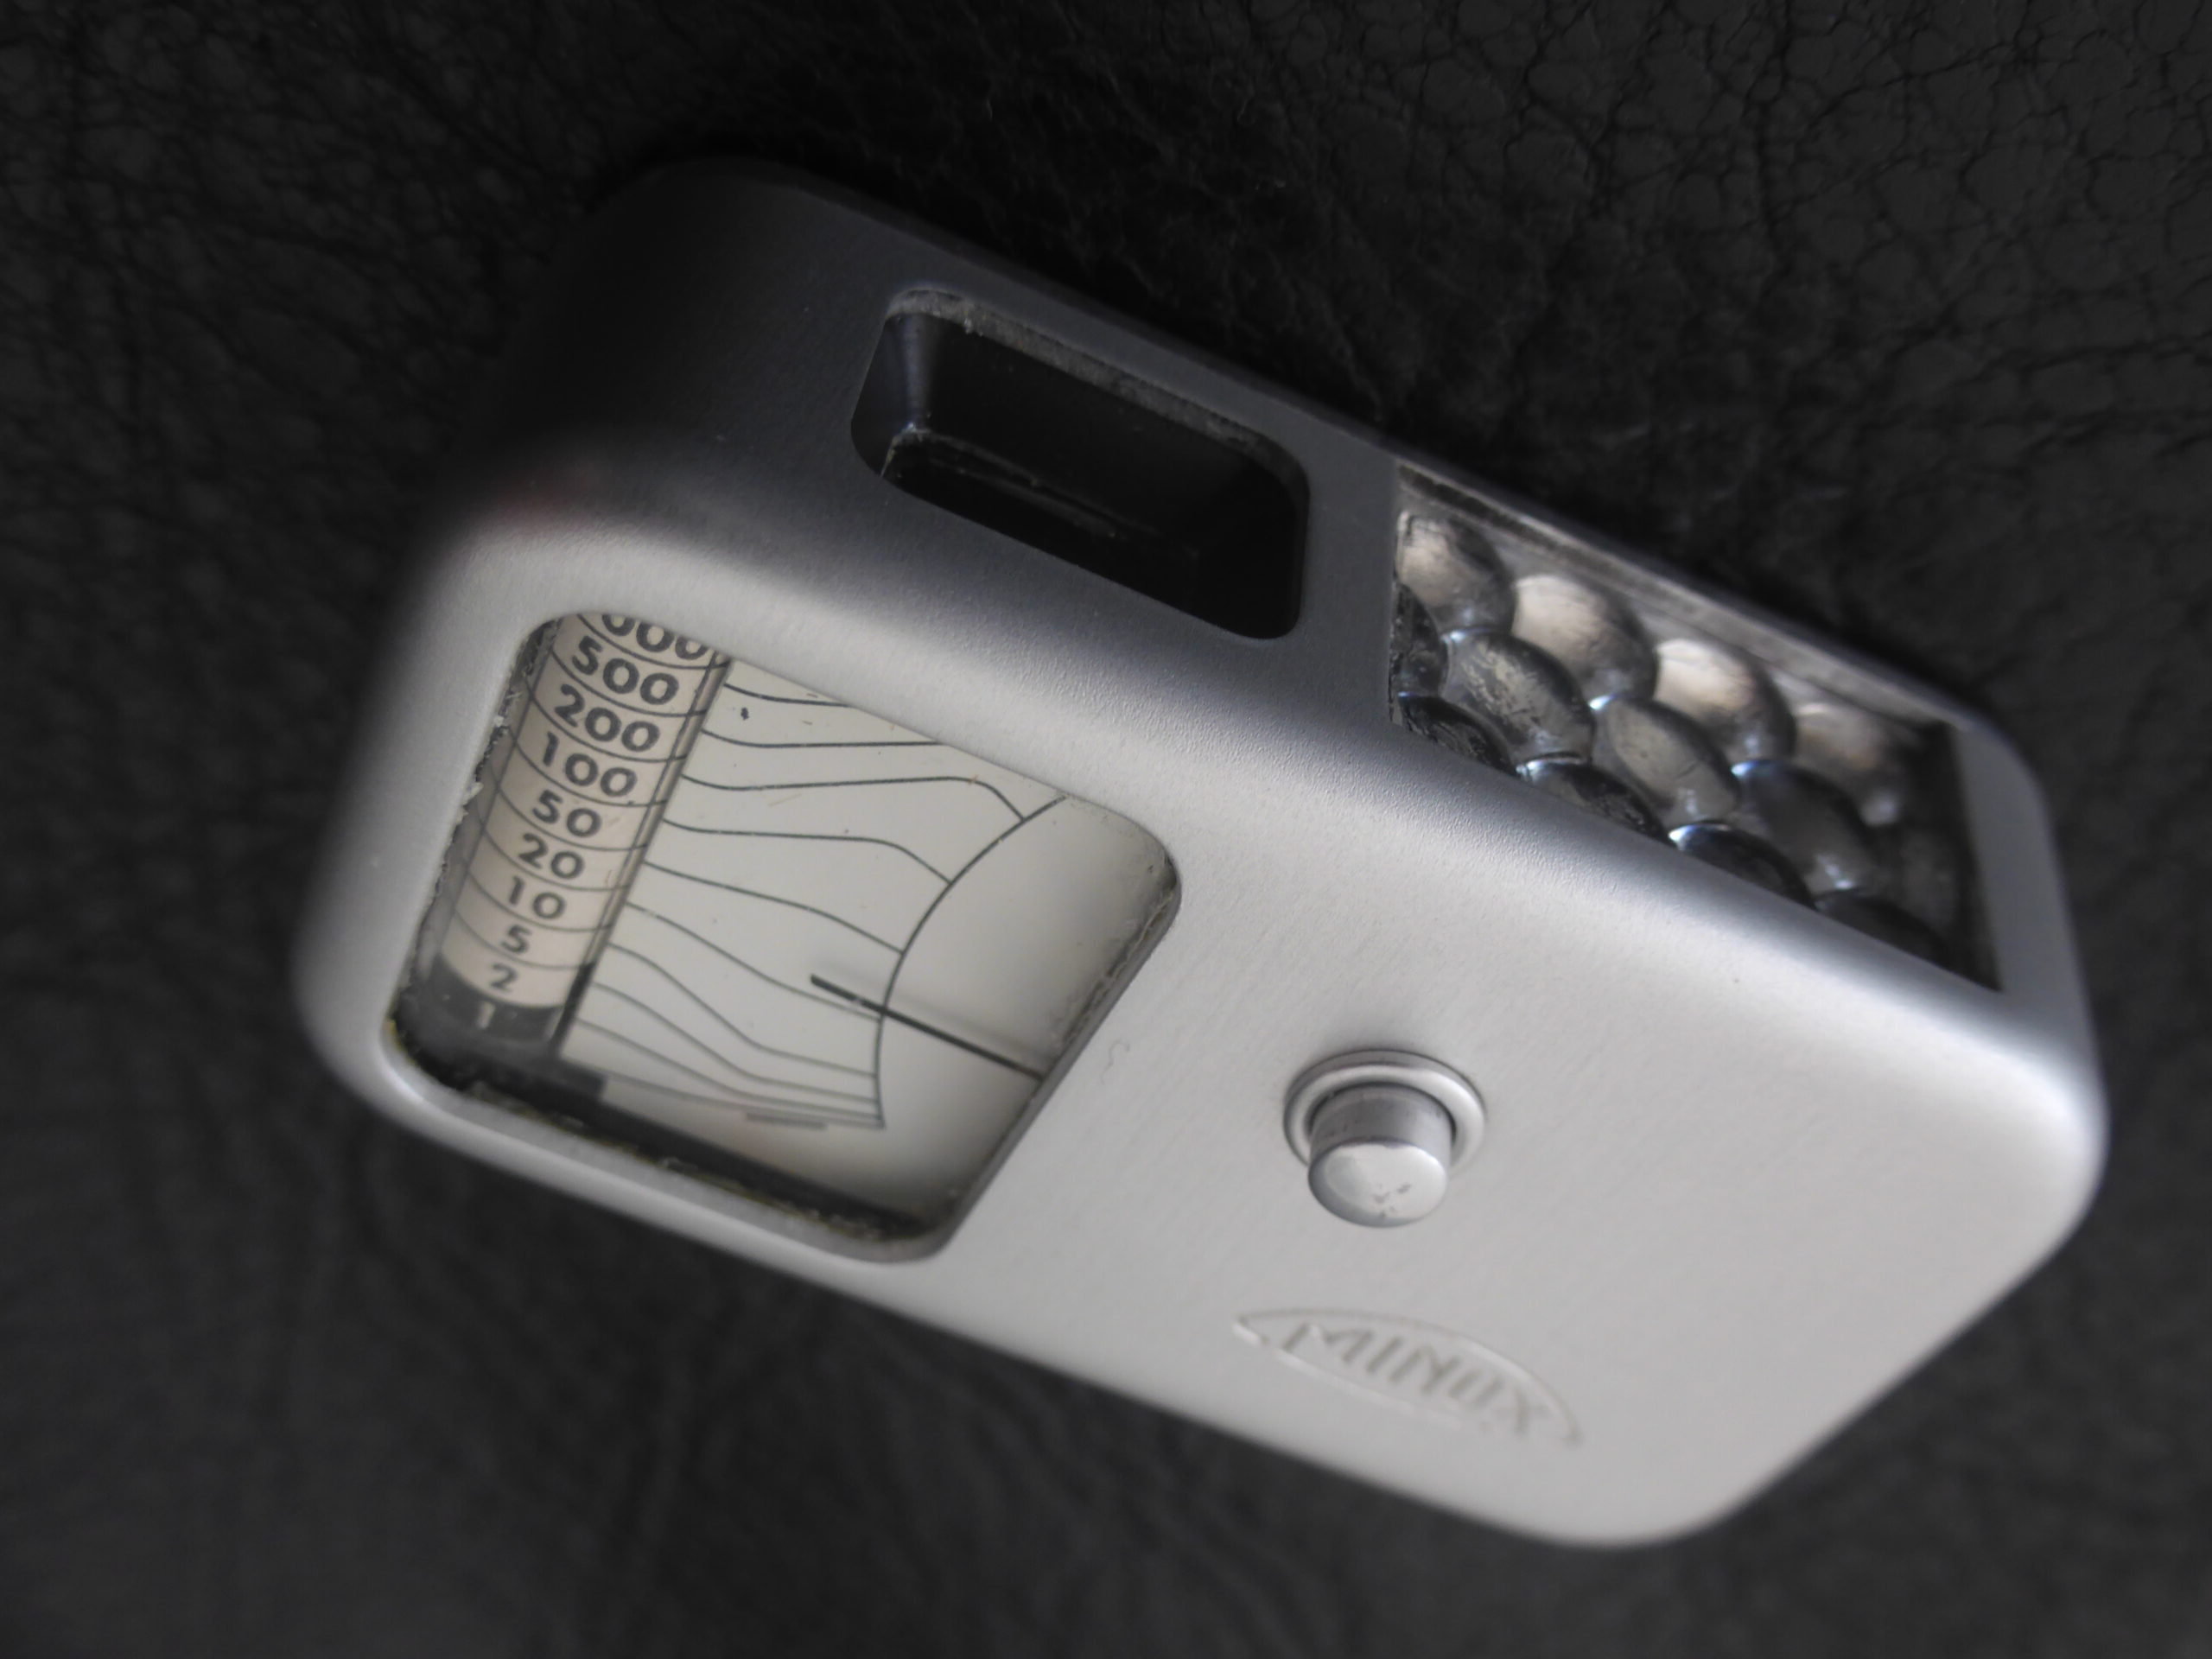
It even has its own viewfinder, which corresponds exactly to the Minox angle of view. And it also mechanically stores the measured value. So you look at the scene through the viewfinder and press the metering button for 3 seconds. The pointer is then fixed and you can read off the value at your leisure.
If you decide to get one, you need to make sure that it still works properly. Although the devices are of very high quality, they could be inaccurate due to their age.
Attract attention with photos
So far, we’ve only talked about the right exposure. If you want to take photos that will attract attention, read on here.